Automation For Jira - How to create a rule that adds to the watcher list of an issue the members of a project role
Platform Notice: Data Center Only - This article only applies to Atlassian products on the Data Center platform.
Note that this KB was created for the Data Center version of the product. Data Center KBs for non-Data-Center-specific features may also work for Server versions of the product, however they have not been tested. Support for Server* products ended on February 15th 2024. If you are running a Server product, you can visit the Atlassian Server end of support announcement to review your migration options.
*Except Fisheye and Crucible
Summary
This article describes how to create an Automation Rule using the add-on Automation For Jira (for Jira Server/Data Center) that automatically adds the members of a project role to the watching list of a Jira issue.
As explained in the feature request https://jira.atlassian.com/browse/JIRAAUTOSERVER-826, the Manage Watchers action has some limitations:
It is only possible to add watchers by:
either listing specific users
or copying users from a user picker field via a smart value
However, it is not possible to add to the watcher list:
users that belong to a group
users that belong to a project role
This article provides some suggestions on how to work around such limitation.
Solution
Let's assume that you are trying to configure a rule that:
is triggered when a new Jira issue is created
automatically adds the members of the Developers role, if the assignee is also part of this role
There are 2 ways to implement an automation rule that will work for this use case:
1 way without using the paid 3rd party add-on ScriptRunner for Jira
This method is supported by Atlassian
1 way using the paid 3rd party add-on ScriptRunner for Jira
This method is not supported by Atlassian
Solution 1 - Without the ScriptRunner add-on
Preliminary steps
Creating a new Custom Field
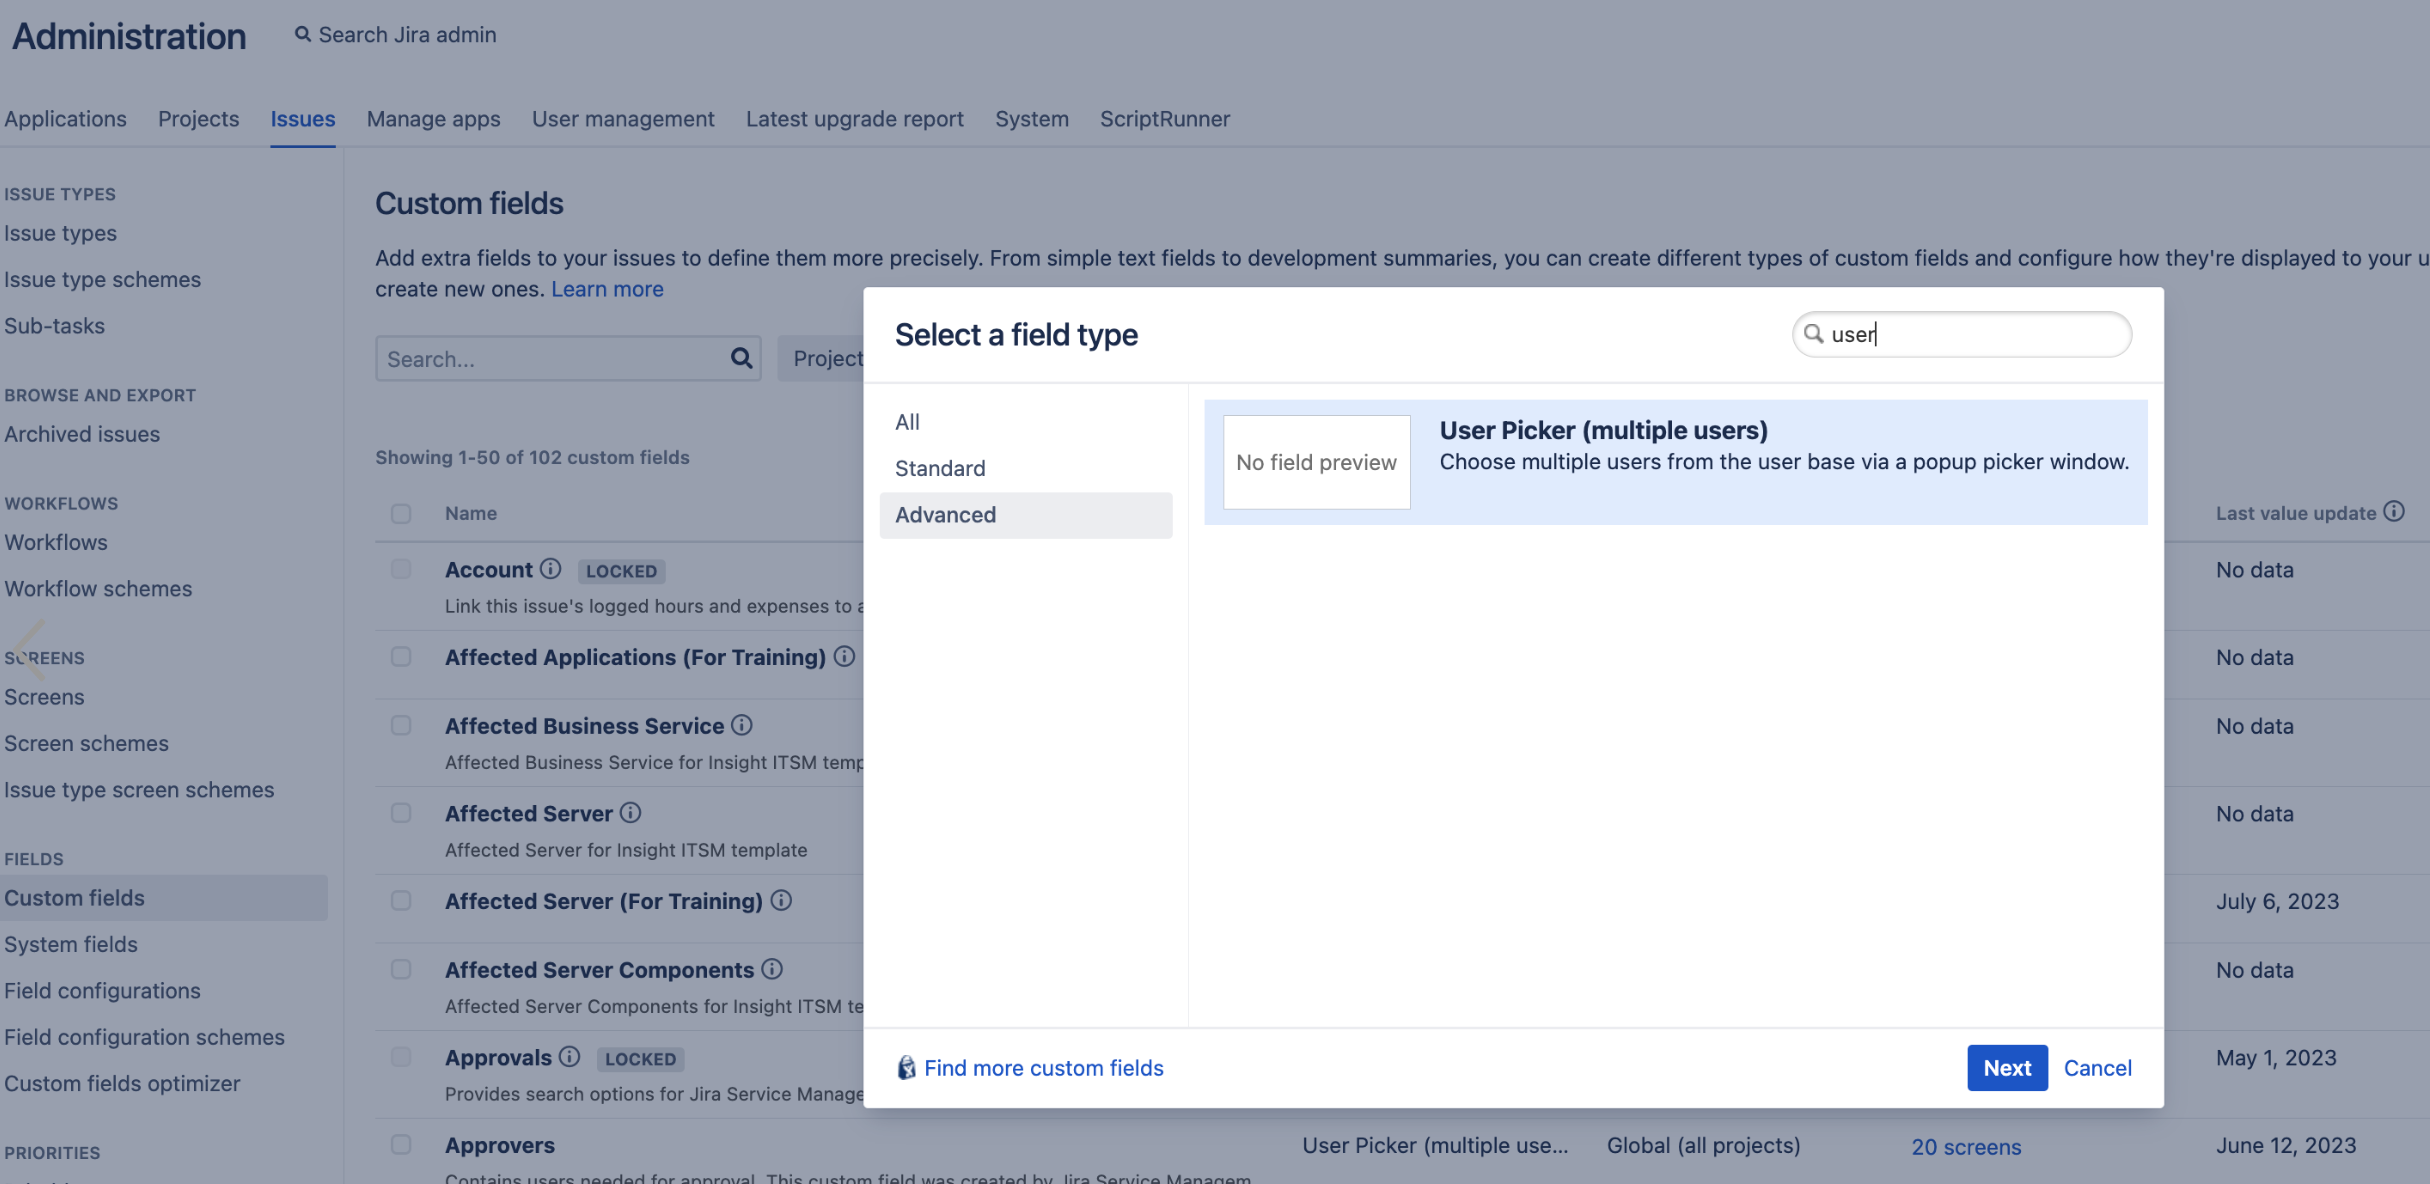
Go to ⚙ > Issues > Custom Fields
Create a new field of type User Picker (multiple user)
Make sure that
The field context is configured so that the field is available in the project where you wish to configure the rule
The field is added to the Edit Issue Screen used by all the issue types in the project where you wish to configure the rule
Getting the project Role ID
Open the URL below in a new tab of the browser, while making sure that you are already logged into Jira as an Admin User, after replacing <JIRA_BASE_URL> with the Jira Base URL, and <PROJECT_KEY> with the project key:
|
Check the output, and get the ID located at the end of the URL next to the role you are interested in
In the example below, the ID is 10102 for the Developers role
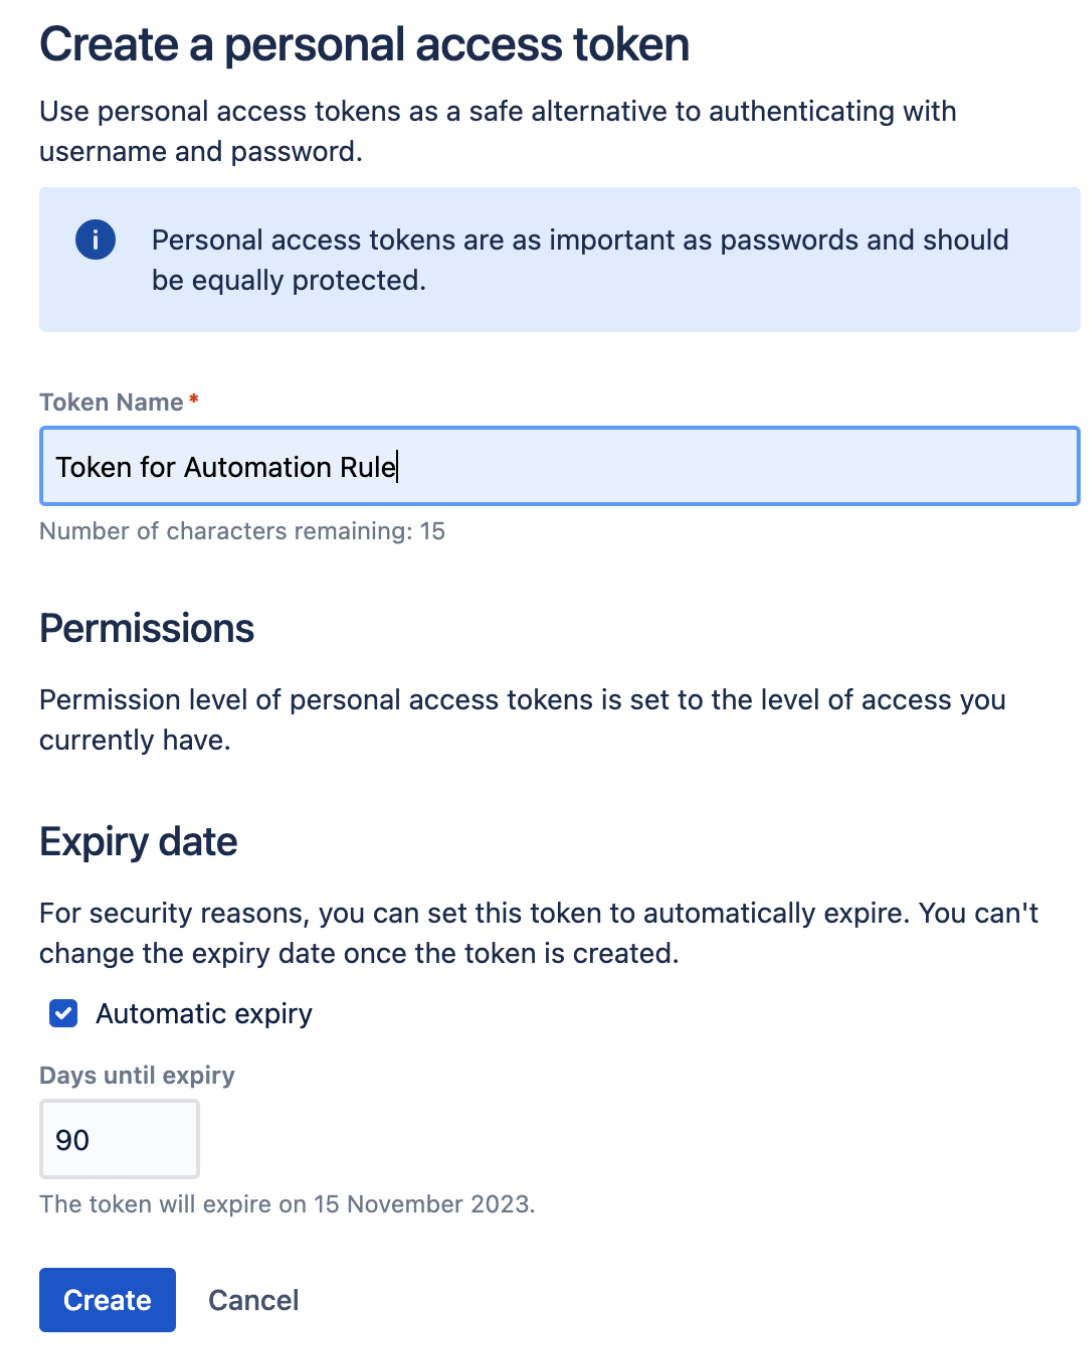
Creating a PAT (Personal Access Token)
Create a Personal Access token by:
Going to your user profile (by clicking on your avatar)
Clicking on the Personal Access Tokens menu
Rule configuration
The rule needs to be configured as follows:
Add the trigger Issue Created
Add the User Condition with the parameters below
User
: Assignee
Check to perform
: is in role
Criteria
: Choose the role of your choice (for example: Developers)
Add the Send Web Request action with the parameters below:
Webhook URL: copy the URL below after replacing replacing <JIRA_BASE_URL> with the Jira Base URL, <PROJECT_KEY> with the project key, and <ROLE_ID> with the ID identified in the preliminary steps:
|
Headers: Add 1 header as follows, after replacing <PAT> with the Personal Access Token generated during the preliminary steps:
Name: Authorization
Value: Bearer <PAT>
HTTP Method: GET
Wait for response: Tick this option.
Ticking this option is necessary for the rule to work properly.
Add the Edit Issue action with the parameters below
Choose fields to set...
: Select the multi-user picker field created during the preliminary steps
Value: copy the smart value below:
|
Add the Re-fetch issue data action
This action is necessary for the rule to work because it will re-load the new value of the multi-user picker field
Add the Manage Watchers action with the parameters below
Add these watchers
Add the smart value below, after replacing <MULTI_USER_PICKER_FIELD_NAME> with the name of the field created during the preliminary steps
|
For example, if the field name is
|
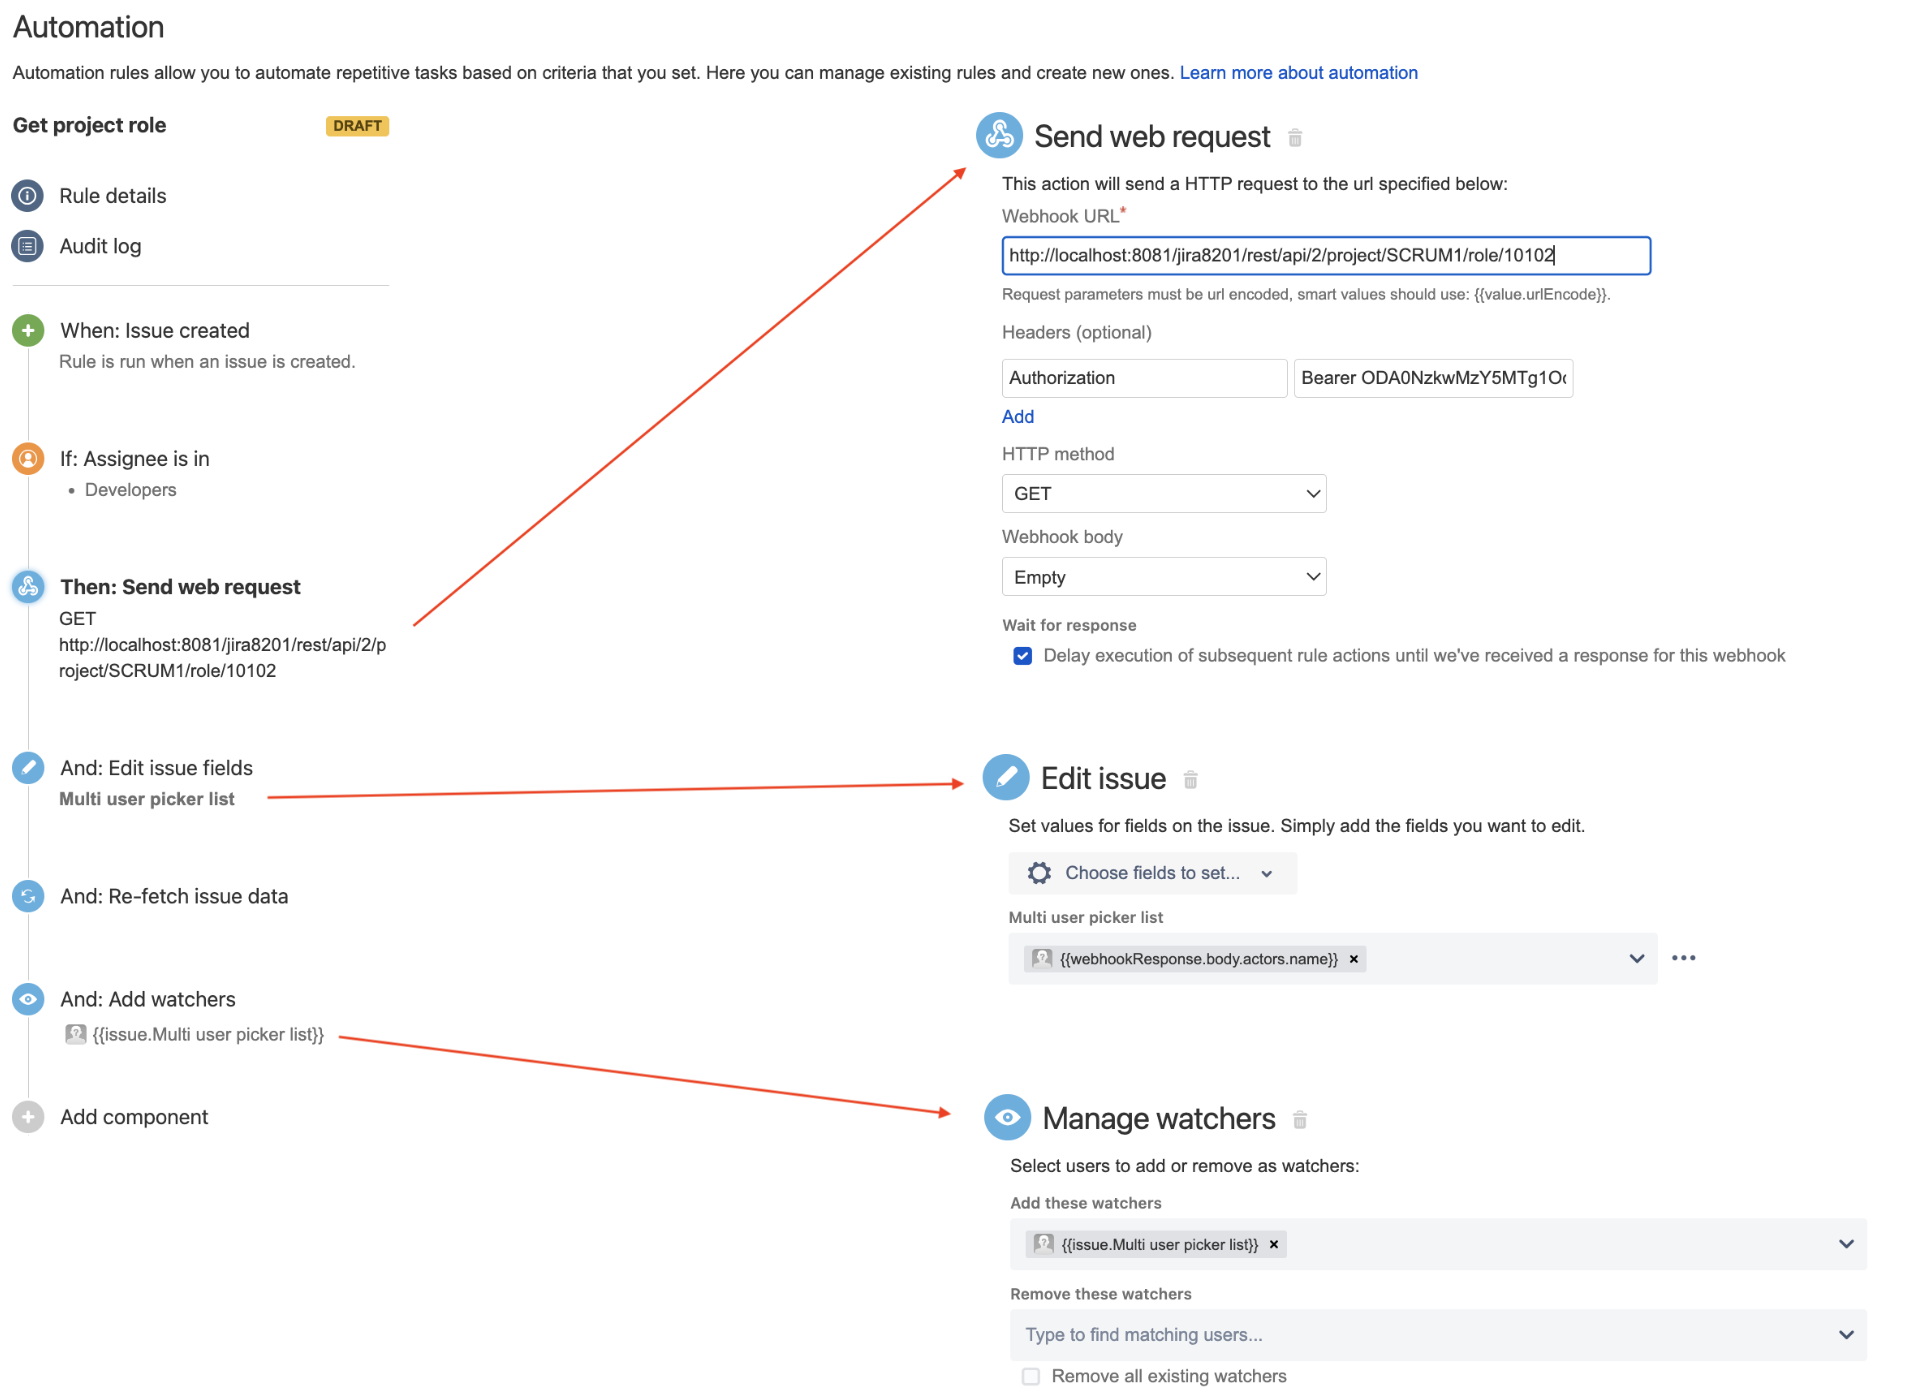
Screenshot showing the rule
Solution 2 - With the ScriptRunner add-on
NOTE: Atlassian does not support this solution, as it involves using the third-party add-on ScriptRunner for Jira. It is only provided as is in this KB article.
Rule configuration
Add the Issue Created trigger
Add the User Condition with the parameters below
User: Assignee
Check to perform: is in role
Criteria: Choose the role of your choice (for example: Developers)
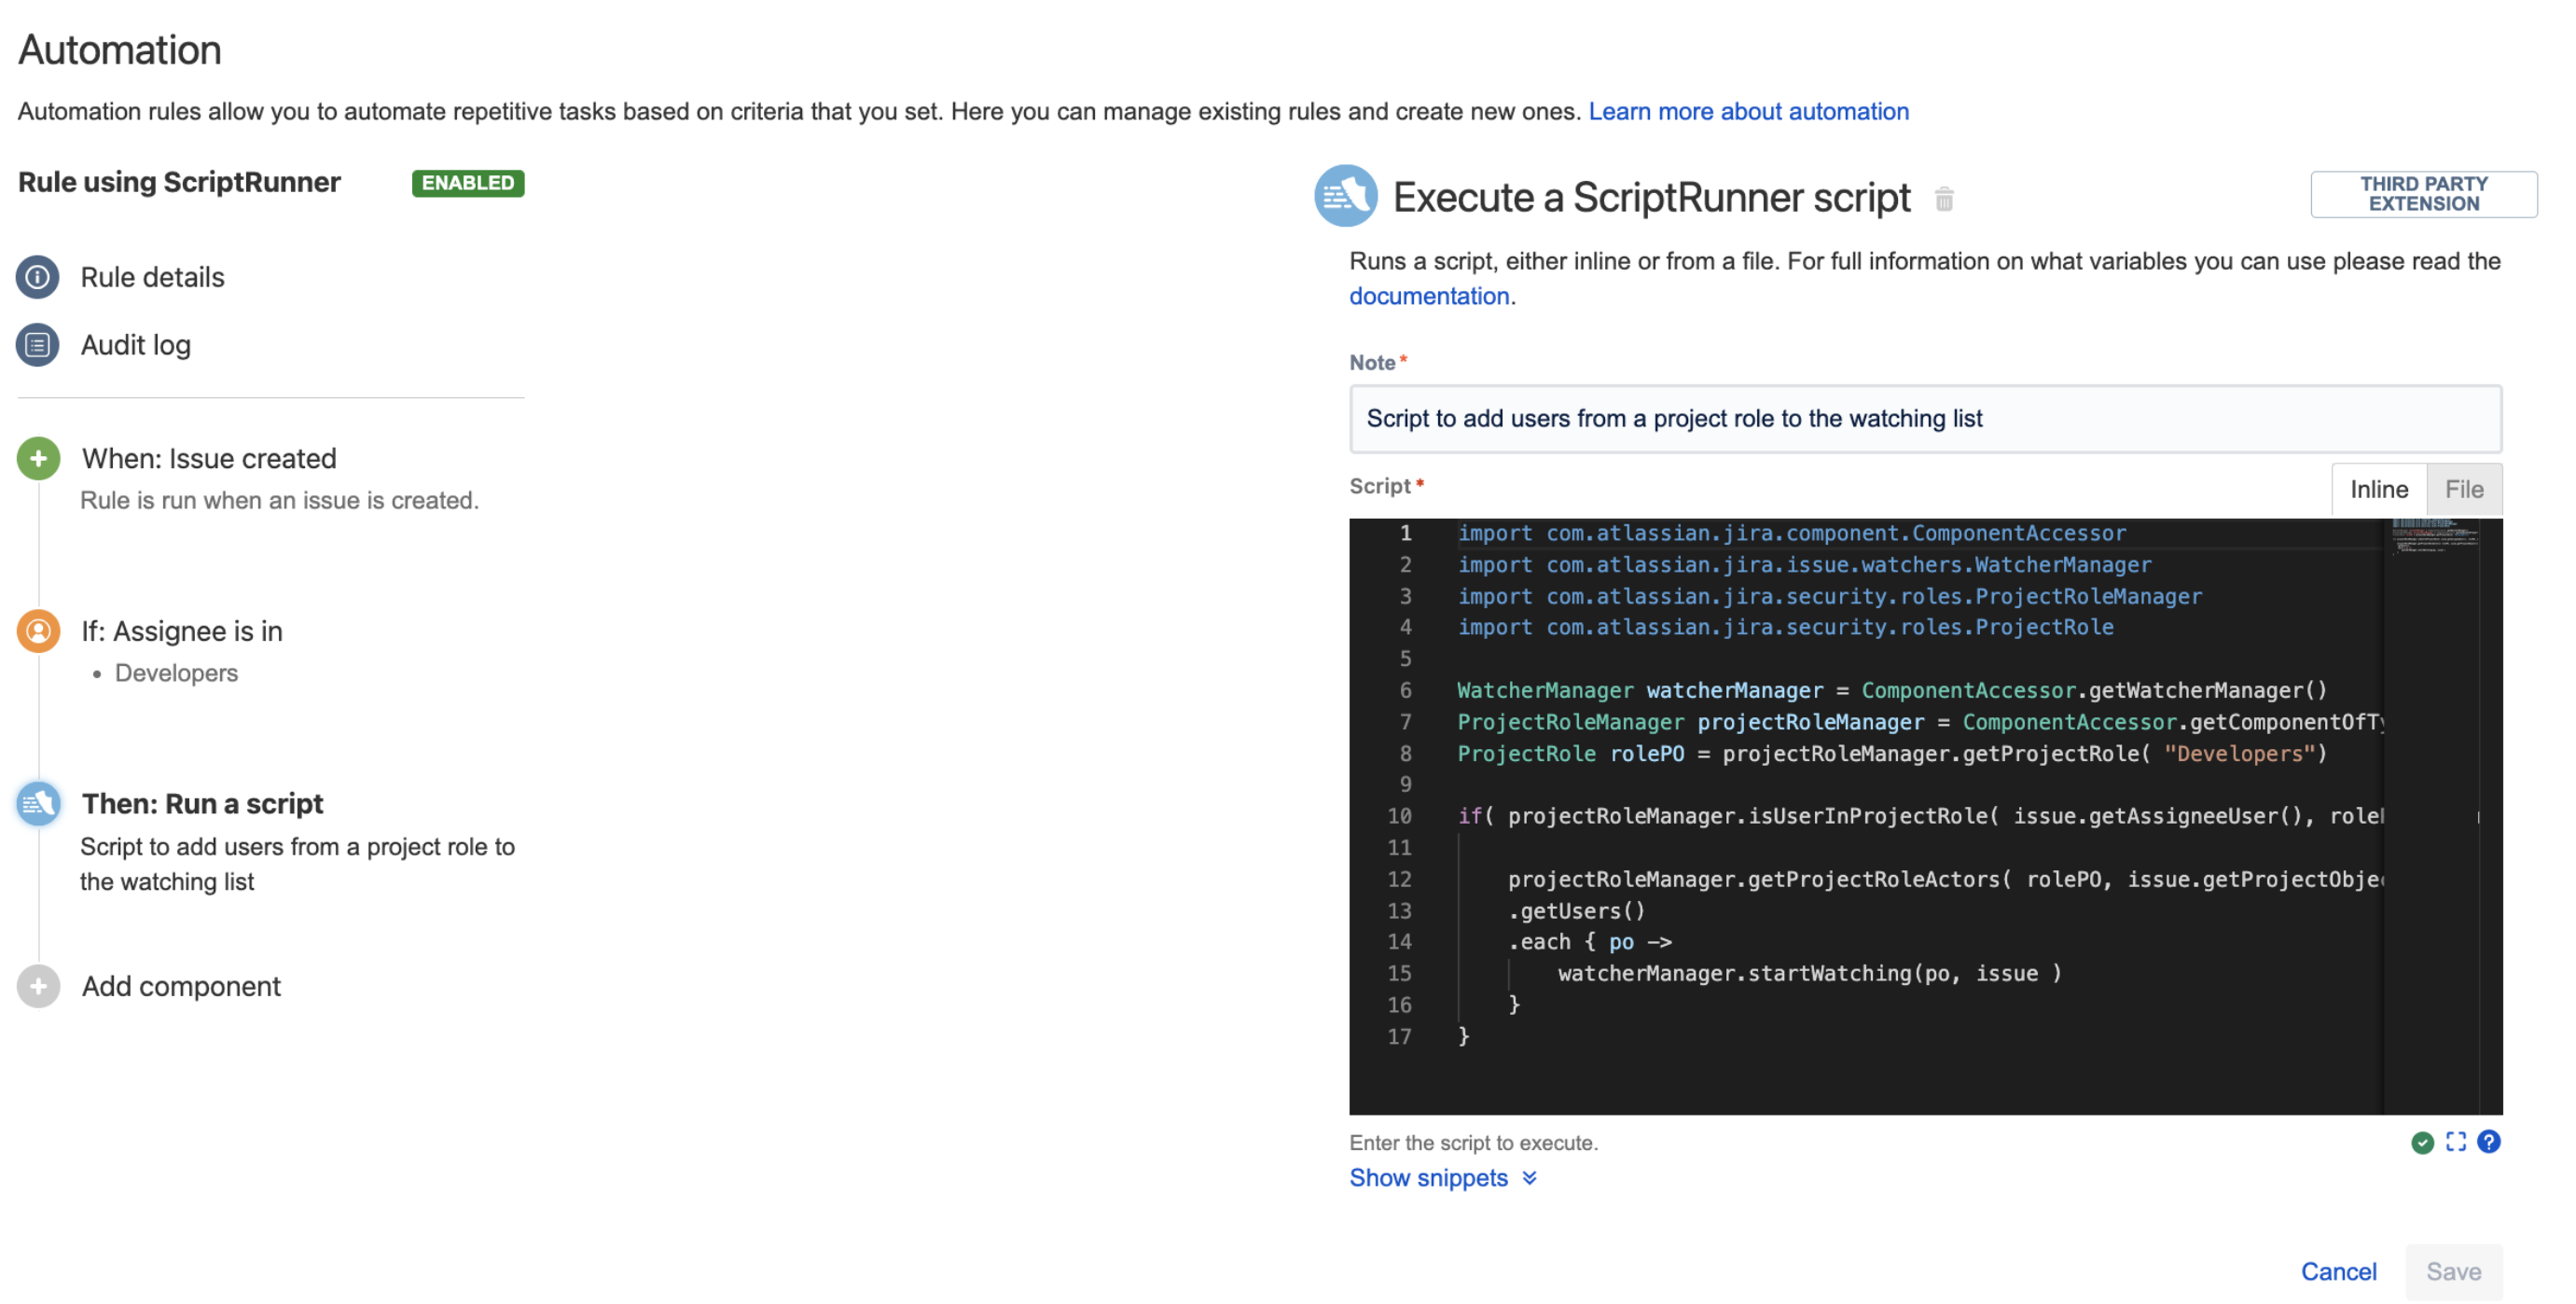
Add the Execute a ScriptRunner script action with the code snippet below, and after replacing <PROJECT_ROLE> with the name of the project role:
|
Screenshot showing the rule
Was this helpful?