Adding components to issues using automation
Platform Notice: Data Center Only - This article only applies to Atlassian products on the Data Center platform.
Note that this KB was created for the Data Center version of the product. Data Center KBs for non-Data-Center-specific features may also work for Server versions of the product, however they have not been tested. Support for Server* products ended on February 15th 2024. If you are running a Server product, you can visit the Atlassian Server end of support announcement to review your migration options.
*Except Fisheye and Crucible
Summary
This article shows how to add/append Components to Issues in Jira using Automation Rules from Automation for Jira.
Solution
Basic mode
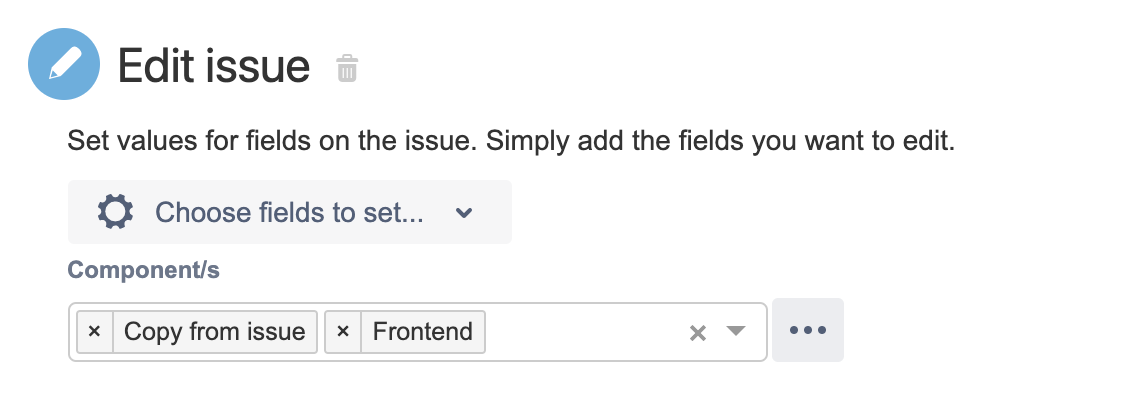
You can accomplish the task using basic mode by:
Selecting the Component/s field
Selecting "Copy from issue" on the values box
Proceeding to add the desired components to be added/appended to the Component/s field

Make sure that no JSON code is inserted into the advanced box below that; otherwise, it will take precedence over the basic mode above.
If you don't select "Copy from issue", the Component/s field will be overwritten with the selected values only, erasing what was previously on the issue.
Advanced mode
If you need to make use of the advanced mode, you can add/append components to the issue with the code below:
1
2
3
4
5
6
7
{
    "update": {
        "components": [{
            "add": {"name": "Name of the Component"}
        }]
    }
}
If you need to add/append multiple components at once, the below code will do:
1
2
3
4
5
6
7
8
9
10
{
    "update": {
        "components": [{
            "add": {"name": "Name of the Component"}
        },
        {
            "add": {"name": "Name of another Component and so on"}
        }]
    }
}
Please refer to the documentation on Advanced field editing - JSON for more information on editing fields on advanced mode.
Lastly, if you're appending components more than once on the same automation rule, be sure to use the Re-fetch issue data action before each new action — or else only the last issue edit action will work.
Was this helpful?