How to configure SAML SSO for Bitbucket Data Center with Google IDP
Platform Notice: Data Center Only - This article only applies to Atlassian products on the Data Center platform.
Note that this KB was created for the Data Center version of the product. Data Center KBs for non-Data-Center-specific features may also work for Server versions of the product, however they have not been tested. Support for Server* products ended on February 15th 2024. If you are running a Server product, you can visit the Atlassian Server end of support announcement to review your migration options.
*Except Fisheye and Crucible
Summary
SSO for Atlassian Server and Data Center should work with any identity provider implementing the SAML 2.0 Web Browser SSO Profile, using the HTTP POST binding. We currently perform tests with the following identity providers (IdP): Microsoft Azure Active Directory, Microsoft Active Directory (using ADFS 3.0), Bitium, Okta, OneLogin, and PingIdentity.
This document outlines instructions to enable SAML SSO for Bitbucket Data Center with OKTA
Step-by-step instructions to enable SAML SSO for Bitbucket Data Center with Google IDP
Environment
Bitbucket Data Center 7.12 or later
Solution
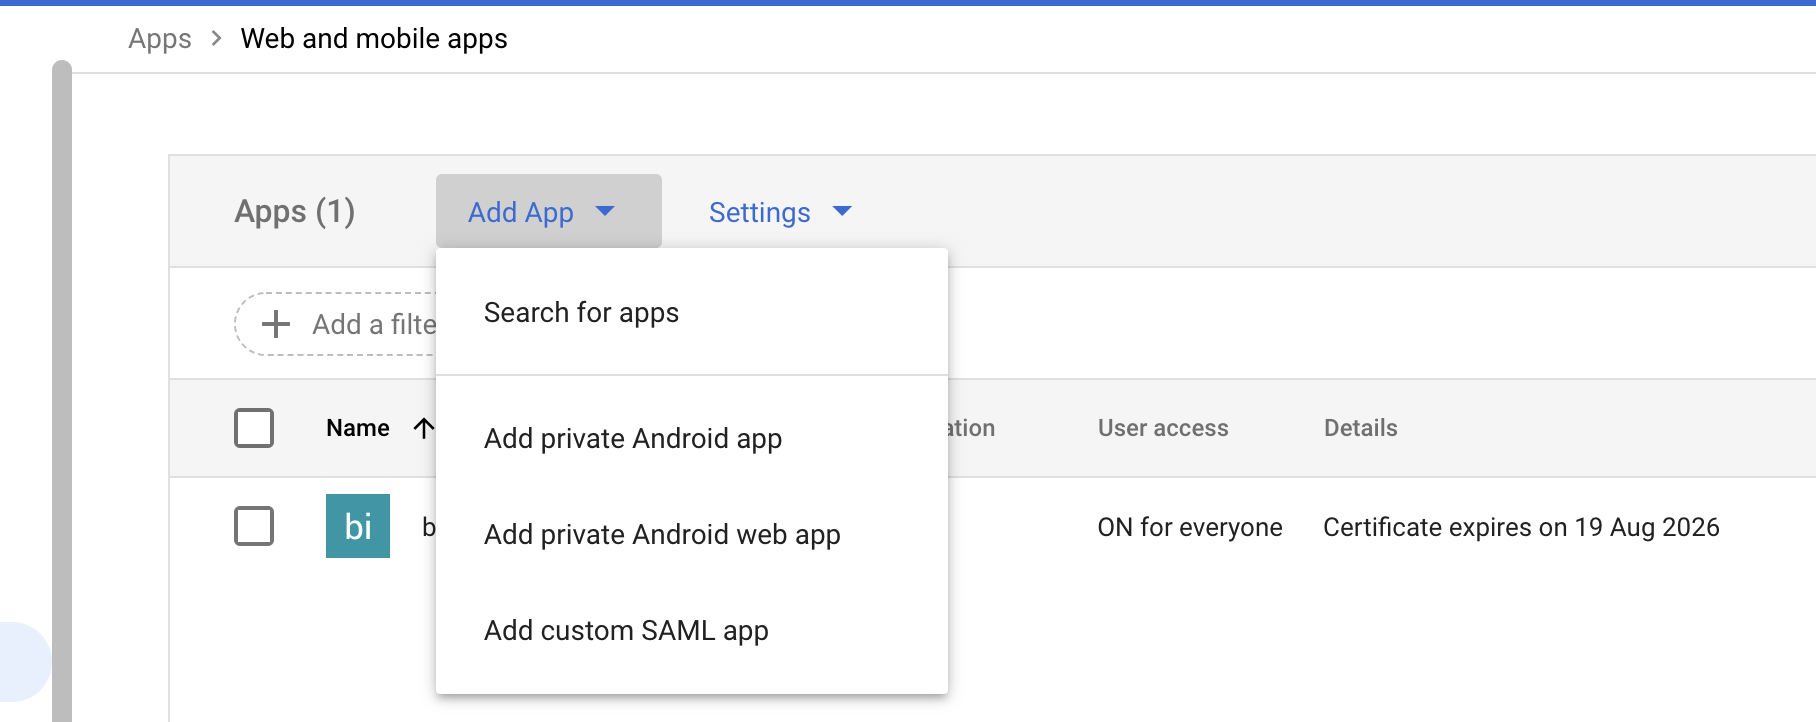
As an administrator account in Google workspace, Login to admin.google.com and navigate to Apps >> Web and Mobile Apps
Add App and click on Add custom SAML App
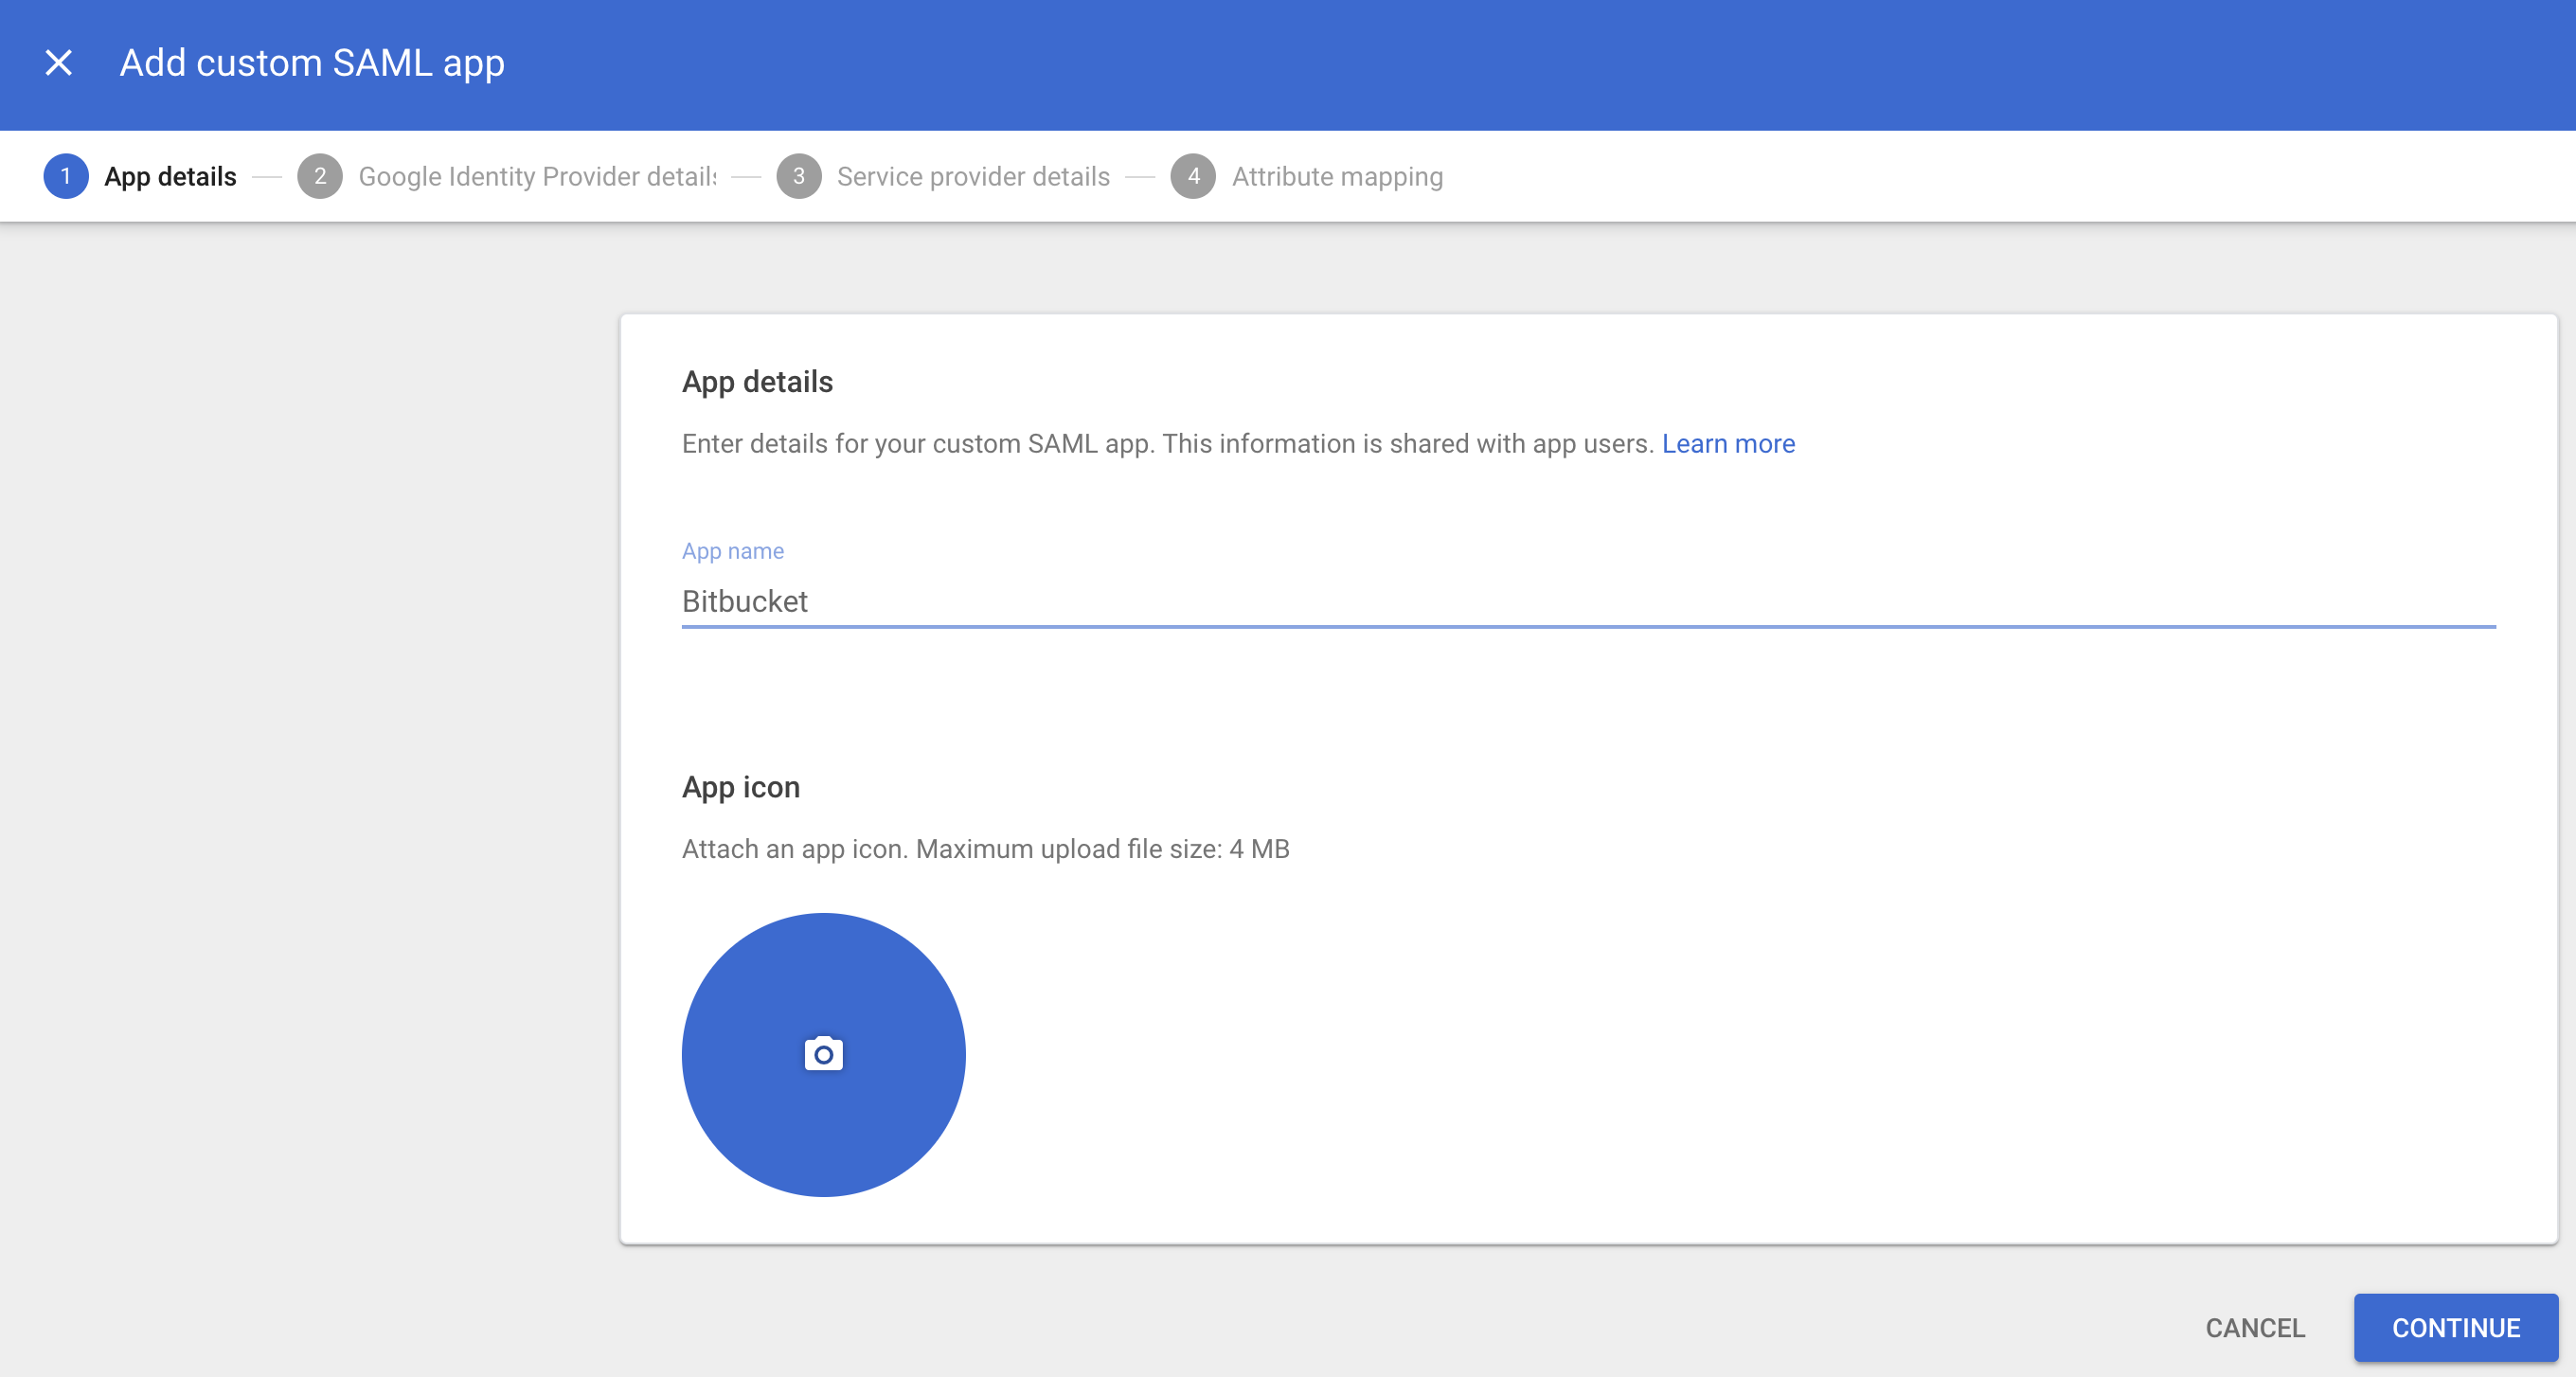
Specify App details providing App name and Logo
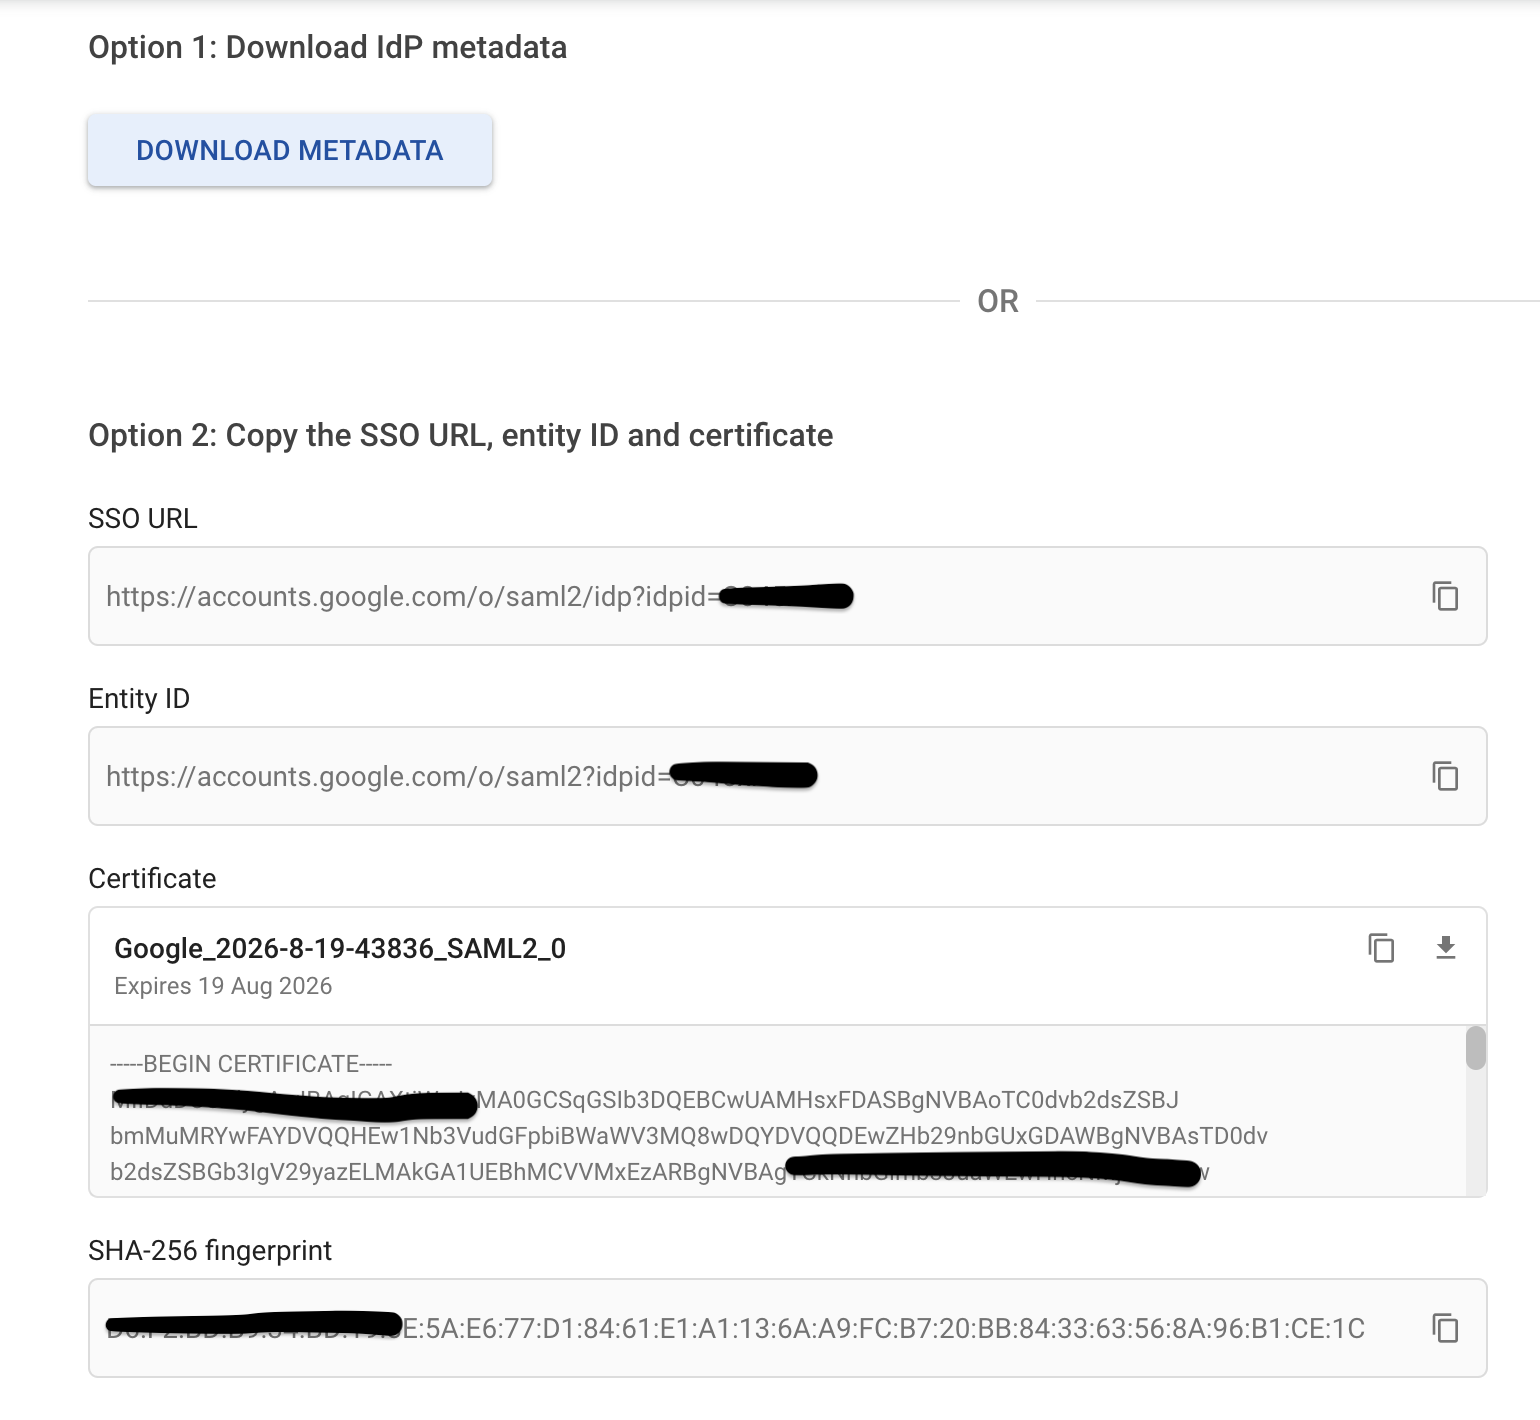
Fetch the SSO Urls details either by downloading metadata (From option 1) or copying the details from option 2
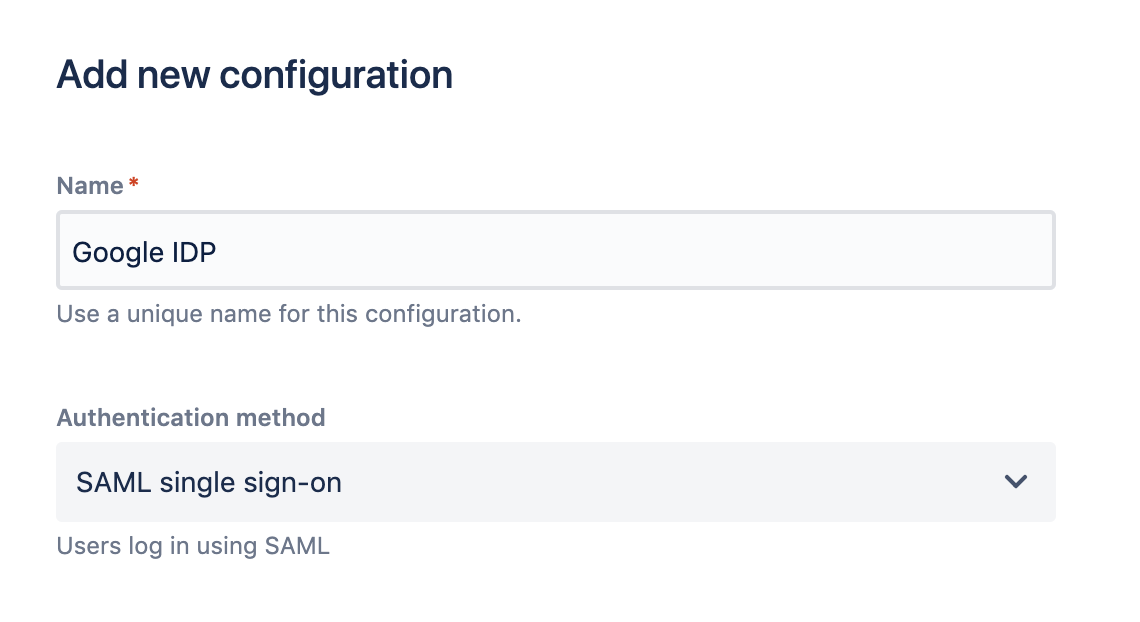
Login to your Bitbucket Date Center UI as a System Administrator, navigate to Administration >> Authentication Methods and Click on Add Configuration

Specify Name for the configuration and Authentication Method to SAML single sign on
Configure SAML SSO settings in Bitbucket as per the details from Google IDP. SSO Url from Google to be specified against Identity provider single sign-on URL in Bitbucket. Entity ID from Google is to be mapped to Single sign-on issuer in Bitbucket. Specify X.509 certificate from Google in Bitbucket.
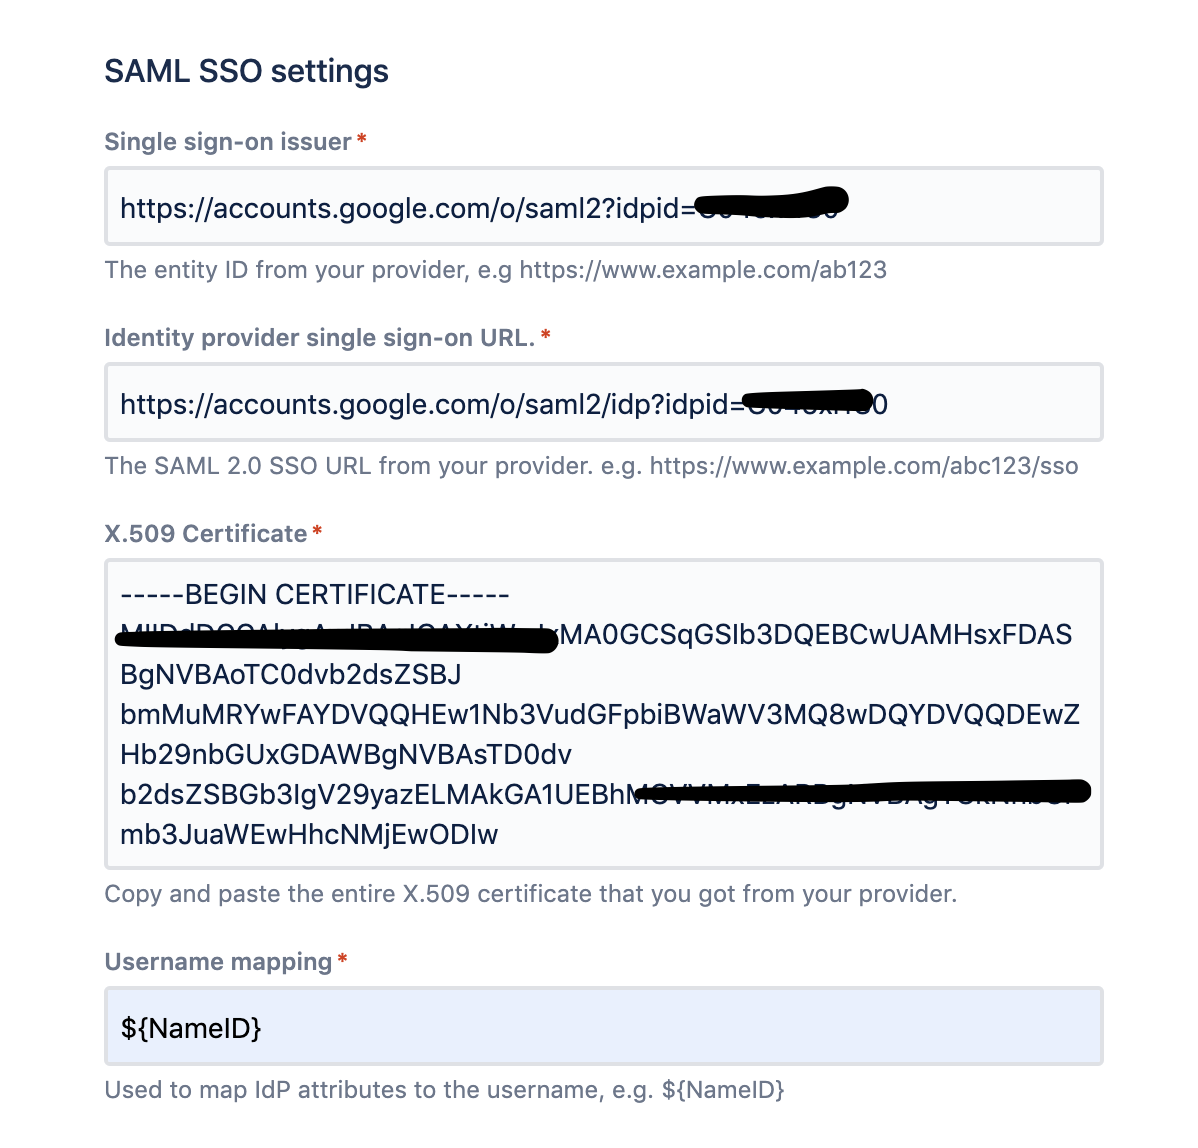
Username Mapping - This parameter tells Bitbucket on how to identify username in SAML Assertion response. By default, many IDP providers uses
NameIDto determine the username of the user that is logging in. Some IDP providers use Attribute value as documented in HOWTO: Using a SAML assertion attribute as the product username. Google IDP specifies username in Name ID field. So, we set Username Mapping setting to ${NameID}. Sample Name ID from SAML Assertion response from Google1 2<saml2:Subject> <saml2:NameID Format="urn:oasis:names:tc:SAML:1.1:nameid-format:unspecified"><username@domainname.com></saml2:NameID>Specify Assertion Consumer Urls from Bitbucket in Google IDP SAML configuration
From Bitbucket
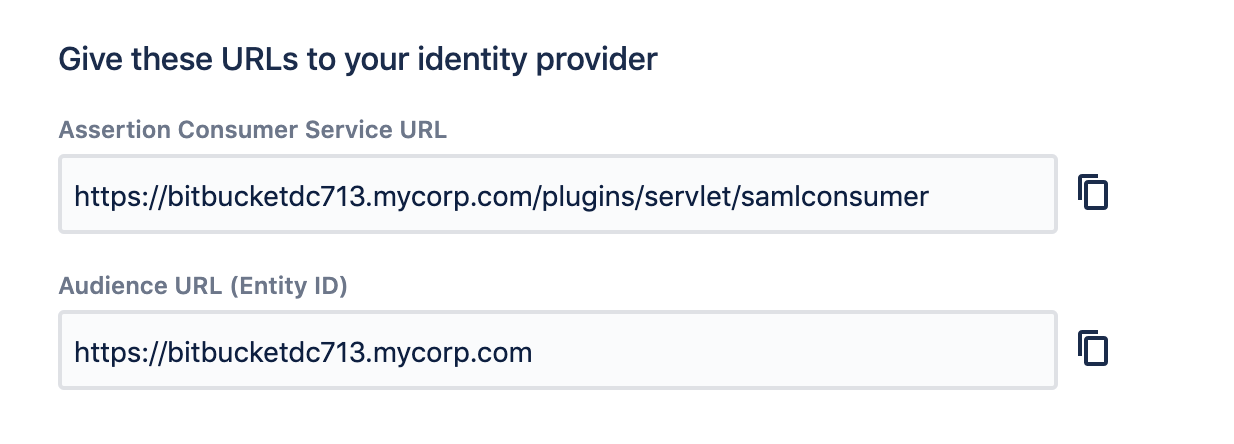
To Google SAML Configuration
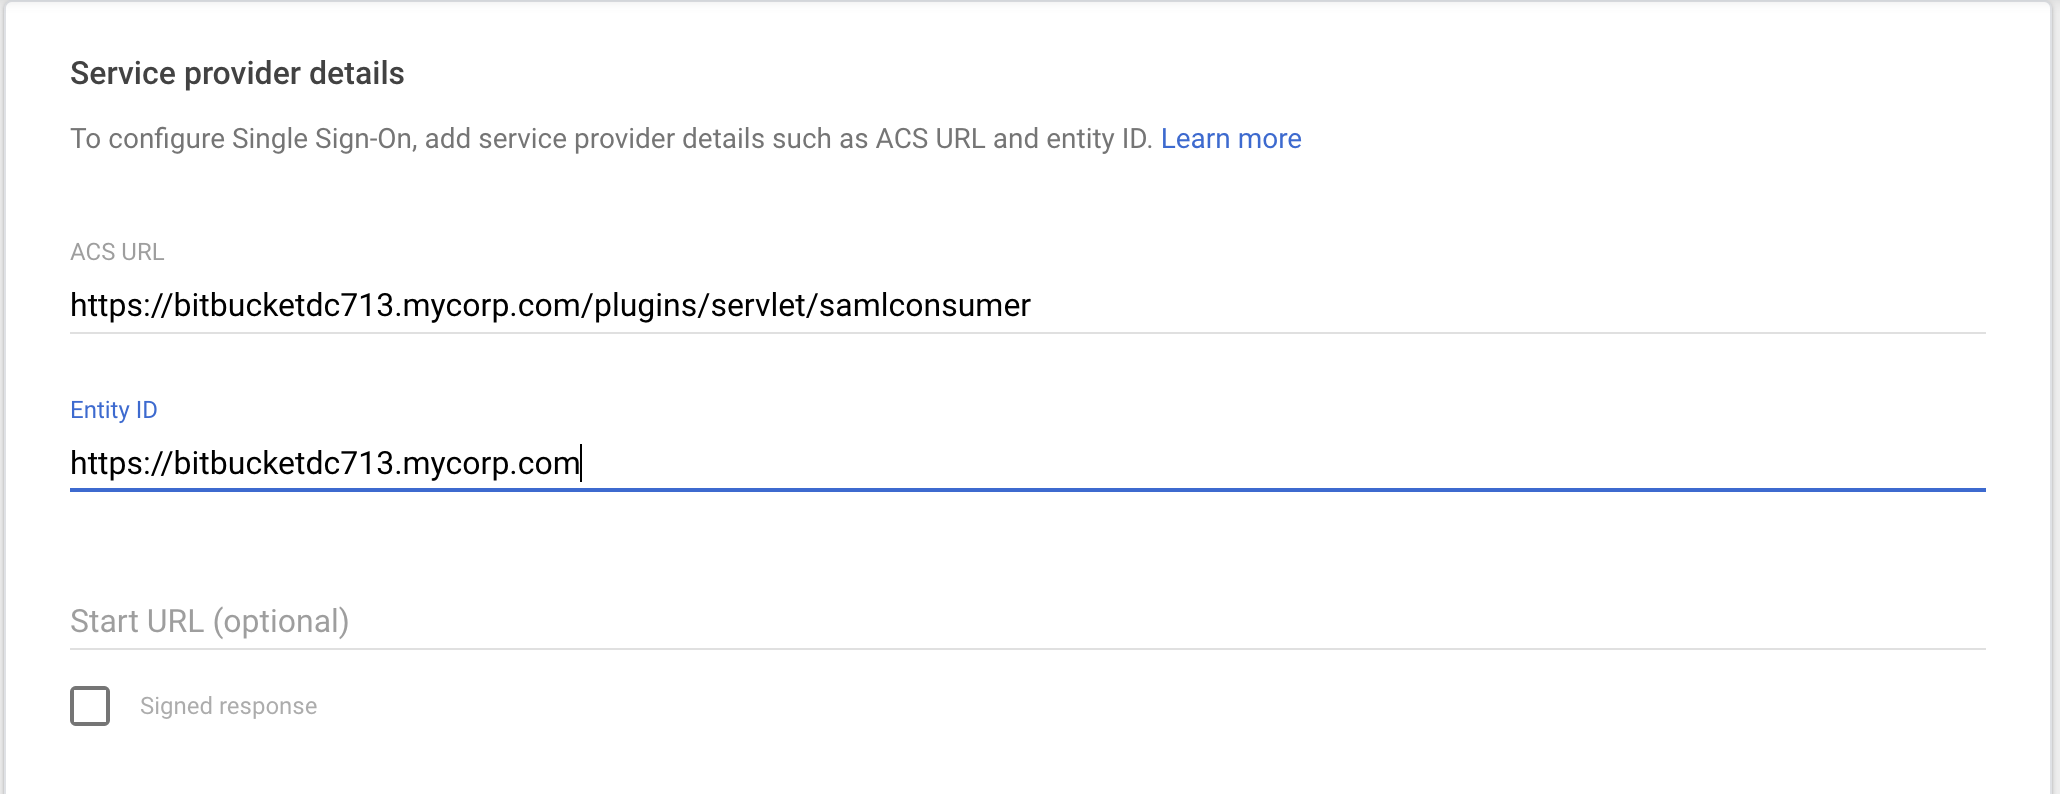
(Optional) Check the Signed Response box if your service provider requires the entire SAML authentication response to be signed. If this is unchecked (the default), only the assertion within the response is signed.
Specify Name ID format in Google SAML Configuration. Select the appropriate Name ID format as per your requirement. The default Name ID is the primary email

(Optional) On the Attribute mapping page, click Add another mapping to map additional attributes. Specify Attribute Mapping to map from Google directory to Service provider attributes.
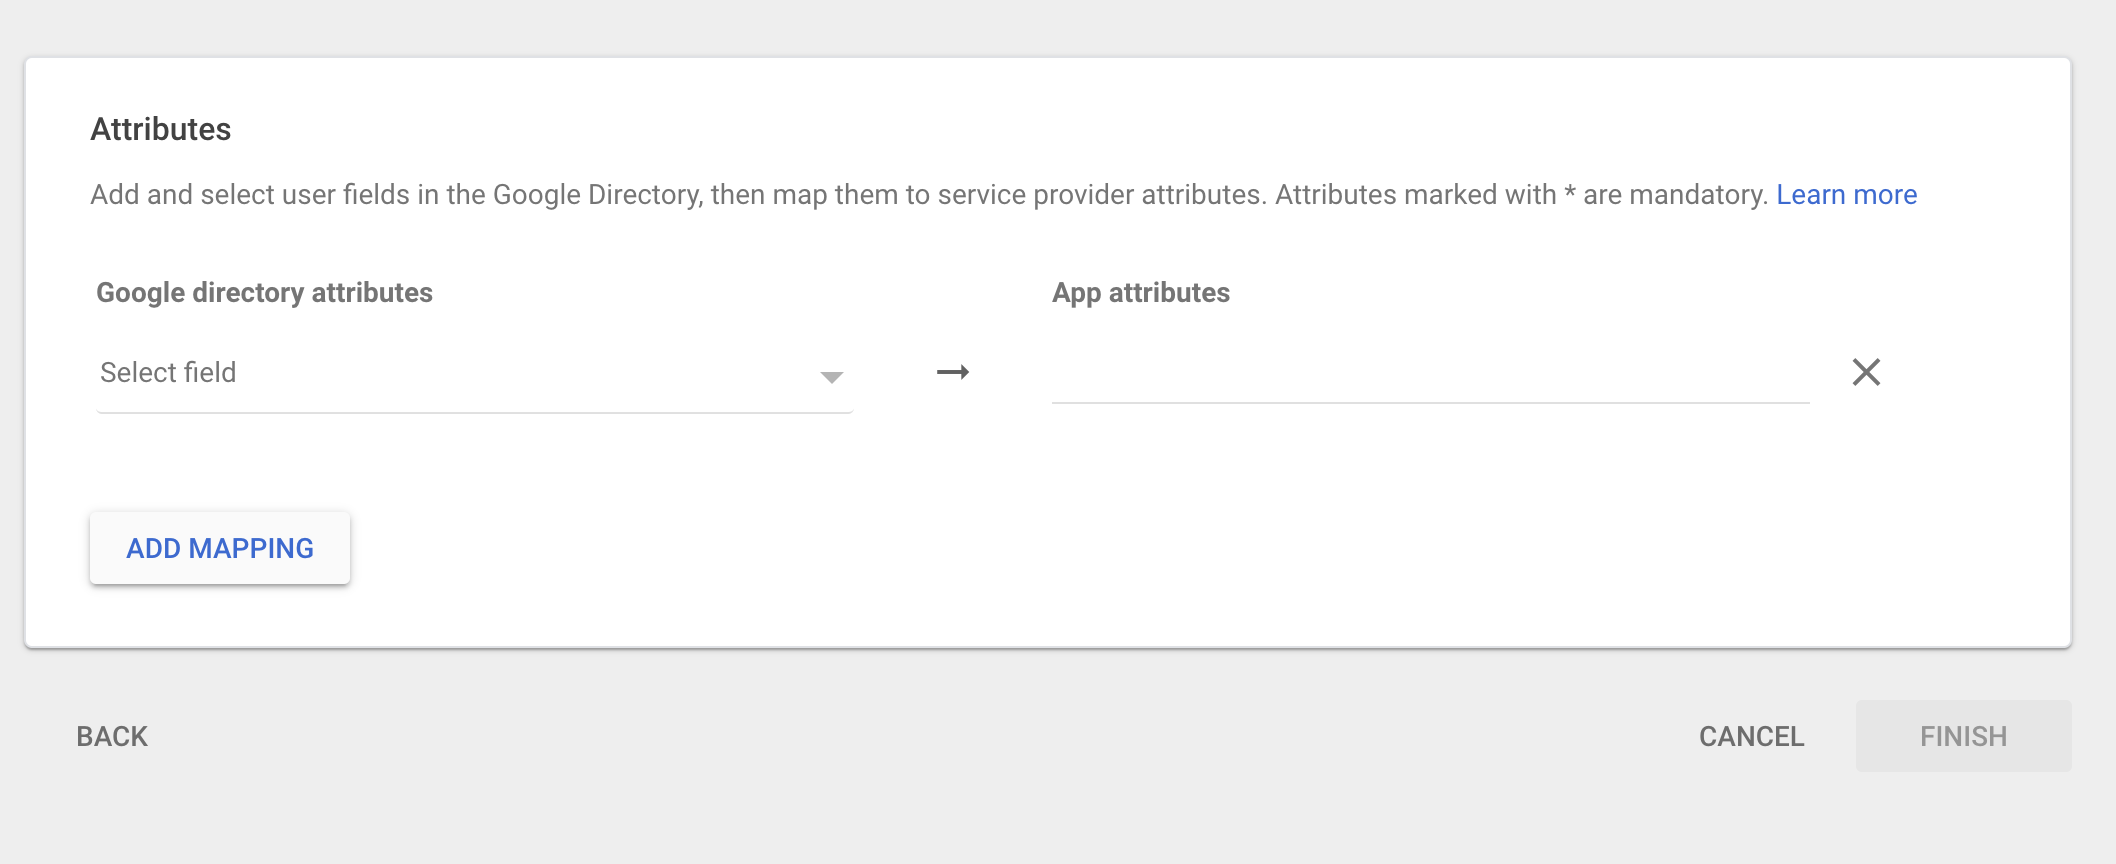
Click Finish in Google SAML Configuration.
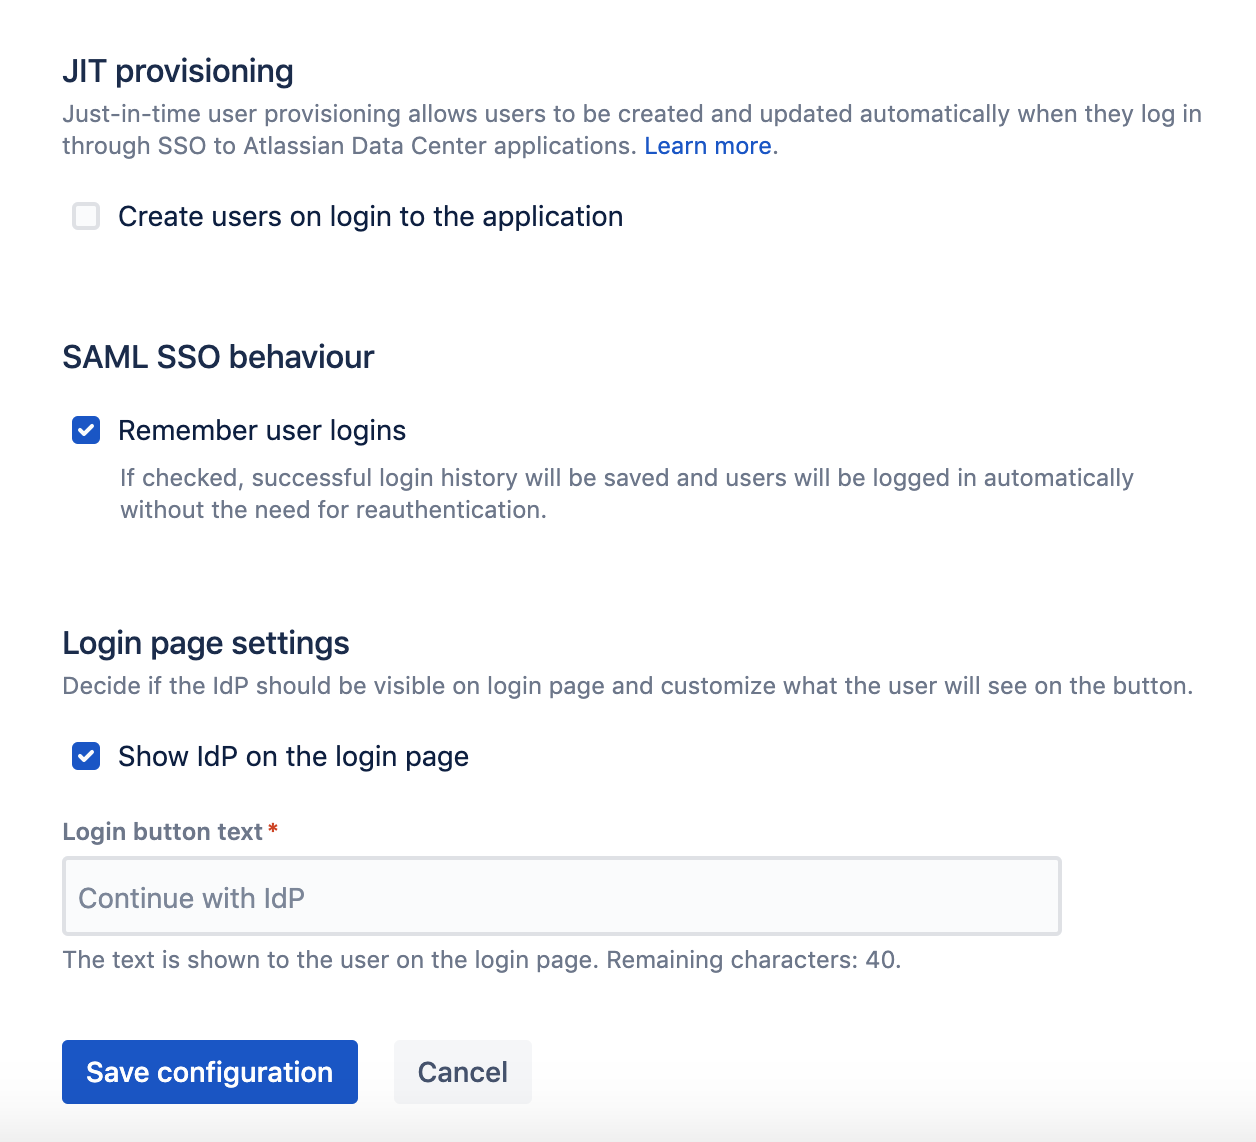
In Bitbucket SAML configuration, specify the remaining parameters and save the configuration.
To have the SAML application available for users, turn the service on

Test SAML-Sign on either in Google or Bitbucket to verify SAML integration.
From Bitbucket: By Navigating to Authentication Methods

From Google: Click on TEST SAML LOGIN

Was this helpful?