How to configure SAML SSO for Bitbucket Data Center with OKTA
Platform Notice: Data Center Only - This article only applies to Atlassian products on the Data Center platform.
Note that this KB was created for the Data Center version of the product. Data Center KBs for non-Data-Center-specific features may also work for Server versions of the product, however they have not been tested. Support for Server* products ended on February 15th 2024. If you are running a Server product, you can visit the Atlassian Server end of support announcement to review your migration options.
*Except Fisheye and Crucible
SSO for Atlassian Server and Data Center should work with any identity provider implementing the SAML 2.0 Web Browser SSO Profile, using the HTTP POST binding. We currently perform tests with the following identity providers (IdP): Microsoft Azure Active Directory, Microsoft Active Directory (using ADFS 3.0), Bitium, Okta, OneLogin, PingIdentity.
This document outlines instructions to enable SAML SSO for Bitbucket Data Center with OKTA
Summary
Step by step instructions to enable SAML SSO for Bitbucket Data Center with OKTA
Environment
Bitbucket Data Center
Solution
Install SSO for Atlassian Server and Data Center plugin from Marketplace for Bitbucket versions < 7.14. If you are running Bitbucket version 7.14 or above, the SSO feature is bundled with the product. You can navigate to Authentication Methods from the Administration page.
- Create an application in OKTA for your Bitbucket server
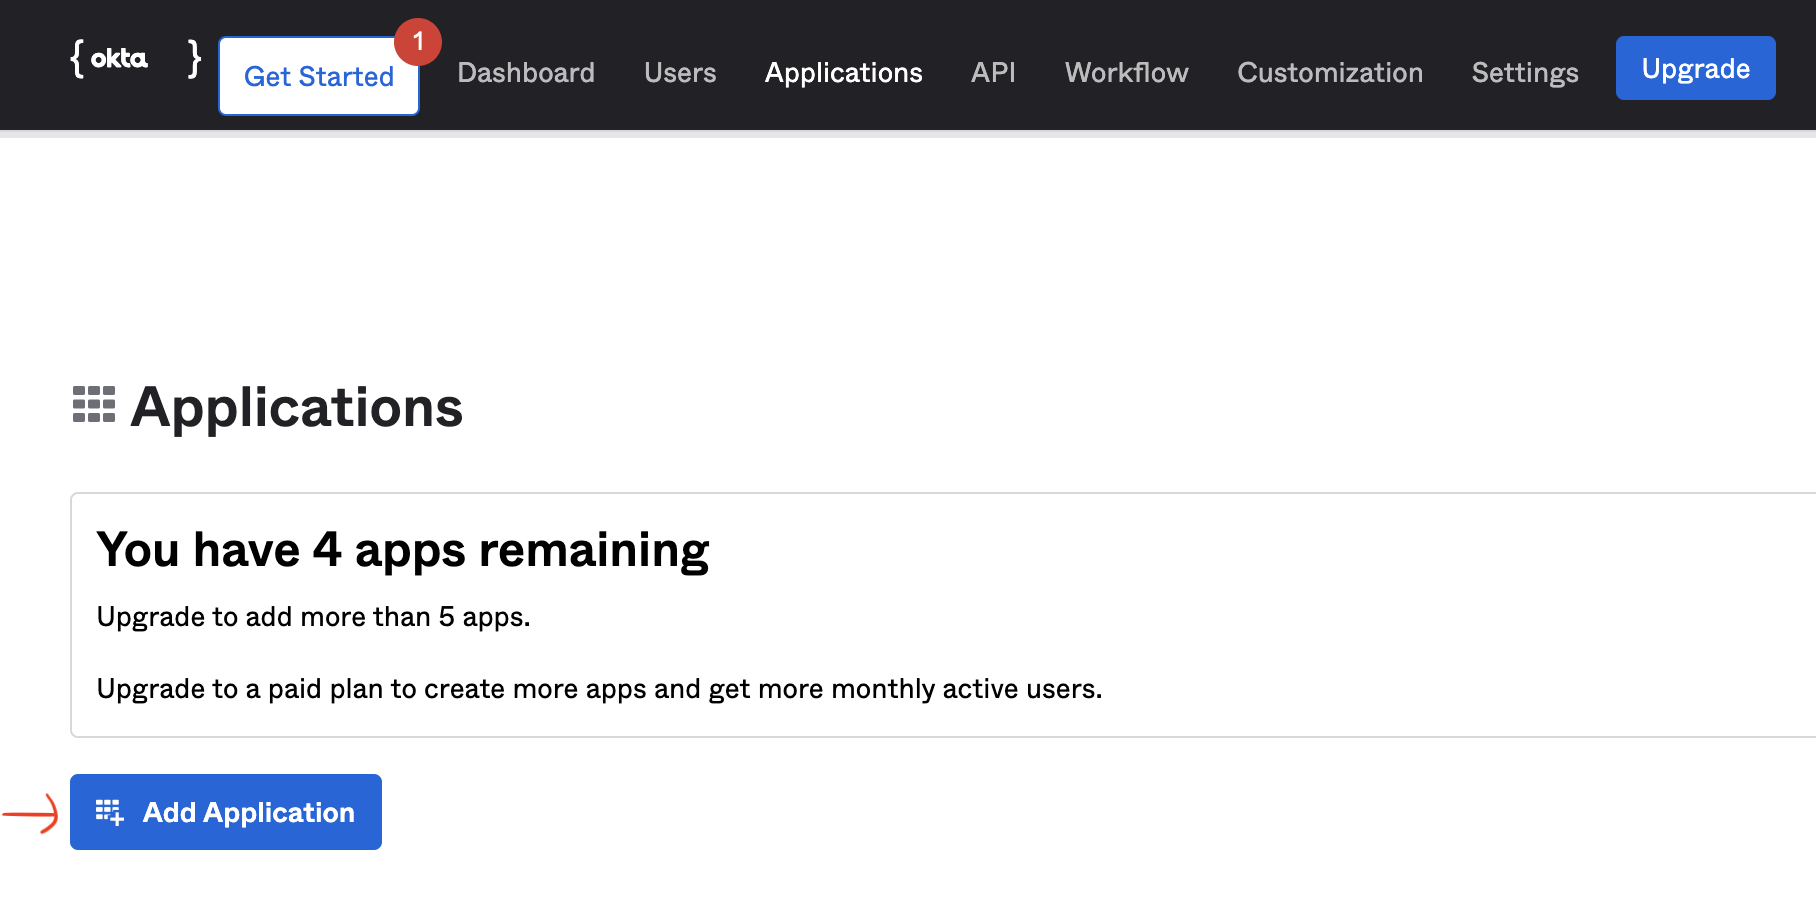
- Login into OKTA as an administrator and navigate to Applications and click on Add Application
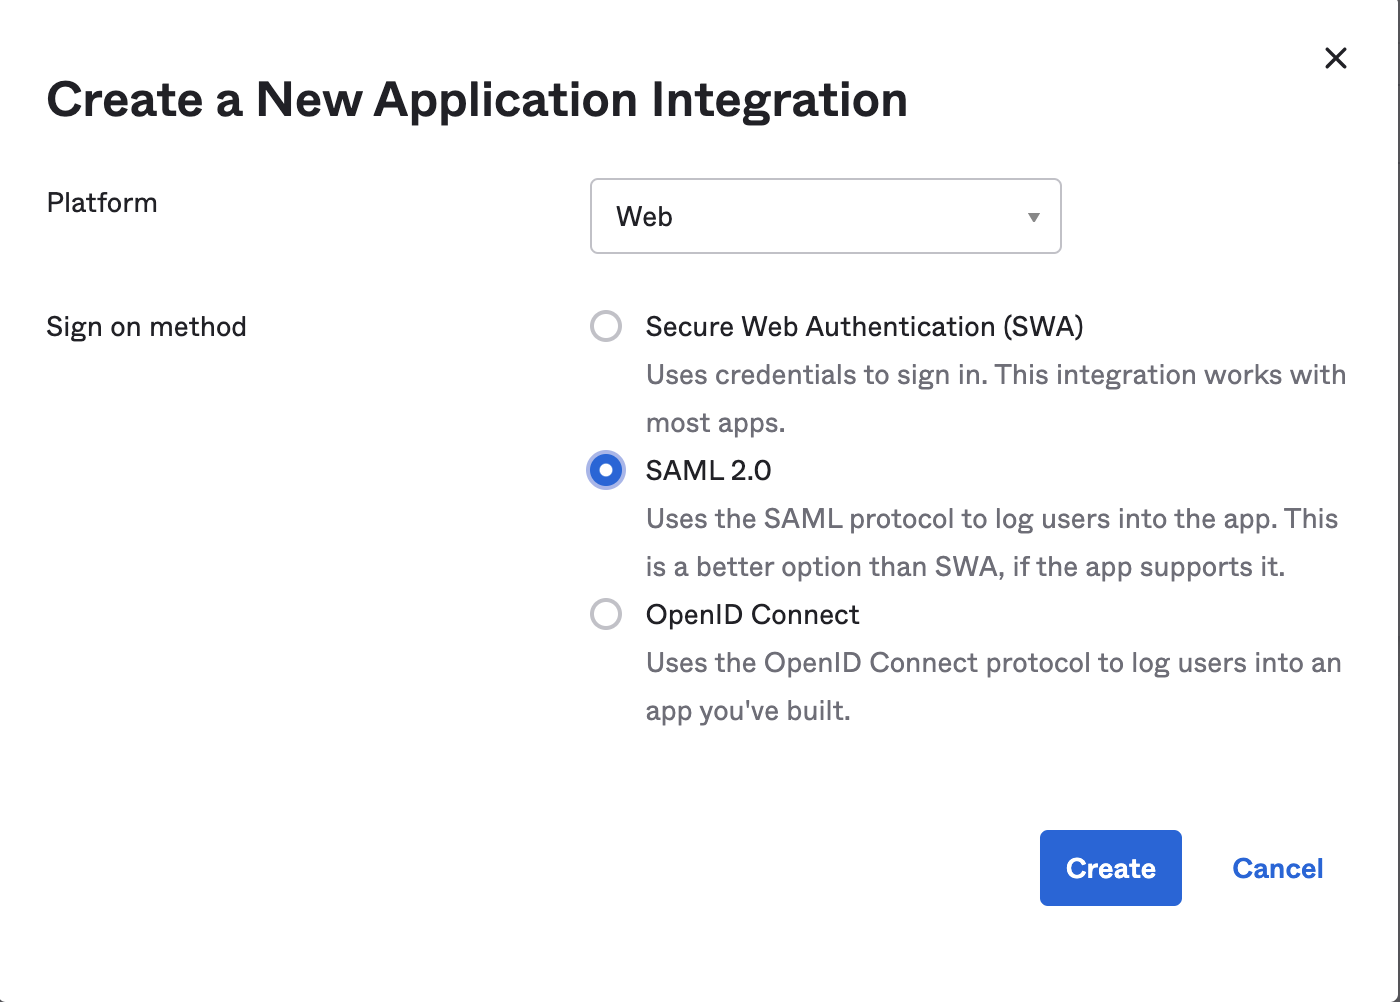
- Create a new application and select SAML 2.0
- Fill General Settings for the application
App name: Specify name of the application.
App logo(optional) : Upload a logo for the application
App visibility (optional): Select application visibility option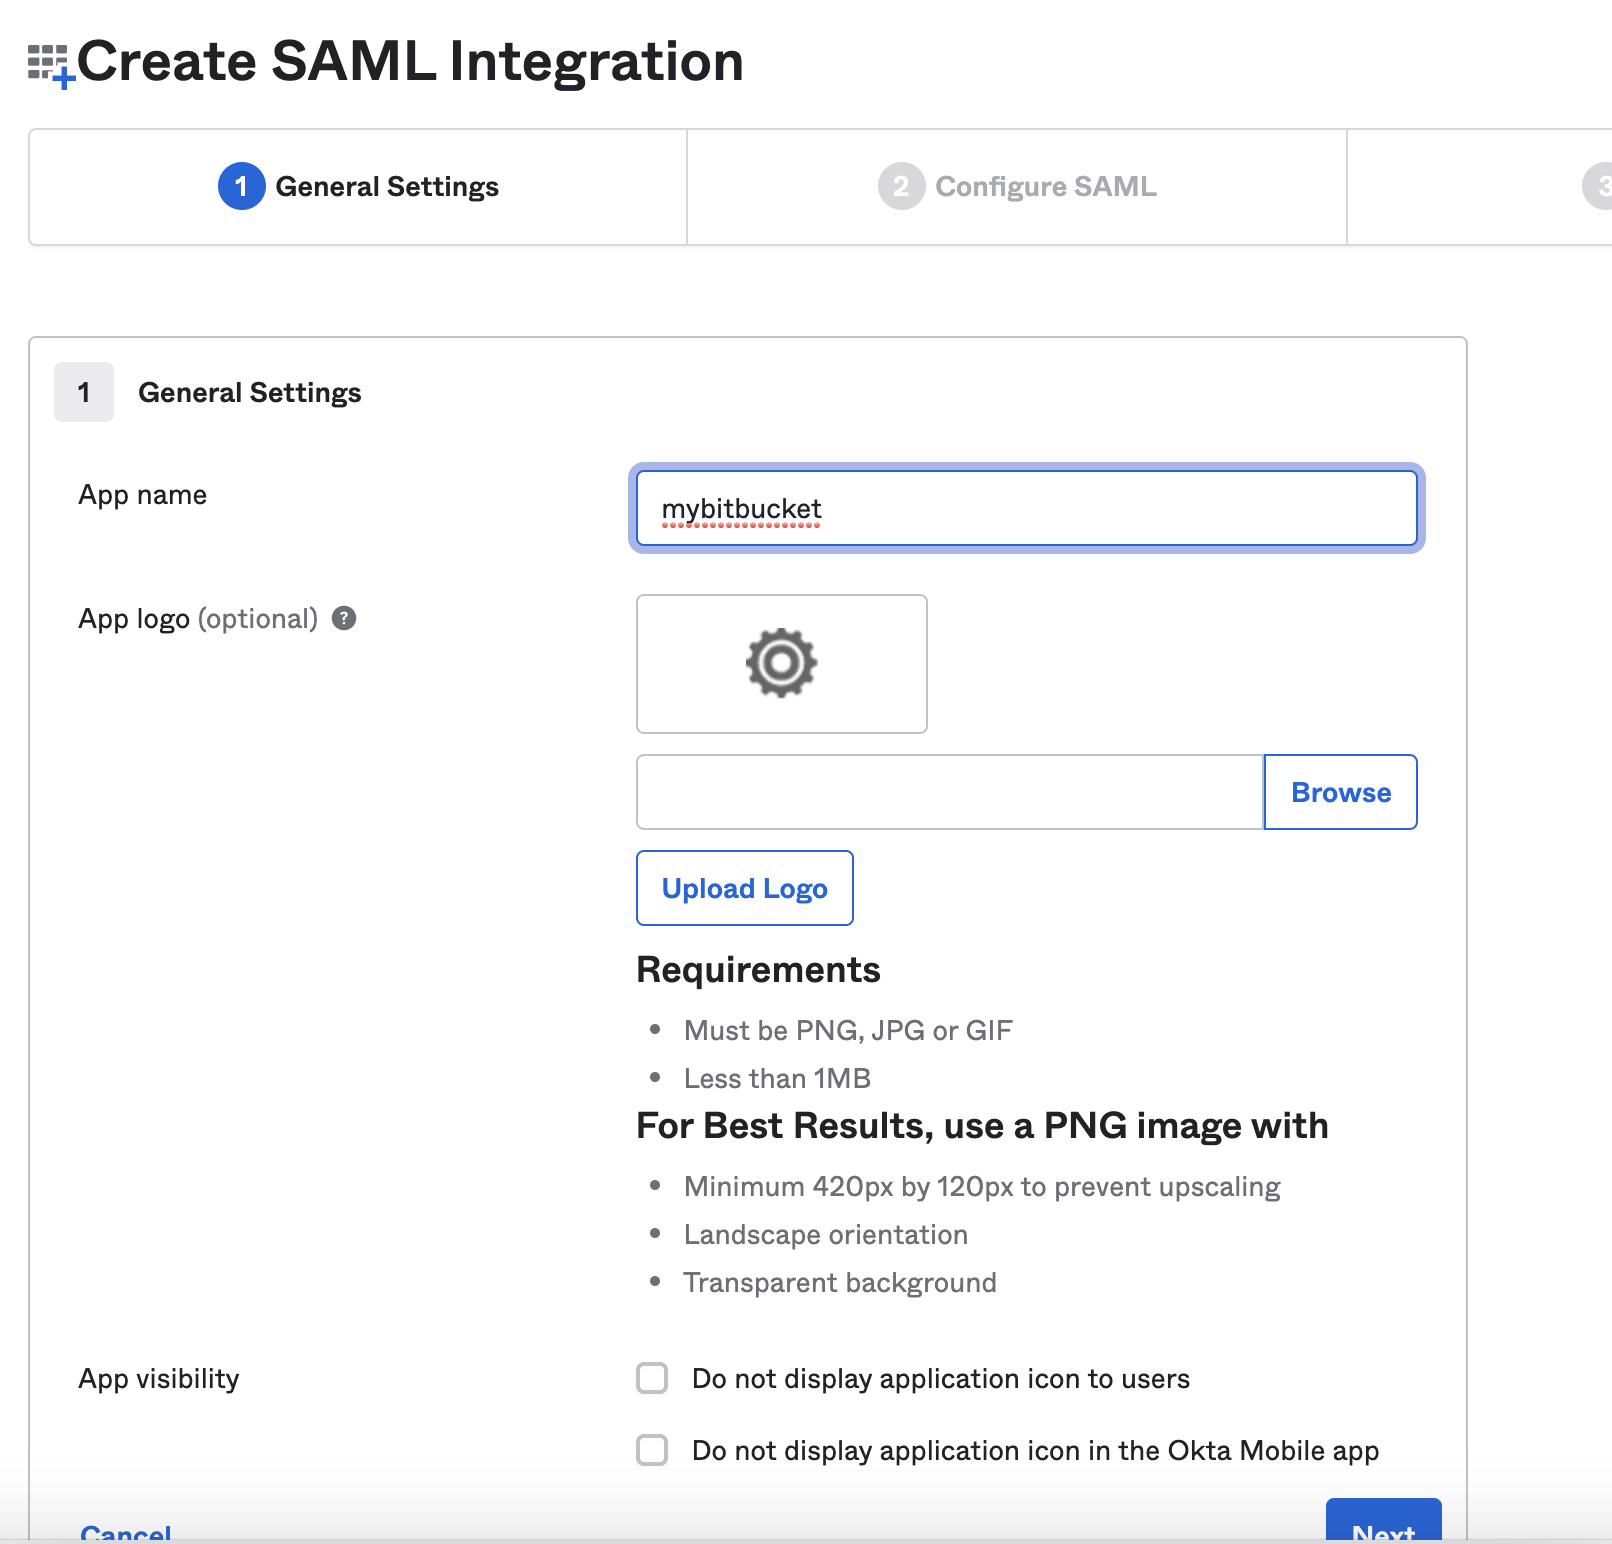
- Fill in Single Sign On Url details taken from SAML authentication (for versions <7.14)/ Authentication Methods (for versions >=7.14) tab in Bitbucket Administration Menu on the UI.
Details from Bitbucket UI for SAML configuration
In OKTA application: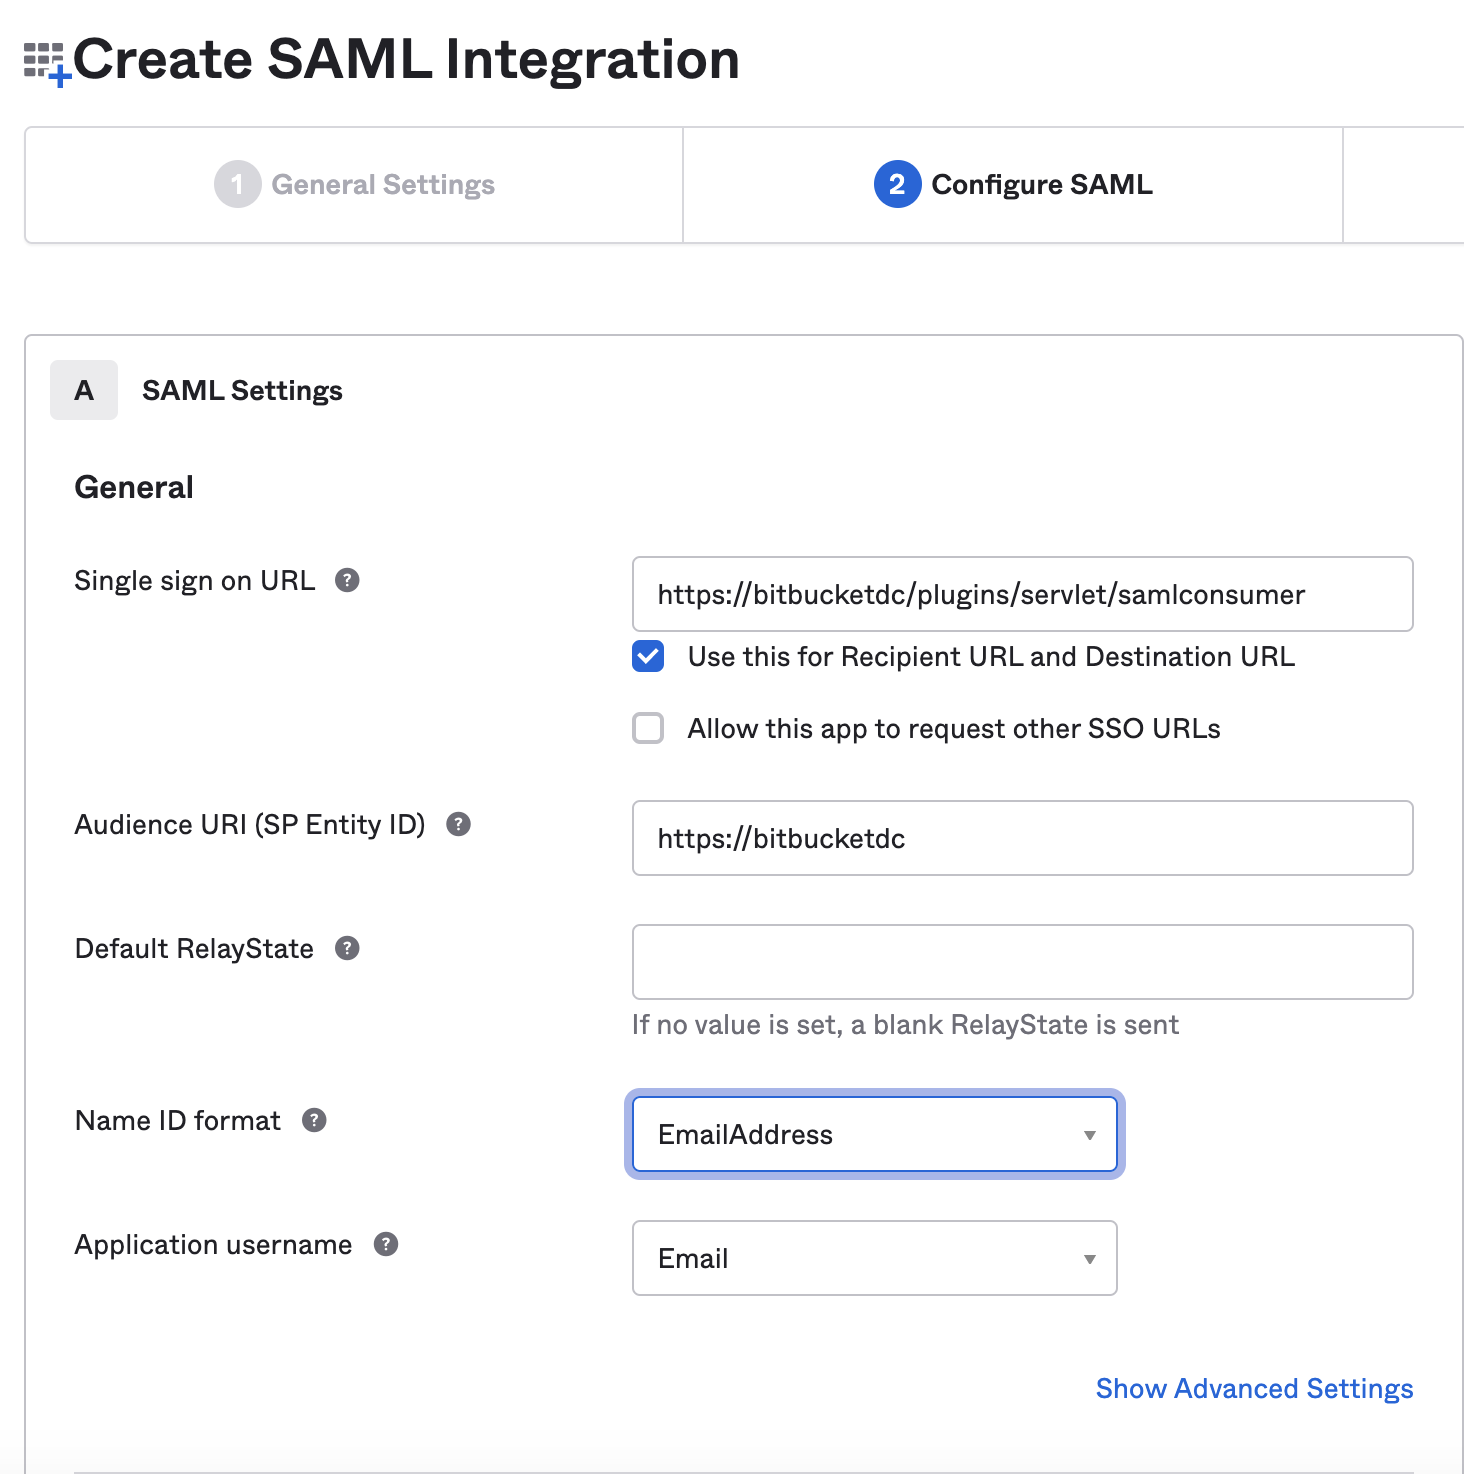
- Fill in additional details in Configure SAML such as Default Relay state, Name ID format, Application username etc., and click Next
Single sign on URL: The location where the SAML assertion is sent with a POST operation. This URL is required and serves as the default Assertion Consumer Services (ACS) URL value for the Service Provider (SP). This URL is always used for Identity Provider (IdP) initiated sign-on requests. The parameter value is fetched from Bitbucket UI (Assertion Consumer Service URL) as shown in the above screenshot.
Audience URL (SP Entity ID): The intended audience of the SAML assertion. This is usually the Entity ID of your application. The value is fetched from Bitbucket UI (Assertion Consumer Service URL) as shown in the above screenshot.
Default RelayState (Optional): The page where users land after a successful sign-in using SAML into the SP. This should be a valid URL. In most cases, this can be left blank.
Name ID format: The username format you are sending in the SAML Response.EmailAddress,considering users would authenticate to Bitbucket server using the email address. This must match with the username attribute in Bitbucket's user directory, so you may need to change depending on the desired/used configuration.
Application username: The default value to use for the username with the application.Email;considering users would authenticate to Bitbucket using the email address. If using a different method change accordingly.This must match with the username attribute in Bitbucket's user directory - The Next section is the feedback section. Select the options accordingly and click Finish.

- You have now successfully created a new application in OKTA for your Bitbucket data center.

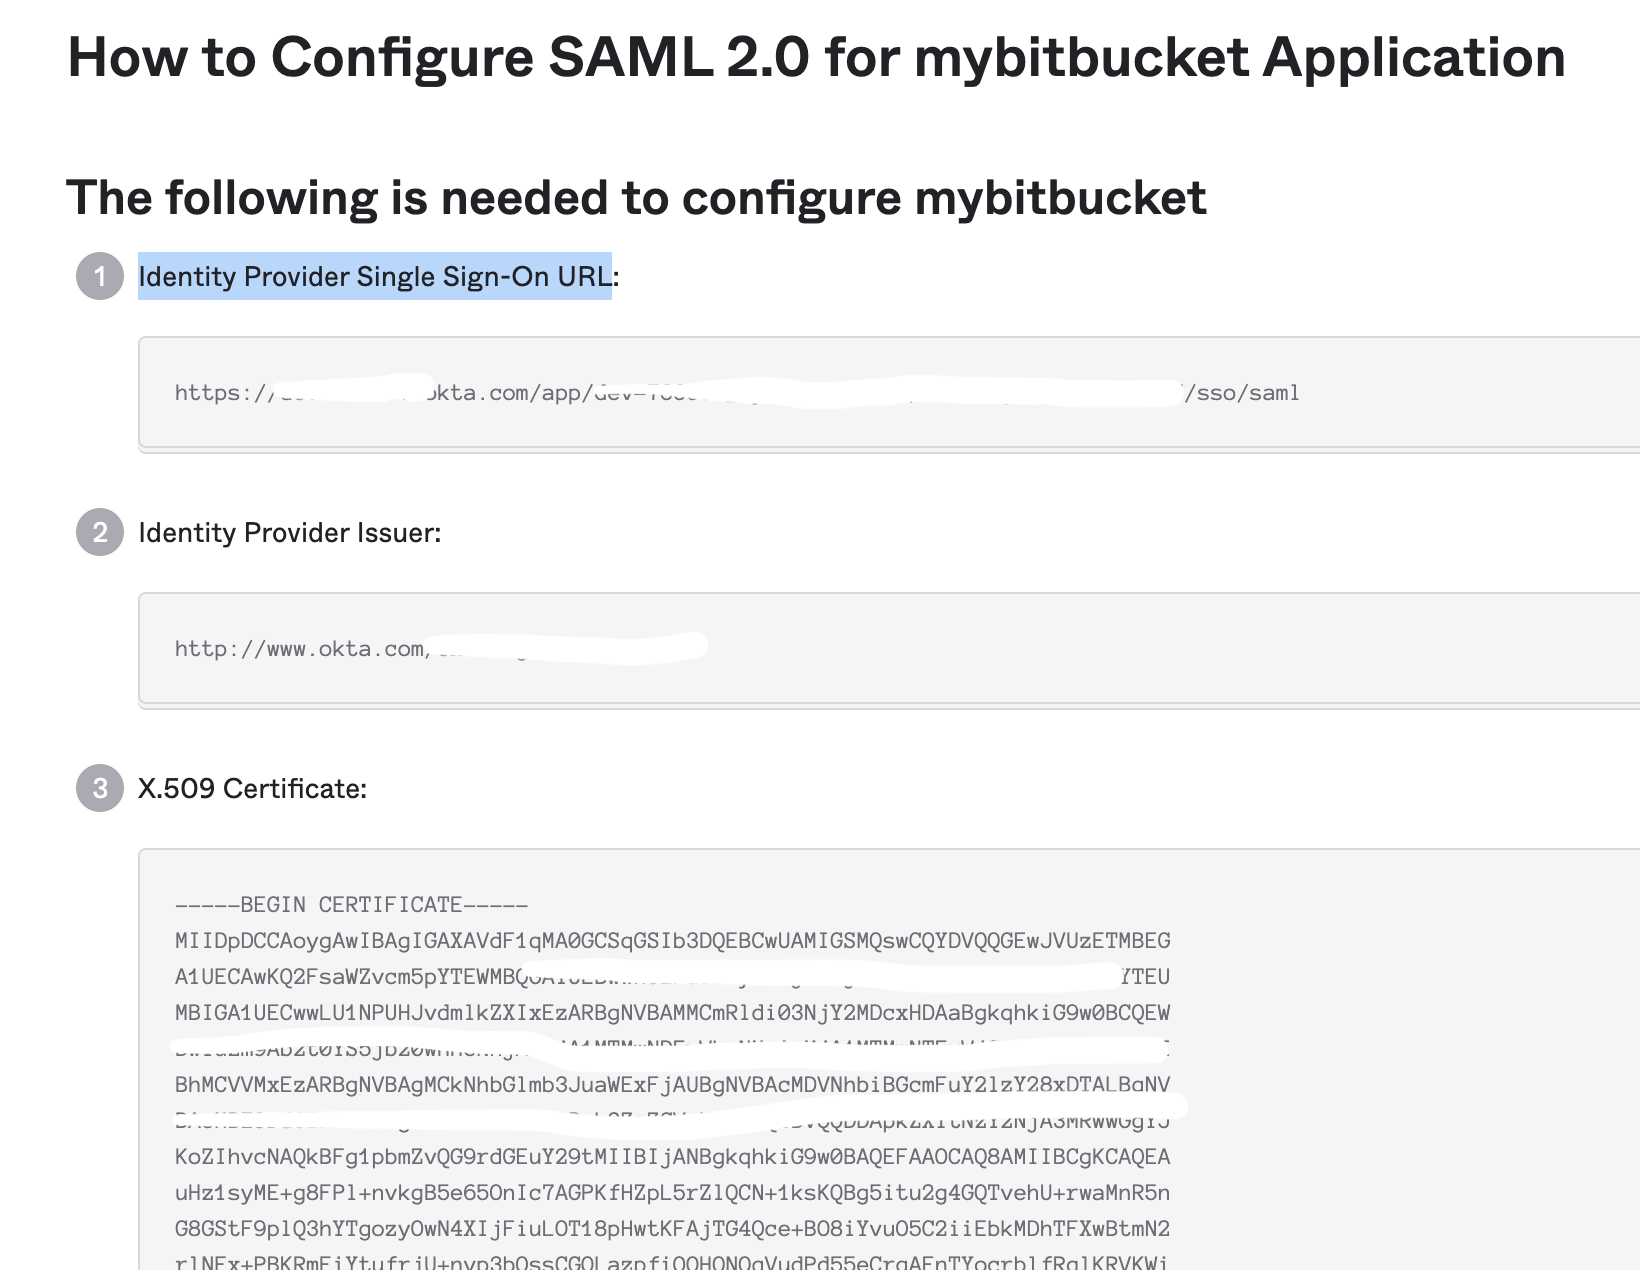
- Click on View Setup Instructions that provides OKTA application details such as Identity Provider Single Sign-On URL, Identity Provider Issuer, X509 certificate to be configured in SAML 2.0 app in Bitbucket Data Center
- Login into OKTA as an administrator and navigate to Applications and click on Add Application
- Configure SAML SSO in Bitbucket
- For Bitbucket version < 7.14 Navigate to SAML Authentication tab in Administration Menu in Bitbucket UI
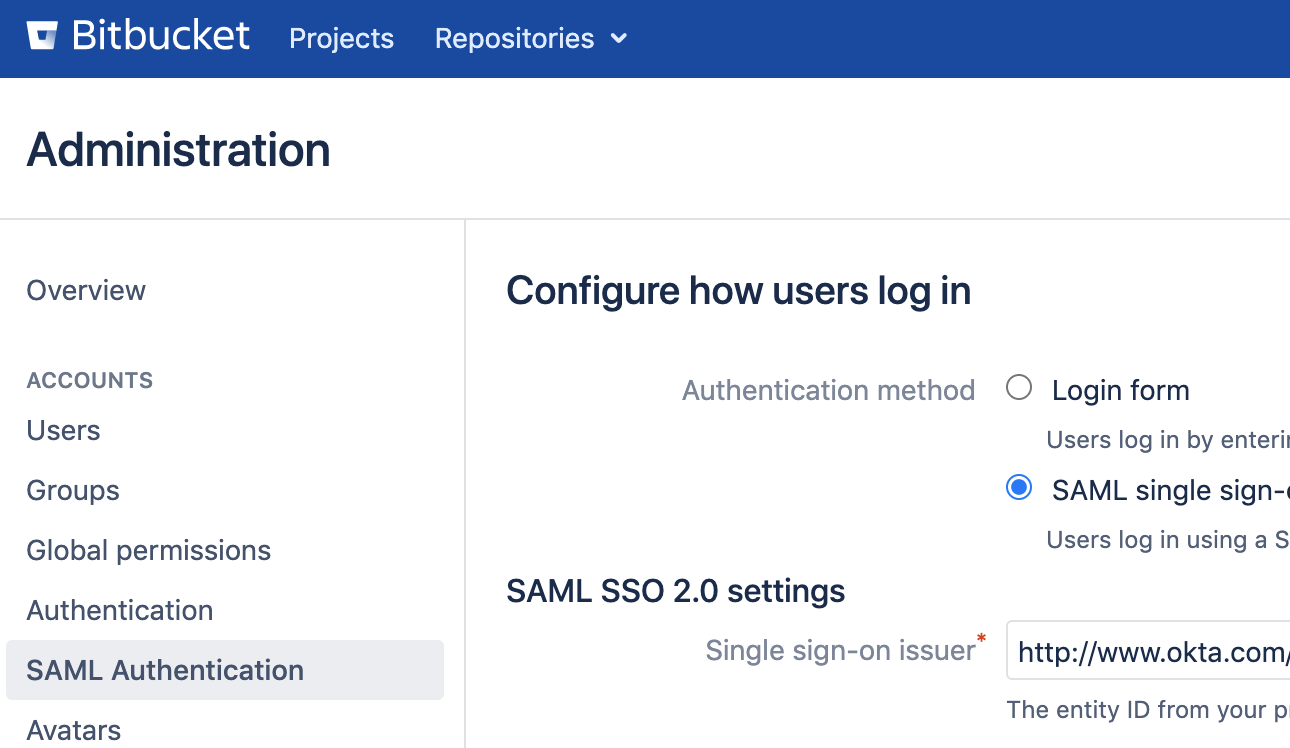
For Bitbucket version >= 7.14, Navigate to Authentication Methods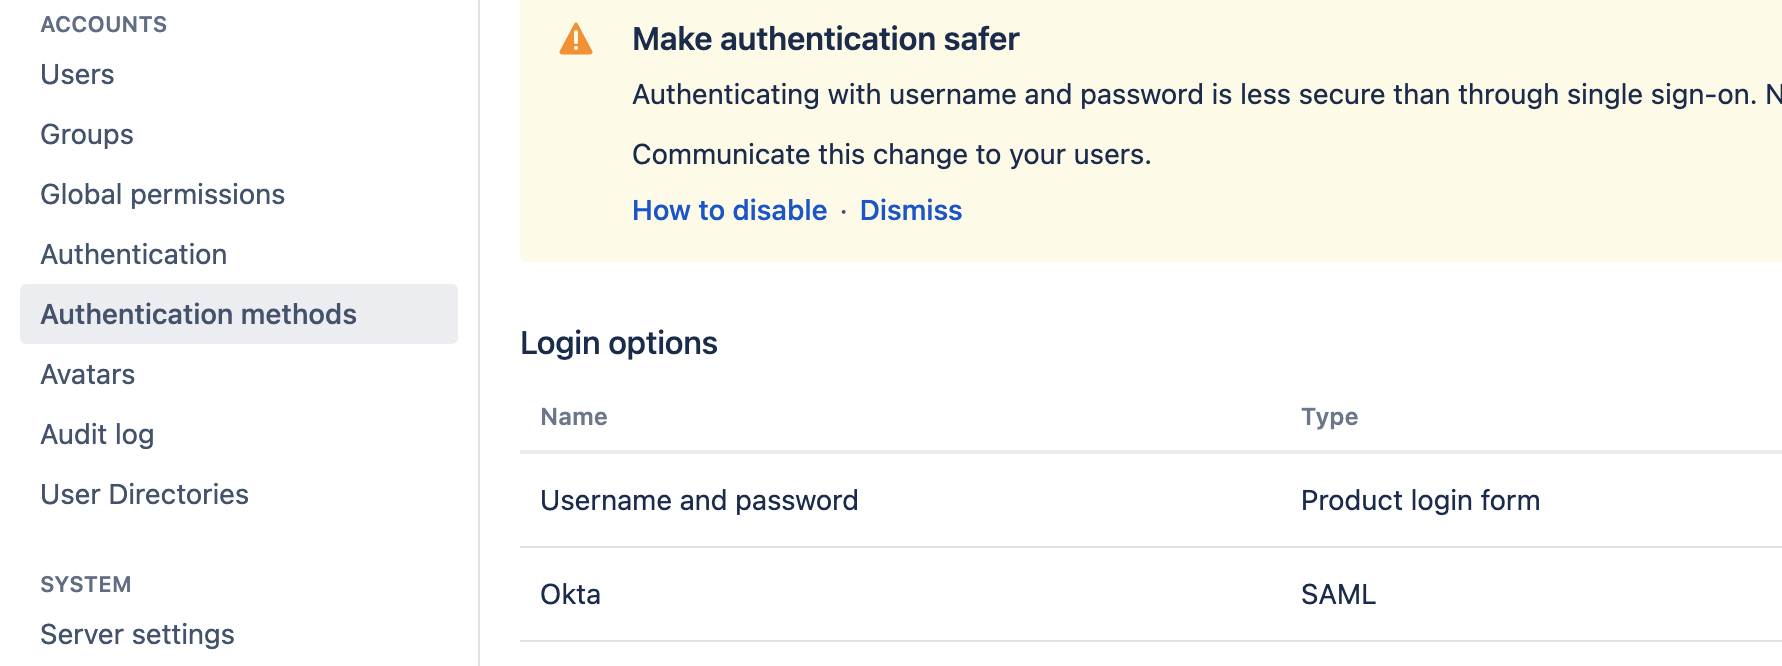
- Configure SAML SSO settings for Bitbucket that are provided from OKTA
- Select Login Mode and Remember User Logins accordingly as per your requirement. The definitions of the parameters are described in SAML SSO settings for Bitbucket
- Click on Save Configuration in Bitbucket UI to save SAML SSO configuration.
- For Bitbucket version < 7.14 Navigate to SAML Authentication tab in Administration Menu in Bitbucket UI
- Assign the users and groups to the application in OKTA for SSO authentication.
If you are facing trouble authenticating users, you can refer to basic troubleshooting and best practices in our document SAML single sign-on for Atlassian Data Center applications