How discovery Agents can export to Cloud instance
Platform Notice: Cloud and Data Center - This article applies equally to both cloud and data center platforms.
Support for Server* products ended on February 15th 2024. If you are running a Server product, you can visit the Atlassian Server end of support announcement to review your migration options.
*Except Fisheye and Crucible
Discovery Agents can transfer their local scan results using File Copy or SFTP export. These results are then picked up by a Collector or the Assets Discovery tool. While a direct upload to a cloud instance is suggested for efficiency ( JSDCLOUD-11802 - Getting issue details... STATUS ), this feature is pending prioritization. Until then, you can use a Discovery Collector to export results to the Cloud.
On this page:
Before you begin
Before you start exporting Agents scans to your Jira, make sure that:
Discovery Agents is installed on each device (Windows Environment only). Set up Discovery Agent
Discovery Collector is installed on a Windows device or Linux system. For Linux, install the latest Mono packages from the native Linux GUI. Set up Assets Discovery Collector
Shared path folder is accessible by both Discovery Agent and Collector. This can be a local path or an SFTP directory.
Exporting scan results
Let's imagine the following scenario: Discovery Toll can't scan remote laptops and Discovery Agents results should be uploaded to Assets in Cloud. In this case, to export scan results:
Install Discovery Agents.
The Discovery_Agent_Setup.msi installer is in the Discovery_x.x.x.zip file. By default, scan results are stored in the local device within the Agent installation directory under thescansdirectory.Configure the Agent settings:
Edit the Agent.cfg file in the Agent installation directory.
Set the
DirectCopyPathelement to the shared path for exporting results. For example, to:C:\Program Files\Atlassian\Discovery Agent Installer\export. Ensure the path is accessible by both the Discovery Agent and the Collector host.
In the following example, we use a local path but it could also be a remote path or even a SFTP as long as the Discovery Agent can access it as well as the Collector host. By default, Discovery Agents run a scan every 24 hours.Example - Agent.cfg<?xml version="1.0" encoding="utf-8"?> <Settings xmlns:xsd="http://www.w3.org/2001/XMLSchema" xmlns:xsi="http://www.w3.org/2001/XMLSchema-instance"> <ScanLogLevel>Debug</ScanLogLevel> <NextScanDate>2022-10-24T19:40:39.0555278+02:00</NextScanDate> <ScanInterval>24</ScanInterval> <AgentPort>51337</AgentPort> <JustUseFirstIP>false</JustUseFirstIP> <DeleteLogsAfter>7</DeleteLogsAfter> <DisableTCPListener>false</DisableTCPListener> <DirectCopyPath>C:\Program Files\Atlassian\Discovery Agent Installer\export</DirectCopyPath> <SFTPSettings> <TransferReties>5</TransferReties> <TranserRetryInterval>30</TranserRetryInterval> </SFTPSettings> </Settings>If you want to transfer the result data as an XML file to the configured target path, you can add an SFTP transfer setting. Add the following code to the
agents.cfgfile, inside of the<Settings>node:<SFTPSettings> <ExportPath>192.168.2.2/discovery/import</ExportPath> <UserName>yourUser</UserName> <Password>mysecurepassword</Password> <TransferReties>5</TransferReties> <TranserRetryInterval>30</TranserRetryInterval> </SFTPSettings>Alternatively, use
Discovery_Agent.exe -setupsftp(this will execute a small console configuration for the sftp transfer). Note that the password will be encrypted during the first startup.
- Install Discovery Collector on a different device:
- Run the command prompt with administrator privileges in the Discovery installation directory.
Install the Collector tool as a service using the command
Collector.exe -i.
- Configure the Collector settings
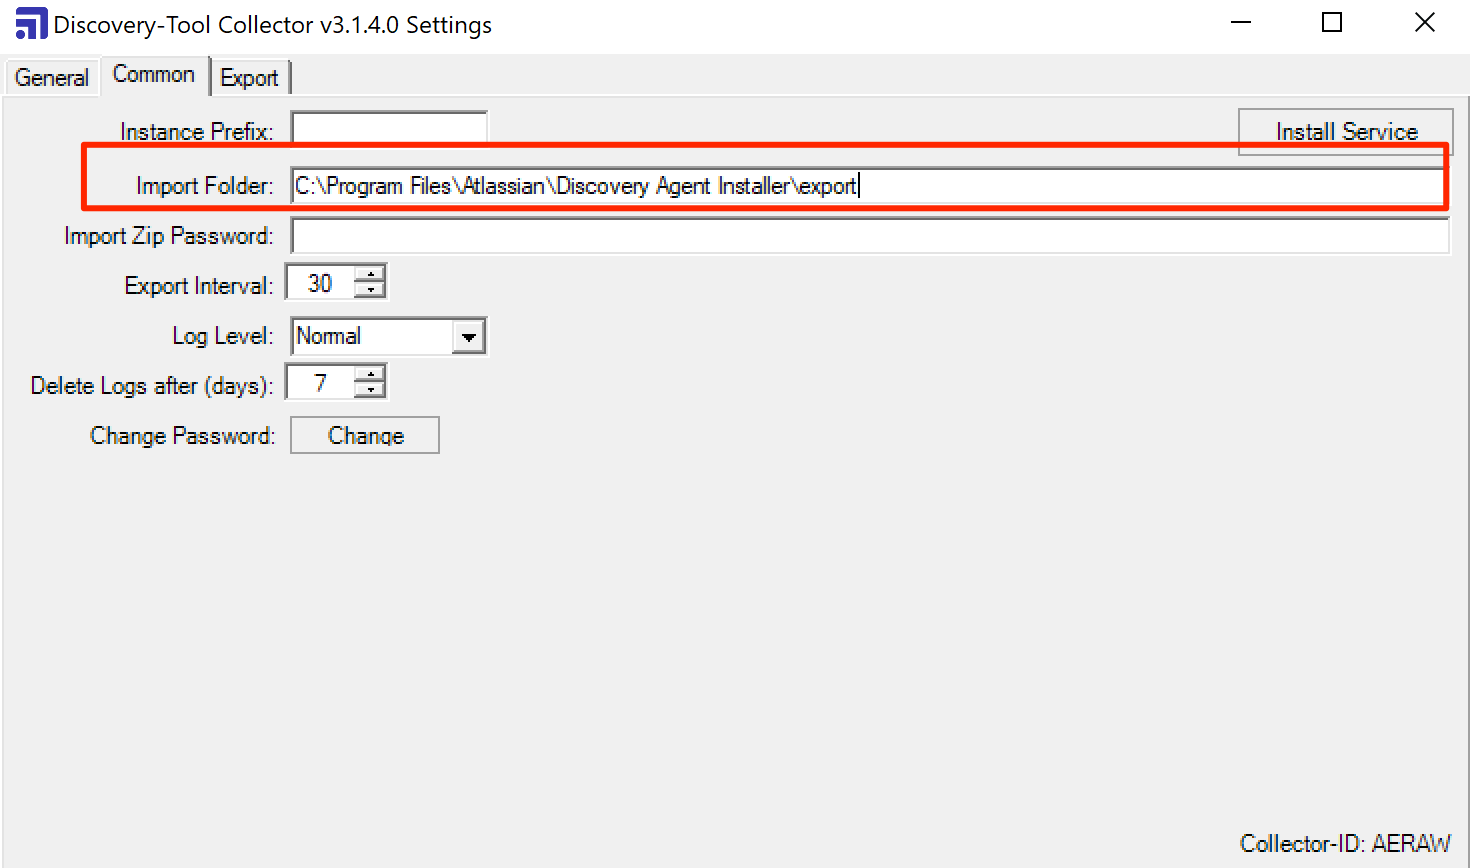
- Open Collector-Tool Settings with the command
Collector.exe -s. In the Import Folder field, set the shared path where the Agents' scan results are exported.
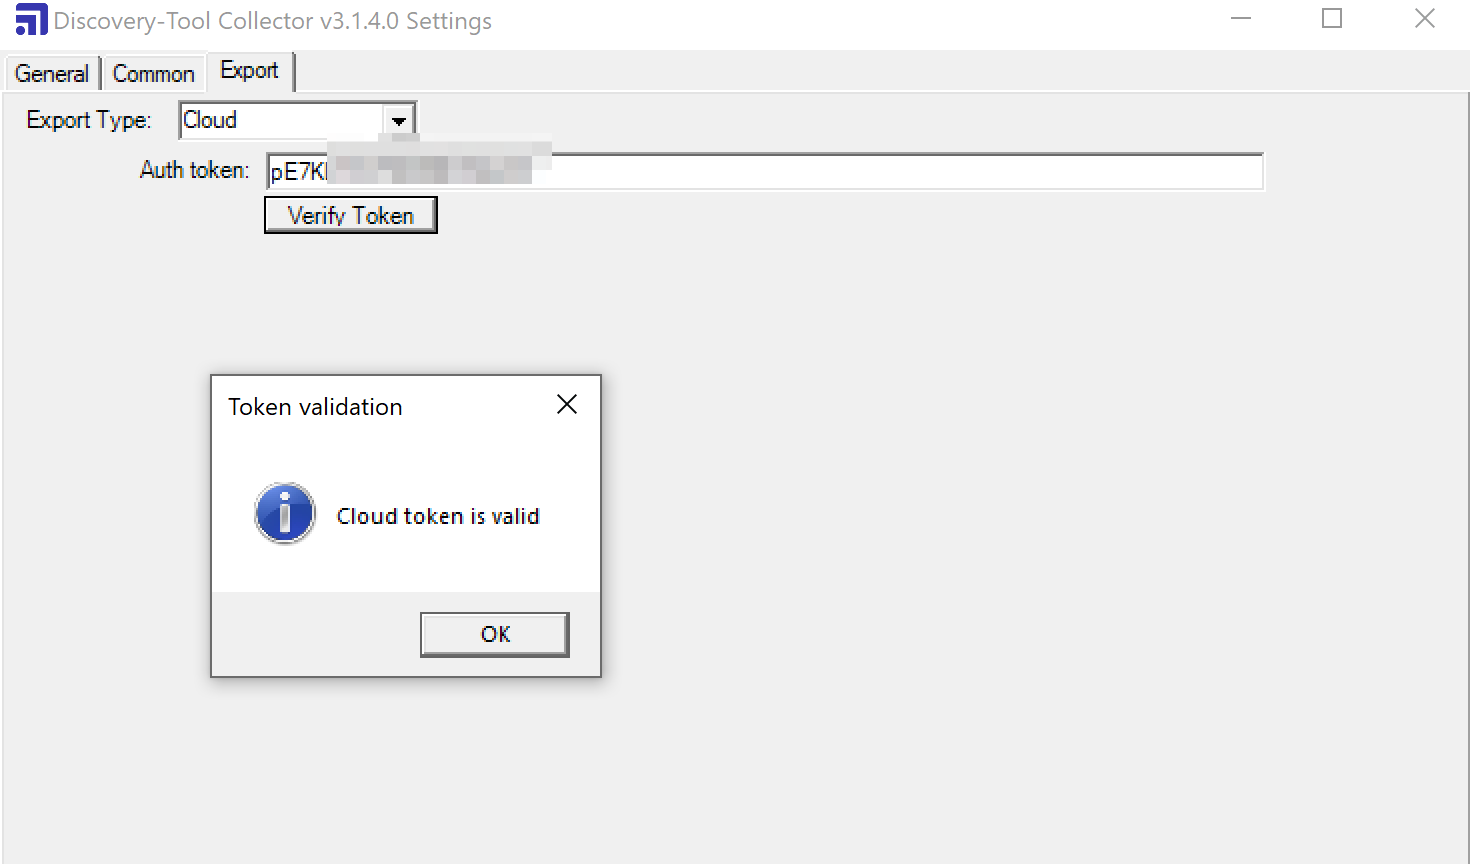
Go to the Export tab and set Export Type to Cloud.
Add an auth token for secure data transfer into Assets. Generate a token for importing
- Open Collector-Tool Settings with the command
You can now close the Collector settings. Discovery Collector will run every 30 minutes by default. If any Agent scan results are found in the Import Folder, they will be exported to the Cloud.