Automatically sharing a new ticket with a specific Organization and add the reporter as a member of the Organization
Platform Notice: Cloud Only - This article only applies to Atlassian products on the cloud platform.
Summary
This article shows how to use automation to set an organization field based on the reporter's membership with that organization. It also provides the option to add the customer to a specific customer organization.
Environment
Jira Service Management Cloud
Solution
A scenario of how this knowledge article can apply if:
- You have a Jira Service Management project and this project is only intended for a single Organization/Company. And,
- You want every request created in this project to automatically share with all the members of the Organization by adding that Organization in the Organization field.
- If the reporter is not part of the Organization yet, the automation will make sure to add the reporter as a member of the Organization.
- This way, all other users/members of that Organization will be notified of any new ticket/request creation within the project.
In this article, Jira Service Management REST API will be used. Detailed steps to create the automation rule and the conditions of the automation rule will be presented further in the article. You can also import the example rule created for this article.
Example Automation Rule

Overview of the Automation rule
We will start with creating the automation rule for this action. You can follow the steps below to create your automation rule. There will be 4 different parts that you need to follow.
To create a new rule:
From your service project, select Project Settings > Automation.
Select Create rule in the top-right corner.
Select a trigger for the rule.
Select "Issue created" from the trigger settings and select Save.
Select New component and choose New condition. "If block" should be selected.
- Select the "User condition" and configure accordingly.
- Select "New action" and choose "Edit Issues".
- Repeat steps 5-7 for the "else-if block".
Select "New action" on your else-if block. Configure this step as shown in the below.
Select Save.
Give your rule a name, then select Turn it on.
Part 1: Tools and Components
Selecting Trigger
Automation rules in Jira cloud contain a number of triggers to use. For this rule, we will need the “Issue Created“ trigger.

Creating the If/else Block
In the rule, we’re aiming the check whether the reporter is a member of a certain customer organization. This will contain multiple options. Hence, we will be using the “If/else block“ condition.

Checking the user’s membership
To check whether a user from a user picker field(Reporter), “User condition“ can be used.
This condition verifies if a user is present or belongs to a specific group. You have the flexibility to include more criteria in this condition and choose whether all or any of the criteria need to be met.

Executing the action
In this rule, there will be two actions to be used. The initial step involves considering the positive condition, which entails including the customer as a member of the targeted customer organization. For this purpose, we will be using the “Edit Issue“ action.

Edit the current issue by selecting the field you want to modify and the value you want to add. In Jira Service Management, you have the ability to edit both Jira fields and Assets fields. To gain a deeper understanding of Assets in Jira Service Management, please refer to this link.
Part 2: Prerequisite information
Set up basic authentication for API.
Create an API token following these instructions here: Get an API token
Generate the base64 encoded authorization following the instructions here: Supply basic auth headers
Getting the organizationID
You can get the “organizationID” by calling the following endpoint.
https://<YOUR-SITE>.atlassian.net/rest/servicedeskapi/organization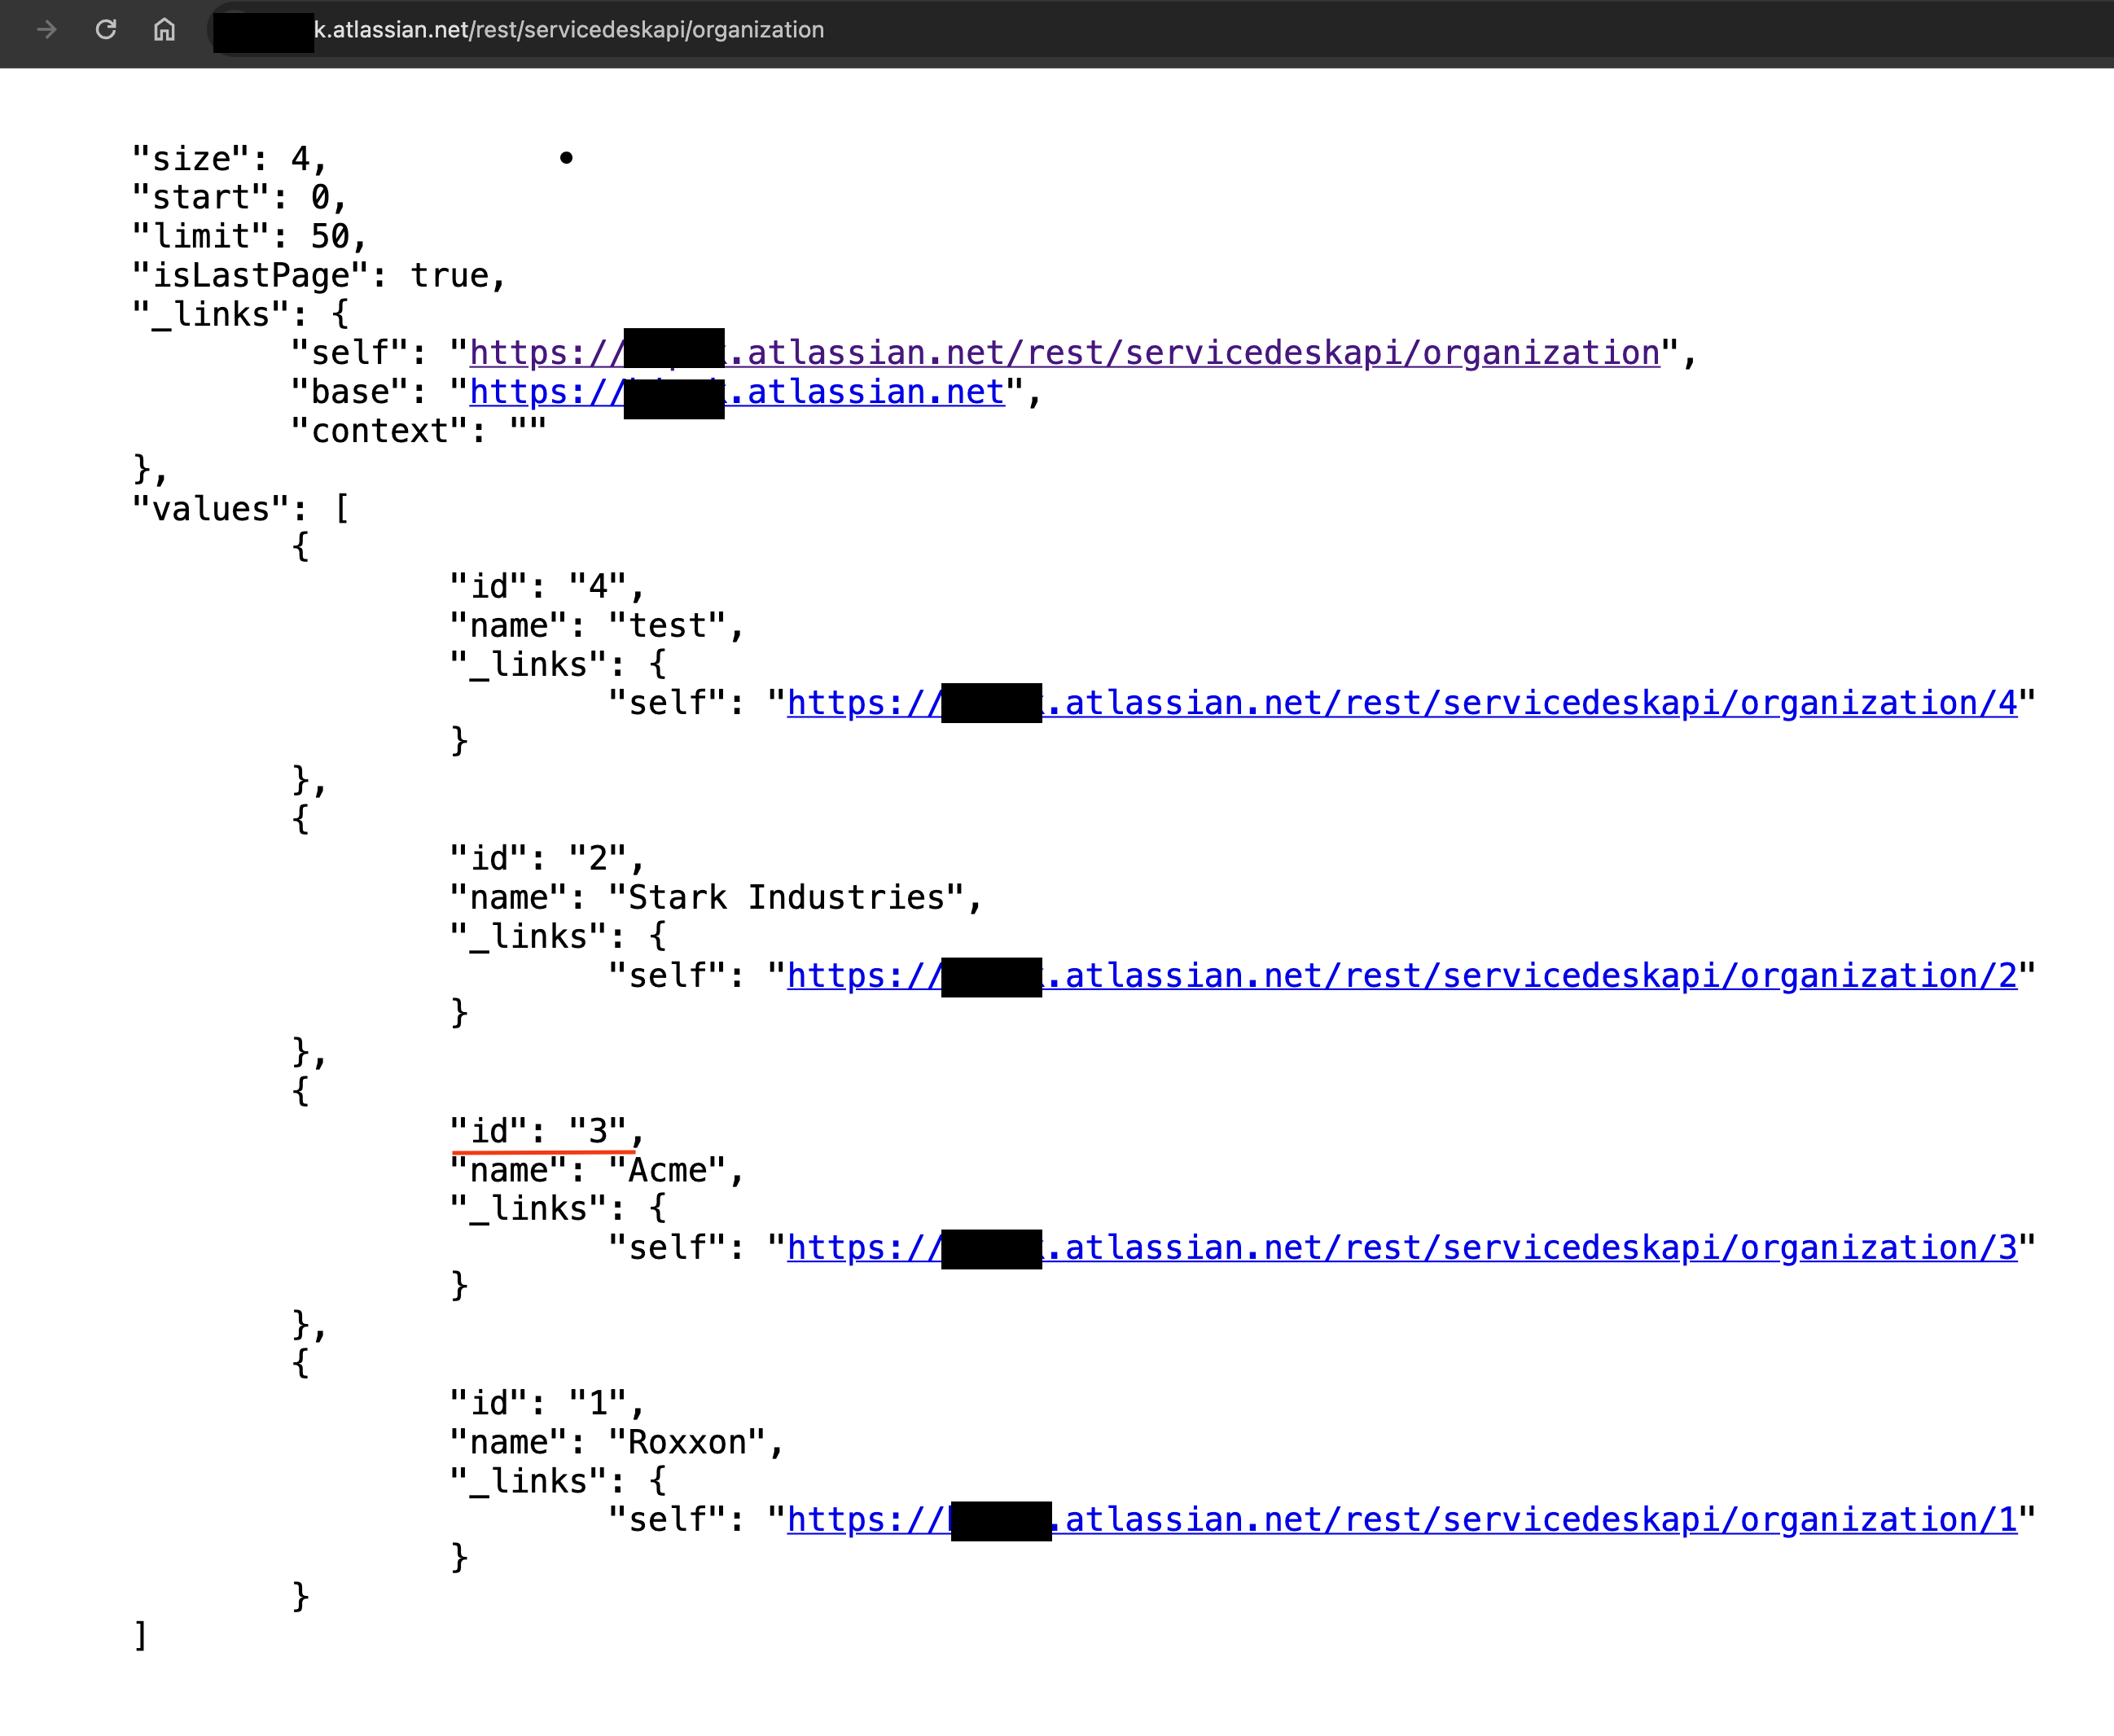
Part 3: Adding a reporter as part of the Organization member
The second action we will take if the user is not part of this customer organization is the “Send Web request” action.
Sends a web request to notify another system when a rule is executed. You have the option to configure this action to return response data that can be utilized in a subsequent action.

Create the Web request
Add an action: Send web request.
Web request URL:
https://<YOUR-SITE>.atlassian.net/rest/servicedeskapi/organization/<organizationID>/user
- Set the HTTP method to POST
- Add the “Custom data“ which will contain the reporter information. To get the reporter’s information we will be using the smart values. “{{issue.reporter}}“ will return the reporter’s account ID.
{
  "accountIds": ["{{issue.reporter}}"]
}
- Add Headers:
- Key: Content-Type
- Value: application/json
- Add another header
- Key: Authorization
- Value: Basic <ADD THE ENCODED STRING>
Test Send Web Request action
Click on the Validate your web request configuration drop-down.
Enter an issue key and Validate the call.
You should see a green Response 204.
Click Payload to see the returned information.
Part 4: Finalize and validate all the steps
Putting together everything with the following steps, you’ll be creating the automation rule as shown below.
Add Trigger
Add If block
Add positive “User condition” to the if block
Add “Edit issue“ action to set the customer organization.
Add the Else block
Add the negative “User condition” to the else block
Add the “Send web request“ action based on the information mentioned above
Add “Edit issue“ action to set the customer organization.
You can always Contact Atlassian support if you have any questions.
Related articles
- Jira automation triggers
- Jira automation conditions
- Jira automation actions
- Jira smart values - issues
- Jira smart values - users
- Add users to an organization
