How to add the 'Escalate this issue' link to a Service Management request
Platform Notice: Data Center Only - This article only applies to Atlassian products on the Data Center platform.
Note that this KB was created for the Data Center version of the product. Data Center KBs for non-Data-Center-specific features may also work for Server versions of the product, however they have not been tested. Support for Server* products ended on February 15th 2024. If you are running a Server product, you can visit the Atlassian Server end of support announcement to review your migration options.
*Except Fisheye and Crucible
Summary
To build an 'Escalated' status into your workflow.
Solution
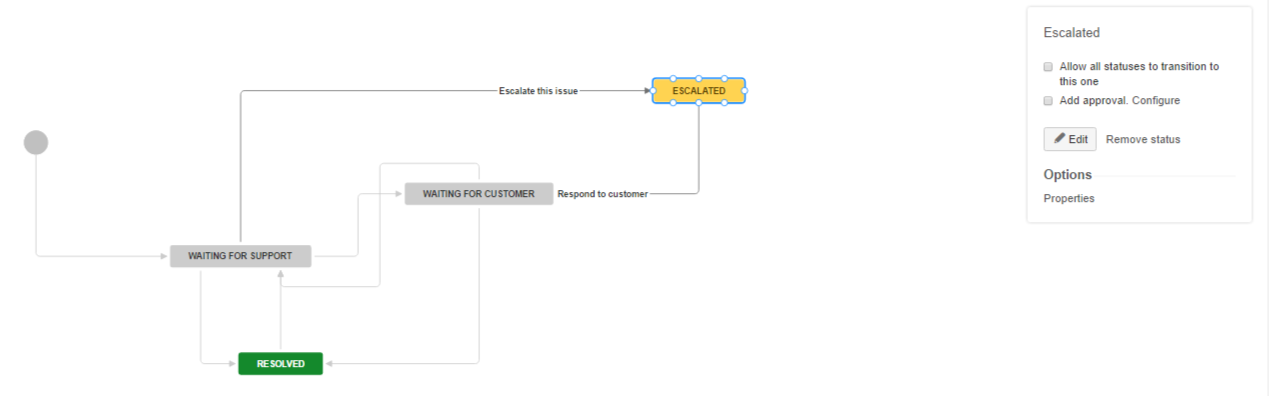
Edit the desired workflow in Diagram mode.
Add a new status called Escalated with the 'In Progress' category.
Add a transition from Waiting for support to Escalated, name the transition 'Escalate this issue'.
Select Show transition in the customer portal to allow Customer to click on this transition from the Customer Portal, do NOT set a resolution.
Add another transition from Escalated to Waiting for customer, name the transition 'Respond to customer'.
Publish the workflow.
Next, add a new queue to show all the Escalated issues to Agents. See Making queues for your service project teams.
(Optional) You can even set an Automation rule to alert a member of your team via an @mention when an issue is escalated, or to add a pre-populated comment to every escalated issue. See Automating your service project.
Was this helpful?