How to configure Default Approvers for Request Types?
Platform Notice: Cloud - This article applies to Atlassian products on the cloud platform.
Purpose
This article would help you to configure the Default Approvers in the custom field when a new request is created in a Jira Service Management project.
Environment
Jira Service Management cloud
Solution
There are multiple ways to solve this ask. Please follow the below solutions to achieve the requirement:
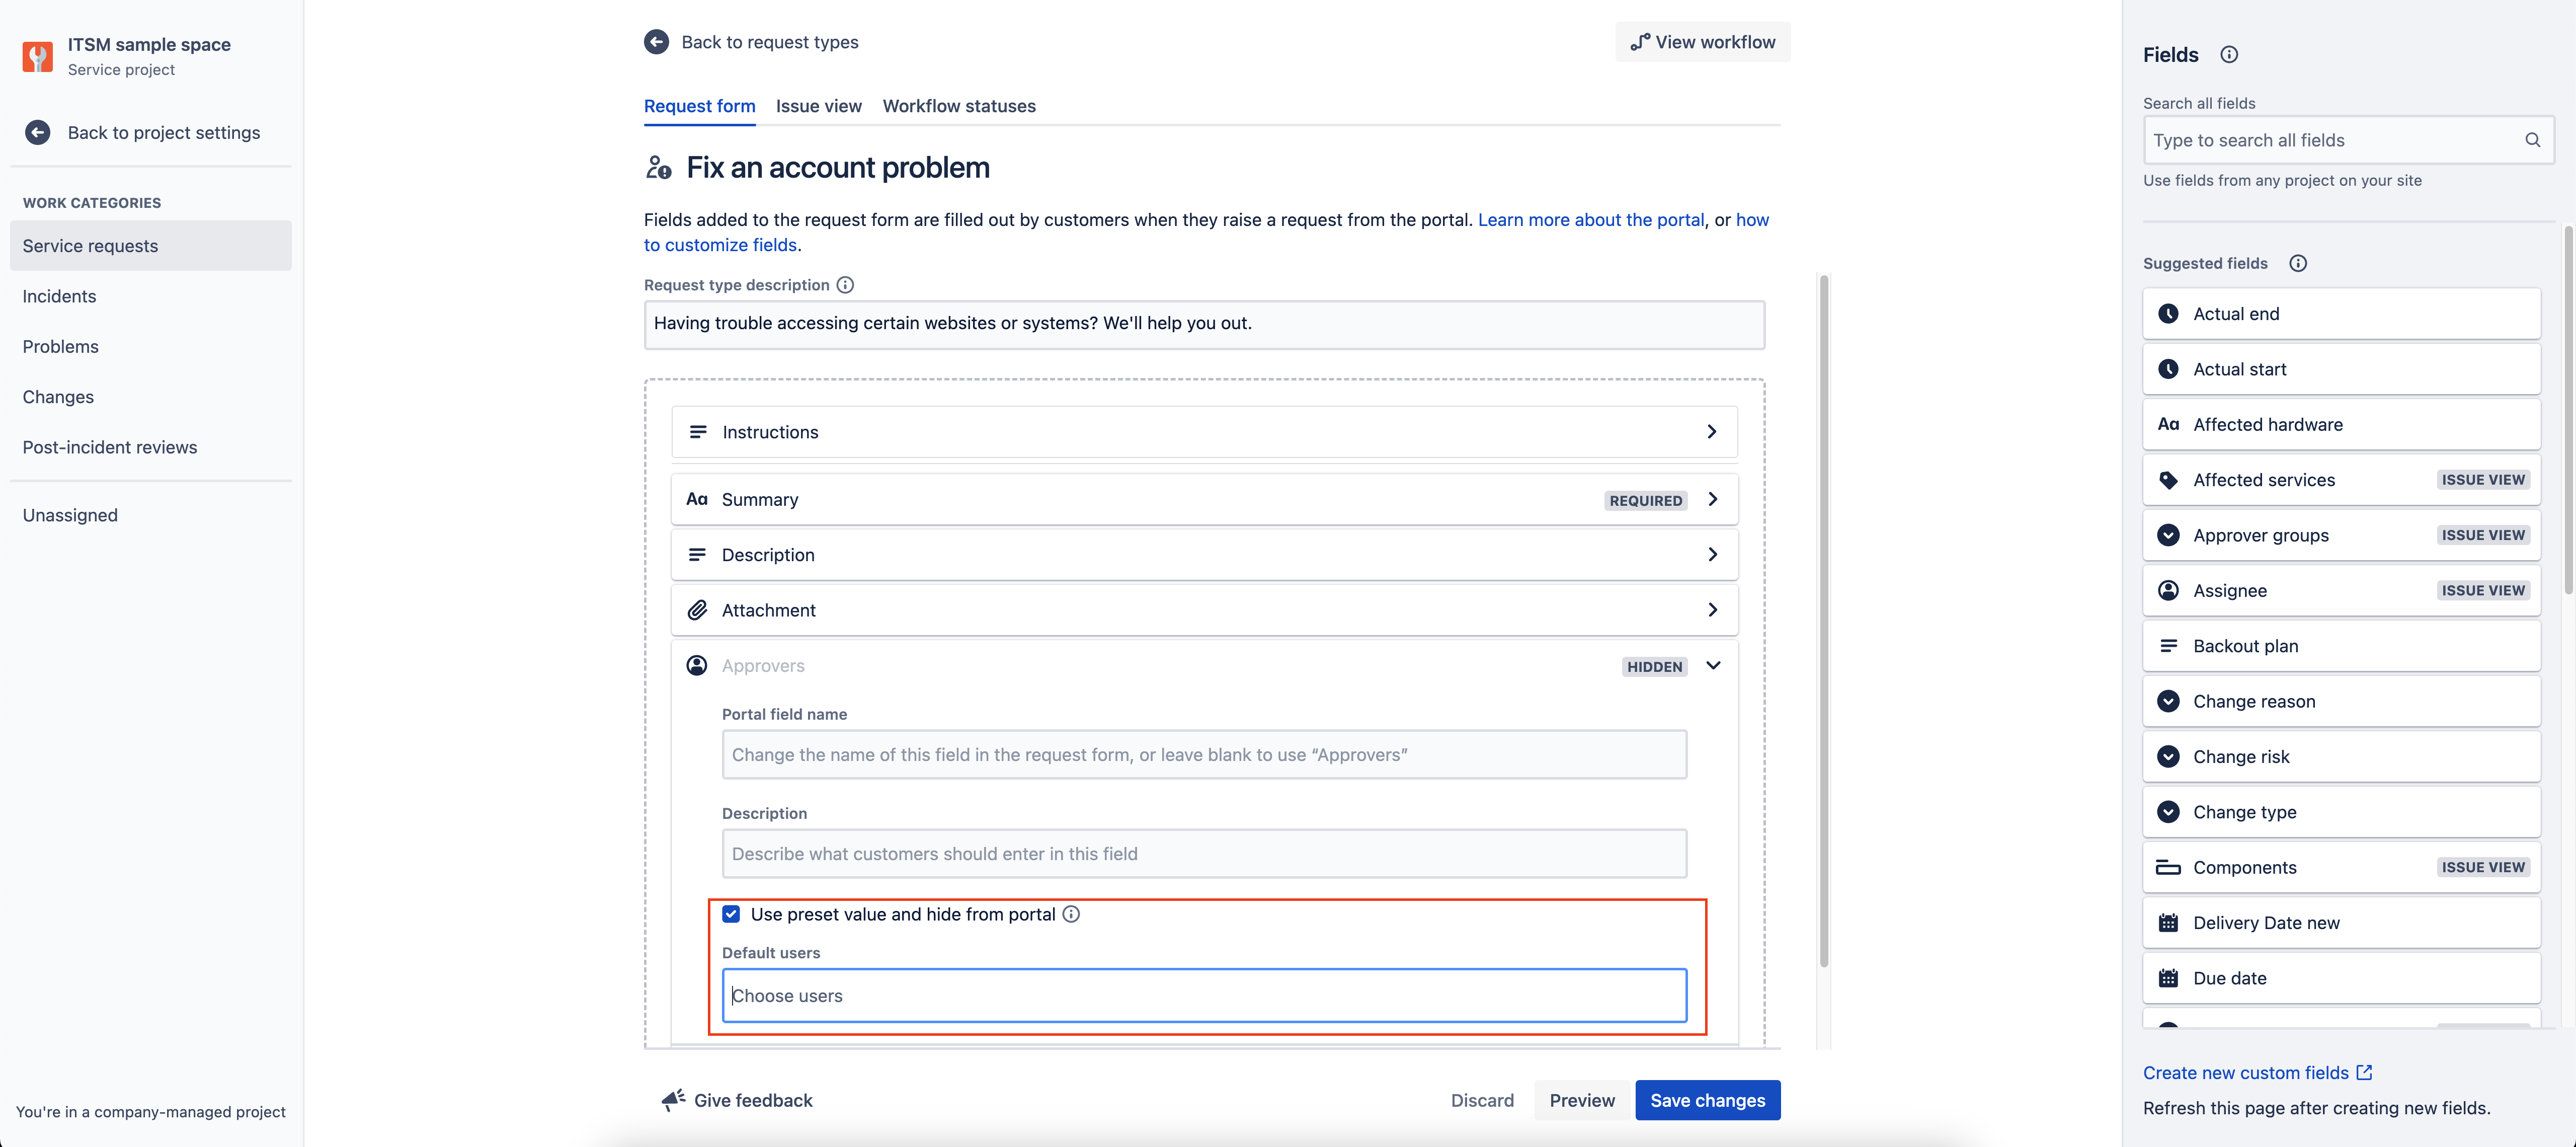
Solution 1: Request Form configuration - You can add the Approvers custom field in the request form of the required request type/s and then include the default users for the same using Use preset value and hide from portal.
Please follow the steps below for all the request types where you want to achieve the Default Approvers functionality :
- From your service project, go to Project settings, and then Request types.
- Select the relevant work category in the left hand navigation panel.
- Select the request type for which you want to change the Default Approver.
- Select Request form to update the request form.
- Add the custom field Approvers to the request form by dragging it from the right side panel.
- Click on the newly added Approvers field and select the checkbox marked as Use preset value and hide from the portal. This will open a panel below with Default users.
- Search and Add the Default users. These users will be shown as Default Approvers in the requests for that particular request type.
- Click on save changes.
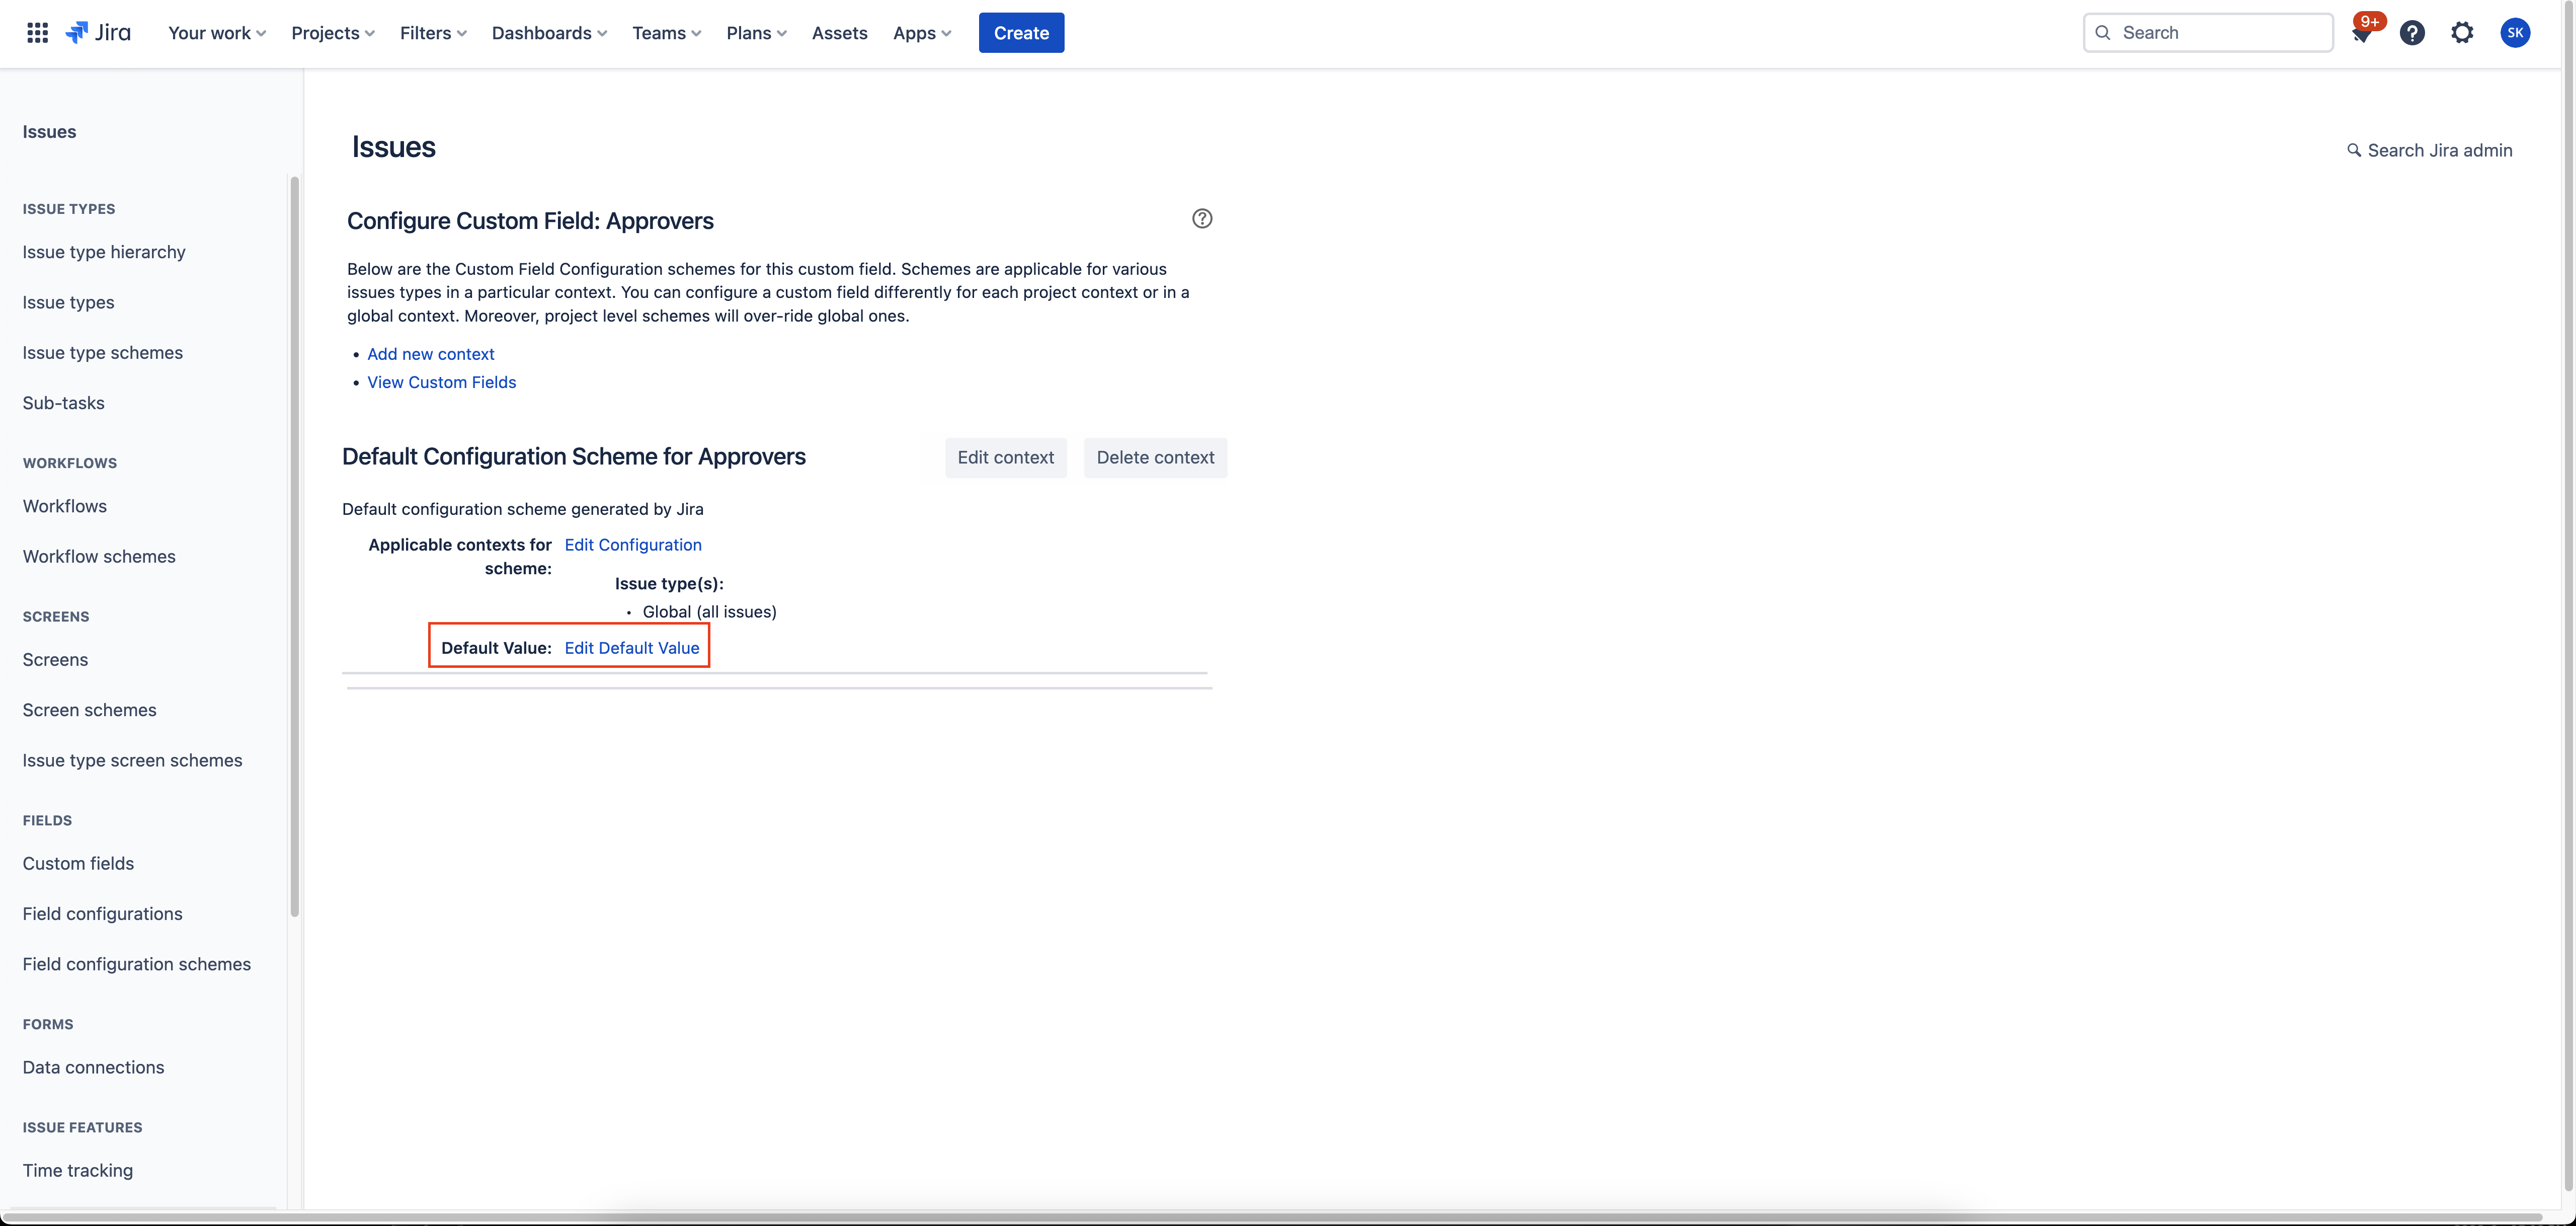
Solution 2: Custom Field configuration - You can set the default values for the custom field in the Configure a custom field for the particular issue type.
Please follow the steps below to add the Default approvers using the custom field configuration :
- Select
 > Issues.
 - Under FIELDS, click Custom fields.
- Find the custom field (Approvers, in this case) you want to configure, click
 > Contexts and default value.
 - In the Default Configuration Scheme for Approvers section, select Edit Default Value.
- Enter the list of users which you want to set as default options
- Click on Set Default.

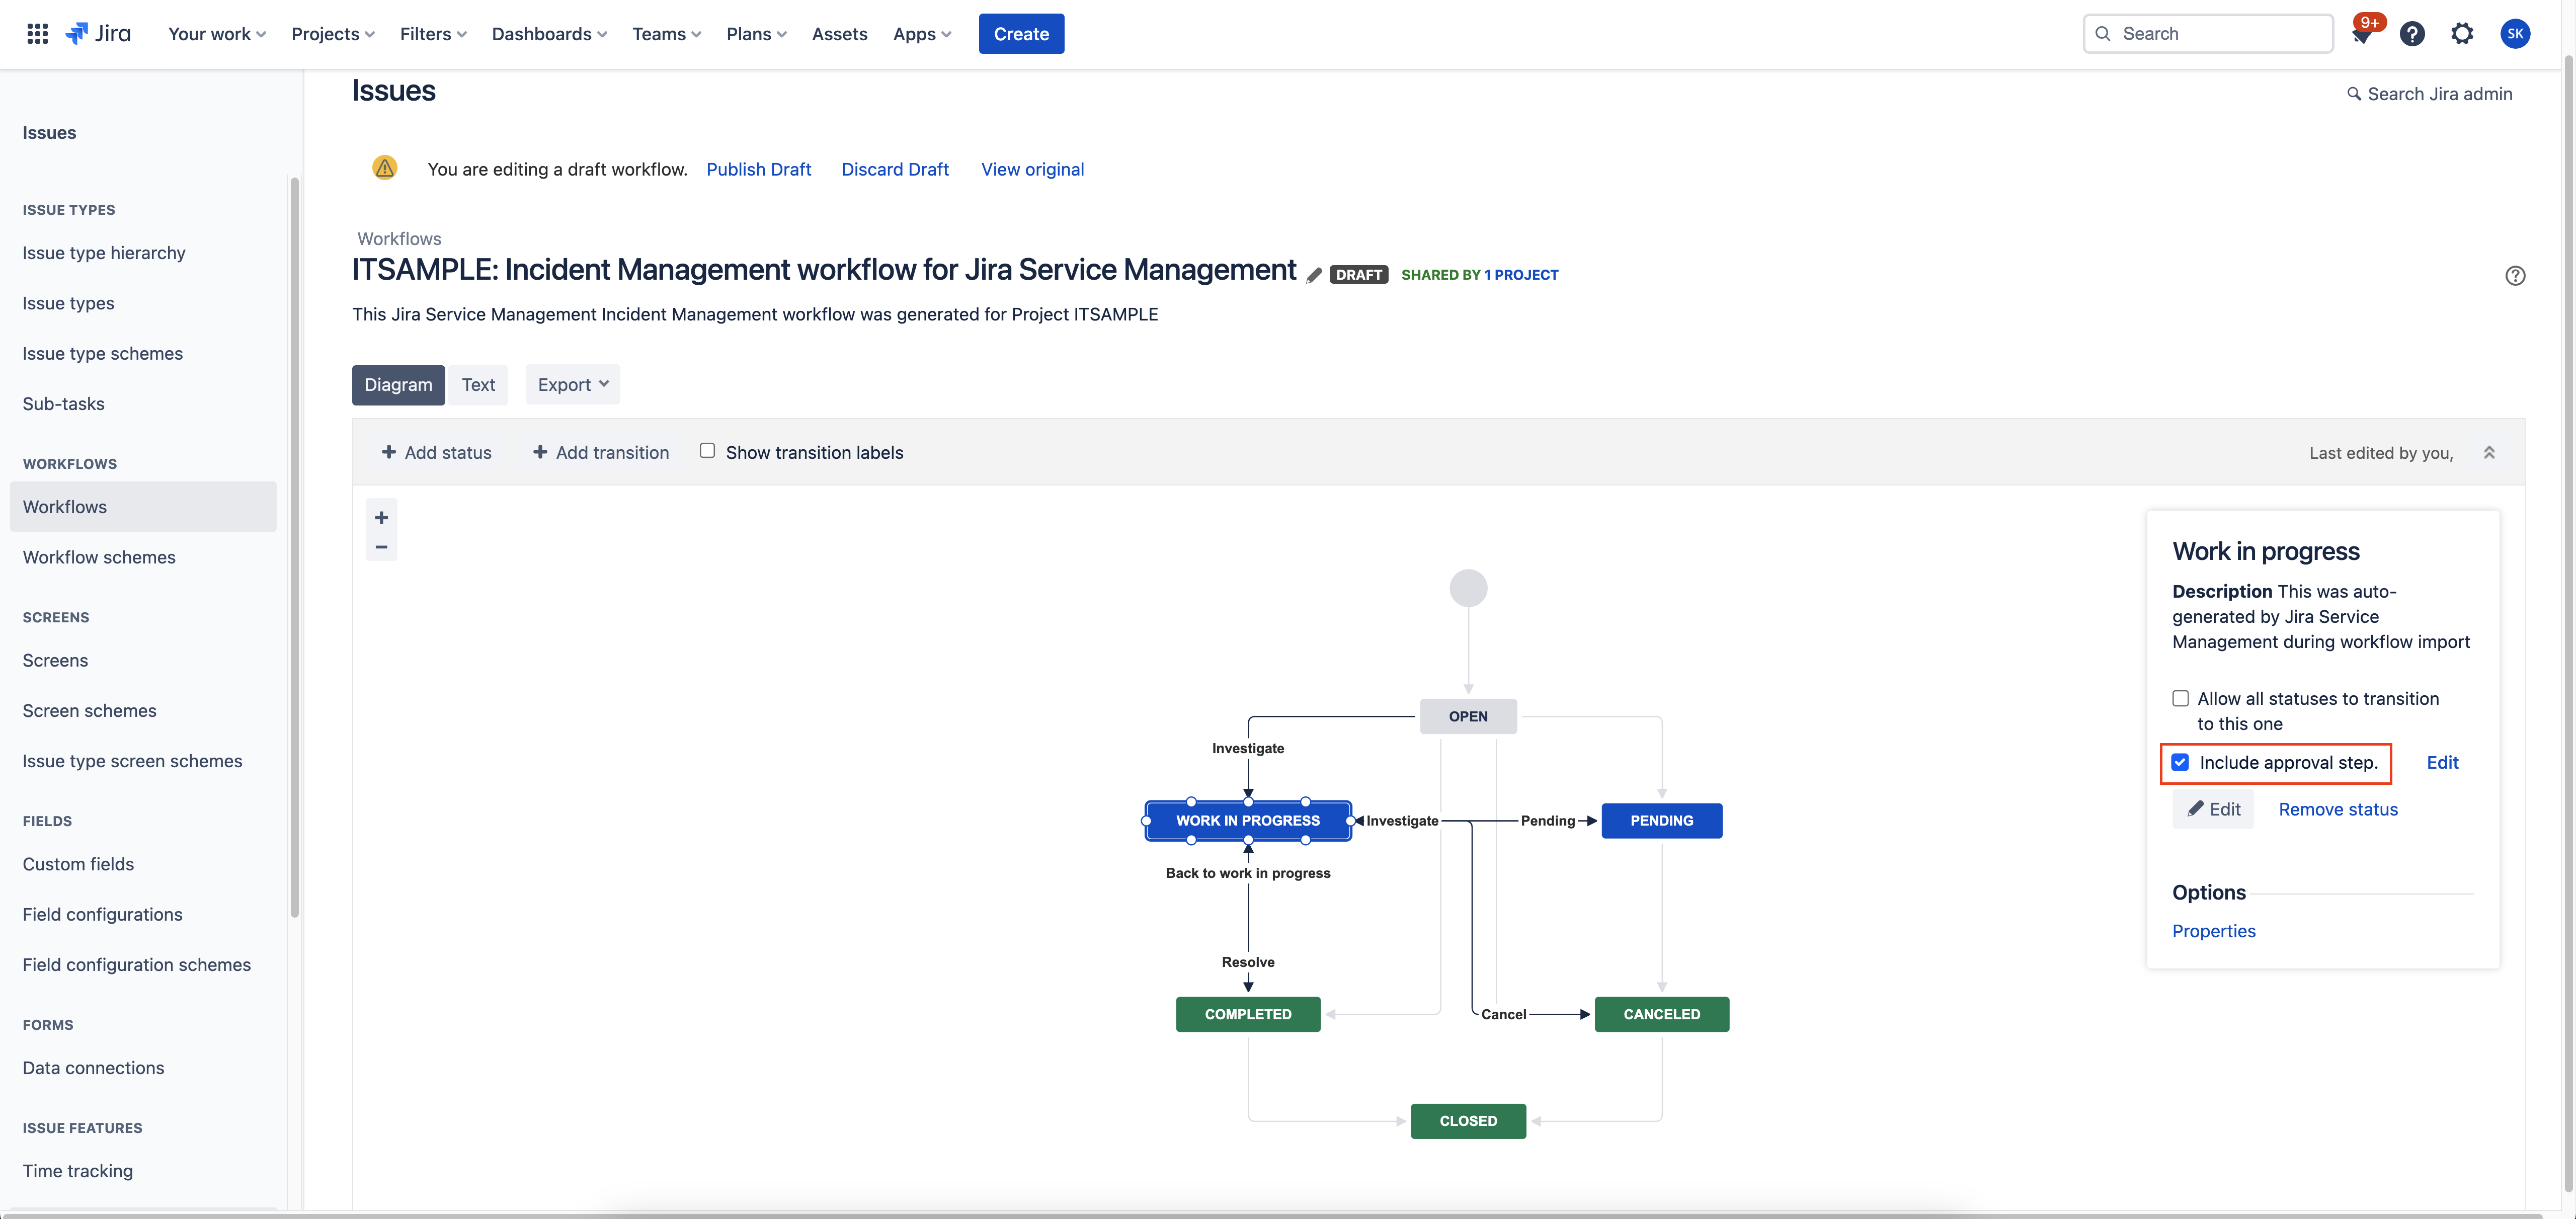
Solution 3: Workflow configuration - When you add an approval step to a workflow status, you can choose when an issue requires approval, who needs to approve the issue and who can't approve it, and what happens when the issue is approved or declined. You can add an approval step to workflows of the associated issue type, that is being used by the request type. Please note this solution has the best use case after setting default Approvers in the custom field configuration(Solution 2).
Please follow the steps below to add the default approvers to the issue workflow :
- From your service project, select Project Settings > Workflows.
- Select Edit next to the workflow you want to add approval to.
- Select Diagram if you’re not already in the diagram view.
- Select the status you want to add an approval step to.
- Check the box next to the Include approval step.
- Note: This option is only available if the workflow status has at least two transitions: one for Approve, and one for Decline.
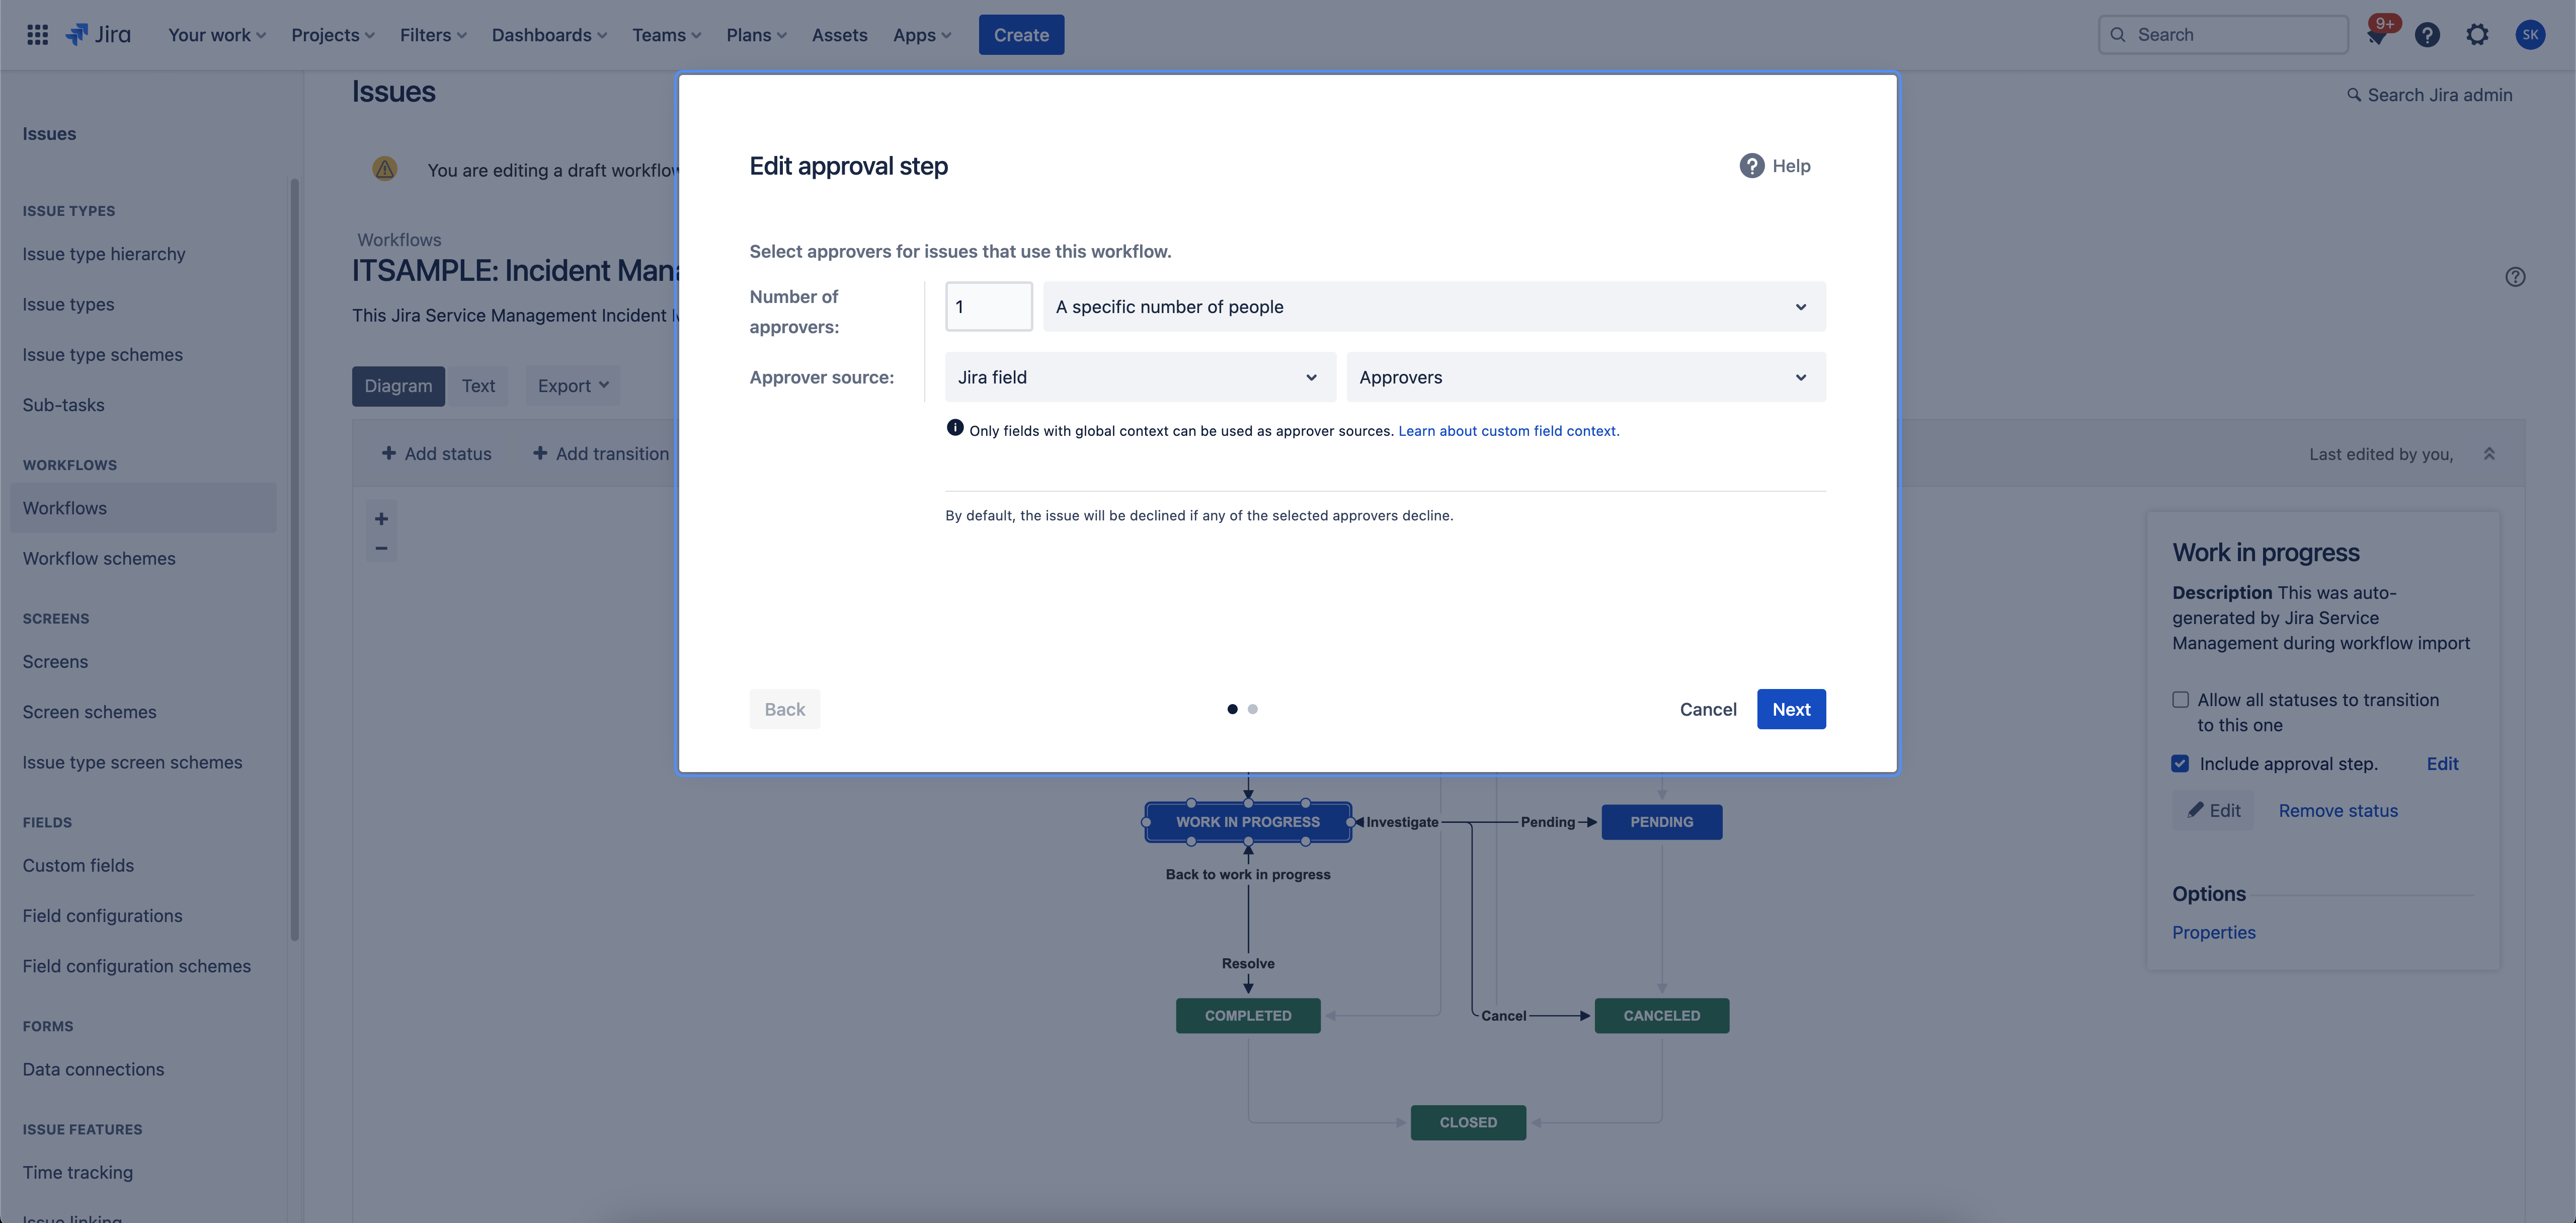
- Next to the Include approval step, Click on Edit. The Add Approval step window opens.
- Next to the Number of approvers, select how many people you want to approve the issue.
- Next to the Approver source, select Jira field, then select the Custom field (Approvers in this case)
- If you don’t see the custom field you want to get approvers from, make sure its Applicable context is set to Global.
- Select Next.
- Select the statuses to transition to if the issue is approved or declined.
- Under Exclude approvers from, select the fields you want to exclude approvers from.
- Any users that appear in the fields you select here will not be able to approve issues that use this workflow.
- Select Add.
- At the top of the screen, select Publish draft.
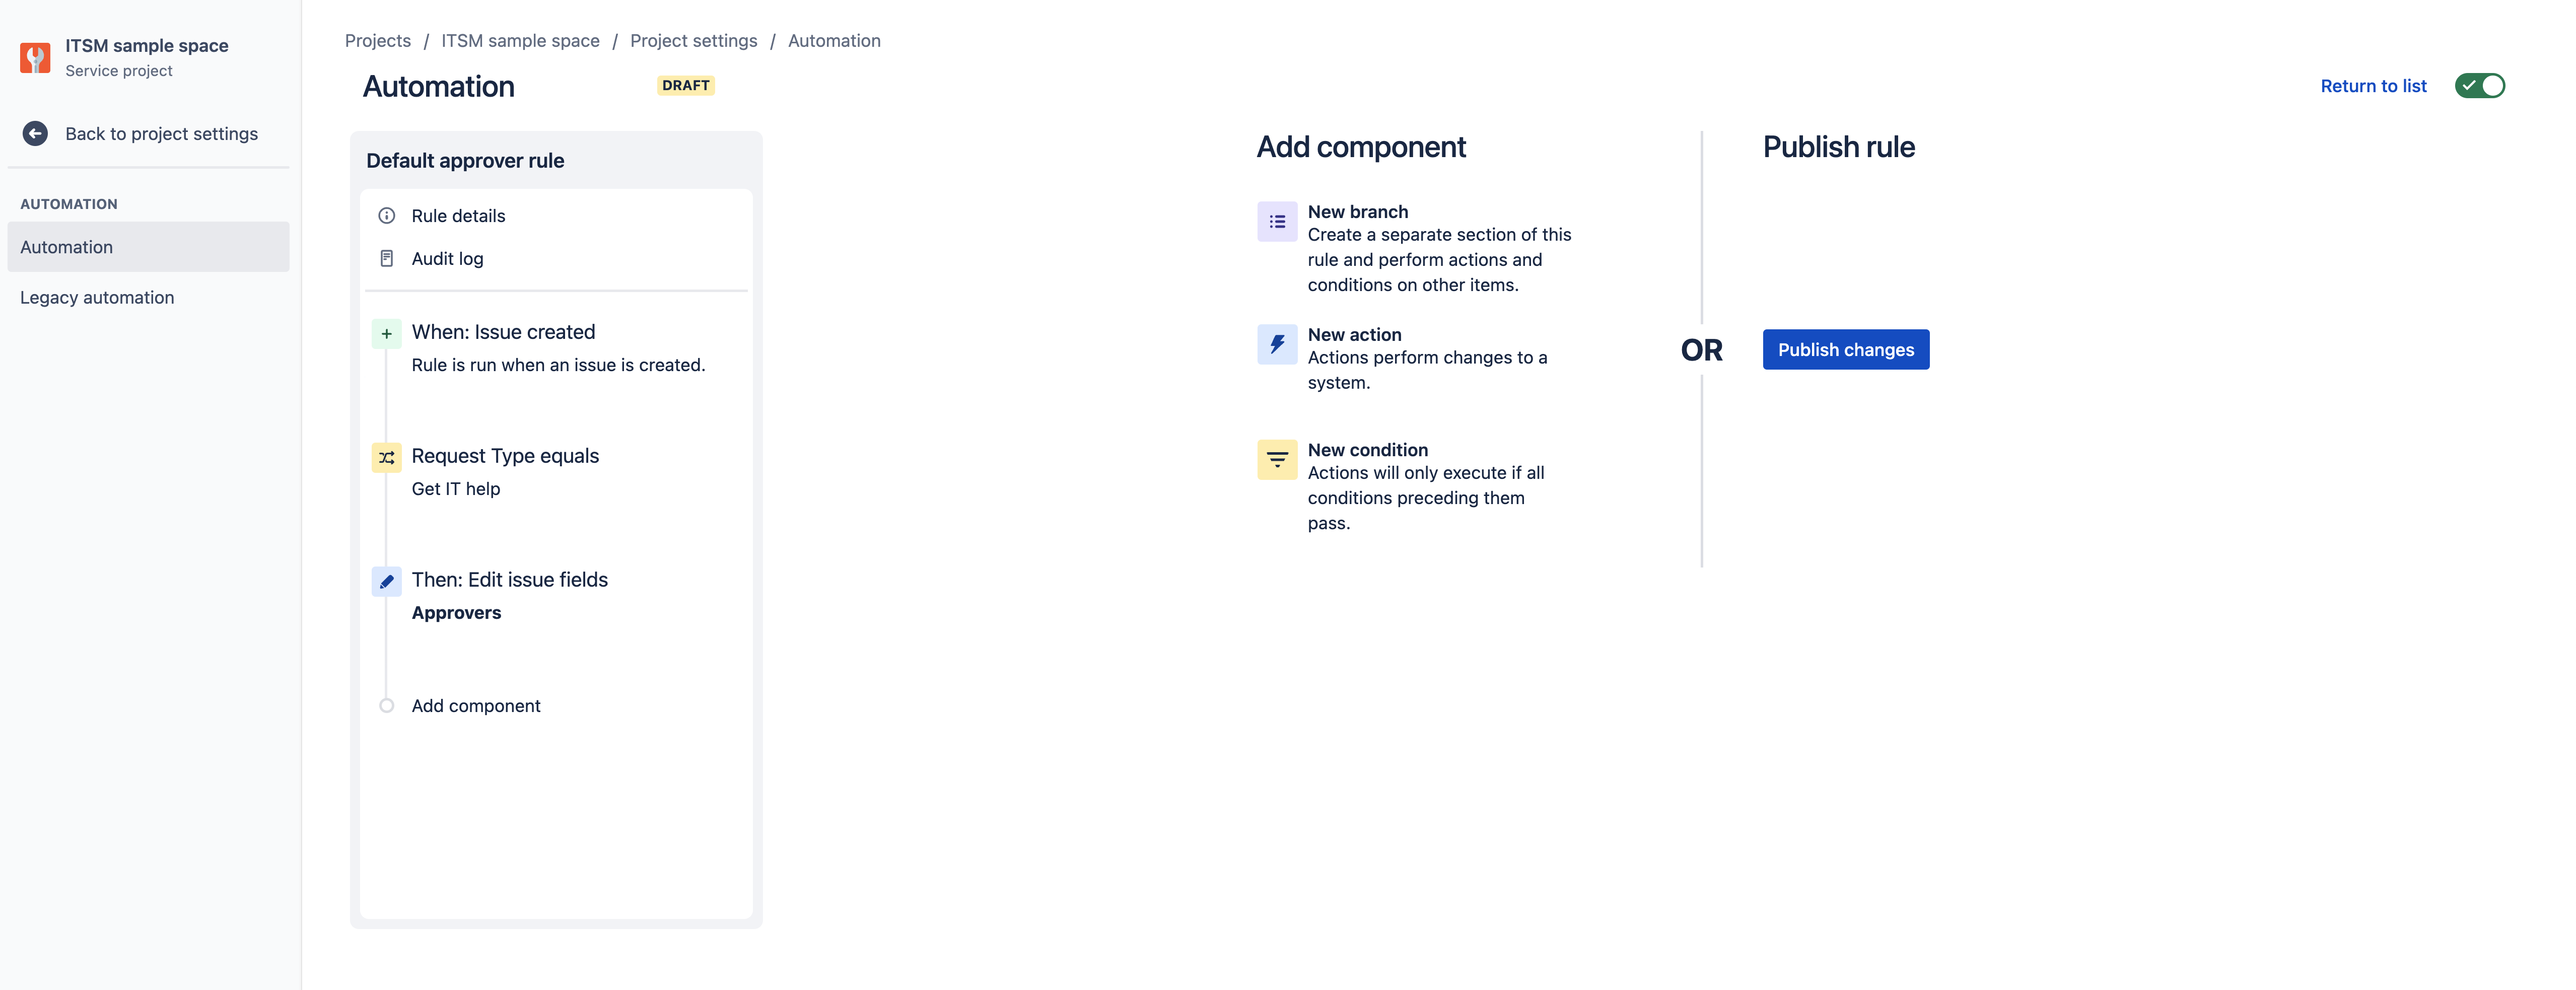
Solution 4: Automation - You can use automation rules to set the default approvers skipping the manual repetitive task to add them when the issue is created.
Please follow the steps below to configure default approvers using automation rules:
- From your service project, select Project Settings> Automation.
- Select Create a Rule in the top-right corner.
- Select a trigger for the rule. In this case, you can select the Issue created trigger
- Configure the trigger settings (if the trigger is different than Issue Created) and select Save.
- Select New component and add a New condition - Issue Fields condition.
- Add the condition for the Request Type field to be equal to the required request type in your project.
- Select New component and add a New action - Edit Issue.
- In the Fields to Set section, add the Approvers field.
- Add the default approvers from the dropdown panel.
- Select Save.
- You can also add the other request types by adding more conditions in this automation rule.
- Give your rule a name, then select Turn it on