How to import data from an external database in Jira Assets / Insight
Platform Notice: Data Center Only - This article only applies to Atlassian products on the Data Center platform.
Note that this KB was created for the Data Center version of the product. Data Center KBs for non-Data-Center-specific features may also work for Server versions of the product, however they have not been tested. Support for Server* products ended on February 15th 2024. If you are running a Server product, you can visit the Atlassian Server end of support announcement to review your migration options.
*Except Fisheye and Crucible
Summary
This article guides you on how to import data from another database to from an external database to an instance of Jira Assets without using an integration plugin.
Solution
Overview
To import and map the data in Jira Assets you shall:
Create the Object containing the same attributes as the source data
In the Object Schema configuration/ Import, create a new import configuration, and select Database.
Configure the database connection, providing the database URL, JDBC driver, user and password. Following the screen requirements.
Create an importing mapping by manually clicking on Create Object Type mapping
Select the Object Type and in Selector setup the query
Go back to the mapping screen and map the fields - Note that the first column works like a primary key, and will be used as a unique identifier value for this import.
(Make sure the identifier is set in the right database column. At least one column must be set as an identifier)
Enable this object mapping import, enable the import configuration
Click on Synchronize to test the import
Attention: You must be a Jira admin to create and configure database imports.
See below for the supported JDBC connections available
Jira uses a common framework (JDBC) to connect to the database, so we support the following ones:
Database Type | Driver |
|---|---|
Microsoft SQL Server | com.microsoft.sqlserver.jdbc.SQLServerDriver |
Oracle | oracle.jdbc.OracleDriver |
PostgreSQL | org.postgresql.Driver |
MySQL | com.mysql.jdbc.Driver |
For database address location, port, and DB name, please follow the guidelines from Connecting Jira applications to a database.
Example
Let's use this table as an example of external database to have the data imported:

With the steps to import:
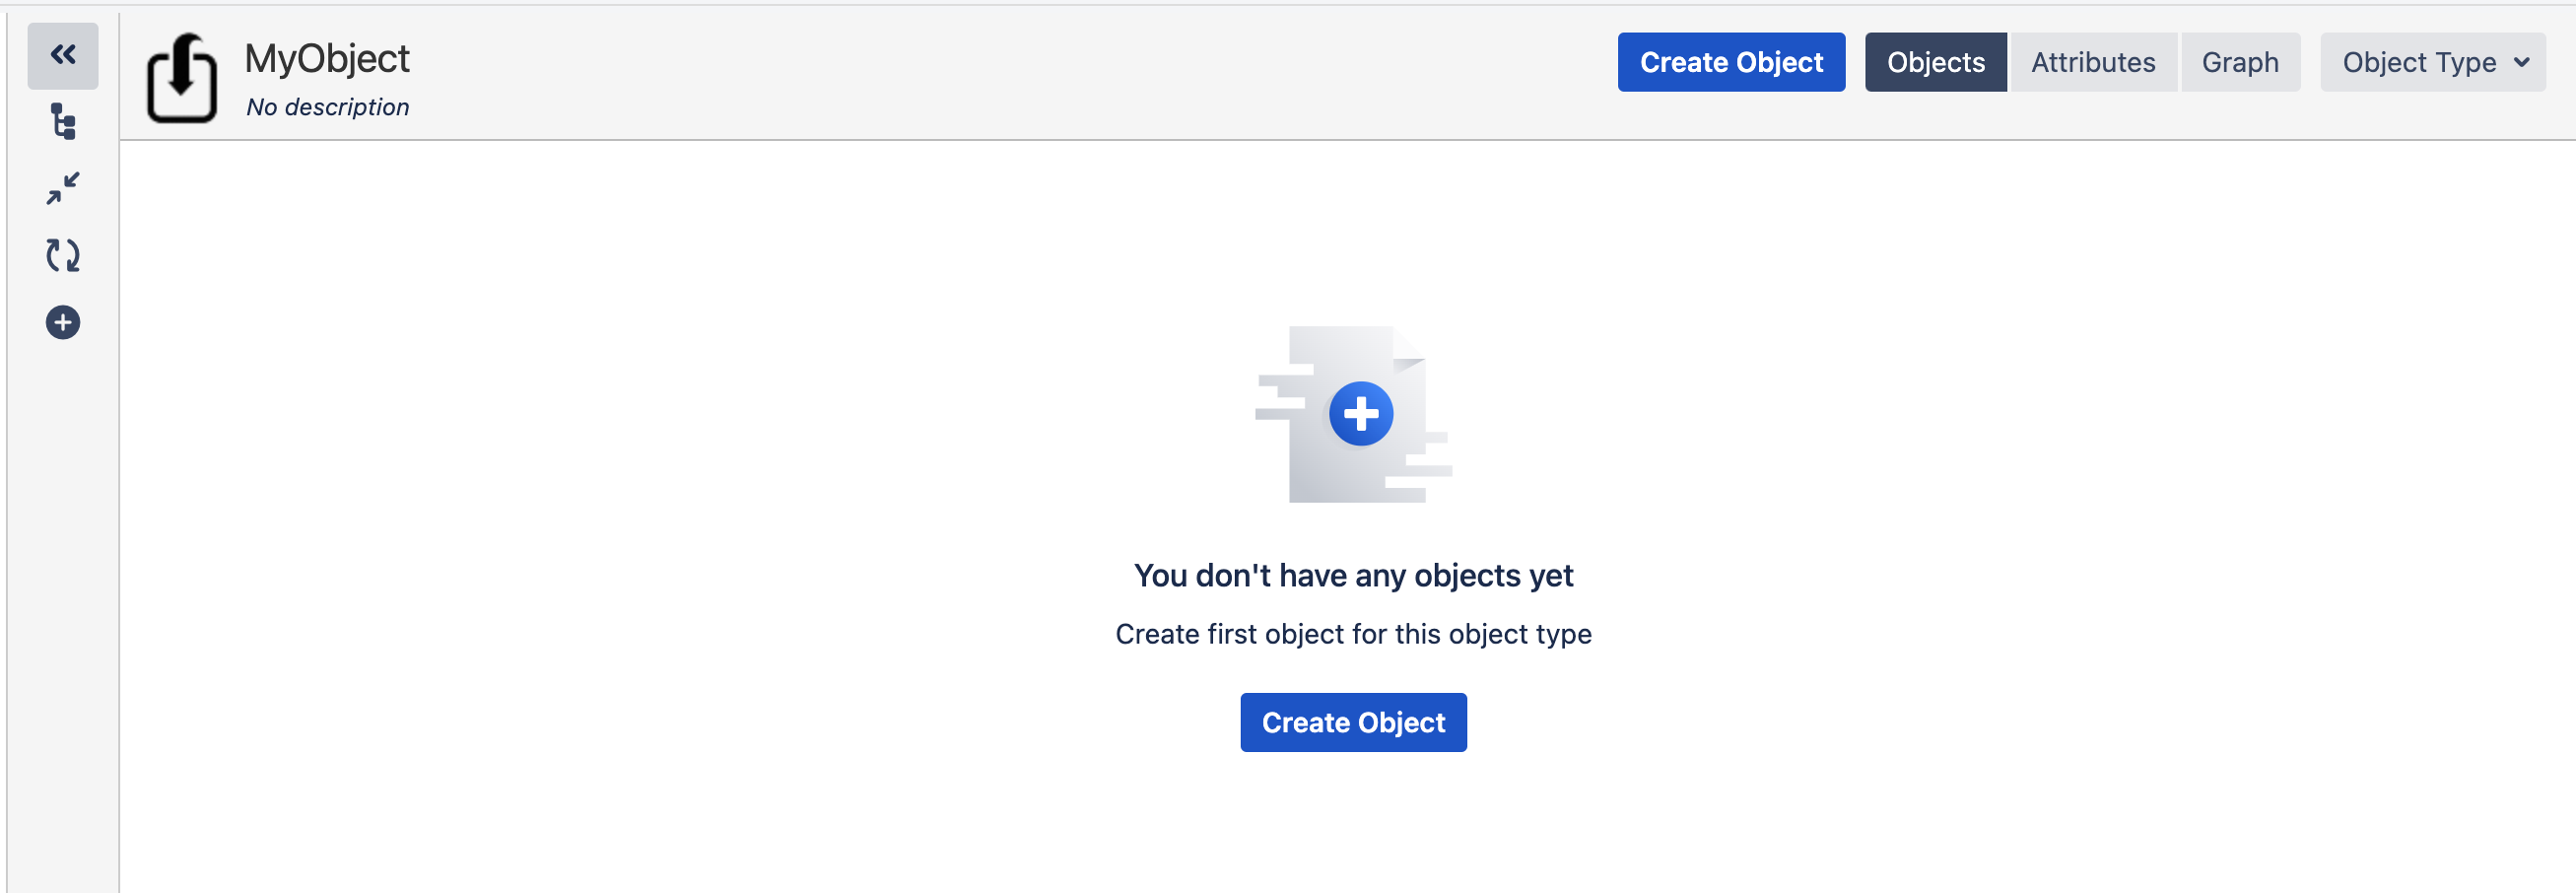
Step 1:
To import data from a Database to Jira Assets, first, we need to create the Object containing the same attributes as the source data:
In this case, the attributes are the columns: Name, color, and created date.

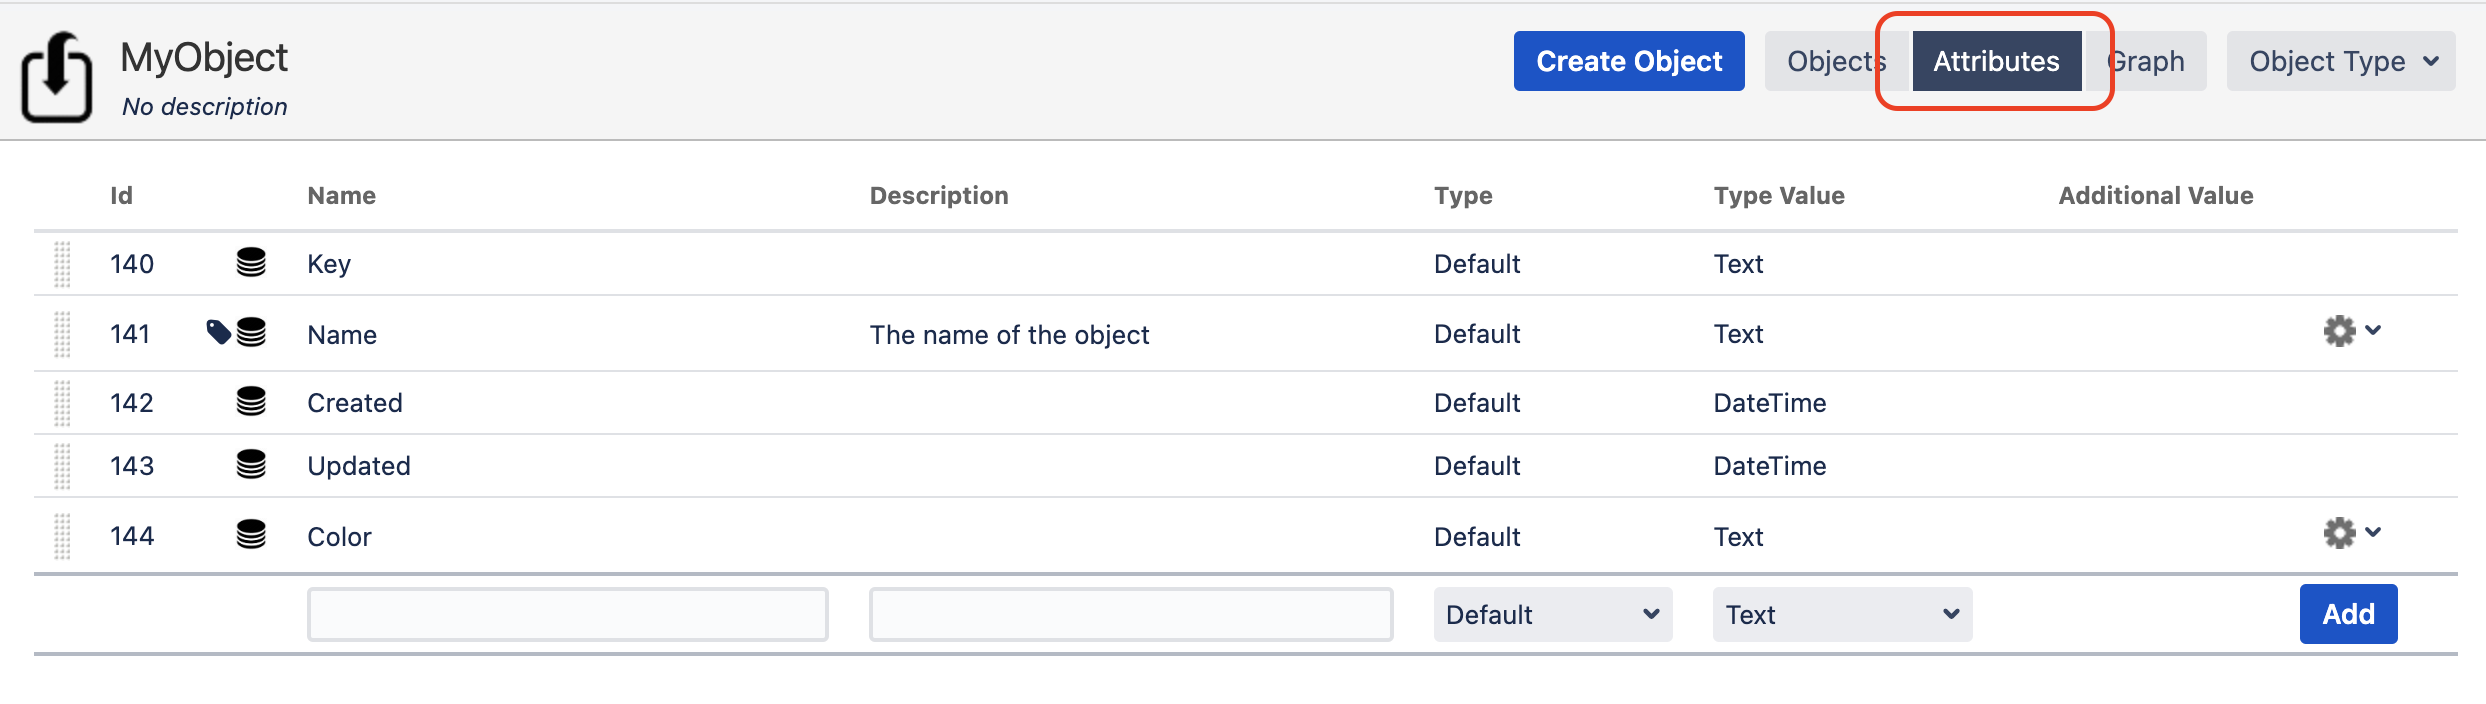
Step 2:
Once the object is created and configured as in this image below:
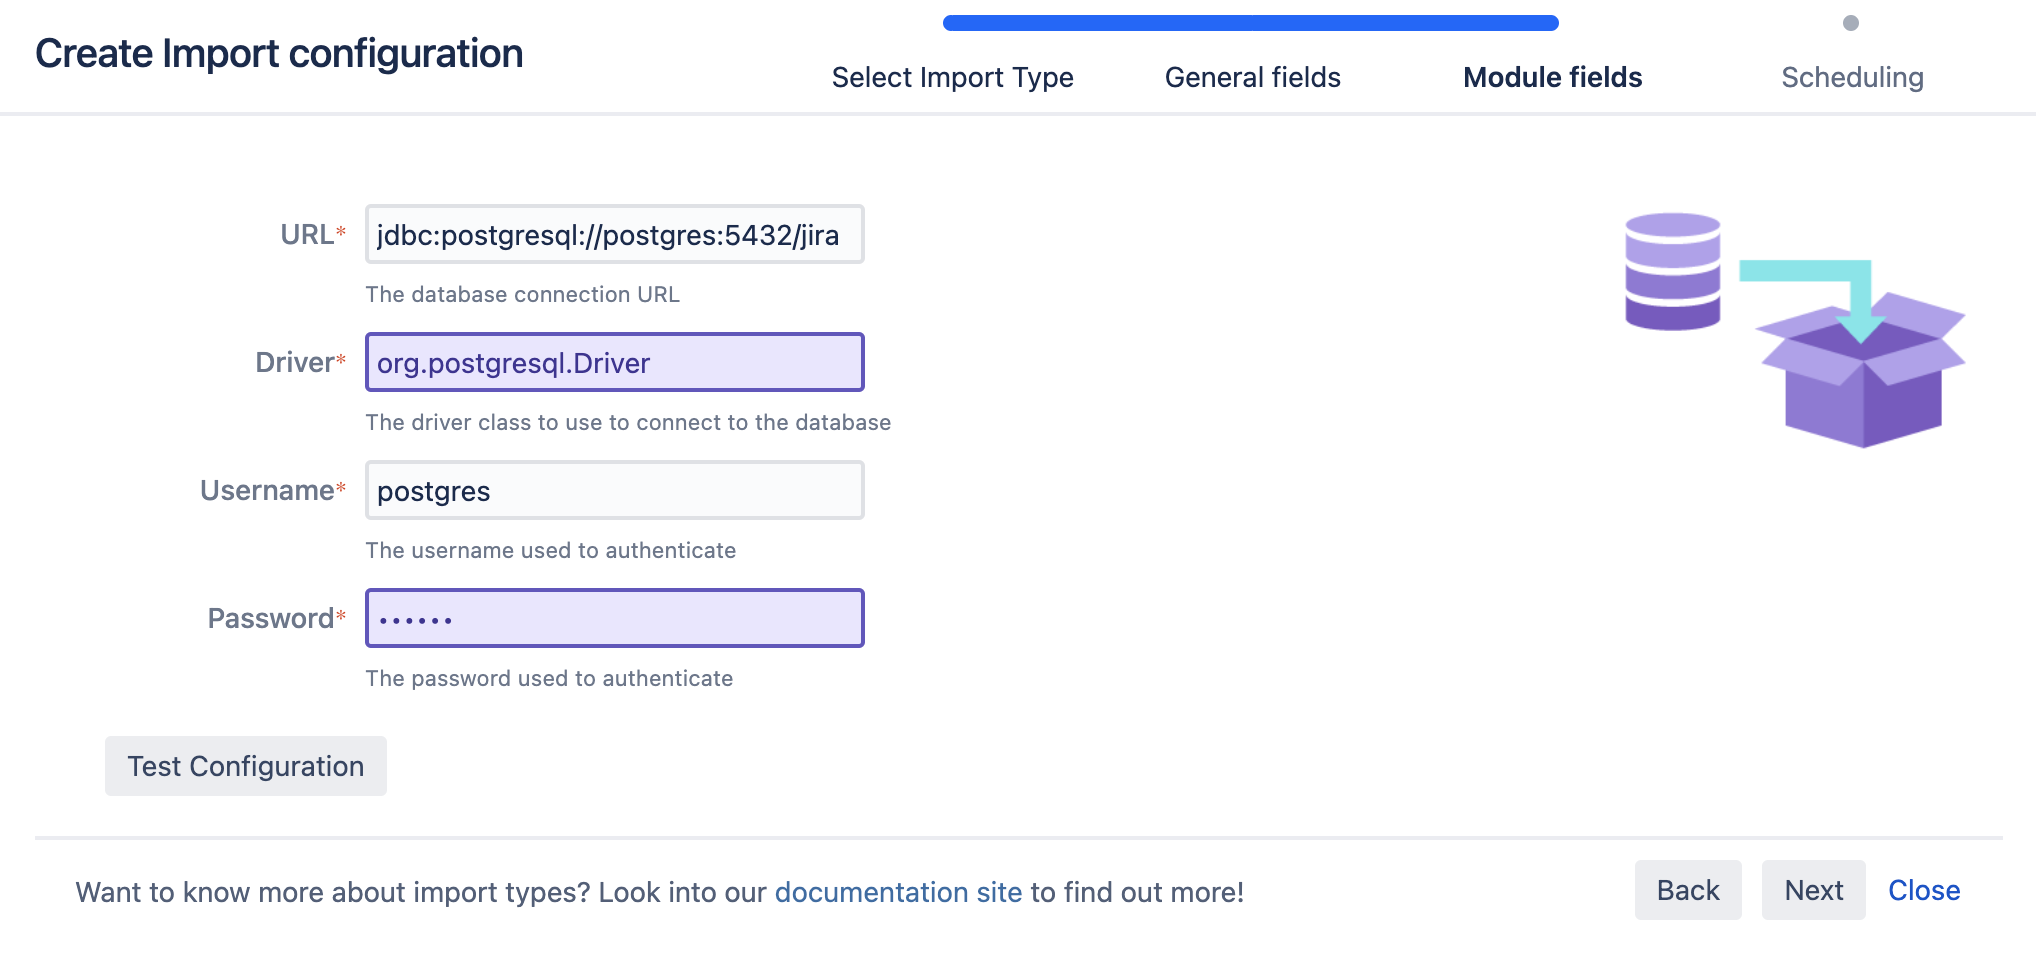
Step 3:
We can now go to the Object Schema configuration./ Import, create a new import configuration, and select Database.
After setting up the import name, we must configure the database connection, providing the database URL, JDBC driver, user and password.
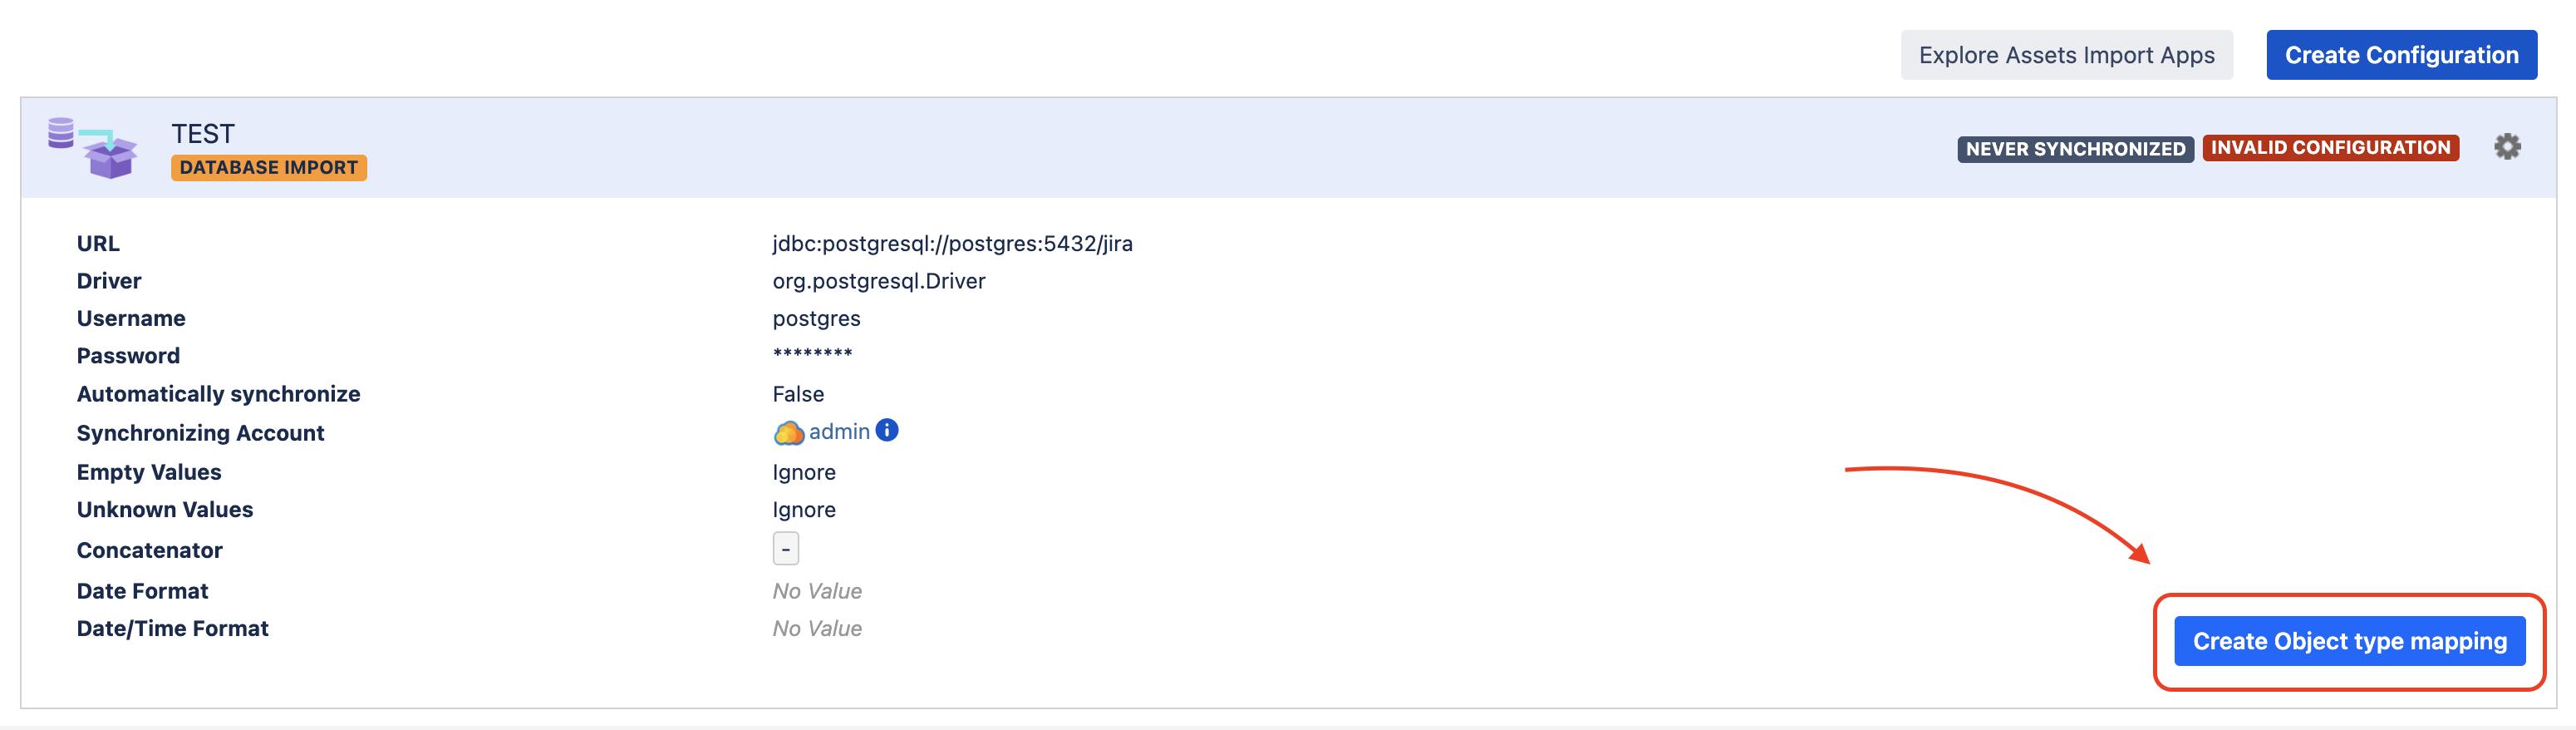
Step 4:
Once finished, it won't create any predefined import mapping. We need to create one manually by clicking on Create Object Type mapping
Step 5:
We can select the object type we created earlier and add the database query that will return the data we want to import:
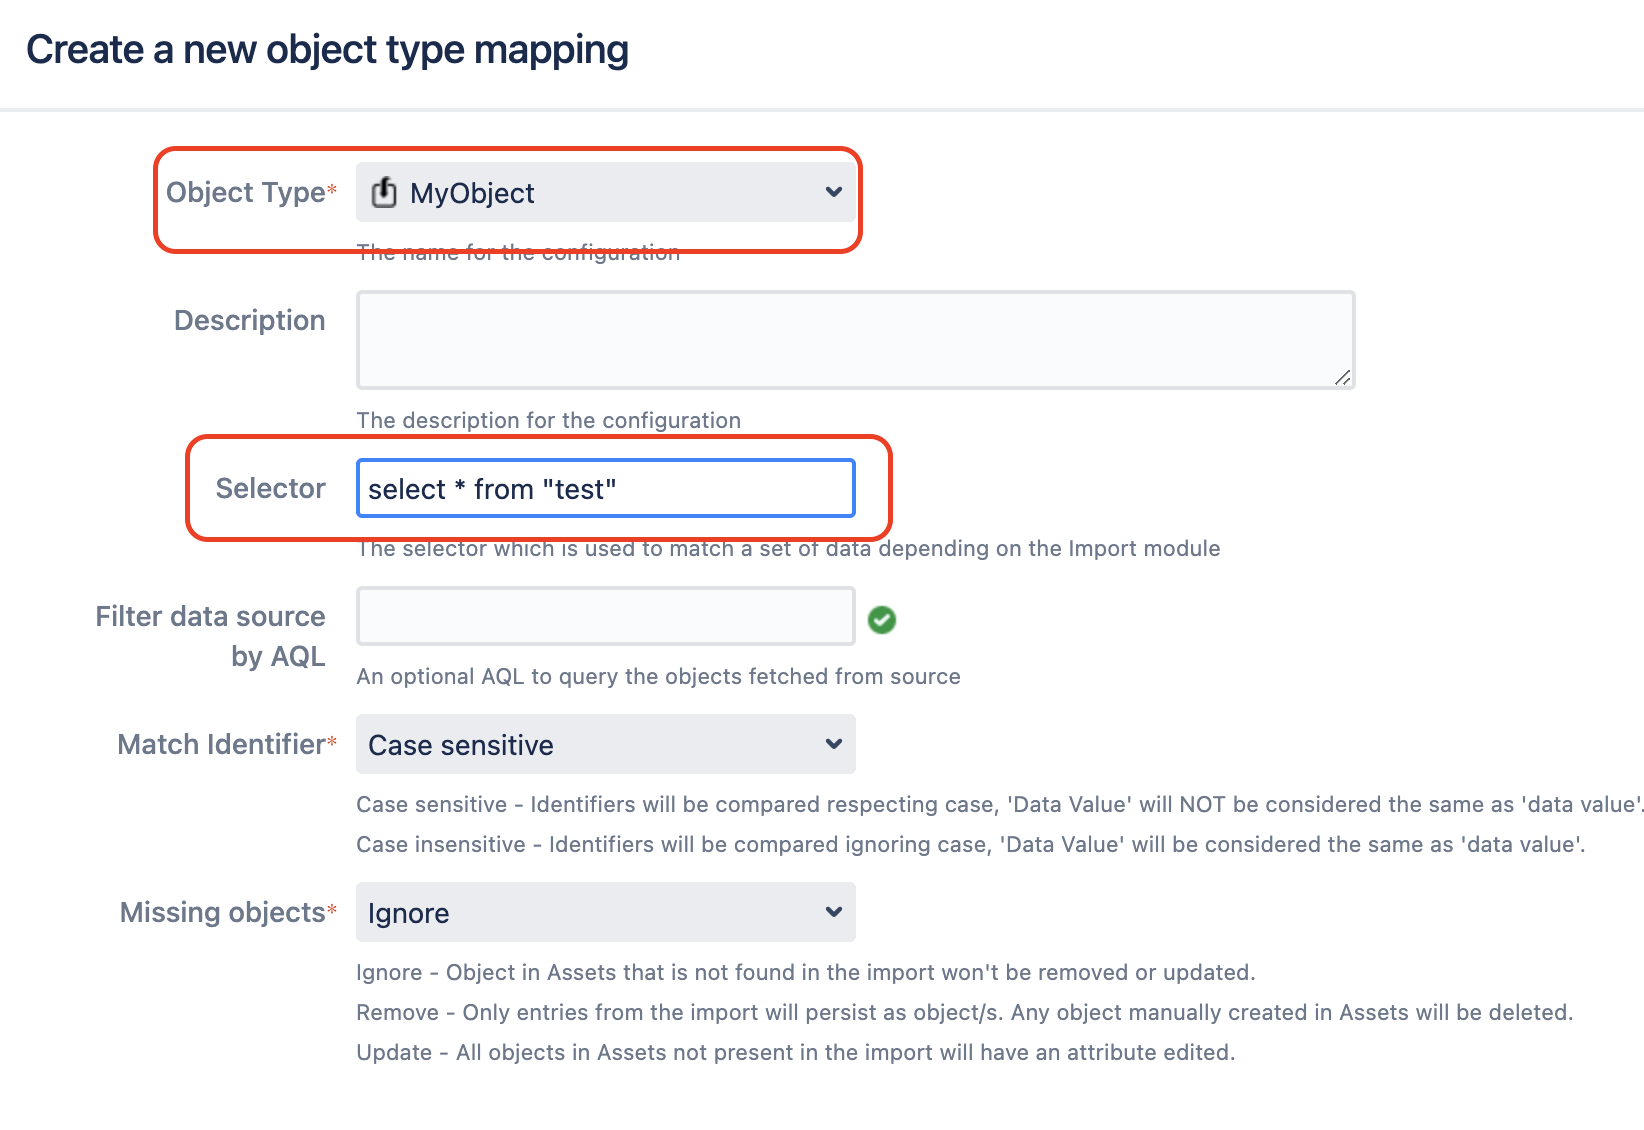
Step 6:
Once we setup the query, we can go back to the mapping screen and then map the fields. Note that the first column (identifier) works like a primary key, and will be used as a unique identifier value for this import.
Make sure the identifier is set in the right database column. At least one column must be set as an identifier.
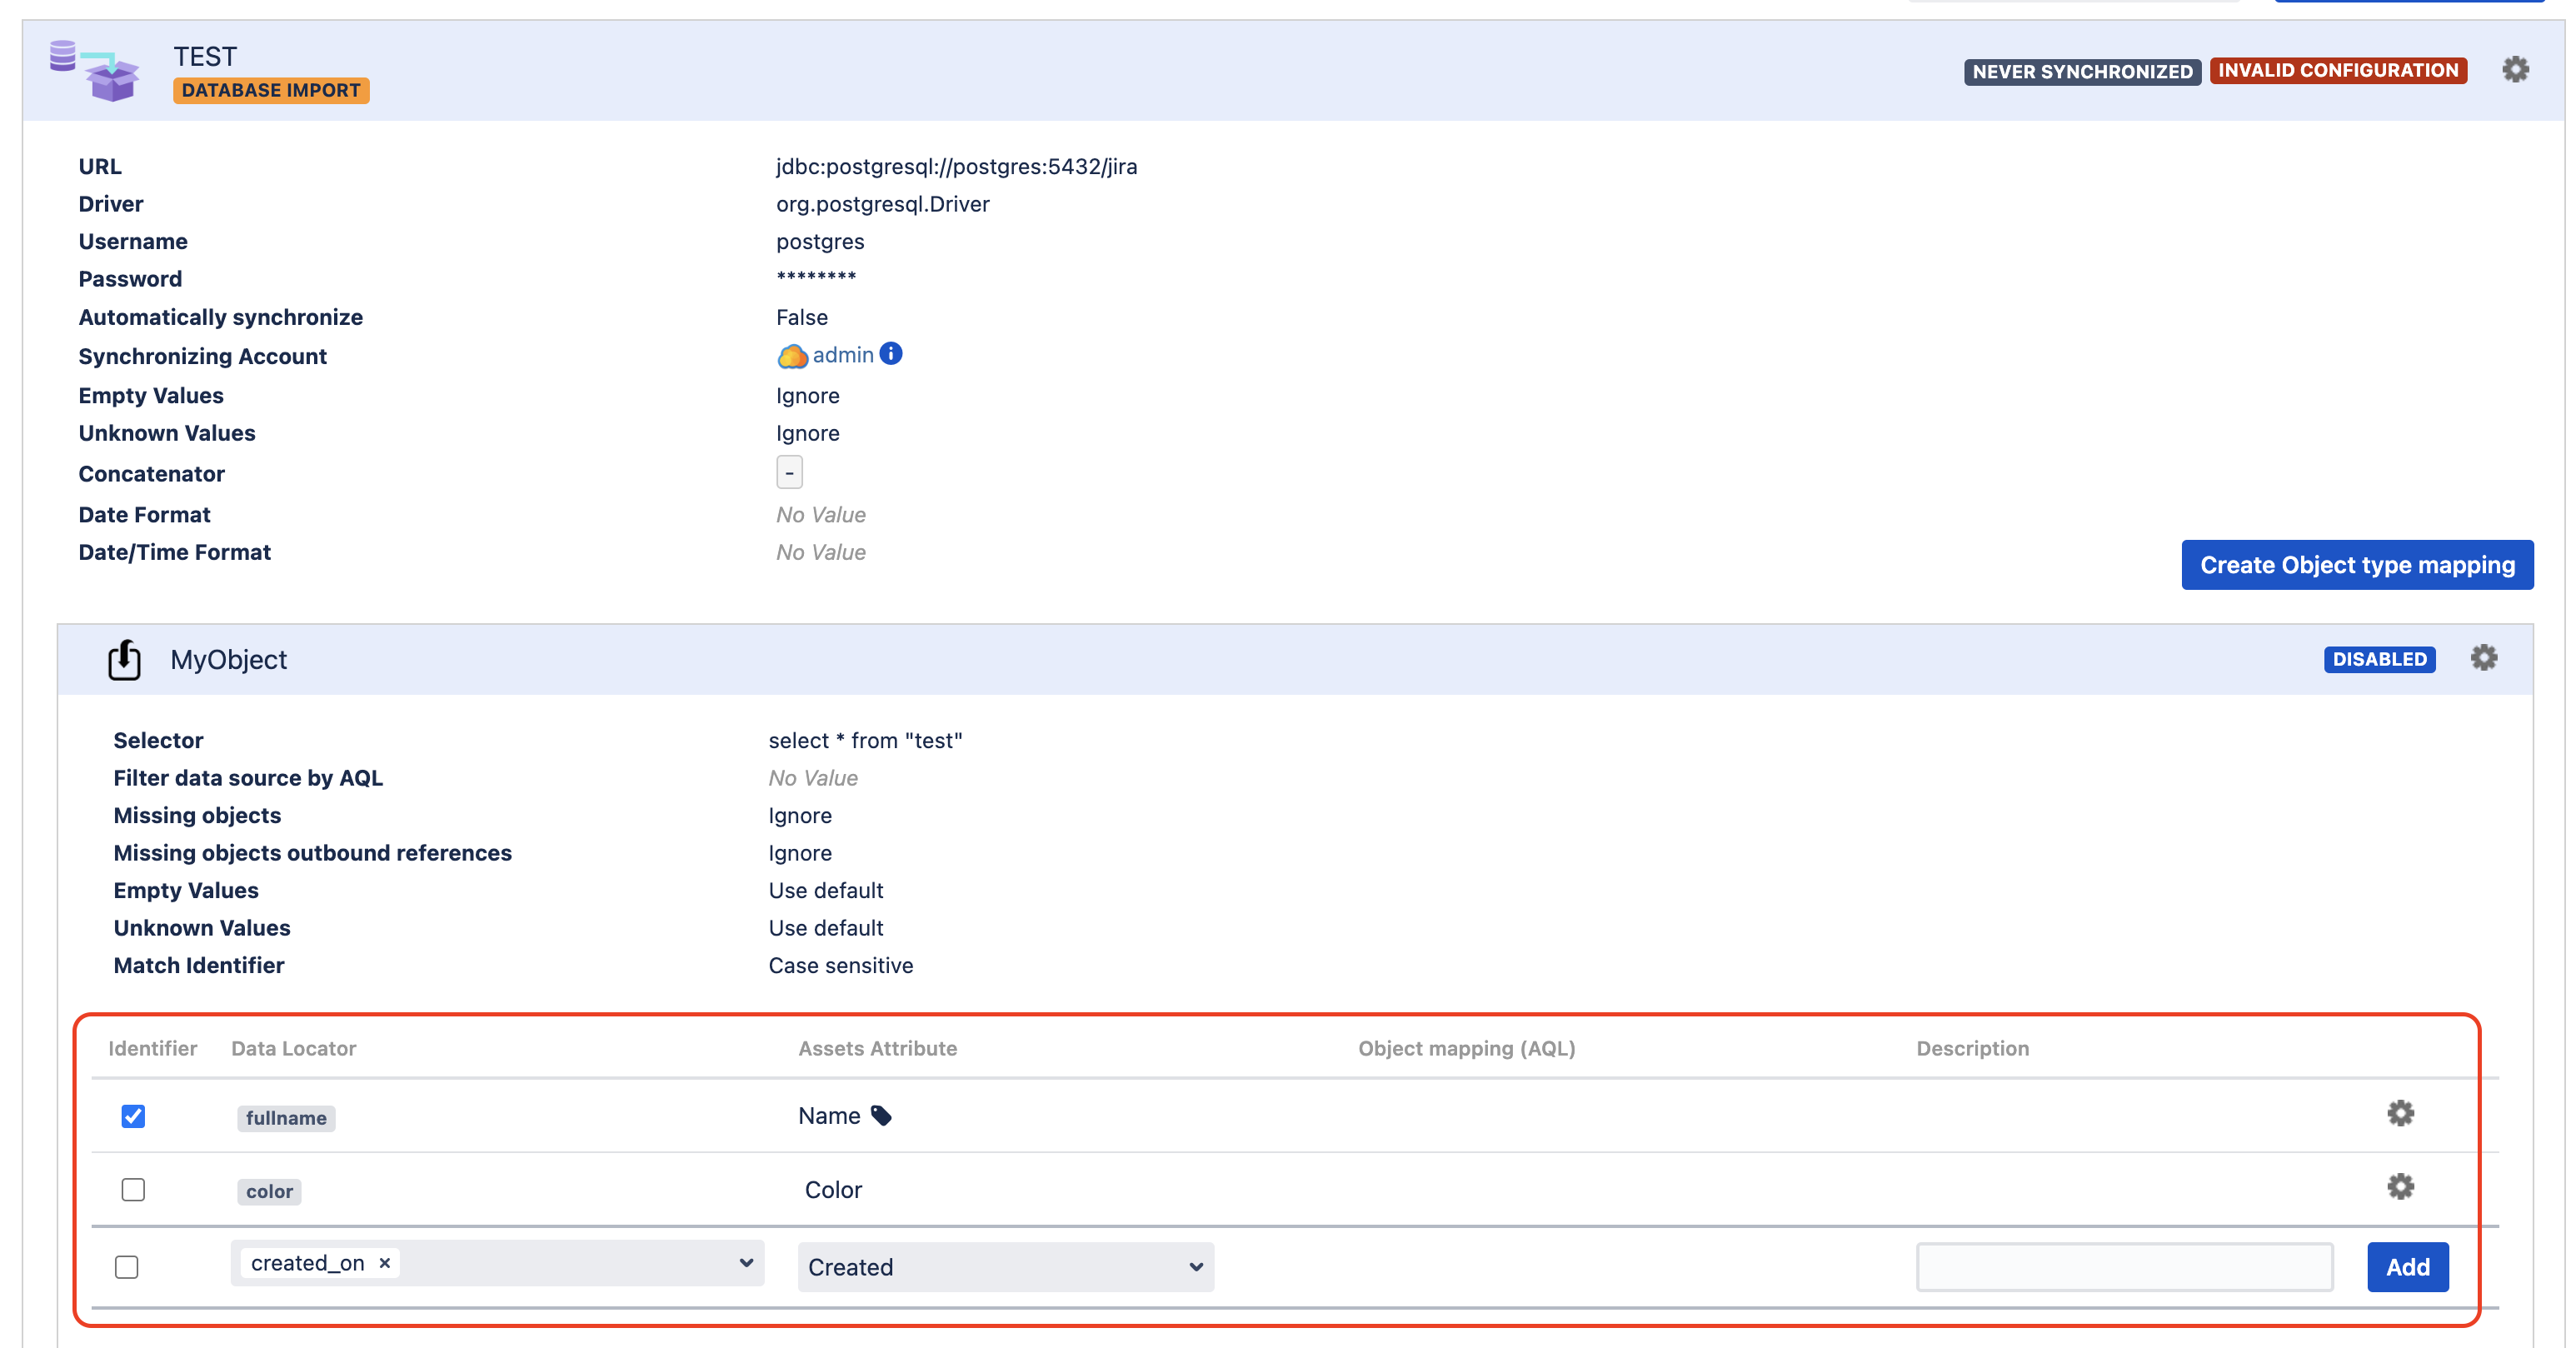
Step 7:
After mapping the fields, we have to enable this object mapping import.
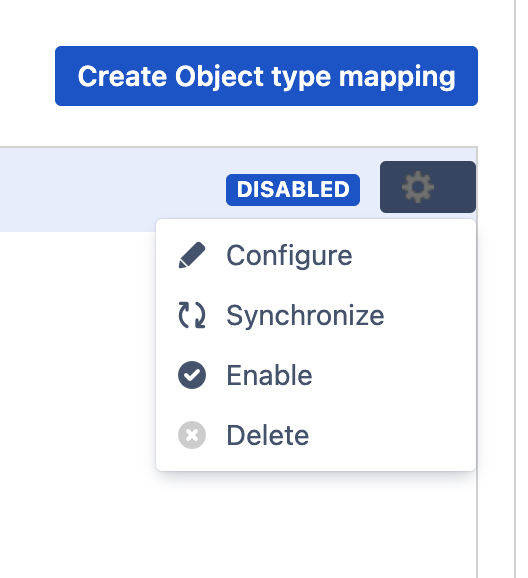
Step 8:
And also enable the import configuration and click on Synchronize to test the import.

Step 9:
Once it finishes, we should have a result like this.

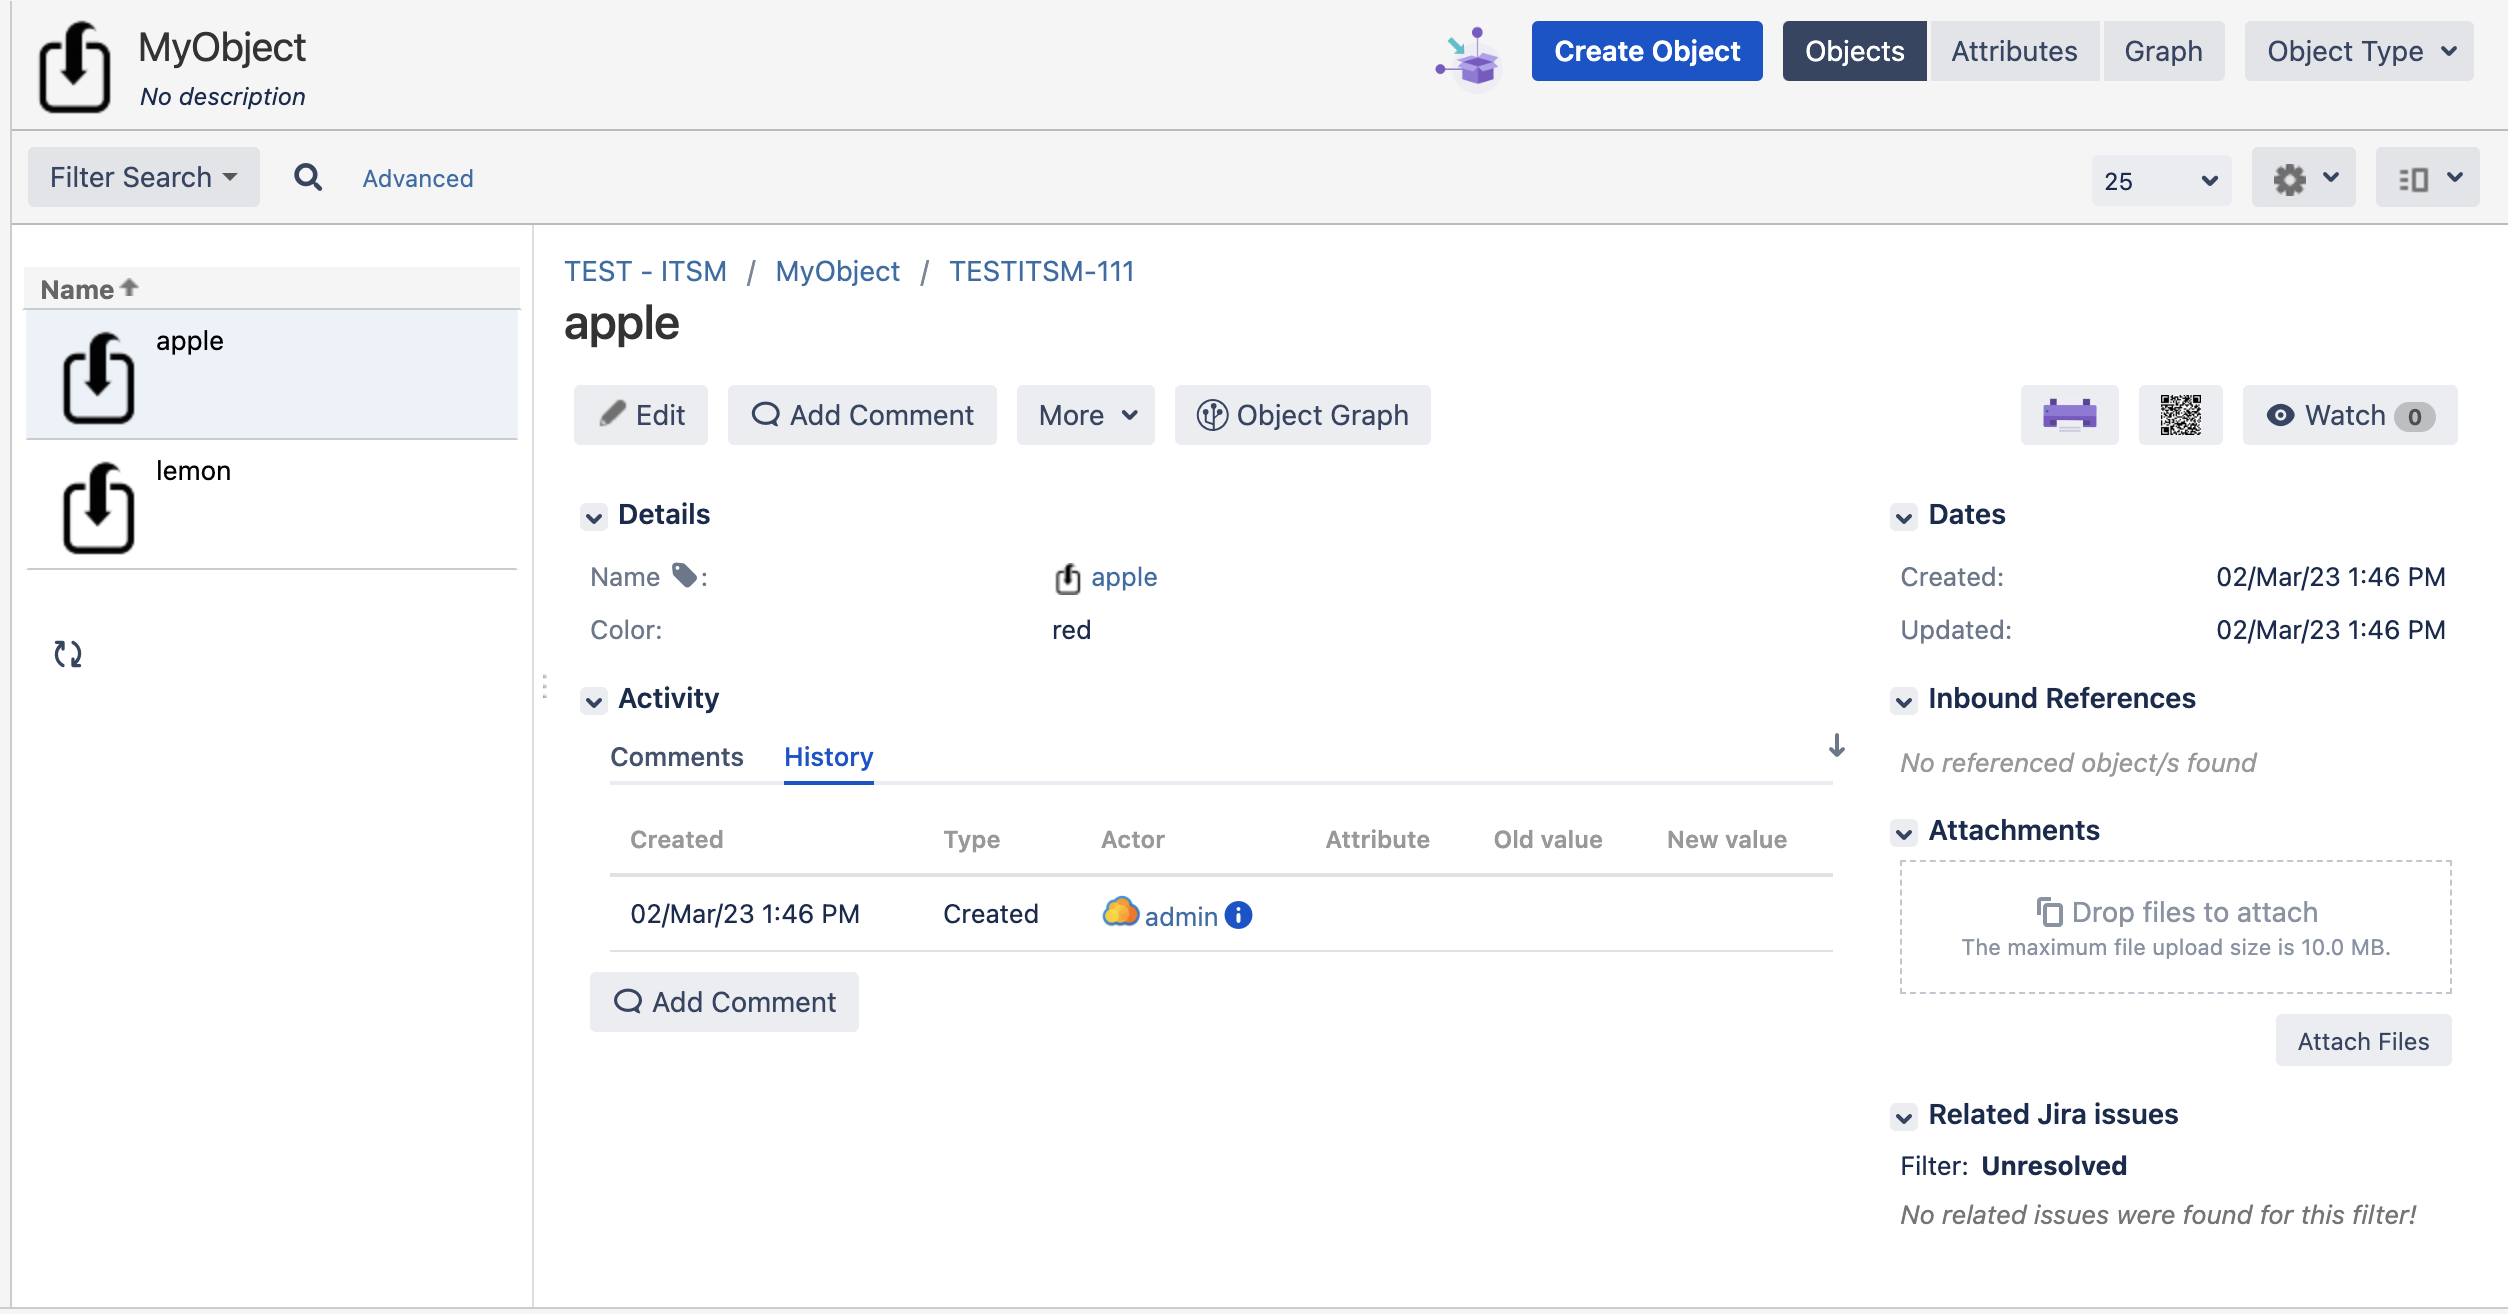
Step 10:
And at the end, the data will appear in the object type we created.
Was this helpful?