How to import Assets object types with attributes referencing existing objects
Platform Notice: Cloud and Data Center - This article applies equally to both cloud and data center platforms.
Support for Server* products ended on February 15th 2024. If you are running a Server product, you can visit the Atlassian Server end of support announcement to review your migration options.
*Except Fisheye and Crucible
Summary
This articles details steps to import an Assets object type from one schema to another schema, maintaining the object reference for object attributes that references an existing Assets object.
Environment
Jira Service Management Assets
Assets on Jira Server / Data Center
Scenario
The admin would like to migrate data from an object schema to another instance – E.g: From an JSM Assets in Data Center instance to JSM Assets in Cloud. And the object types being migrated contains attributes that reference another object in the schema.
Solution
First, you need to make sure to import the reference object type first. On the source object schema, click on the reference object type, and export all objects in object type by clicking on the Bulk action button (The settings cog on the right side of the object screen), and clicking on Export Objects.
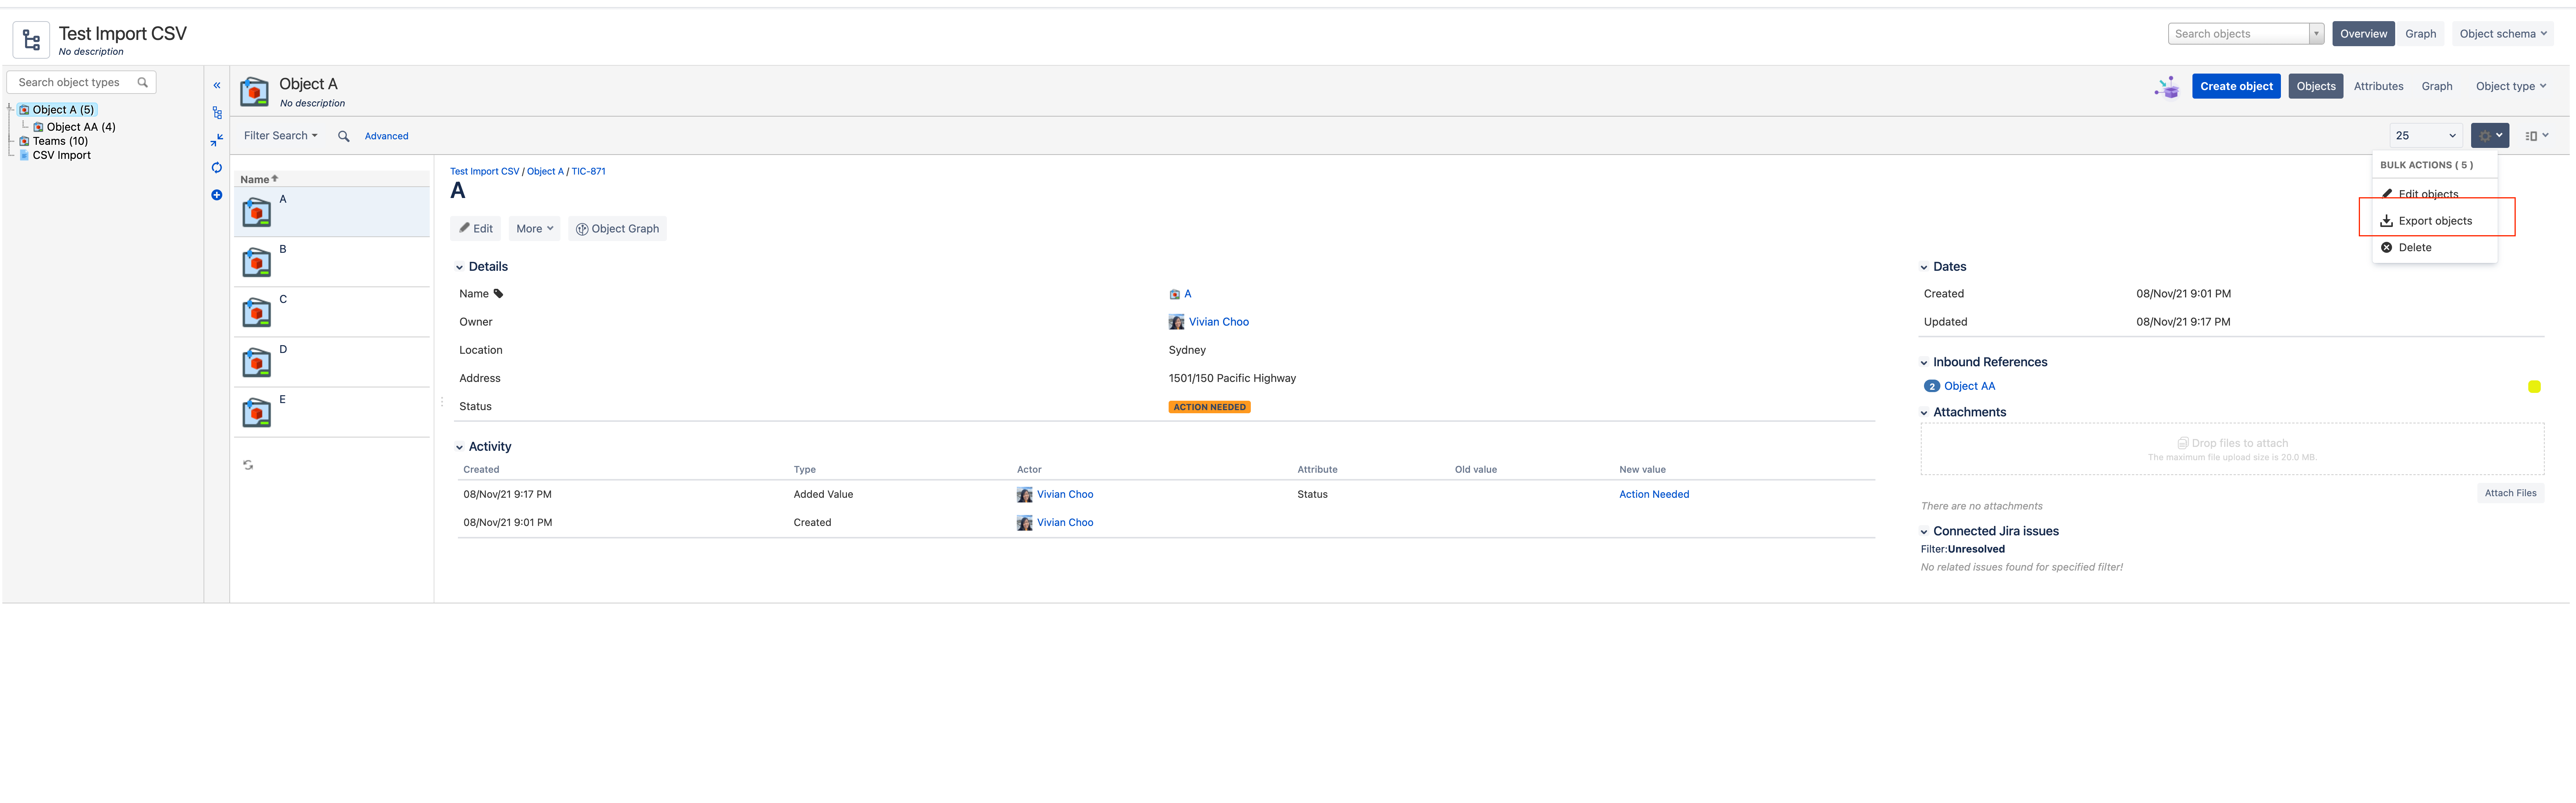
Click on Export to generate and download the CSV import file containing the objects.
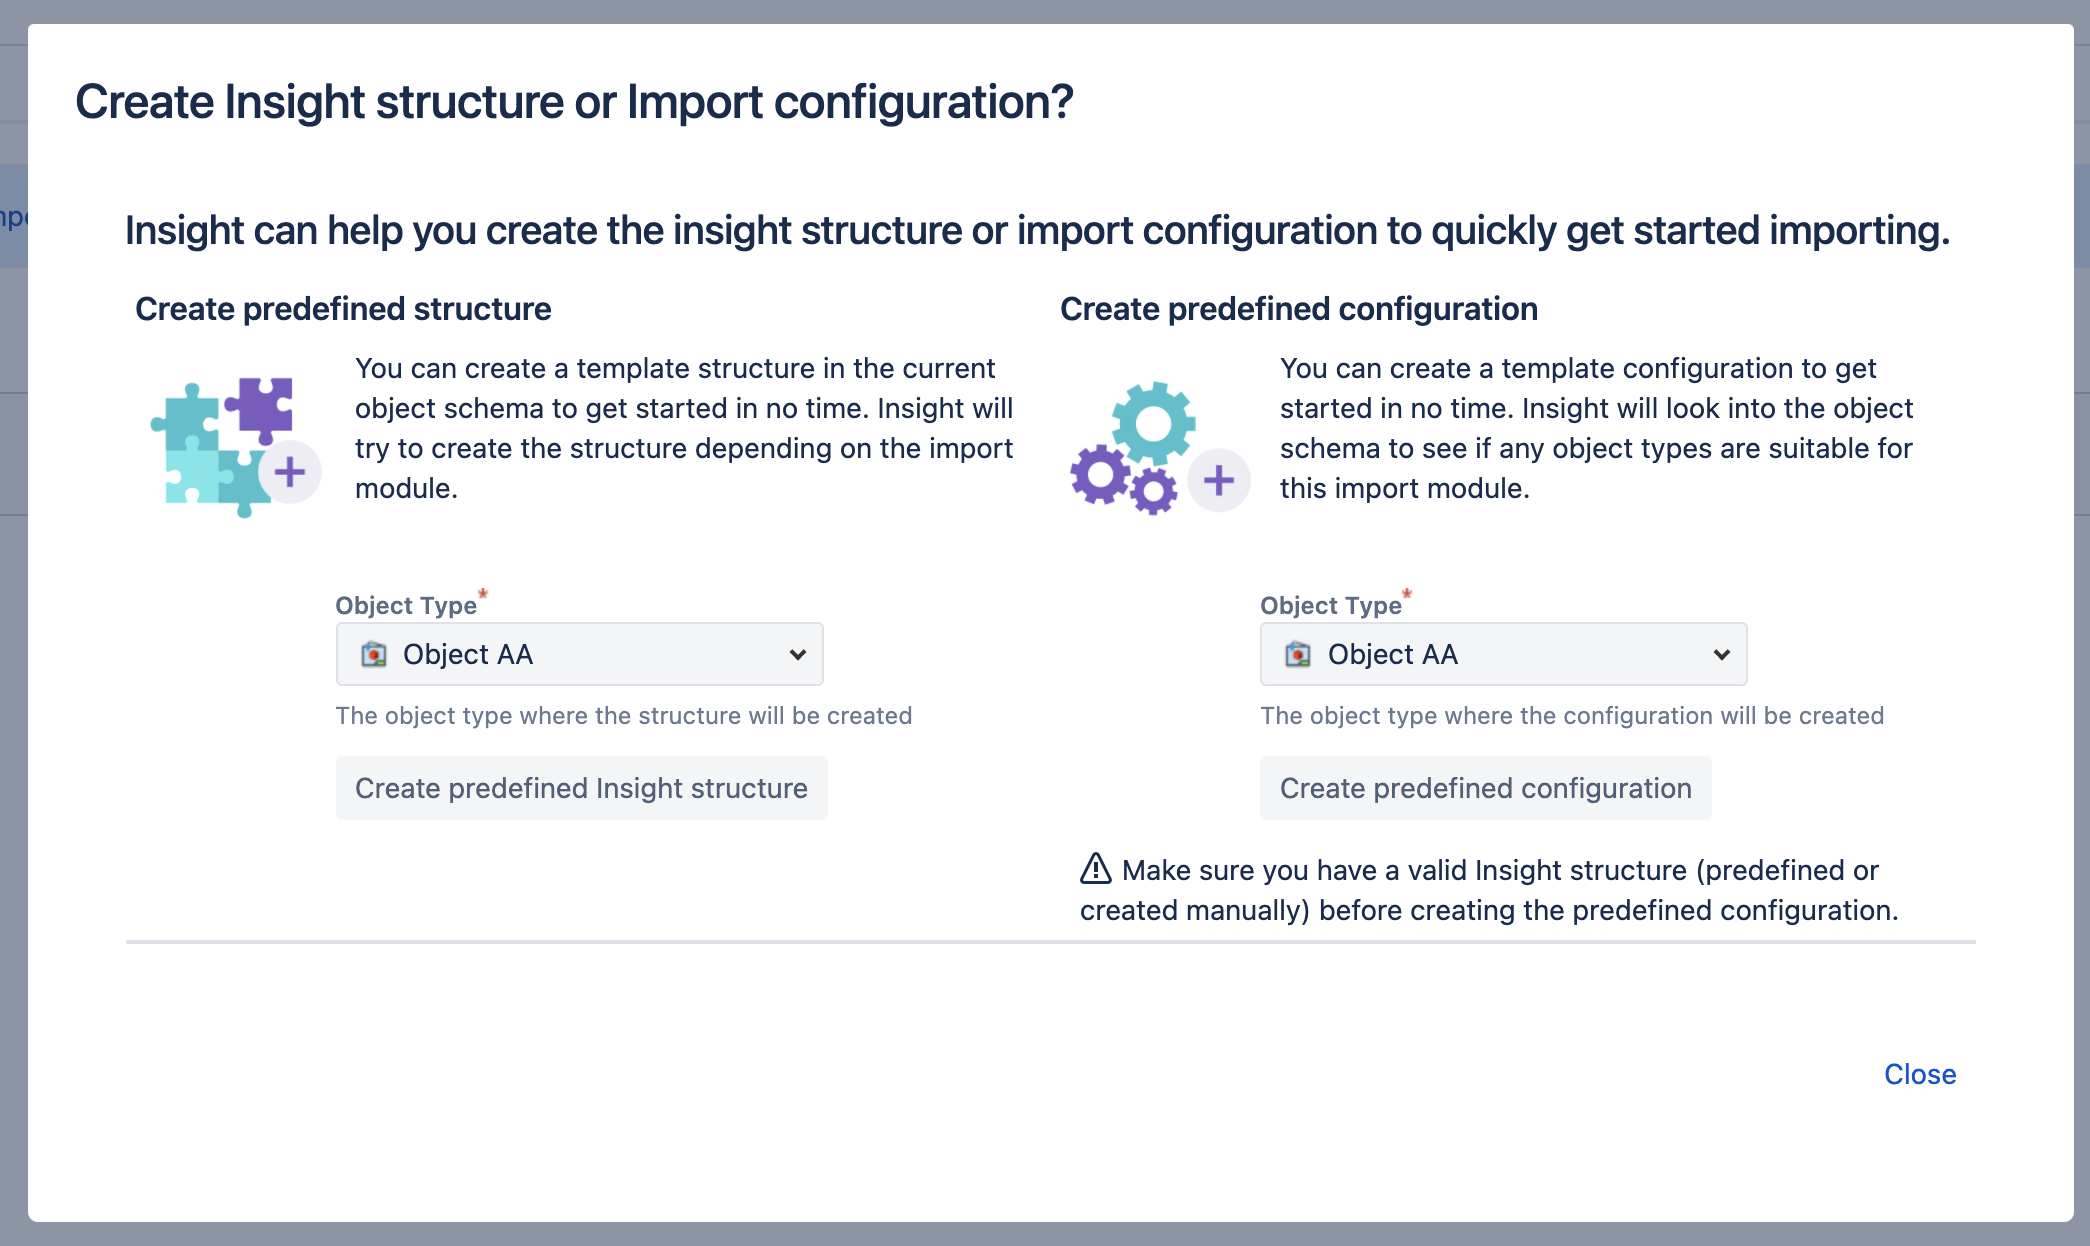
On the destination site, select the object schema (or create a new one) where you should like to import the Assets data to, and go to Action(...) → Configure

On the Import tab, create a new import configuration. Select CSV Import.
Name the import configuration. Select the CSV import file generated from step 2 to import and save the import configuration.
For each type of object that you want to map in Assets, you must create an object type and for each attribute or reference that you want to map in Assets, you must create an attribute. Once you save the import configuration in step 6, you have the option to either select an existing object type to import to, or you can create a predefined object type and configuration to automatically create the object type structure based on the CSV file.
If needed, change the attribute type of the object type to be the same as the type set on the source schema.

Click on the newly created Import configuration to expand it and Create Object Type Mapping

For each attribute you want to add to the object type:
Select a Data Locator. The data locator specifies the location of the data in the import configuration.
Select an Assets object Attribute to map with the Data Locator.
Click Add, at right.
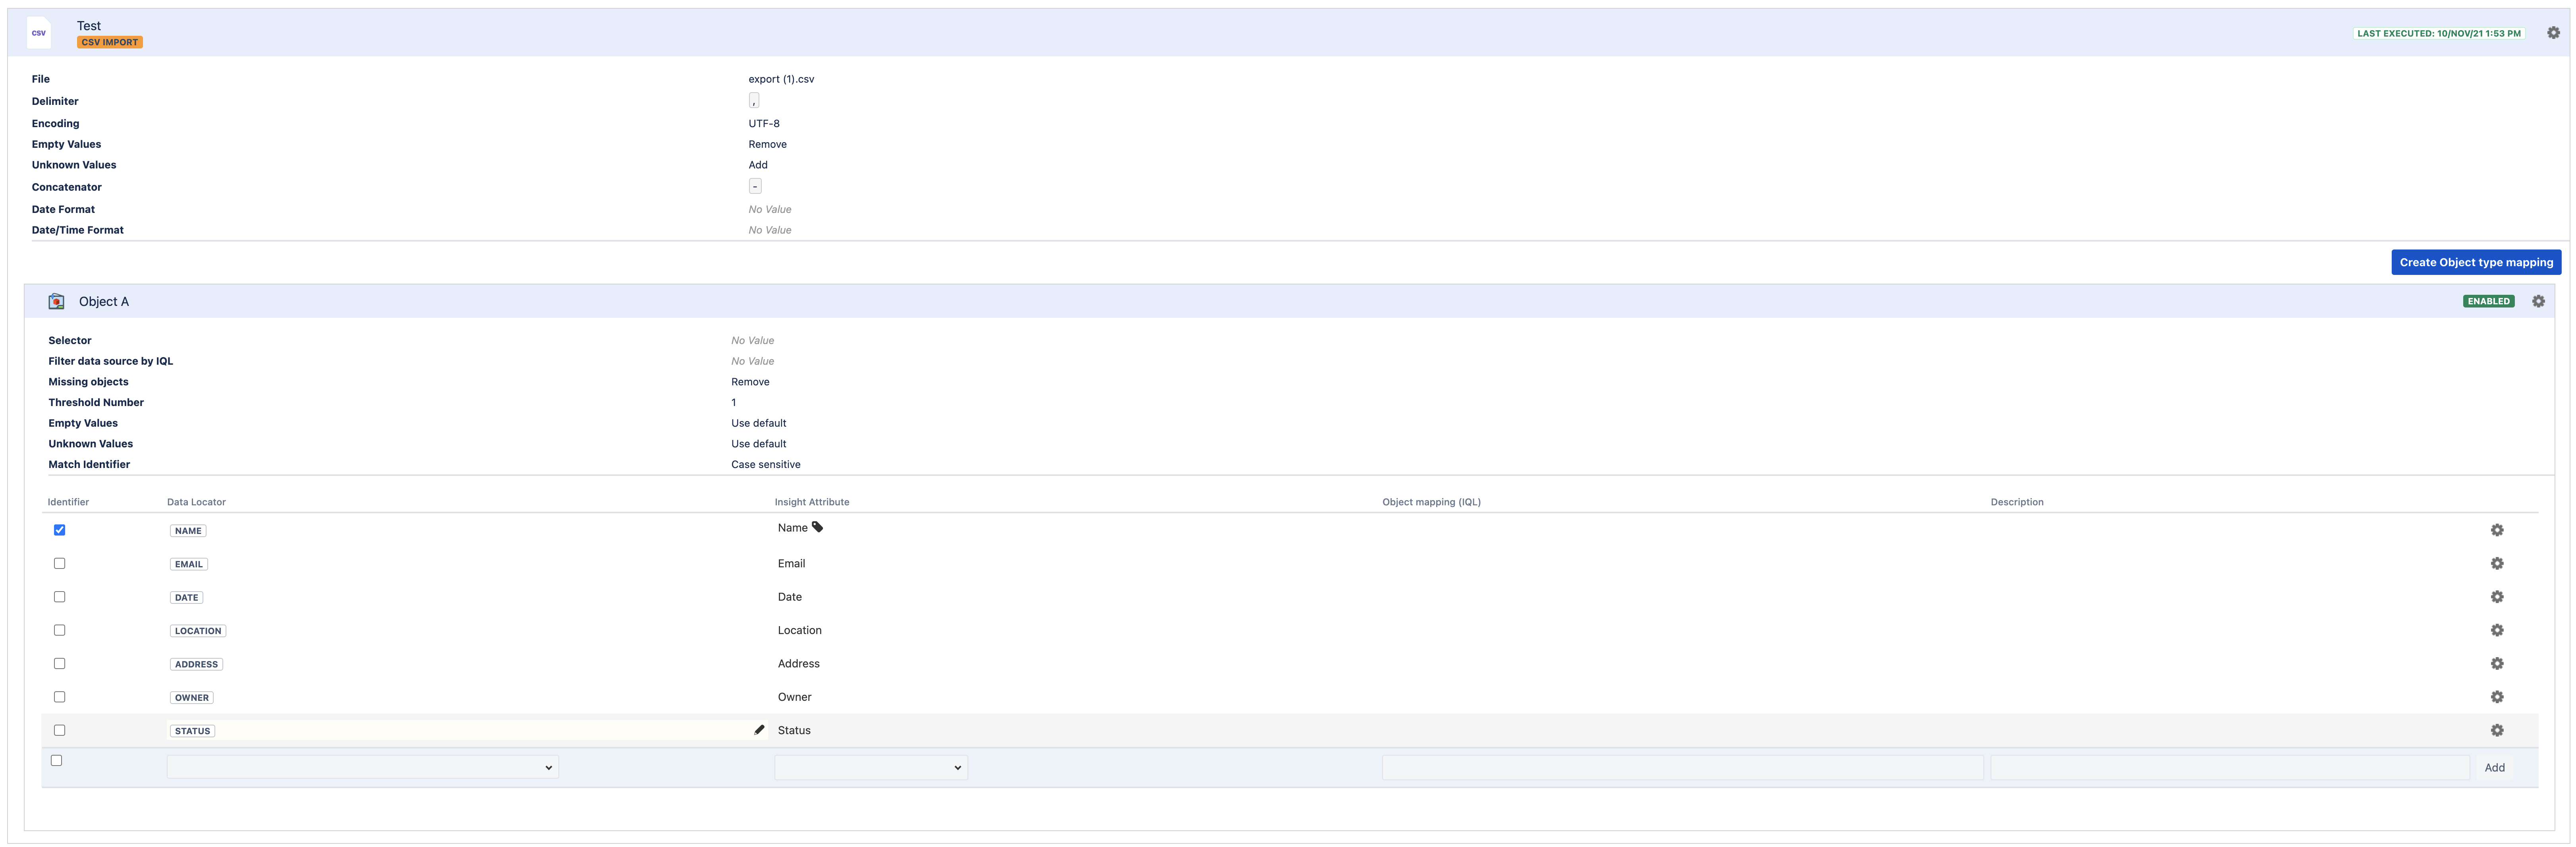
Once all attributes to be imported are mapped, execute the import.
After the import is completed and the destination schema is populated with the object type, it's time to then import the object type that contains attributes that references the previous imported object type. Repeat steps 1 to 9 for the 'child' object type.
For the step to export the object type to a CSV file, make sure to select User friendly as the format for the CSV file. Otherwise, the data exported for the object attribute will be in the object key format instead of the attribute label, which will cause the object type attribute mapping NOT to work! This is due to the object key not being maintained and each import process will generate a new key for each object that is imported to the schema – the object label is required for the object type attribute mapping.
On the step to map the attribute from the CSV file to add to the object type, for the attribute that references an object in the reference object type, you will need to use the placeholder in the import configuration (under Object mapping) to import the data correctly.
Use the Object Mapping (AQL) column to enter AQL that maps the label of the reference to a placeholder for the data locator.
If you are mapping only one reference from the data, enter
Label = ${Locator}whereLocatoris replaced by the name of the Locator.Note: this example will use whatever attribute is set as label. By default, attribute "Name" is set as label and this can be changed in the Attributes screen on the object type being referenced. In situation where "Name" is set as label, the alternative, corresponding AQL that can be be used is:
Name = ${ObjectA}If you are mapping multiple references from the data, enter
Label IN (${Locator${0}})whereLocatorsis replaced by the name of the Locators.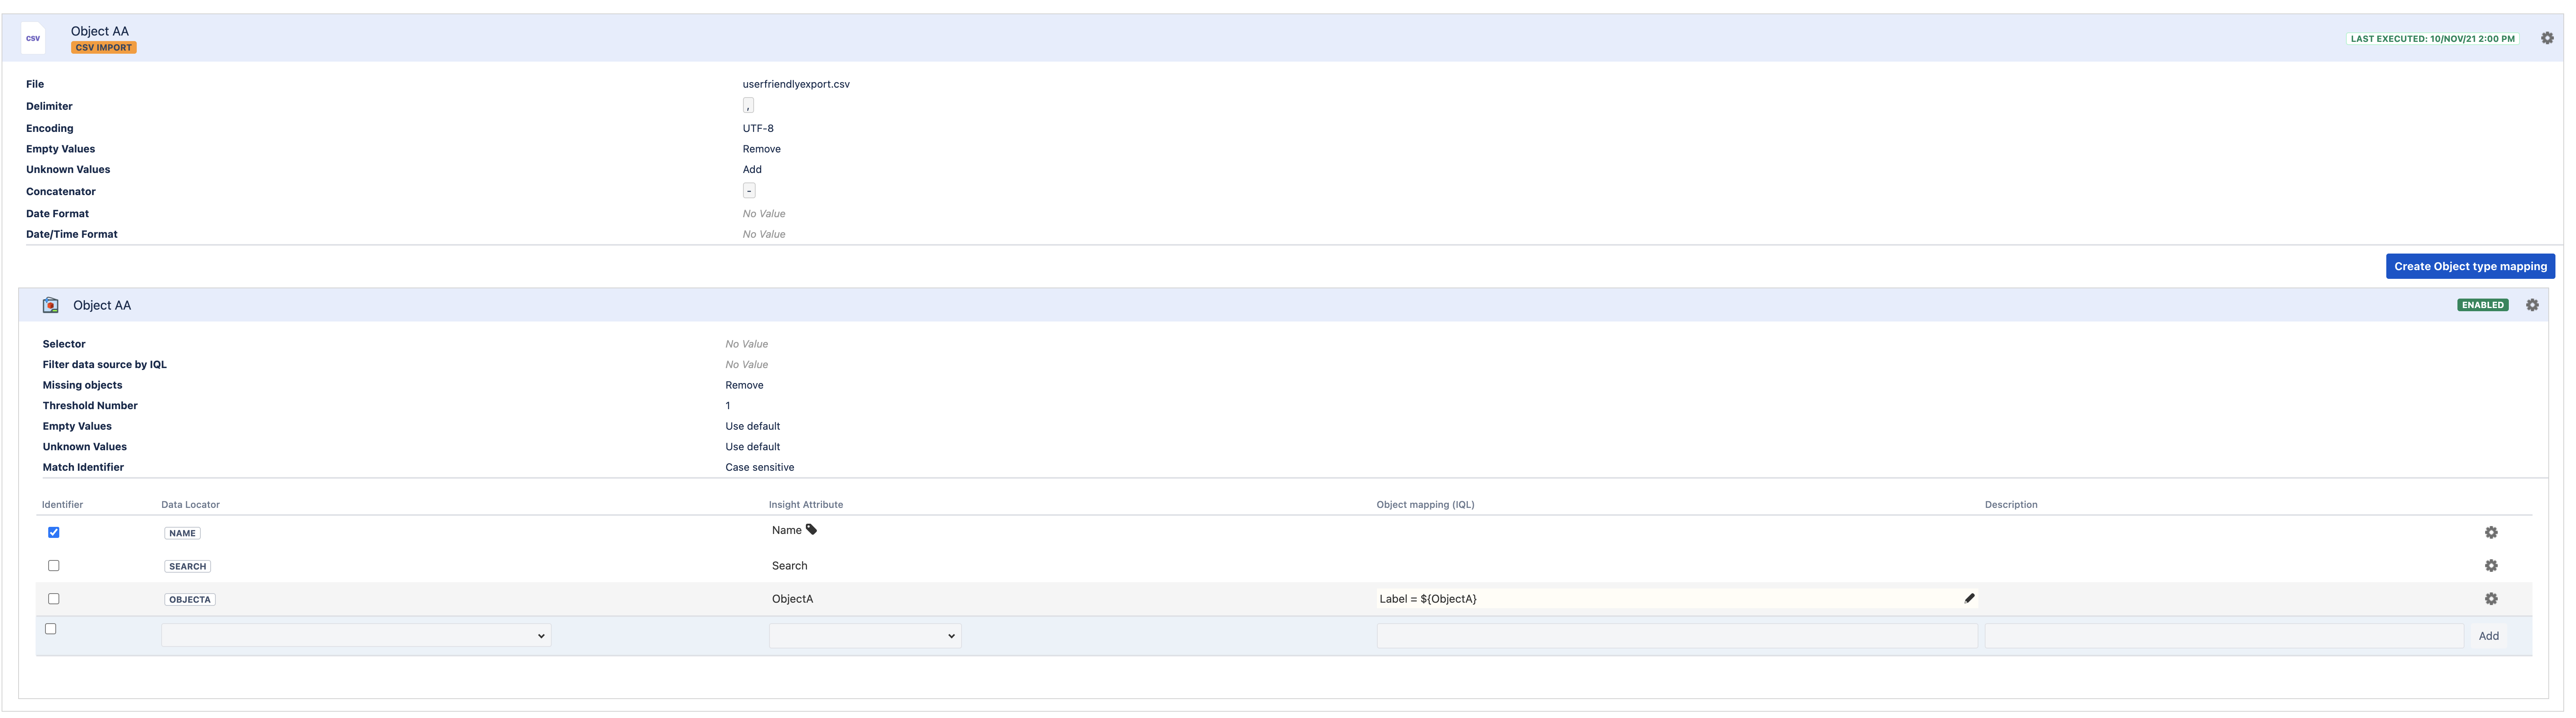
Execute the import for the object type.
Was this helpful?