Setting OpsGenie Alert Priority via a Jira custom field
Platform Notice: Cloud - This article applies to Atlassian products on the cloud platform.
Scenario
While Priority Schemes are not yet available in Jira, teams will usually use a custom field to emulate a priority scheme to be used for a single specific project. However, that can cause issues when integrating their projects with OpsGenie, as currently it is not possible to map Jira custom fields to OpsGenie.
In this article we'll use workflow post functions to workaround those limitations and have new alerts created with the appropriate priority.
Requirements
- Be a Jira Administrator.
- Have a Select List custom field with your desired priorities.
- Add the priorities from the custom field above to your global priorities.
- Add the custom priority field to the appropriate Request Types.
The Workflow Post Function
WIth the above requirements met, follow these steps:
Select
 > Issues.
Click Workflows and then Edit for the relevant workflow.
Select the Create Issue transition:
In diagram mode, select the transition arrow.
In text mode, select the transition's name from the Transitions (id) column.
Open the post functions tab:
In diagram mode, click Post functions in the properties panel to show the triggers configured for the transition.
In text mode, select the Post functions tab.
Click Add post function.
- Select the Copy Value From Other Field post function and click Add.
- In the Source field, select your custom priority field.
- In the Destination field, select the Priority field.
Add the post function and choose Publish Draft to finalize your changes.
Configuring the OpsGenie automation
After setting up the post function above, we can add different rules to our OpsGenie/Jira integration!
To create an incoming automation rule:
Go to Settings > Integrations.
Select your Jira integration to view its detals.
Under Incoming automation rules, select Add rule.
Enter Rule name.
Select Create alert as the Rule type.
Add a condition to match one of the priority levels in your custom priority field.
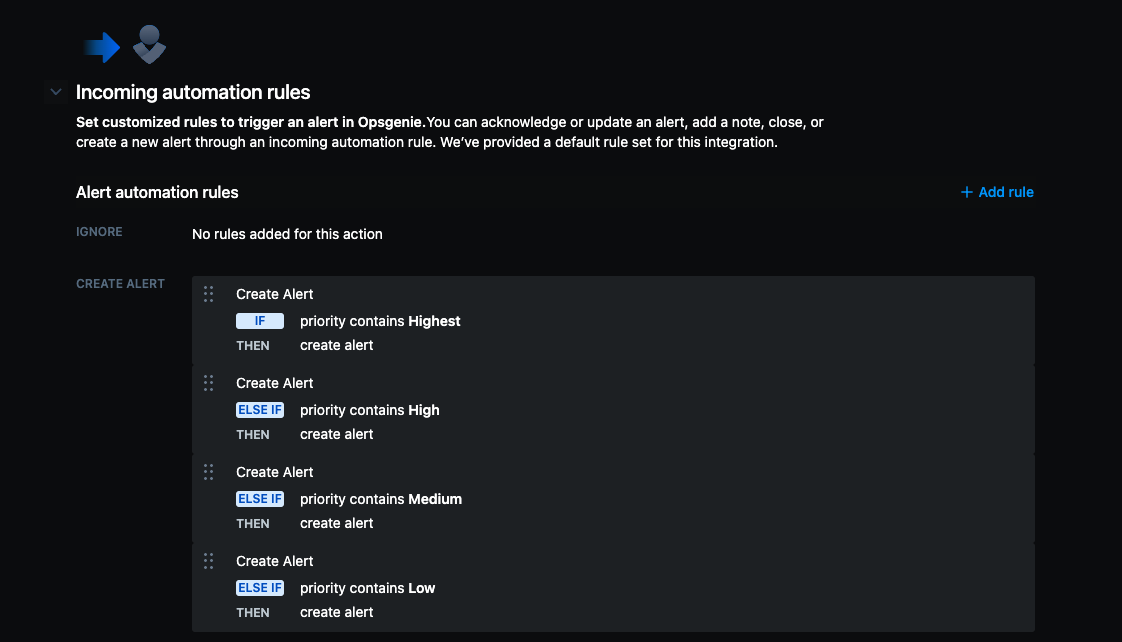
- Repeat steps 3→6 for each level of priority. In the end, the automations should be similar to the screenshot below:
- Repeat steps 3→6 for each level of priority. In the end, the automations should be similar to the screenshot below:
If you’d like to enable this rule now, select Enable now checkbox.
Select Save to add the rule.
And that's it! Now alerts should be created with the appropriate priority based on your custom priority level!