Understand the Expand button in the Assist app for Slack
Platform Notice: Cloud - This article applies to Atlassian products on the cloud platform.
Summary
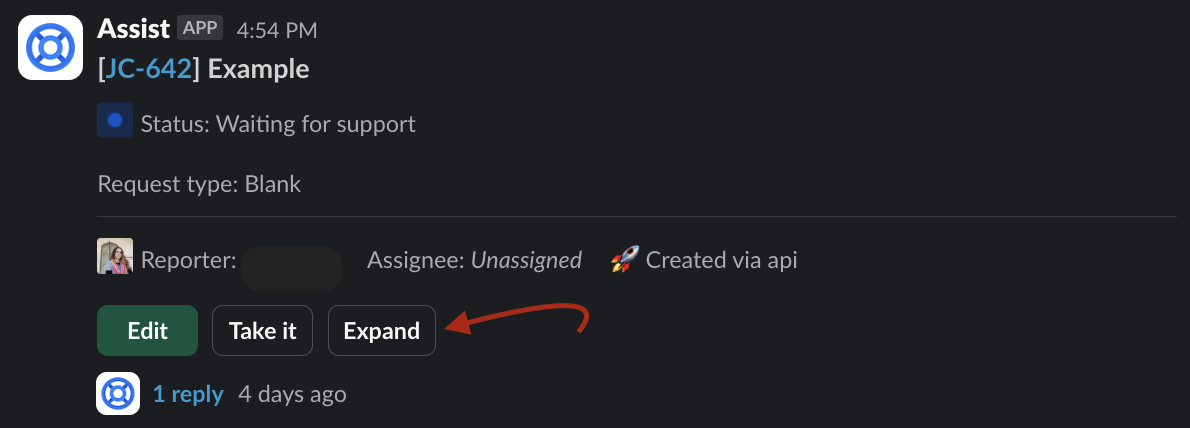
This article details the fields and their order that appear when using the Expand button on request cards in the Agent channel for the Slack Chat integration.
What fields should I expect?
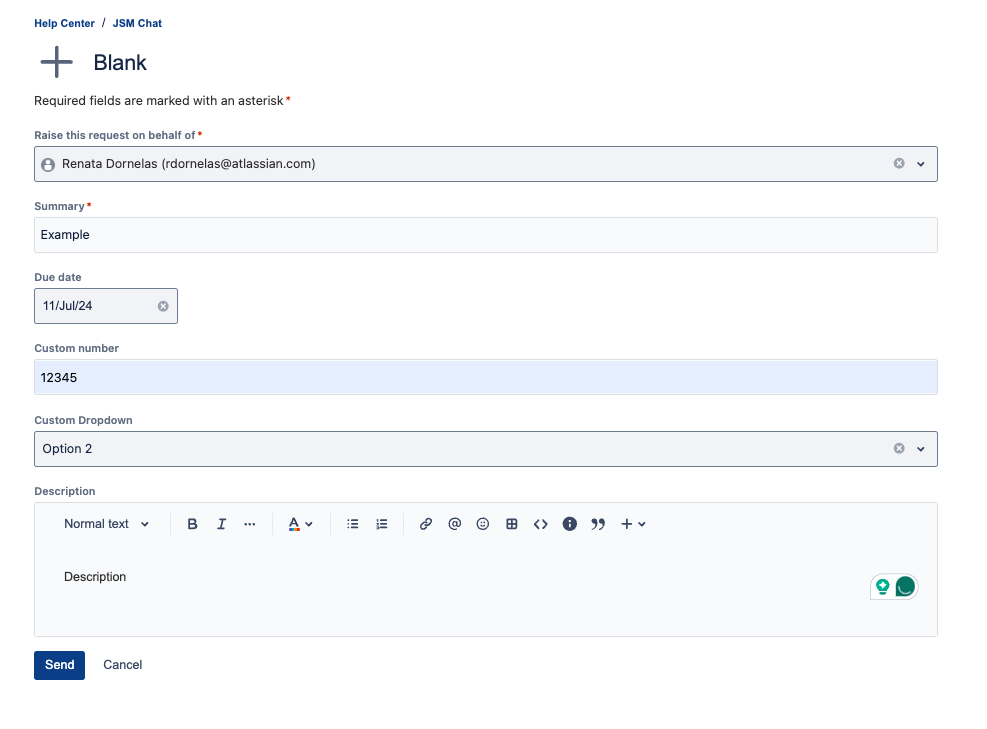
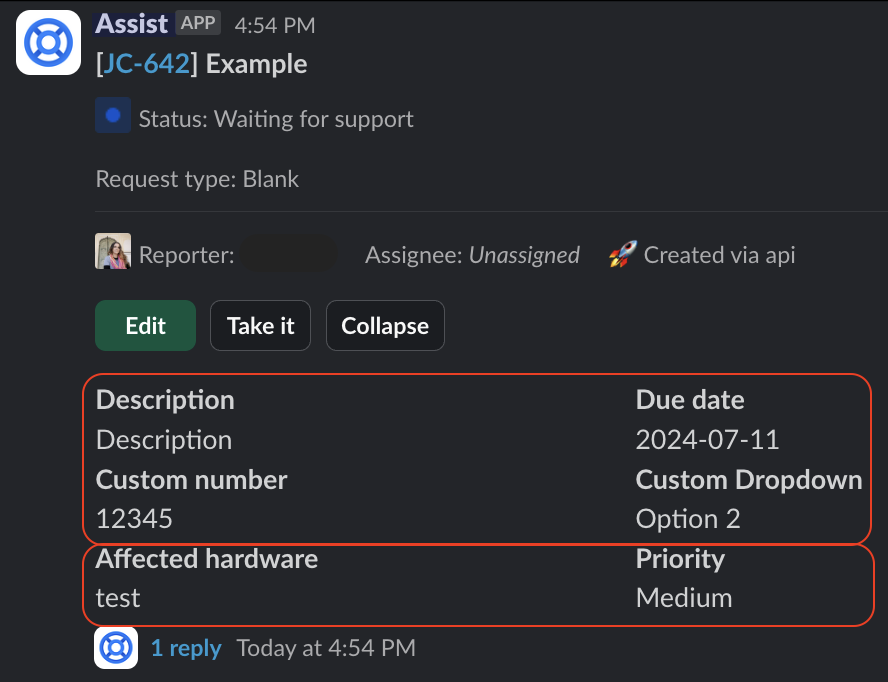
Specifically during the request creation, the Assist app will look for fields with a value set (fields that are not empty) using the following priority from top to bottom:
- The Description field.
- If the Description field is empty when the request is created, it can't be added to the Expand card afterward.
- All other fields on the request, in the same order as the request form.
- even if the Description is not the first field in the request form, it will be the first displayed on the Expand card.
- All other fields from the Issue view, in alphabetical order.
Example:
| Request form | Expand card |
|---|---|
 Important notes and exceptions
- "Text Field (multi-line)" fields are deliberately hidden in Assist due to potentially being too long.
- The Description field is a multi-line text field. As an exception, Assist will display it if the field has a value during ticket creation.
- If the Description field is empty when the request is created, it can't be added to the Expand card afterward.
- Assist will show a maximum of 10 fields. If you have more than that, it will state "To see all fields, view the request in Jira", with a link to the agent view of the issue.
- While most common field types are supported, some Jira fields may not be supported in Slack or haven't been integrated yet, and won't be available in Assist. You can find Supported field types in the Chat documentation. If you run into a problem where a specific field type is not showing, feel free to contact support for further clarification.
Last modified on Jan 13, 2025
Powered by Confluence and Scroll Viewport.


