Committing your plan changes
A plan is like a sandbox scenario, where you can safely try different options and potential outcomes before committing a set of changes to Jira. It prevents you from having to manually update the information. The number next to the plan name shows how many changes you've made. If you're not happy with the changes, you can always revert them in the commit dialog.
How to commit and revert changes
- Modify your plan by creating, editing or deleting work items, teams or releases.
Changes made in your scenario are indicated by orange markers.
- Every time that you change something, a new number shows up in the bubble next to Uncommitted changes representing the number of changes you've made.

Click Uncommitted changes.
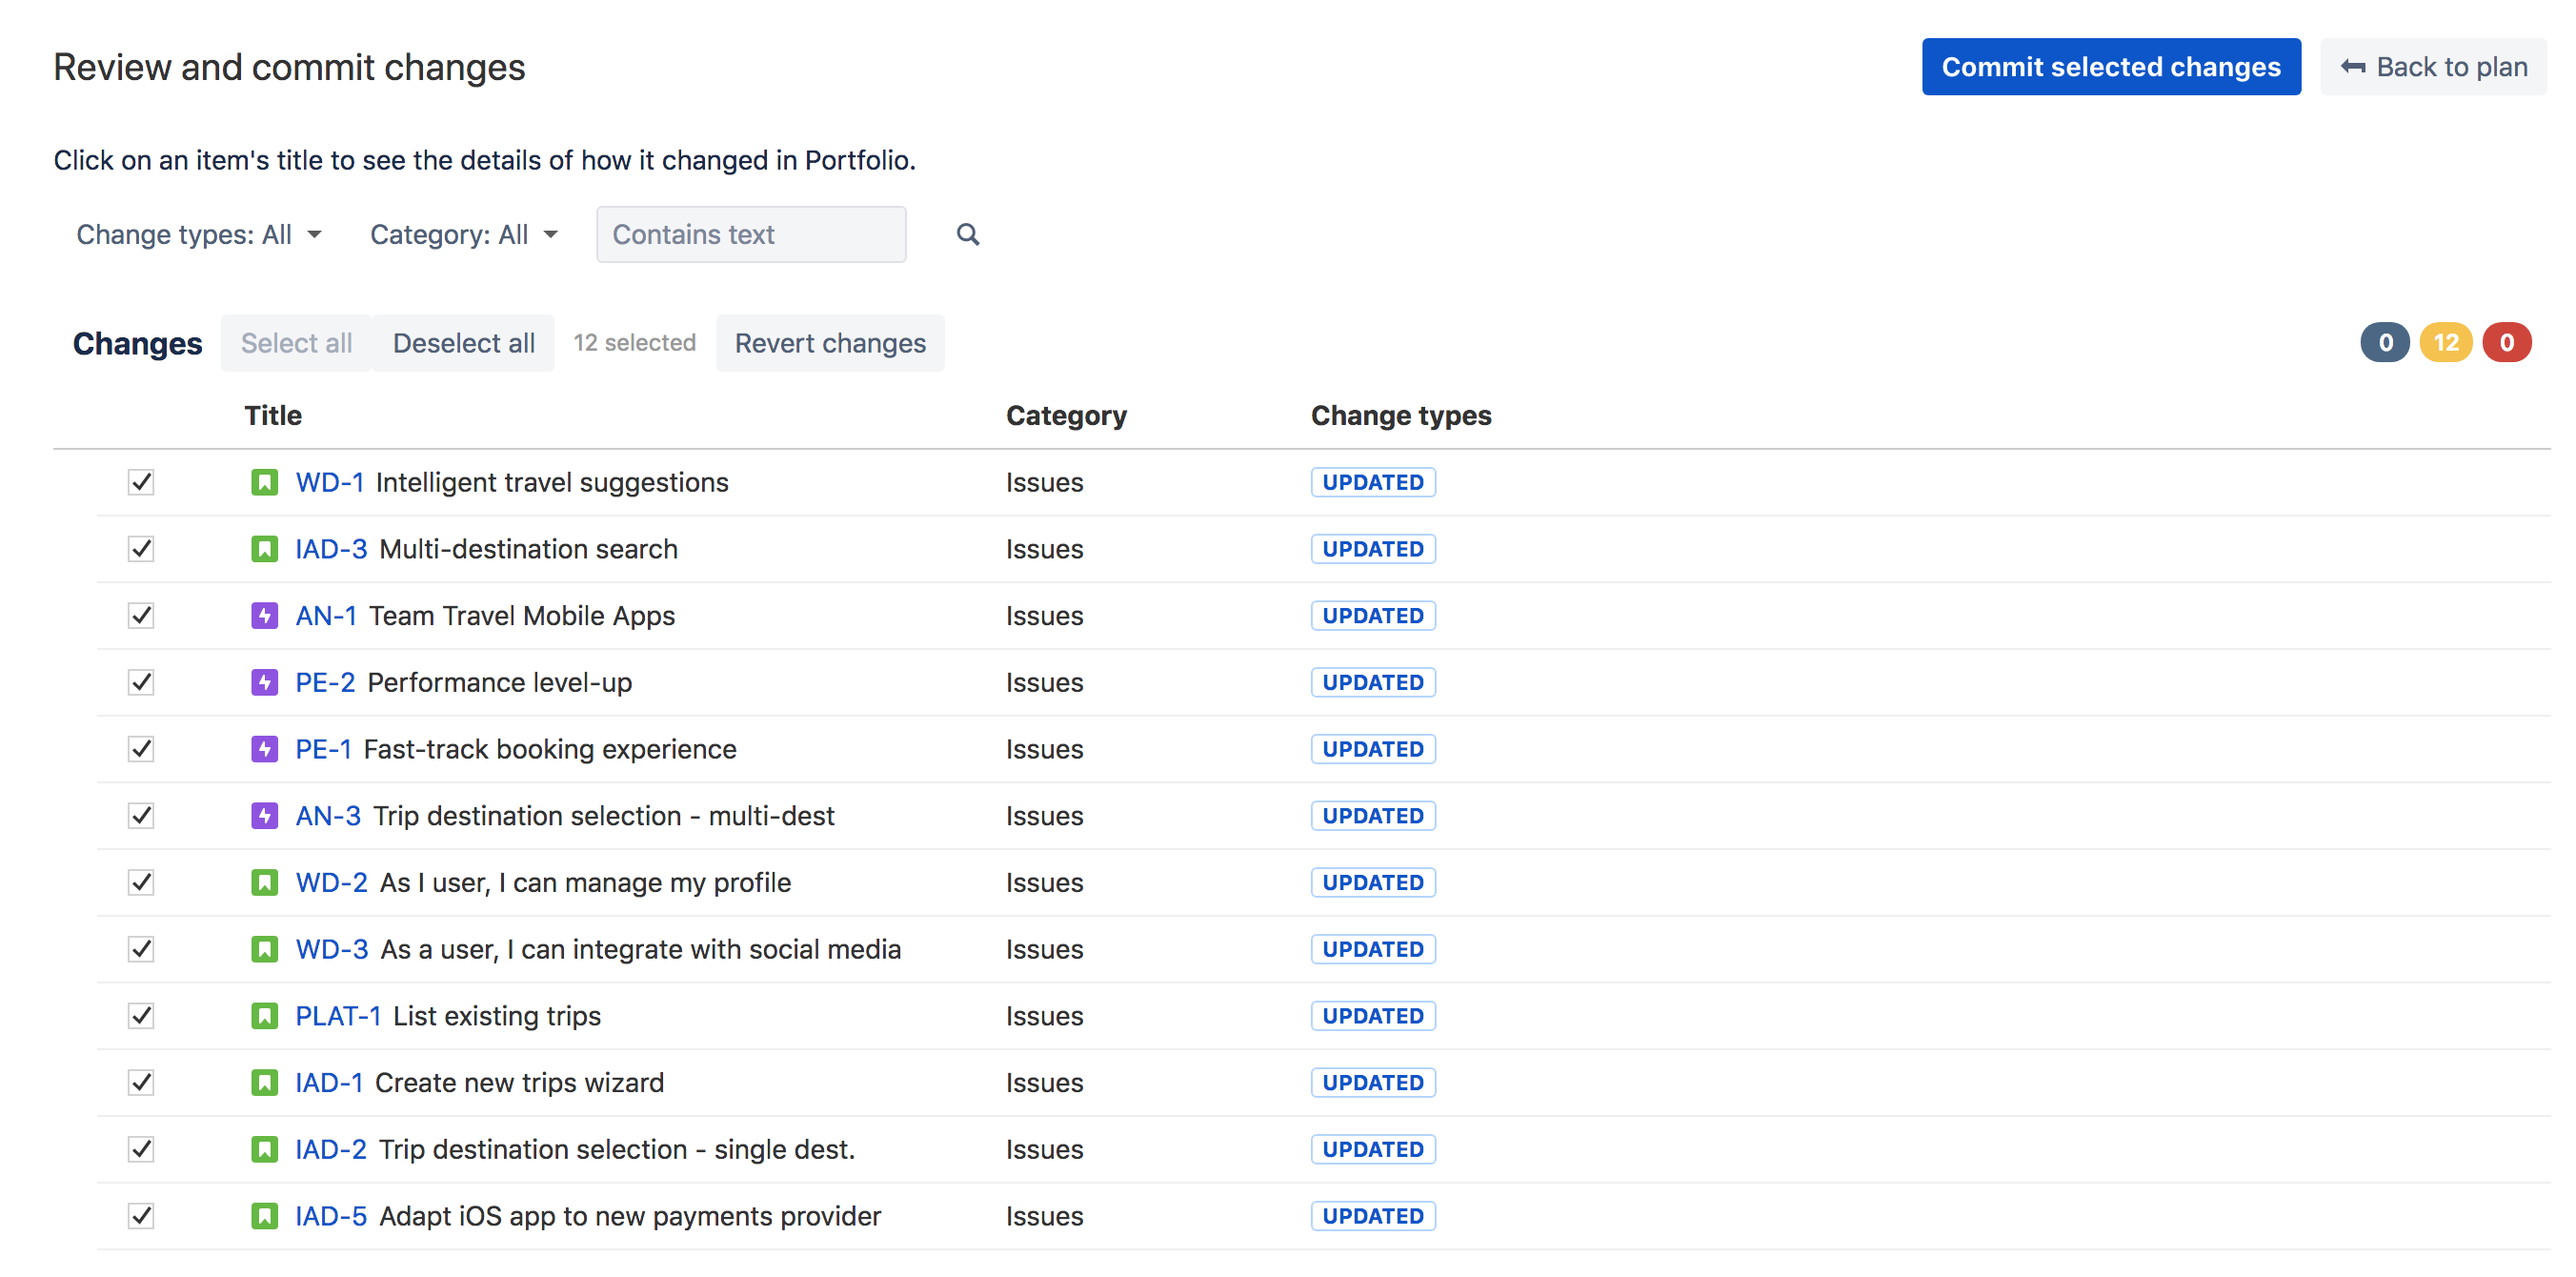
A new window shows up displaying the list of changes you've made.Click the issue title to open a detailed view of the changes.
To commit the selected changes click Commit selected changes.
The committed changes will now be visible from your Jira Software application.
Revert changes by selecting the desired changes and clicking Revert changes.
Note
There are several things you have to keep in mind:
- Issues might disappear upon committing because they don’t match the filter query of the board. If you want to see them again, click on the message and set the required values on your issues.
- Changes to private teams will only affect your Portfolio for Jira plan.
- Changes to shared teams will be committed to global team management.
What will change in Jira after committing changes from Portfolio?
Once you commit your plan changes to Jira, you will see the following changes reflected in your Jira application:
- New and updated issues
- Summary
- Estimates
- Description
- Dependencies
- Team assignment
- Release assignment
- Sprint assignment
- Parent link (Portfolio custom field)
- Custom fields (we have a specific list of types we allow to be edited).
- Labels (so these can be created in Portfolio, also).
- Components (these cannot be created in Portfolio, only edited).
- Dependencies between issues.
- Issue rank, which is the order in which the issues will appear in your Jira backlog.
- New versions and updates to versions
- Title
- Description
- Rank
- Start and release dates
 Troubleshooting
In order to keep the time estimates in Portfolio, you will have to activate the time tracking in Jira.
- Go to
 > Issues > Time tracking.
 - Select the time tracking configuration and click Activate.