View development information for an issue
If your administrator has connected Jira to a compatible development tool, you’ll see development information alongside your issues in Jira. Depending on which tools you have connected, Jira shows your linked branches, commits, pull requests, builds, deployments, and feature flags.
Before you begin
Your administrator must connect and configure Jira and your development tools. Learn more about integrating with development tools
You must have the View development tools permission to be able to see the development panel. Read more about managing project permissions
You can only use Github if you’re in an Atlassian Government environment.
Send development information from your tools to Jira
You must reference Jira issue keys in commits, branches, and pull requests to display development activity in Jira. Learn more about referencing issues in your development work. Once development information has been linked to an issue, it can’t be removed.
View the development panel on Jira issues
If everything has been set up correctly, you'll see a development panel on each of your issues, similar to the screenshot below. The development panel provides you with just enough information to evaluate the status of an issue's development at a glance.
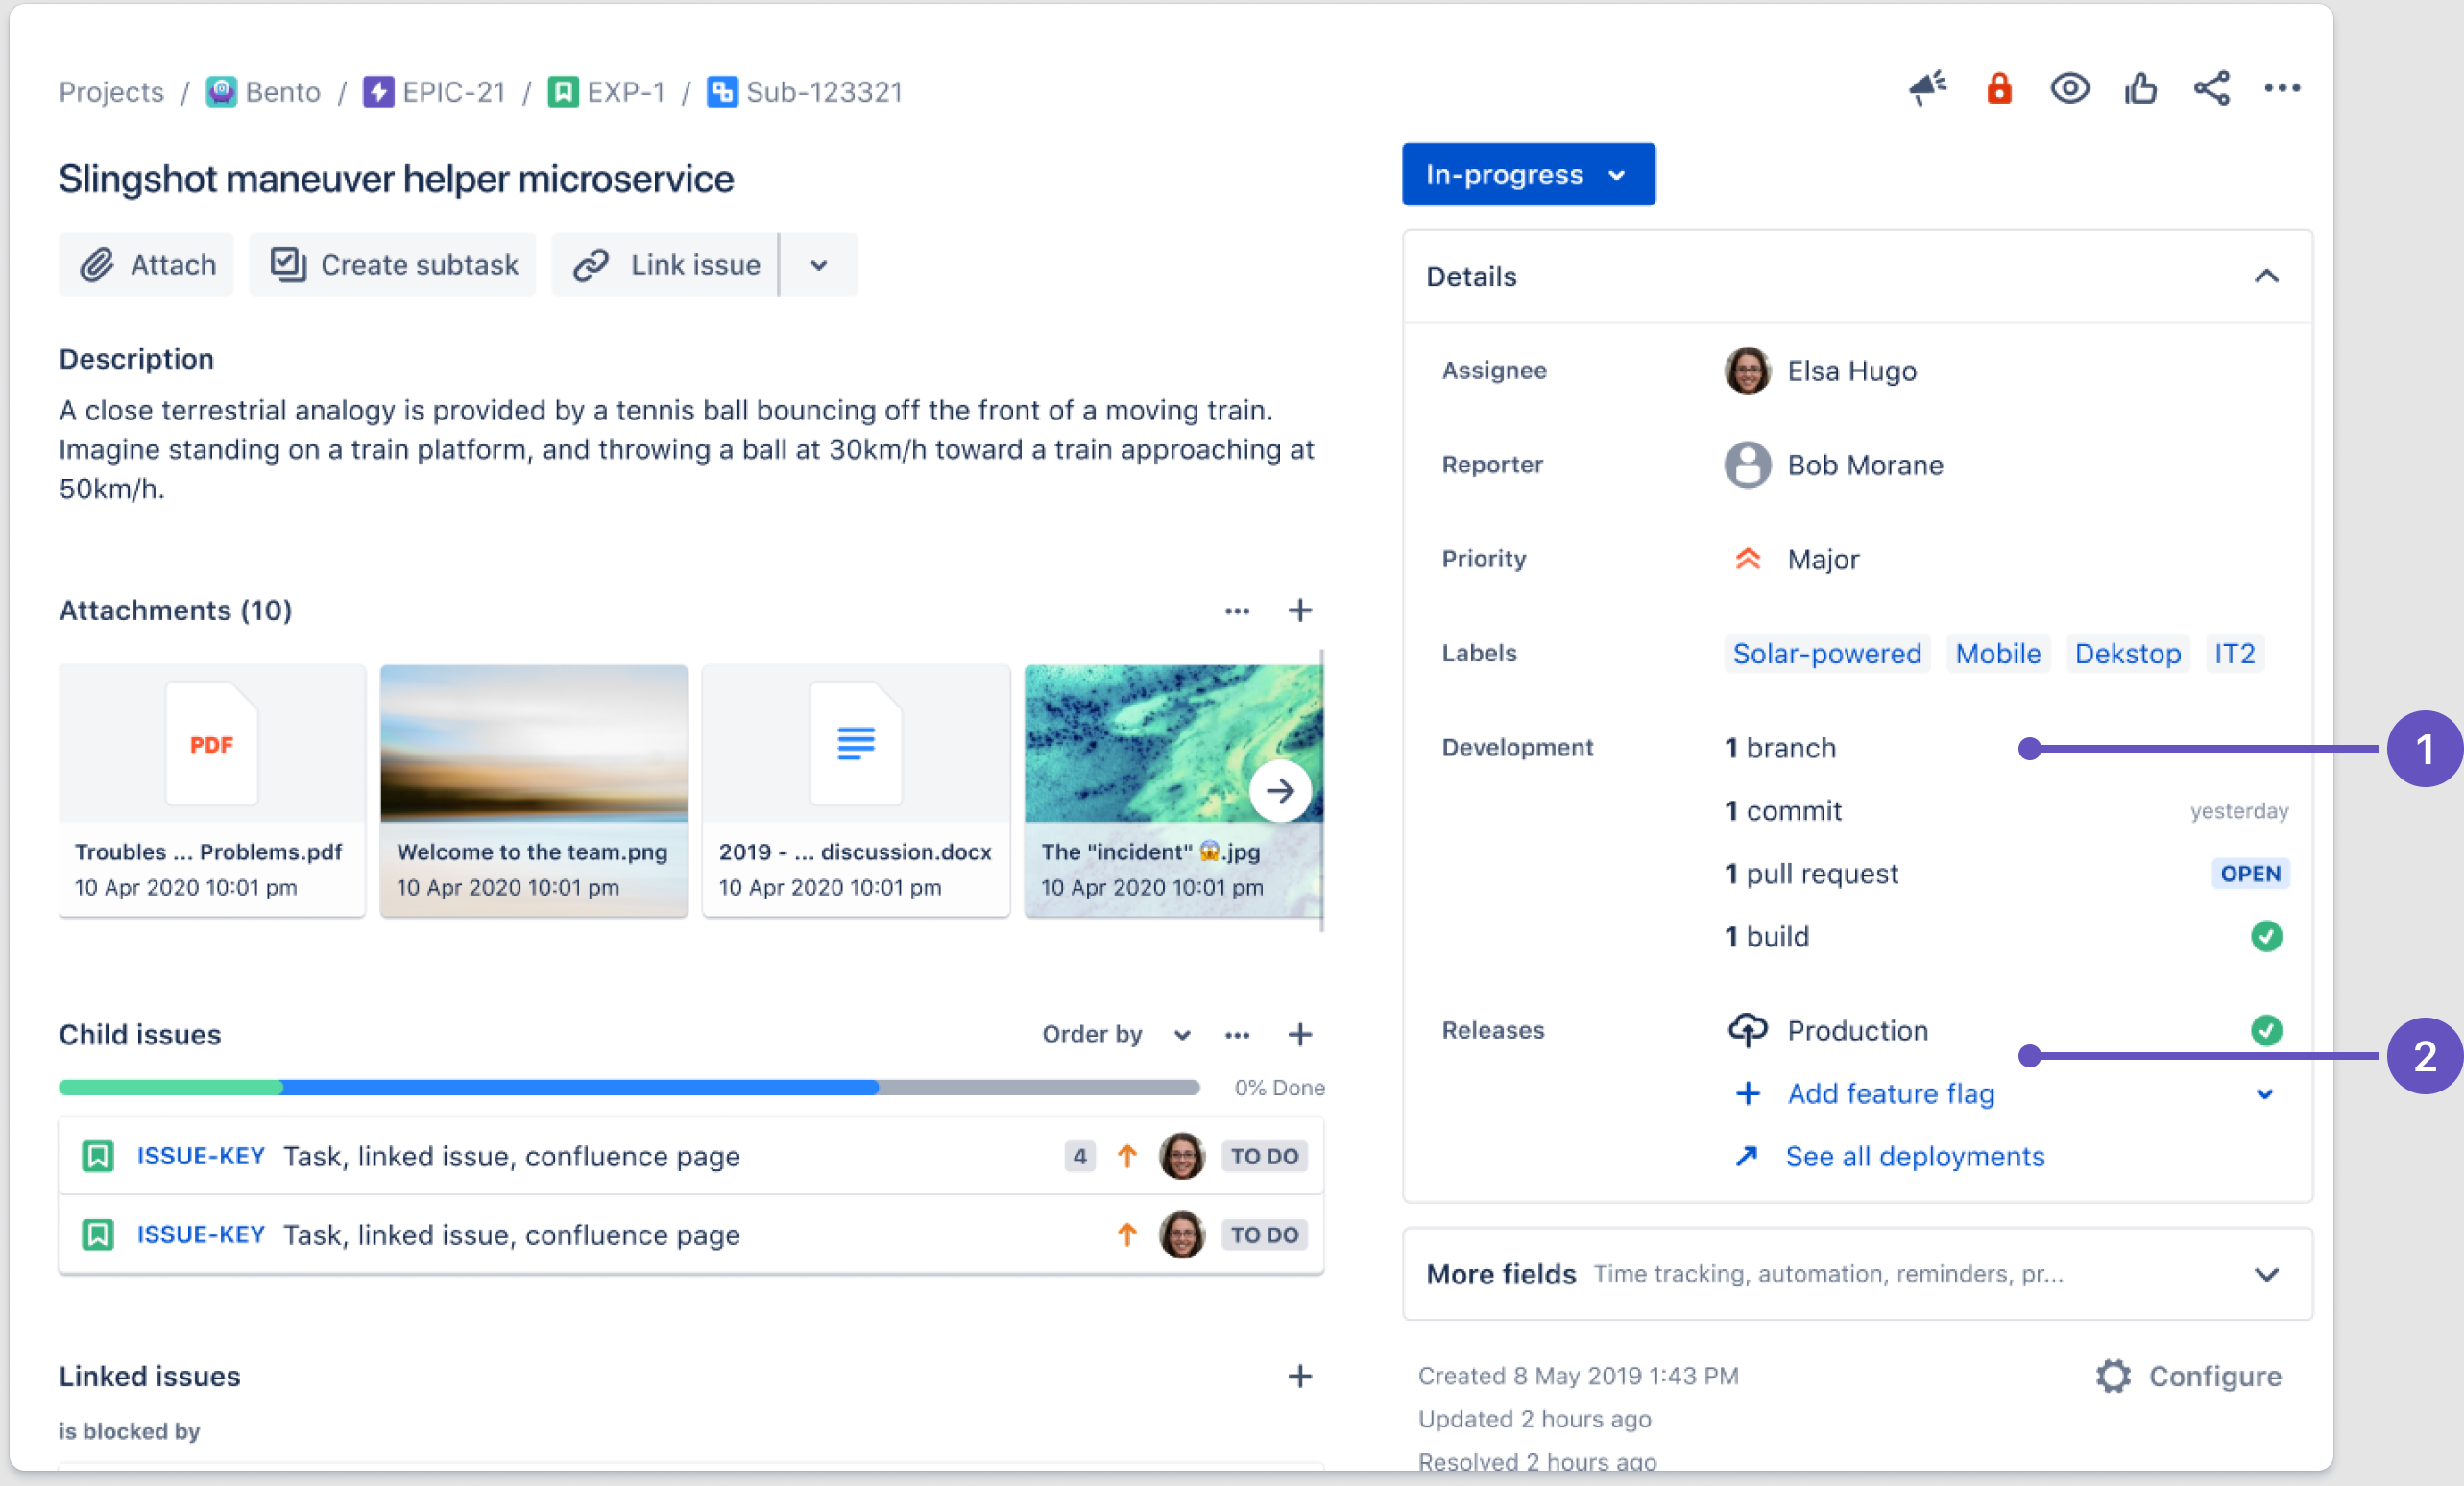
Development panel: Hover over branches, commits, pull requests, and builds to see more details.
Releases panel: Hover over deployments and feature flags to see more details.
Click on a development activity (for example, 2 pull requests) to open the development dialog.
This shows all the development information that has been linked to your issue. From here, you can select a particular item (for example, a pull request title or deployment pipeline) to view it in your connected development tool.
Some users who can see data in the Development panel may not have permission to see all the information in the development dialog. This is because Jira checks for appropriate permissions in the linked applications.
The development dialog may display duplicates, although the number of unique items are reported at the top of the dialog and in the development panel summary.
Only the first 100 commits linked to an issue will be shown on the development panel.
If commits linked to the issue are involved with a Bamboo build that fails, the first successful build that follows will be reported, even though the original commits are no longer involved with that build.
What does the status lozenge next to the pull requests mean?
The pull request(s) status in the development panel is:
OPEN if there is at least one open pull request.
MERGED if there are no open pull requests, and at least one pull request has been merged.
DECLINED if there are no open or merged pull requests, and at least one pull request has been declined.
The number next to the status lozenge indicates how many pull requests are currently in that status.
What does the status lozenge next to the reviews mean?
The review(s) status in the development panel is:
REVIEW (yellow with black writing) – At least one review in 'Review' status.
APPROVAL (black) – There are no reviews in 'Review' status, and at least one review is in 'Approval' status.
SUMMARIZE (black) – There are no reviews in 'Review' or 'Approval' statuses, and at least one review is in 'Summarize' status.
REJECTED (red) – There are no reviews in 'Review', 'Approval', or 'Summarize' statuses, and at least one review is in 'Rejected' status. (Red)
APPROVAL (green) – All reviews are in 'Closed' status.
'Draft' and 'Abandoned' reviews are not shown.
What does the status lozenge next to the builds mean?
The build(s) status in the development panel is:
if all the different builds (for example, unit tests, functional tests, deploy to staging) have passed.
if at least one run failed for any build by any linked build server.
View the development panel for a GitHub integration
If you’ve integrated GitHub with Jira but you can’t see the Development panel in Jira issues, you might need to update the issue layout.
Start in your Jira project settings.
If you’re in a company-managed project, select Issue layout, then select Edit issue layout.
If you’re in a team-managed project, select Issue types.
In the section titled Hide when empty, check for the Development field.
Move the Development field from Hide when empty into the section titled Context fields.
Take action from the development panel
Create feature branches
Select Create branch in the development panel to open your connected code tool and start the process for creating a branch. If you have multiple tools connected, you can choose where you'd like to create the branch. Alternatively, you can copy a git command to create and checkout a branch on your local. The key for the Jira issue will be automatically added to the name of the branch.
To update your default git command branch name format:
Select the settings icon next to GIT CREATE & CHECKOUT A NEW BRANCH.
Select the fields you want to add to your new branch name format. You must include the issue key to link your branch and build info to Jira.
Select Save.
Your new branch name format will be applied when you copy the git command to create a new branch on your local.
Create commits
Select Create commit in the development panel to either copy the Jira issue key and paste it into your commit message, or copy a sample git command containing your issue key.
Create pull requests
Select Create pull request in the development panel to open your connected code tool and start the process for creating a pull request. The Jira issue key will be automatically added to the pull request title.
View development information for issues on the board
When your team includes issue keys in branch names, commit messages, and pull requests, you’ll see development information on your Jira board. Issue cards display development icons to indicate when they have pull requests, branches, or commits associated with them. You can hover over the icons to view the details of the development activity, and click through to go to your connected development tool.
Was this helpful?