Jira Integration in Fisheye
When Fisheye is integrated with Jira Software, you and your team get all the benefits described on this page. Go straight to Linking Fisheye to Jira Software if you want to connect Fisheye to a Jira Software server.
You can also use Jira Software for delegated management of your Fisheye users. See Connecting to Crowd.
See Configuring development tools for the full story of how Atlassian tools work together to give you a fast and guided software development process.
Starting in Jira 6.2.2 the Source and Reviews tabs are only displayed if Jira Software is unable to display the associated information in the Development Tools panel.
Related pages:
Your user tiers don't need to match between Jira Software and Fisheye/Crucible in order to integrate them. Jira Software users that are not Fisheye users will see the same view as Fisheye users within Jira Software, but will not be able to log in to Fisheye to view the source/reviews.
The Release Hub in Jira Software shows the relevant issues and development information for a version – so you can determine which issues are likely to ship at a glance. With Jira Software and Fisheye connected, the release page can warn you about potential development issues that could cause problems for your release.

From the Release Hub you can also:
- Release a version
- Mark a version as complete
- Move incomplete issues to other versions
- Trigger release builds (if Jira is connected to Bamboo)
- Warnings that help you reconcile what is happening in development with Jira Software data.
To view the Release Hub (with the project sidebar enabled), navigate to a project, click on Releases, then select a version listed. See Checking the progress of a version for more detailed information about using the Release Hub in Jira Software.
For Fisheye 3.3 and later, the Fisheye repository branches related to a Jira Software issue are summarized in the Development panel for the issue, when Jira Software and Fisheye are connected with an application link. To see details of the branches, simply click the branches link. You can see which repository each branch is in and when the last commit was made. As long as the issue key is included in the branch name the branch is automatically linked to the Jira Software issue.

For Fisheye 3.3 and later, the Fisheye repository commits related to a Jira Software issue are summarized in the Development panel for the issue, when Jira Software and Fisheye are connected with an application link. You can click the commits link to see detailed information such as who made each commit, when they commited, and how many files were changed. Click through to see a particular commit in the Fisheye instance where the commit was made. A developer only needs to add the issue key to the commit message for that commit to be automatically linked to the Jira Software issue.

Fisheye recognizes Jira Software issue keys, and displays those as links in places such as the activity stream, side-by-side diffs, and commit messages:
Click on the linked issue key to see details for the issue, as described next.
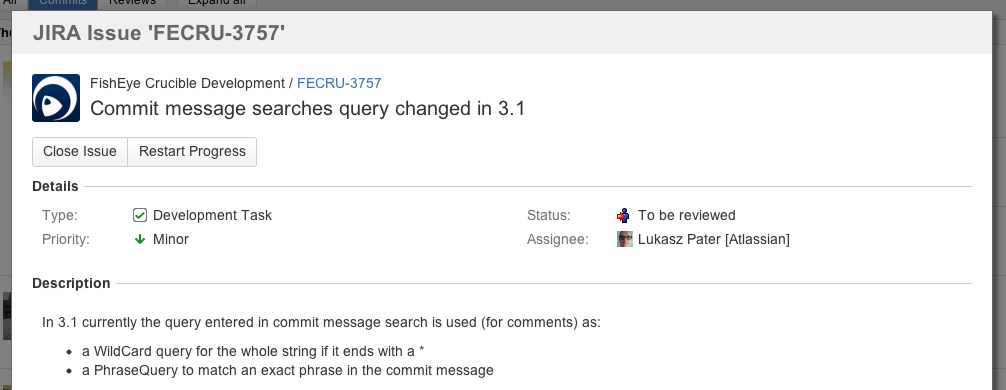
Click a linked issue key anywhere in Fisheye to see the details of that issue in a dialog. And you can click the issue key at the top of the dialog to go straight to the issue in Jira Software:

You can easily transition a Jira issue from within Fisheye. For example, when viewing a commit, you may want to transition the related Jira Software issue into QA. Click on a linked Jira issue anywhere in Fisheye to see a dialog with the available workflow steps:
![]()
Click on a step in the dialog, and complete any displayed fields as required. If there are custom required fields that are unsupported by Fisheye, just click Edit this field in Jira to transition the issue directly in Jira.
Fisheye can link to more than one Jira server at a time, so different teams can work with their own projects in different Jira Software instances, or a single team can link to issues across multiple Jira Software servers.