Adding custom fields
To create a custom field:
- In the upper-right corner of the screen, select Administration
 > Issues.
Under Fields (the left-side panel), select Custom fields.
Select Add custom field.
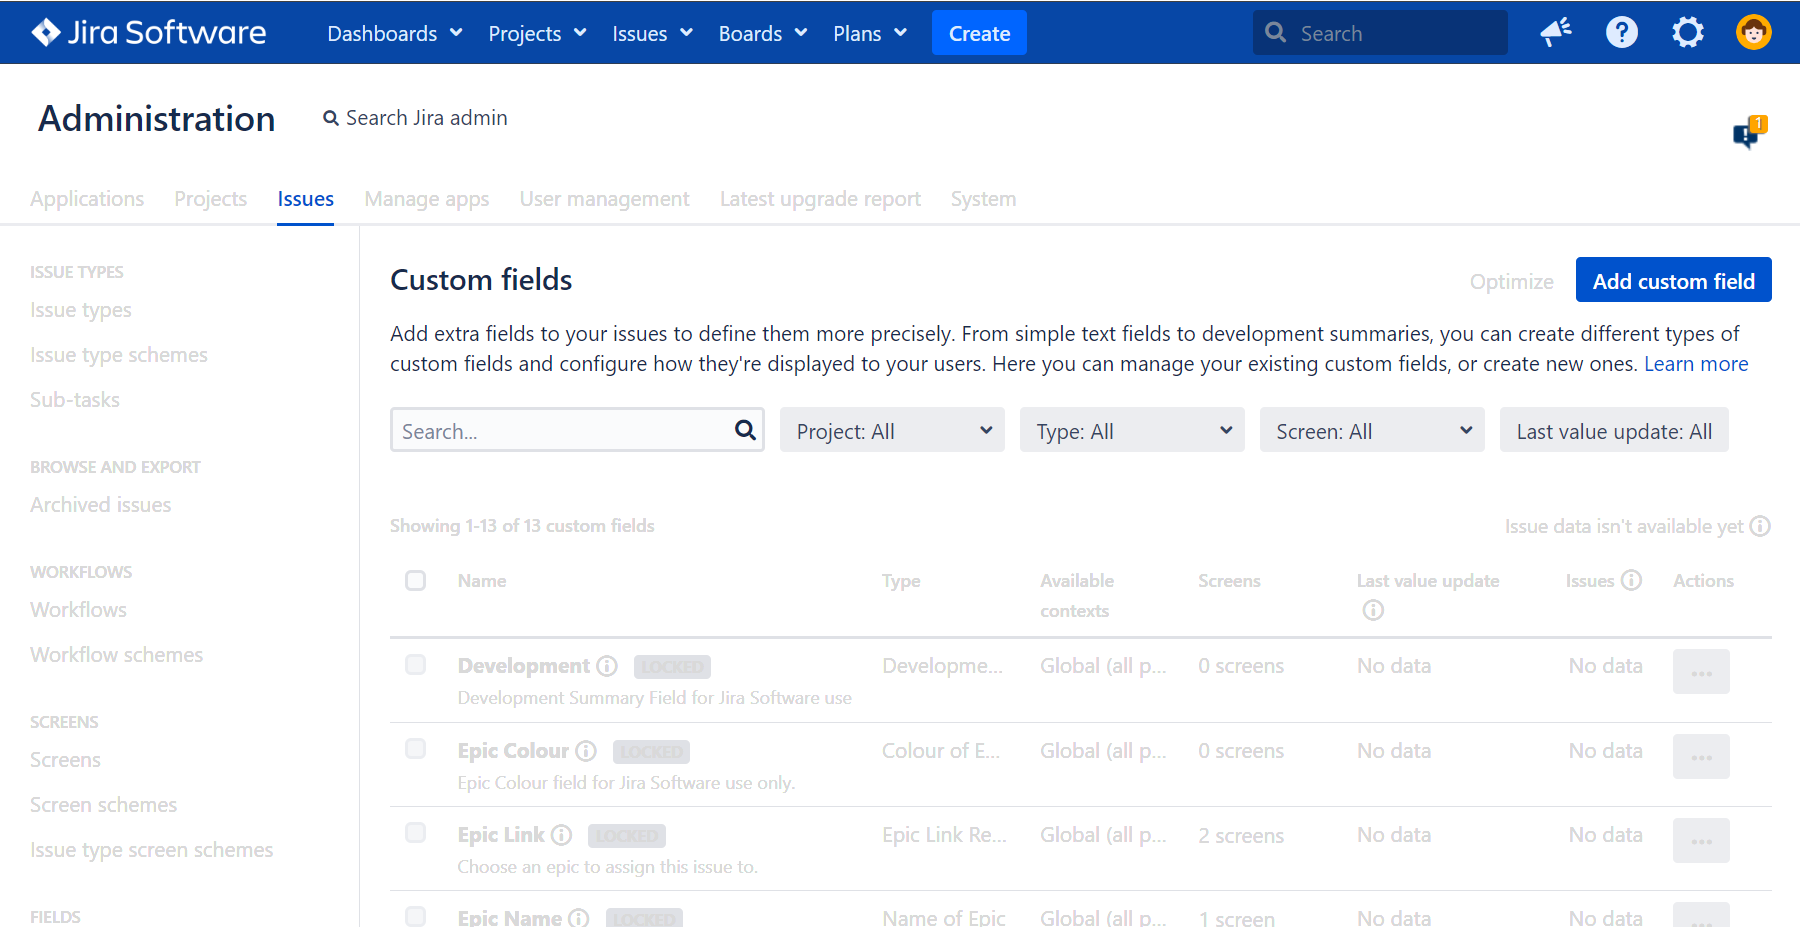
In the Select a field type modal dialog, select All to make sure you can see all available field types.
Select the field type and select Next. For example, let’s select the Checkboxes field type.
Configure the field by entering its name, description, and options if required. Select Next.
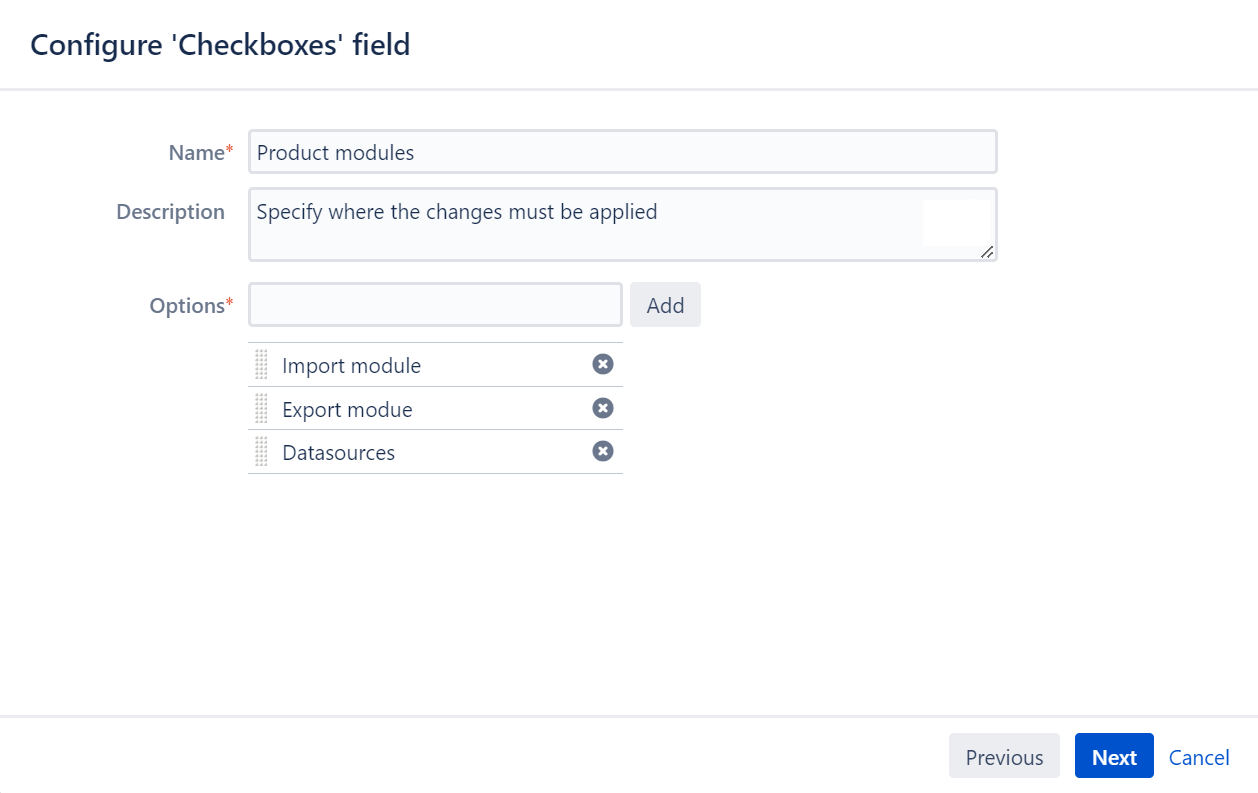
You’ll see the Name as the custom field's title when entering and retrieving information on issues. You’ll see the Description beneath the field when creating new issues and editing existing issues, but not when browsing issues.Configure the context for the field.
- Select projects where the custom field must be applied.
- Select Create.
Now, you can associate the new custom field with issue screens and then add the field to your issues. Learn more
Associating a custom field with an issue screen
After you create a custom field, you’ll be brought to the Screens page. Learn more about screens
Here, you can choose on which issue screens your custom fields should be displayed. For example, on the Default screen or Resolve issue screen.
To associate the field with the screens, select the checkboxes next to the desired screens and select Update.
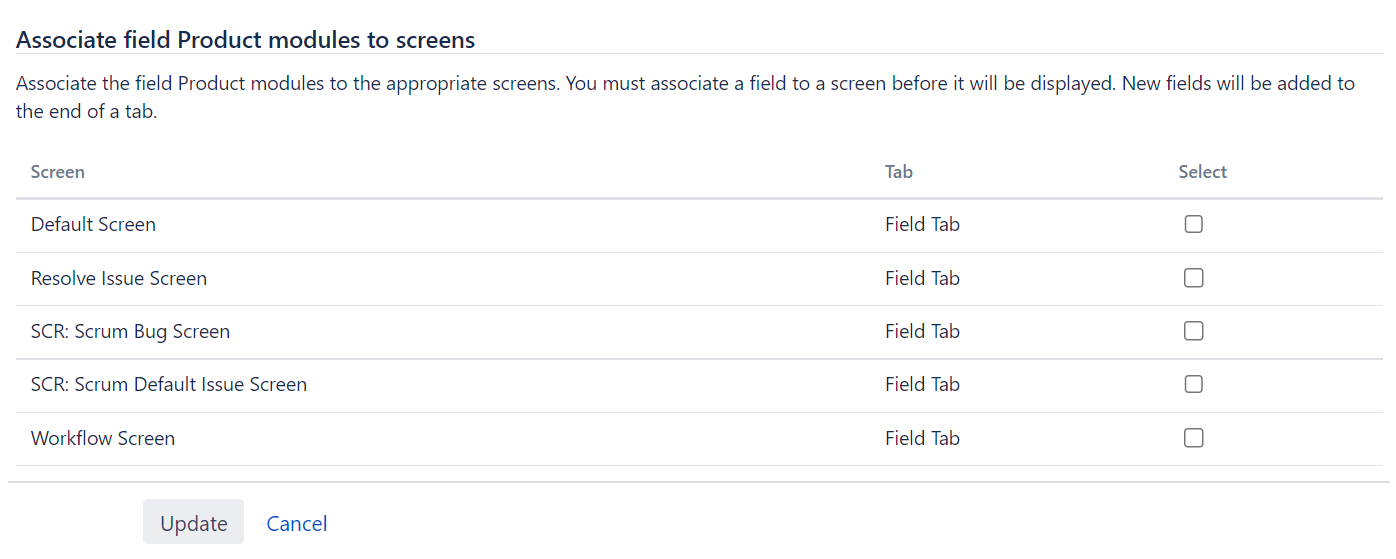
The custom field will be available on all issue screens for which you’ve enabled it. If you don’t select any screen here, you won’t see the custom field when creating or editing an issue.
Editing existing associations
You can always edit the associations between the custom field and selected screens. To do this:
- In the upper-right corner of the screen, select Administration > Issues.
Under Fields (the left-side panel), select Field configurations.
Select the field configuration.
Find your custom field in the list and select Screens.

Change the associations and select Update.
You can also add custom fields into existing issues regardless of the associations with screens.
Adding a custom field directly to an issue
Even if your custom field isn’t associated with an issue screen, you can still add this field to existing issues of a particular type. Before doing this, ensure you’ve enabled the field for the desired issue type.
To add a field to an issue:
Open an issue.
Select Admin > Add field. In the dropdown, select the field you want to see in the issue view.

Select Edit field to set a value for the field immediately.
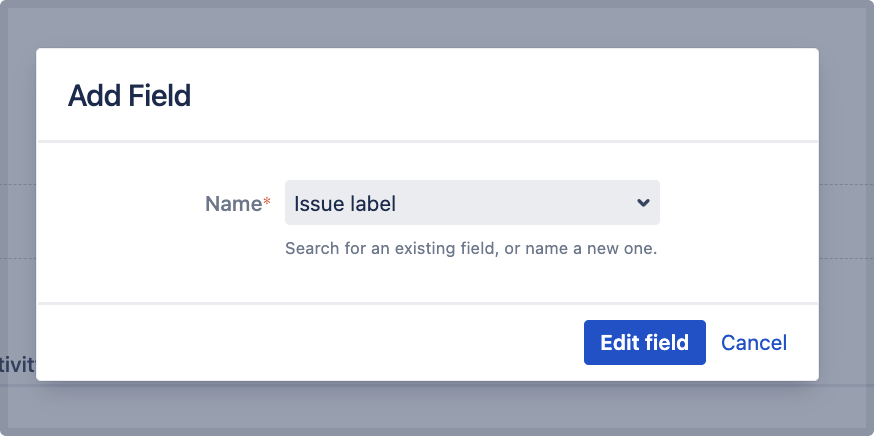
Select Submit.
For all of the following procedures, you must be logged in as a user with the Jira administrators global permission.
You’ll see the custom field either in the Details block or in the Edit Issue Screen. If the field isn’t editable, learn how to change that.
The association with the corresponding issue screens will be generated automatically.
The field will become available in all issues of all types for which you’ve enabled it. For example, your field is enabled only for bugs. So, as soon as you add it to one bug, the field will appear in all bugs either of specific projects or across your instance, depending on the context you’ve configured for the field.
Enabling the field in the board or backlog view
You can add the field from the Jira administration menu. See Configuring a screen's tabs and fields for instructions.
Alternatively, you can do this directly from the issue. As an example, let’s enable the “Issue labels” custom field that we added in the previous section:
Go to the board or backlog view and edit any existing issue.
In the upper-right corner, select Configure fields > Where is my field? to open the field helper.

Enter the name of your custom field. In this case, “Issue label”.
You’ll see the field’s status and details on why your field isn’t displayed and how to update the field’s configuration.

Update the field’s configuration for the Project and issue type scope from the Issue label configuration page. Check out Configuring custom field contexts for details.
- Update Field Screen configuration from the OP: Scrum Bug Screen' Screen configuration page. See Making the added field editable in the issue view section from Configuring the issue view for details.
Changing issue types where custom fields are added
You can always change the issue types for which you’ve added custom fields. For example, the field can be added only to bugs, but you want to add it to issues of all types.
To change issue types:
- In the upper-right corner of the screen, select Administration > Issues.
Under Fields (the left-side panel), select Custom fields.
Find the field in the list and select Configure in Actions.
On the page with configurations, select Edit configuration.
- Go to Choose applicable issue types and select Any issue type.

Learn more about how to edit custom fields
You can add the field to issues of all types. The association with the corresponding issue screens will be generated automatically.
Next steps
If you want to change the field’s context, see Configuring a custom field.
You can also find more custom fields from apps on the Atlassian Marketplace (for example, the Jira Toolkit).
To build your own custom field types, see this tutorial from the Jira Developer Documentation.
To discover more opportunities of using custom fields in Jira, try one of the apps from the Atlassian Marketplace:
Projectrak – Project Tracking for Jira: add, manage, and customize Jira project fields according to each project's needs.
Power Custom Fields: use formulas, scripts, calculated fields, and custom messages inside a custom field.
Elements Connect – external data fields: create custom fields that can be populated with any data source.
Dynamic Forms for Jira: use dynamic forms to build clear, relevant, and easy-to-navigate issue screens.