Create a new repository
Step 1. Create the repository
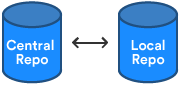
Initially, the repository you create in Bitbucket is going to be empty without any code in it. That's okay because you will start adding some files to it soon. This Bitbucket repository will be the central repository for your files, which means that others can access that repository if you give them permission. You will also copy a version of that repository to your local system—that way you can update it from one repo, then transfer those changes to the other.
Do the following to create your repository:
- From Bitbucket, click the + icon in the global sidebar and select Repository.
Bitbucket displays the Create a new repository page. Take some time to review the dialog's contents. With the exception of the Repository type, everything you enter on this page you can later change.

- Enter
BitbucketStationSuppliesfor the Name field.
Bitbucket uses this Name in the URL of the repository. For example, if the userthe_besthas a repository calledawesome_repo, the URL for that repository would behttps://bitbucket.org/the_best/awesome_repo. - Keep the rest of the options as is unless you want to change them:
- Access level—Leave the This is a private repository box checked. A private repository is only visible to you and those with access. If this box is unchecked, anyone can see your repository.
- Include a README?—If you recently created your account, this defaults to a tutorial README. For the purposes of this tutorial, pick either of the Yes options, that way you'll start out with a file.
- From Version control system, you can choose either Git or Mercurial. If you aren't sure which one to go with, keep Git as your option.
- Click Create repository.
Bitbucket creates your repository and displays its Source page.
Step 2. Explore your new repository
Take some time to explore the repository you have just created. To view the shortcuts available, press Shift and the ? key on your keyboard.
Click + from the global sidebar for common actions for a repository. Scan through the links in the navigation sidebar to see what's behind each one, including the repository Settings where you'll update repository details and other settings. Click the Commits in the sidebar. If you included a README, you'll see one commit on that page.
Your repository is private and you have not invited anyone to the repository, so the only person who can create or edit the repository's content right now is you, the repository owner.