Deploy with pull requests
You can deploy using pull requests in two main ways:
- Defining pipelines that only run on pull requests
- Using a specific structure for your repository
Define a pull request pipeline
For pull requests within your repository, you can define a special pipeline which only runs on pull requests. This pipeline can be configured to deploy in the same way as a regular pipeline. We recommend only using this to deploy to test environments, as you've not fully merged yet!
Restrict pull requests to certain branches
Step 1: Define the repository structure
Repository branches:
master: Your integration branch
staging: Use this branch to trigger deployments to staging
production: Use this branch to trigger deployments to production
feature/xxx: All feature branches
With the branch structure above, you can define a .YML file that has different flows for different branches:
# This is a sample build configuration for Javascript.
# Only use spaces to indent your .yml configuration.
# -----
# You can specify a custom docker image from Docker Hub as your build environment.
image: node:10.15.0

pipelines:
  default:
    - step:
        script:
          - npm install
          - npm test
  branches:
    staging:
      - step:
          script:
            - npm install
            - npm test
            - export HEROKU_APP_NAME=$STAGING_APP
            - ./heroku_deploy.sh # Check https://bitbucket.org/rjst/heroku-deploy to understand how to deploy to Heroku
    production:
      - step:
          script:
            - npm install
            - npm test
            - export HEROKU_APP_NAME=$PROD_APP
- ./heroku_deploy.sh # Check https://bitbucket.org/rjst/heroku-deploy to understand how to deploy to Heroku- You can check your bitbucket-pipelines.yml file with our online validator.
- All branches except staging and production use the default pipeline that simply runs the tests.
- The staging and deployment branches have a different configuration and are set up to deploy to their respective staging and production environments.
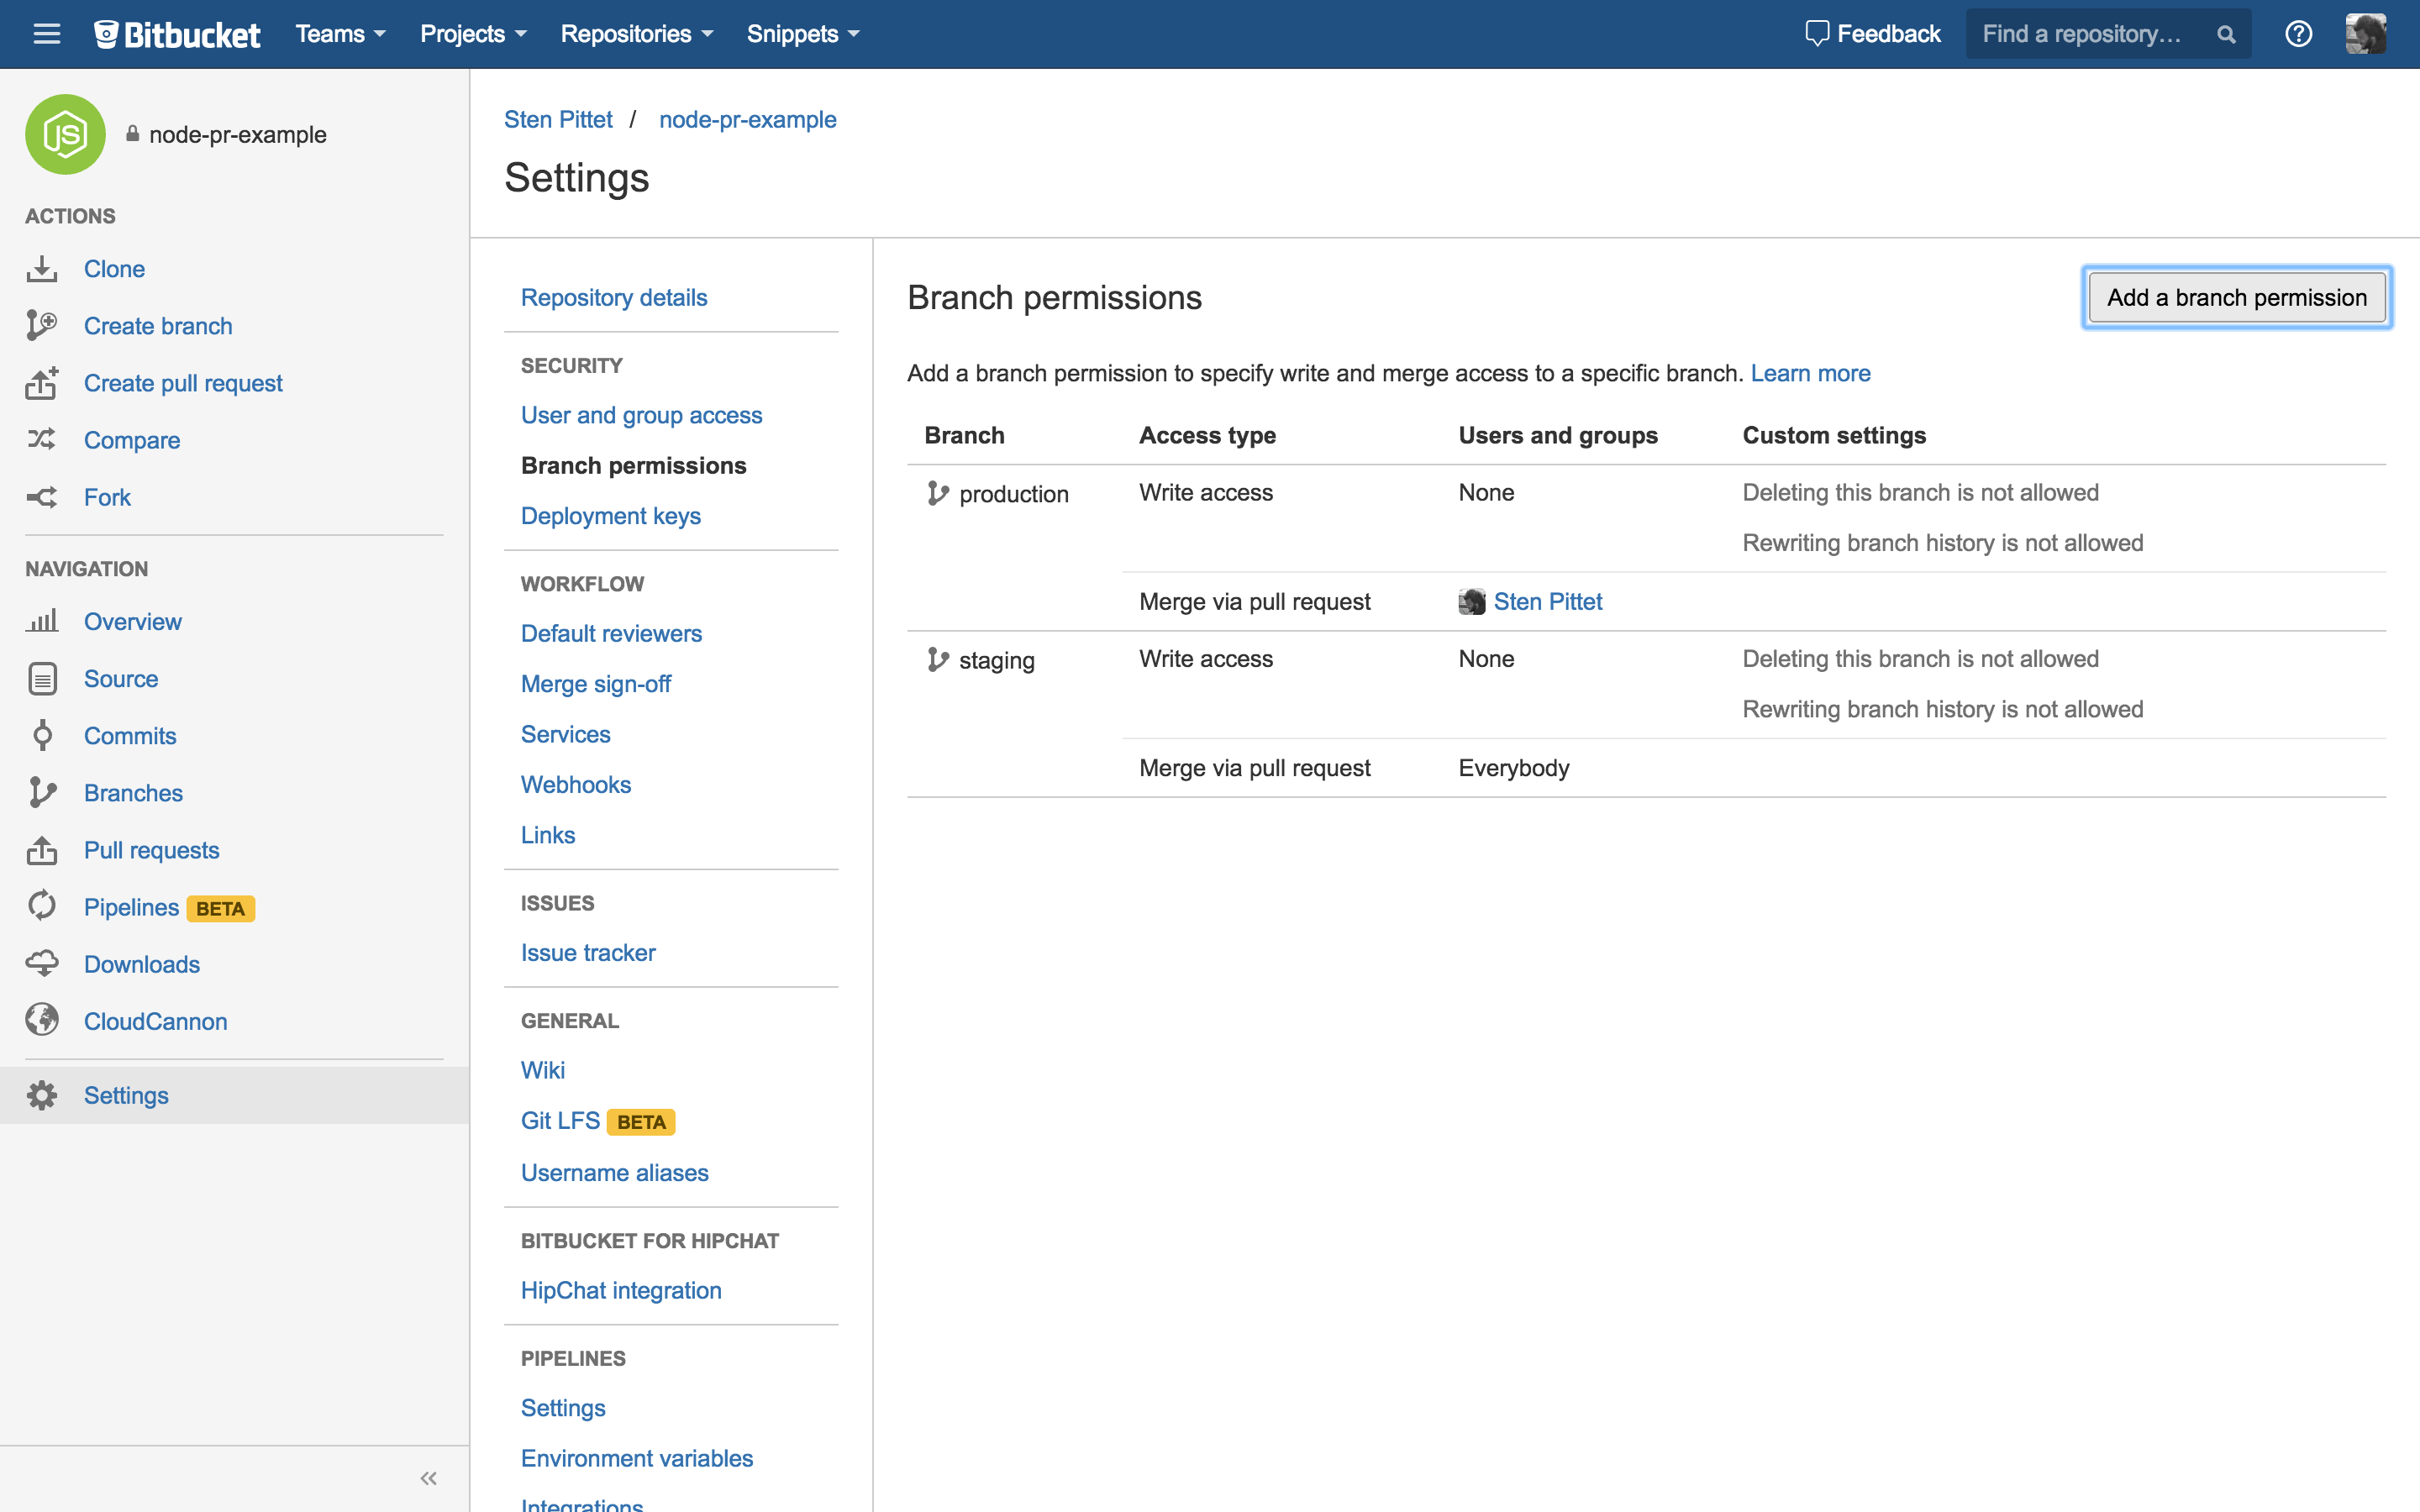
Step 2: Set branch permissions
In order to protect the staging and production branches from being pushed directly, you can use branch permissions to only allow merges via pull requests.
In the example below, branch permissions are set in a way that everyone can merge to staging, but only selected individuals can merge to production:
Step 3: Start deploying with pull requests
You can now simply develop a new feature or improvements on the feature branches and integrate them into master. Then, you can issue a pull request to the staging branch to deploy changes to your staging environment:

Creating a pull request allows you to review the changes before you deploy them to the staging environment. Repeat the process to deploy to production: create a pull request going from the staging branch to the master branch.
The image below presents a view of a pull request merged from staging to production:
