Update application links to use OAuth

OAuth security for application links

On this page

Still need help?

The Atlassian Community is here for you.

Ask the community

As of version 5.2, the Application Links plugin only supports OAuth authentication. The Trusted Applications and Basic Access authentication types have been deprecated for some time now, and are no longer supported. 

When you first upgrade to an Atlassian server application that bundles version 5.2 (or later) of the Application Links plugin, you may need to update your application links. See the Application links version matrix. This page has detailed instructions for how to update application links.

You'll know a link needs updating if you see the DEPRECATED lozenge on the 'Configure Application Links' page in the admin area of your application. In most cases, the link can be updated automatically.

If an application link is not working as expected, refer to the Troubleshoot application links page to correct any problems first.

Choose the best update path

We recommend following the automatic update path, but you can choose the best update path for your particular application link by matching the conditions in the following table:

Update path
(click for instructions) 
Link status

The link uses Trusted Apps
or Basic Access authentication

The link also uses
OAuth authentication
You are logged in with
sysadmin permissions
on the remote application
1. Auto update (recommended) DEPRECATED(tick)(error)(tick)
2. Manual update DEPRECATED(tick)(error)(error)
3. Auto remove deprecated DEPRECATED(tick)(tick)(tick)
4. Manually remove deprecated - newer plugin versionsDEPRECATED(tick)(tick)(error)
5. Manually remove deprecated - older plugin versionsDEPRECATED(tick)(tick)(error)

Path 1: Automatic update to OAuth authentication (recommended)

We highly recommend that you update automatically. The automatic update path adds OAuth authentication to both ends of the application link, checks that the new connection is working correctly, and then disables any Trusted Applications or Basic Access authentication types on the link.

Note that you can only update an application link automatically if you are logged in to the local application using an account that also has sysadmin permissions on the remote application. If you don't have such an account, you can:

  • Obtain temporary sysadmin permissions so you can perform the update automatically
  • Find someone in your organization who does have such an account to perform the automatic update for you.
  • Follow the manual update path described on this page.
Click to see auto update instructions...


Click the DEPRECATED lozenge for the link you're updating:

Click Update in the dialog.

That's it! You're done!

Path 2: Manual update from deprecated to OAuth authentication

We highly recommend that you take advantage of the automatic update path, by obtaining temporary sysadmin permissions on the remote application for your login account. If that is not possible, then follow the manual update path described in this section.

The manual update path involves manually adding OAuth authentication to both ends of the application link, and then disabling any Trusted Applications or Basic Access authentication on the link.

Choose this path if you're logged in to the local application with an account that does not have sysadmin permissions on the remote application, and you're not able to get those sysadmin permissions.

Click to see manual update instructions...

Begin in the local application

First we're going to add OAuth authentication to this end of the link.

Go to the 'Configure Application Links' page in the admin area of the local application.

You'll see a DEPRECATED lozenge beside links that need to be updated:

Click the pencil icon on the right to edit the configuration for the link you are updating.

In the 'Edit' dialog, set the local authentication for the link under 'Connections':

Choose either:

  • OAuth if the applications have different userbases.
  • OAuth (impersonation) if both applications share the same userbase (typically managed with an external directory using LDAP).

See OAuth security for application links for more information.

Make sure that that the authentication matches for the local and remote ends of both the incoming and outgoing directions.

Click Save changes.

Now you'll see a CONFIG ERROR lozenge for the link. Don't worry, we'll fix that shortly!

Now, in the remote application

We're going to add OAuth authentication to the 'remote' end of the link. Choose the instructions column here that matches the UI you see (they both achieve the same result):

For applications with Application Links version 5.2 or later:

Go to the 'Configure Application Links' page in the admin area of the remote application: 

Click the pencil icon on the right to edit the configuration for the link you are updating.

In the 'Edit' dialog, set the local authentication for the link under 'Connections':

Choose either:

  • OAuth if the applications have different userbases.
  • OAuth (impersonation) if both applications share the same userbase (typically managed with an external directory using LDAP).

See OAuth security for application links for more information.

Make sure that that the authentication matches for the local and remote ends of both the incoming and outgoing directions.

Click Save changes.

For applications with versions of the Application Links plugin earlier than 5.2:

Go to the 'Configure Application Links' page in the admin area of the application:

Click Edit for the application link you are updating.

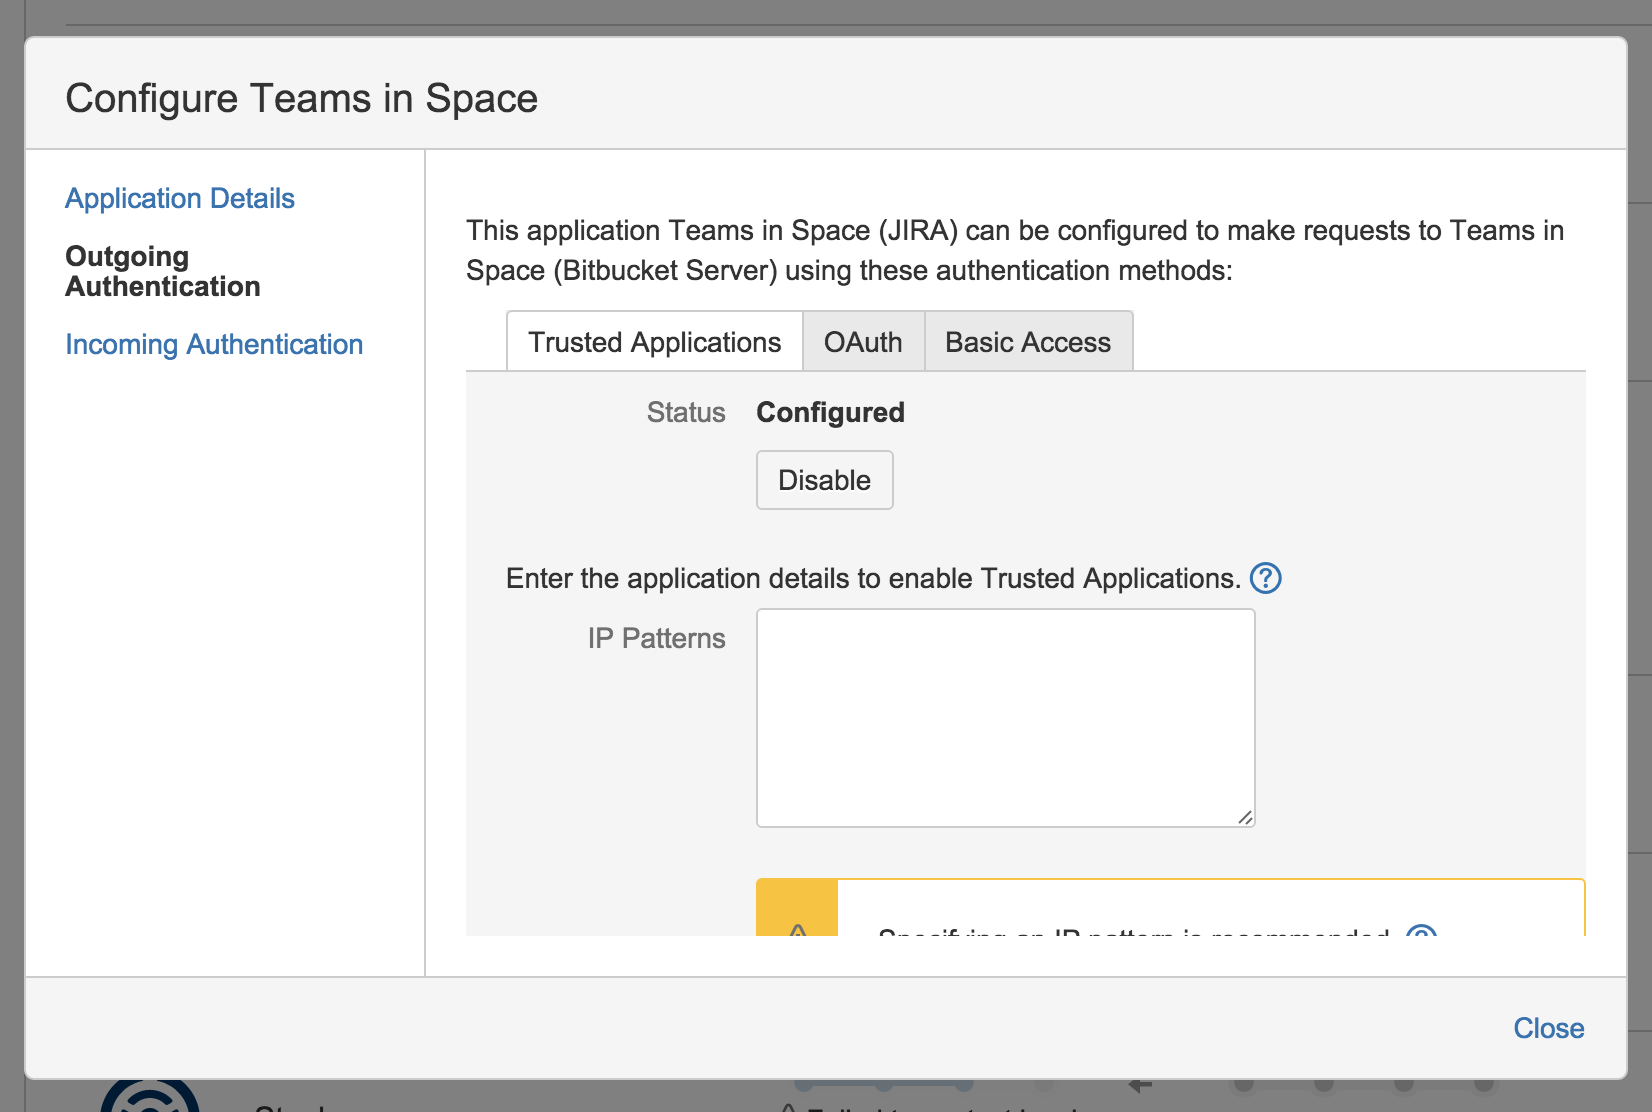
In the 'Configure' dialog, click Outgoing Authentication and then the OAuth tab:

Now, select Enable 2-Legged OAuth, assuming that the applications have different userbases.

Optionally, select Enable 2-Legged OAuth with impersonation, if both applications share the same userbase (typically managed with an external directory using LDAP).

Click Update.

Now, click Incoming Authentication and then the OAuth tab:

Now, select Enable 2-Legged OAuth, assuming that the applications have different userbases.

Optionally, select Enable 2-Legged OAuth with impersonation, if both applications share the same userbase.

Click Update.

Close the dialog.

Once you've done that you'll see a DEPRECATED lozenge for the link. Believe it or not, that's actually progress!

Next, we're going to disable any Trusted Apps or Basic Access authentication while we're at the 'remote' end of the link. You're still on the 'Configure Application Links' page, right? Again, choose the instructions column here that matches the UI you see (they both achieve the same result):

For applications with the Application Links plugin version 5.2 or later: 

Click the DEPRECATED lozenge for the link you're updating:

Click Update in the dialog.

For applications with versions of the Application Links plugin earlier than 5.2: 

Click Edit for the application link you are updating.

In the 'Configure' dialog, click Outgoing Authentication and then the Trusted Applications tab:

Click Disable.

Click Disable on the Basic Access tab too.

Now for Incoming Authentication:

Click Disable.

Click Disable on the Basic Access tab too.

Close the dialog.

Once you've done that you'll see a CONNECTED lozenge for the link. Great!

Back in the local application

You'll still see a DEPRECATED lozenge beside the link you're updating.

We need to remove any Trusted Apps or Basic Access authentication on the 'local' end of the link.

Click the DEPRECATED lozenge for the link you're updating:

Click Update in the dialog.

You'll see a CONNECTED lozenge for the link. You're done!


Path 3: Automatically remove deprecated authentication so only OAuth is used

When the application link already has OAuth authentication working, updating the link simply involves removing any Trusted Applications or Basic Access authentication on the link.

The link can be updated automatically if you are logged in to the local application using an account that also has sysadmin permissions on the remote application. If you don't have such an account, you can:

  • Obtain temporary sysadmin permissions so you can perform the update automatically
  • Find someone in your organization who does have such an account to perform the automatic update for you.
  • Follow the manual update path described on this page.
Click to see auto removal instructions...

Click the DEPRECATED lozenge for the link you're updating:

Click Update in the dialog.

That's it! You're done!

Path 4: Manually remove deprecated authentication when using newer versions

For applications with the Application Links plugin version 5.2 or later.

When the application link already has OAuth authentication working, updating the link simply involves removing any Trusted Applications or Basic Access authentication on both ends of the link.

We highly recommend that you take advantage of the automatic update path, by obtaining temporary sysadmin permissions on the remote application for your login account. If that isn't possible, then follow the manual update path described in this section.

Click to see manual removal instructions...

Begin in the local application

Go to the 'Configure Application Links' page in the admin area of the local application.

Click the DEPRECATED lozenge for the link you're updating:

Click Update in the dialog.

You'll see this warning:

so make sure you also remove the deprecated authentication types from the remote application, described next.

Now, in the remote application

Again, go to the 'Configure Application Links' page in the admin area of the remote application.

Click the DEPRECATED lozenge for the link you're updating:

Click Update in the dialog.

Path 5: Manually remove deprecated authentication when using older versions

For applications with versions of the Application Links plugin earlier than 5.2.

When the application link already has OAuth authentication working, updating the link simply involves removing any Trusted Applications or Basic Access authentication on the remote end of the link.

We highly recommend that you take advantage of the automatic update path, by obtaining temporary sysadmin permissions on the remote application for your login account. If that is not possible, then follow the manual update path described in this section.

Click to see manual removal instructions...

Begin in the local application

Go to the 'Configure Application Links' page in the admin area of the local application.

Click Edit for the application link you are updating.

In the 'Configure' dialog, click Outgoing Authentication and then the Trusted Applications tab:

Click Disable.

Click Disable on the Basic Access tab too.

Now for Incoming Authentication:

Click Disable.

Click Disable on the Basic Access tab too.

Close the dialog.

Now, in the remote application

Again, go to the 'Configure Application Links' page in the admin area of the local application.

Click Edit for the application link you are updating.

In the 'Configure' dialog, click Outgoing Authentication and then the Trusted Applications tab:

Click Disable.

Click Disable on the Basic Access tab too.

Now for Incoming Authentication:

Click Disable.

Click Disable on the Basic Access tab too.

Close the dialog. You're done!

Last modified on Jul 7, 2016

Was this helpful?

Yes
No
Provide feedback about this article
Powered by Confluence and Scroll Viewport.