Restoring a JIRA Cloud Backup into a JIRA Cloud instance
Scenario
To import to JIRA Cloud, a different backup file structure is needed. You will need to extract the data directory from the JIRA export and zip the contents in different files.
This guide is an extension to the section Structure of JIRA Cloud export for importing into JIRA in Exporting issues.
How to:
1. Extract the backup file generated with Backup Manager. You'll have a similar output:
JIRA-backup-20130521
├── activeobjects.xml
├── data
│   ├── attachments
│   └── avatars
└── entities.xml
2. Zip each folder inside data, separately. You'll have a .zip file for each of the existing folders.
If a folder is missing from your backup (avatars, for example, it means you don't have such content to be imported)
3. Upload all files to the WebDAV directory of the target Atlassian Cloud instance, including the original backup created with Backup Manager.
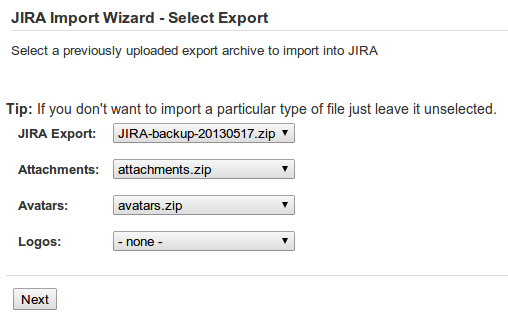
4. On the target instance, Click on Cog Icon > System > JIRA Import. Then click on "Next". Make sure to select the correct backups for each of the file types: