Testing Webhooks in Jira Cloud
Platform Notice: Cloud Only - This article only applies to Atlassian products on the cloud platform.
Summary
Are you uncertain if your configured Jira Webhook has been triggered? Are you testing integrations and need to verify the data sent when a Jira Webhook is triggered? This knowledge base article will guide you through these questions and more.
In this article, we will create a mock API endpoint and use it to configure a Jira Webhook. This will help us determine if the Webhook was triggered and inspect the data sent as part of the request.
Diagnosis
Diagnosing issues with Jira Webhooks often involves verifying if the Webhook has been triggered and inspecting the data sent during the trigger. Users may encounter various scenarios, such as the Webhook not reaching the destination.
Cause
The root causes can vary, for example, configuration errors in the Jira Webhook settings, network issues, or authentication problems. Knowing if the data is being sent from Jira and the actual content of the data will help you continue testing and fine-tuning the rest of the configuration.
Solution
Creating a mock endpoint
We will use Beeceptor, an online tool that requires no downloads. Create an endpoint by entering a unique name (e.g., include your initials for uniqueness), and launch a mock server with the provided project name:
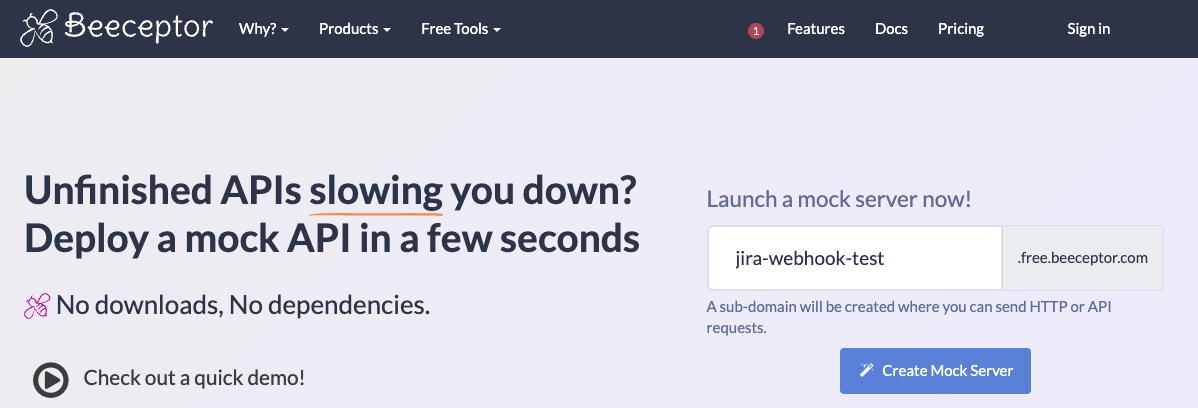
If everything is correct, you should see the following screen:
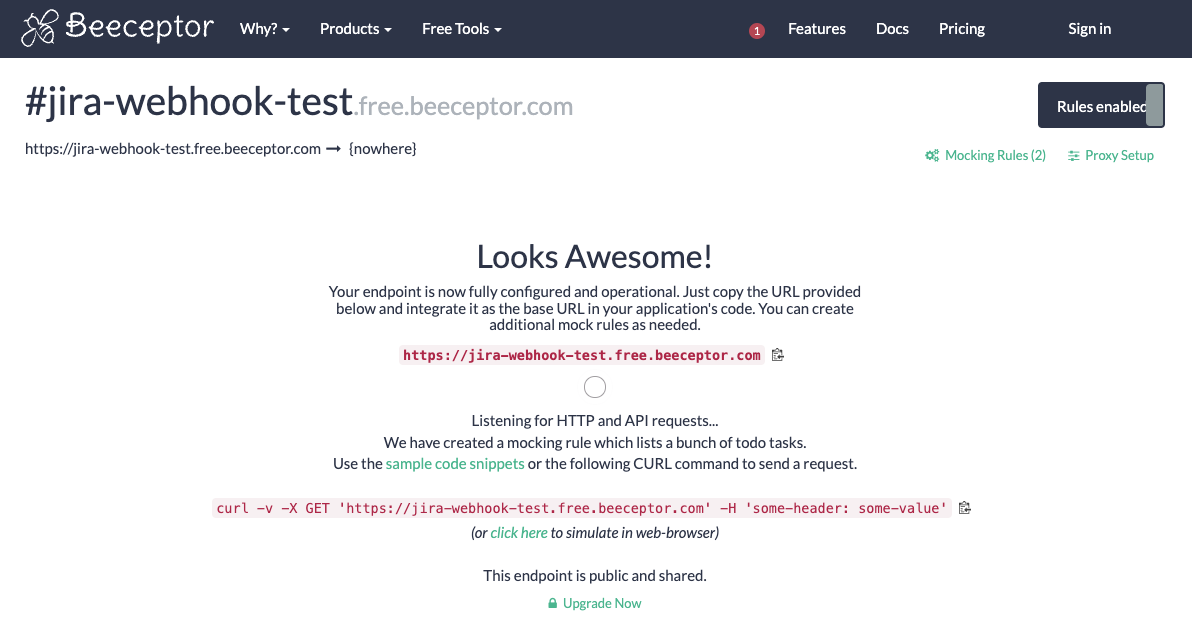
Seeing this page means your endpoint is configured and operational. Copy the provided URL (e.g., https://jira-webhook-test.free.beeceptor.com) as we will use it in a future step to configure the Jira Webhook. Keep this tab open!
This endpoint is public and shared, intended for testing purposes with test issue data only.
Configuring the Jira Webhook
Log in as a user with the Administer Jira global permission.
Choose > System. Under Advanced, select WebHooks.
Click on "Create a Webhook".
Set the Beeceptor endpoint (
https://jira-webhook-test.free.beeceptor.comin this case) in the Jira Webhook URL field: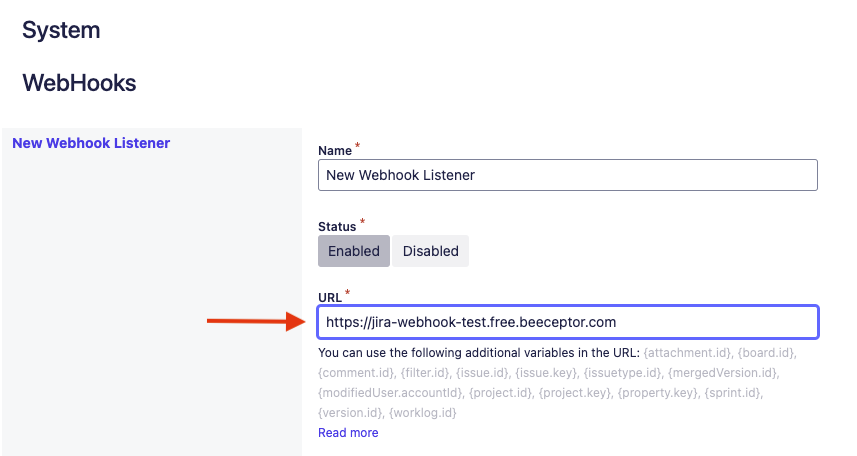
Assign a name and description that clearly describes your Jira Webhook's purpose.
Select the events that will trigger this Webhook. For simplicity, we will choose Issue related events to send a request when an issue or comment is created or updated:
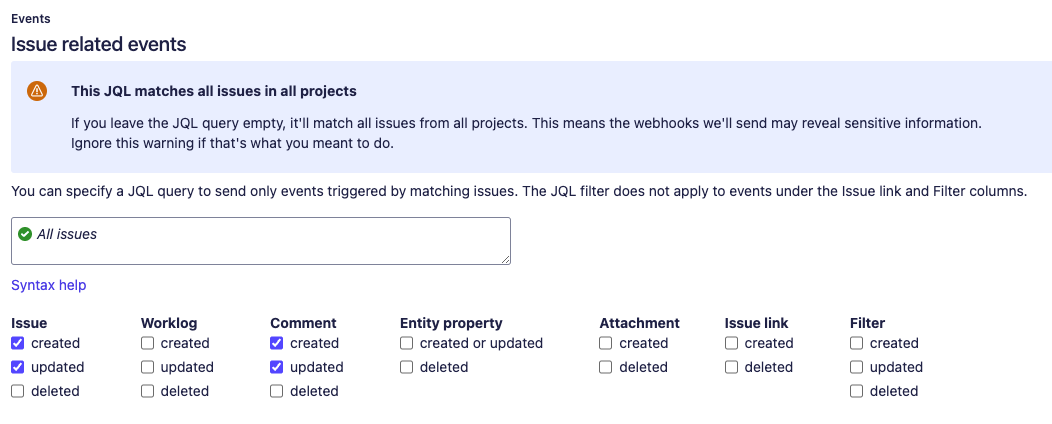
You can also consider other events:
User related events
Jira configuration related events
Project related events
Jira Software related events
If you need to restrict the Webhook trigger, use a proper JQL query. For this demonstration, we won’t include any JQL, so the Webhook will trigger for any issue created, updated, or any comment added or edited.
Ensure to untick the Exclude body checkbox to receive a JSON payload with the data:

Click Create at the bottom of the page to finalize your Webhook configuration:
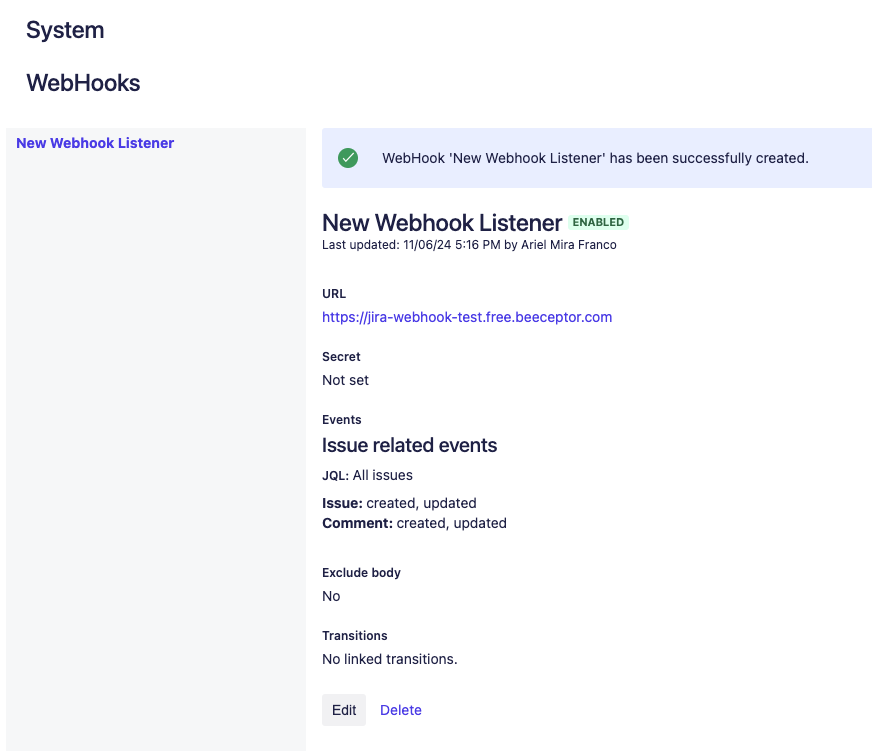
Testing the Webhook
It's now time to test the Webhook!
After editing an issue for the purpose of this test, check the Beeceptor tab. You should see a new request sent to the mock endpoint. Expand the request to view details such as the AAID of the user who triggered the event (e.g., the user who edited the issue). You can also inspect headers and use the "pretty print" function to view the formatted JSON request body:
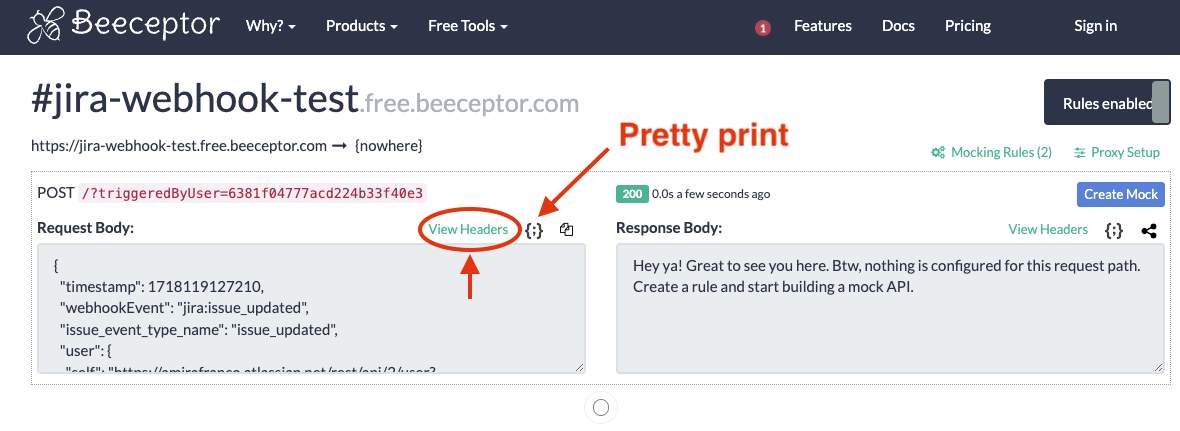
Analyzing the Request Body will help you understand the data sent with this request, which can be useful for further development and testing. By following these steps, you can successfully confirm whether a Jira Webhook was triggered and inspect the transmitted data.
Was this helpful?