Using the help center
Here's a quick look at the help center layout:

Portal cards: View all customer portals at a glance and switch between them quickly.
Recent: View the types of requests that you raised recently.
Sorting: Sort customer portals by popularity, or the ascending or descending order. The popularity of your portals is based on the number of requests raised.
Customizing the help center
To help your customers get the most out of your help center, we recommend that you do three things:
Brand your help center.
Set up a knowledge base for self-service.
Share the help center with customers.
Brand the help center
Who can do this?
![]() Jira admins
Jira admins
You can brand the help center in a number of ways and allow project admins and agents to add announcements to the help center.
- In the upper-right corner of the screen, select Administration and then select Applications.
- Under Jira Service Management (in the left-side panel), select Configuration.
- In the Help Center section, select the View and customize link.
Using the options in this section, you can allow project admins and agents to add announcements to the help center. - From the Customize help center panel (on the right side), you can configure any of the following:
- Add a help center announcement
- Add an announcement to the log in screen
- Give your help center a name
- Add a logo
- Add a banner image or banner background color
- Change the color of components
- Select Save changes to publish your announcement and update your branding.
Branding doesn't stop at just the help center. You can also brand the customer portal that belongs to a service project. How to configure the customer portal.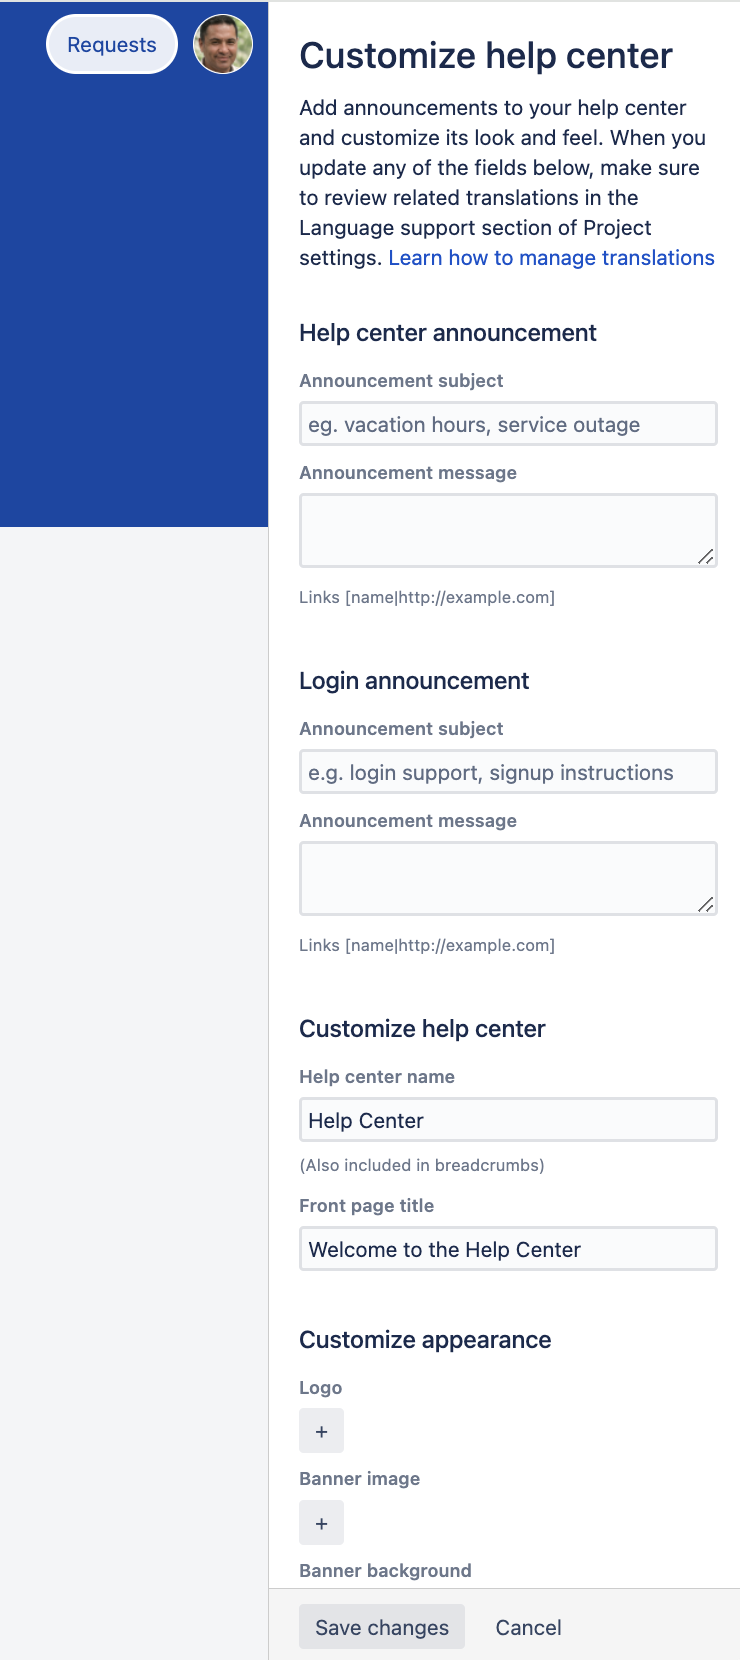
Set up a knowledge base
If you have Jira Service Management and Confluence, you can deflect common requests and solve issues faster by connecting your service project to Confluence and using it as a knowledge base. How to set up a knowledge base for self-service.
Customers can read articles in the help center to self-serve their requests and mark articles as helpful or not. If customers still need to contact your team after reading a knowledge base article, they can select one of the suggested request types or browse all customer portals they have access to.
Share the help center with customers
The help center shows all of the customer portals in your Jira Service Management instance. From here, customers can raise requests in any of the portals they have access to.
Using the Requests button in the top-right corner of the screen they can view all requests they’ve raised. The filters and the sort options in the columns helps customers quickly locate requests.
How to view requests in the help center

To share the help center with customers, send them the following link:
http://<your_computer_name_or_IP_address>:<your_http_port_number>/jira/servicedesk/customer/portals
If you add a customer to a service project, they'll have an account in the help center.
To share the direct link to a specific portal, send them the Visit the portal link from Customer channels of that service project.
Manage access to the help center
You can configure your help center access in different ways:
- Choose who can raise requests.
- Choose who your customers can share requests with.
More about managing access to your service project
The customer portal integrates with Atlassian Crowd, Atlassian's single sign-on (SSO) framework. For information about integrating with third-party SSO providers, refer to Single sign-on integration with Jira and Confluence.
How the smart search works
The smart search algorithm learns from past searches and request types raised, so if a customer has previously raised a hardware request for a laptop and monitor they can search for 'laptop' or 'monitor' in the future to find the same hardware request type. It also performs a similarity search, so if you searched for 'Onboard employee' you'd see the 'Onboard new employee' request type in the results.
Furthermore, the smart search has been built to be language-agnostic, it can learn from search words or phrases entered in any language. As customers enter more searches and raise more requests, the search algorithm gets smarter regardless of the language used.
What you can do to improve search
Your team can help improve search results by updating the request type field. For example, if a customer has searched for 'new laptop' but raised a software request instead of a hardware request, agents can correct the request type field in the issue view. More about request types.