Restricting issues to project roles
By setting the issue security levels and automation rules, you can control which users can access the issue based on their project role and the current issue status. This protects sensitive information by allowing only people with the specific project role to view and edit issues.
This solution is the recommended alternative to Browse Projects permission properties, which are deprecated in Jira 11.2.0. About deprecation of Browse Project permissions
On this page:
Before you begin
- Log in as a user with the Jira Admins global permissions to configure issue-level security. About global permissions
- Make sure all users who want to use issue-level security have the project-specific "Set issue security" permission. About managing project permissions
Checking for project roles
Check or create project roles that you want to restrict access to:
- In the upper-right corner of the screen, select Administration
 , then System.
 - In the menu on the left, select Project roles.

- Make sure the needed project role is there. If it isn’t, add or edit project roles. About managing project roles
In the next section, you’ll add users to the project roles you configured.
Adding people to project role
To add people to a project role:
- Open the needed project. In the lower-left corner of the screen, select Project settings.
- Select Users and Roles, and then Add users to a role.
- In the Add users to a role dialog:
- Type name, group, or email address of the needed user.
- Select the needed user role.
- Select Add.
- Repeat step 3 for all the needed users.
As the result, you should see have your users and groups mapped to their project roles.

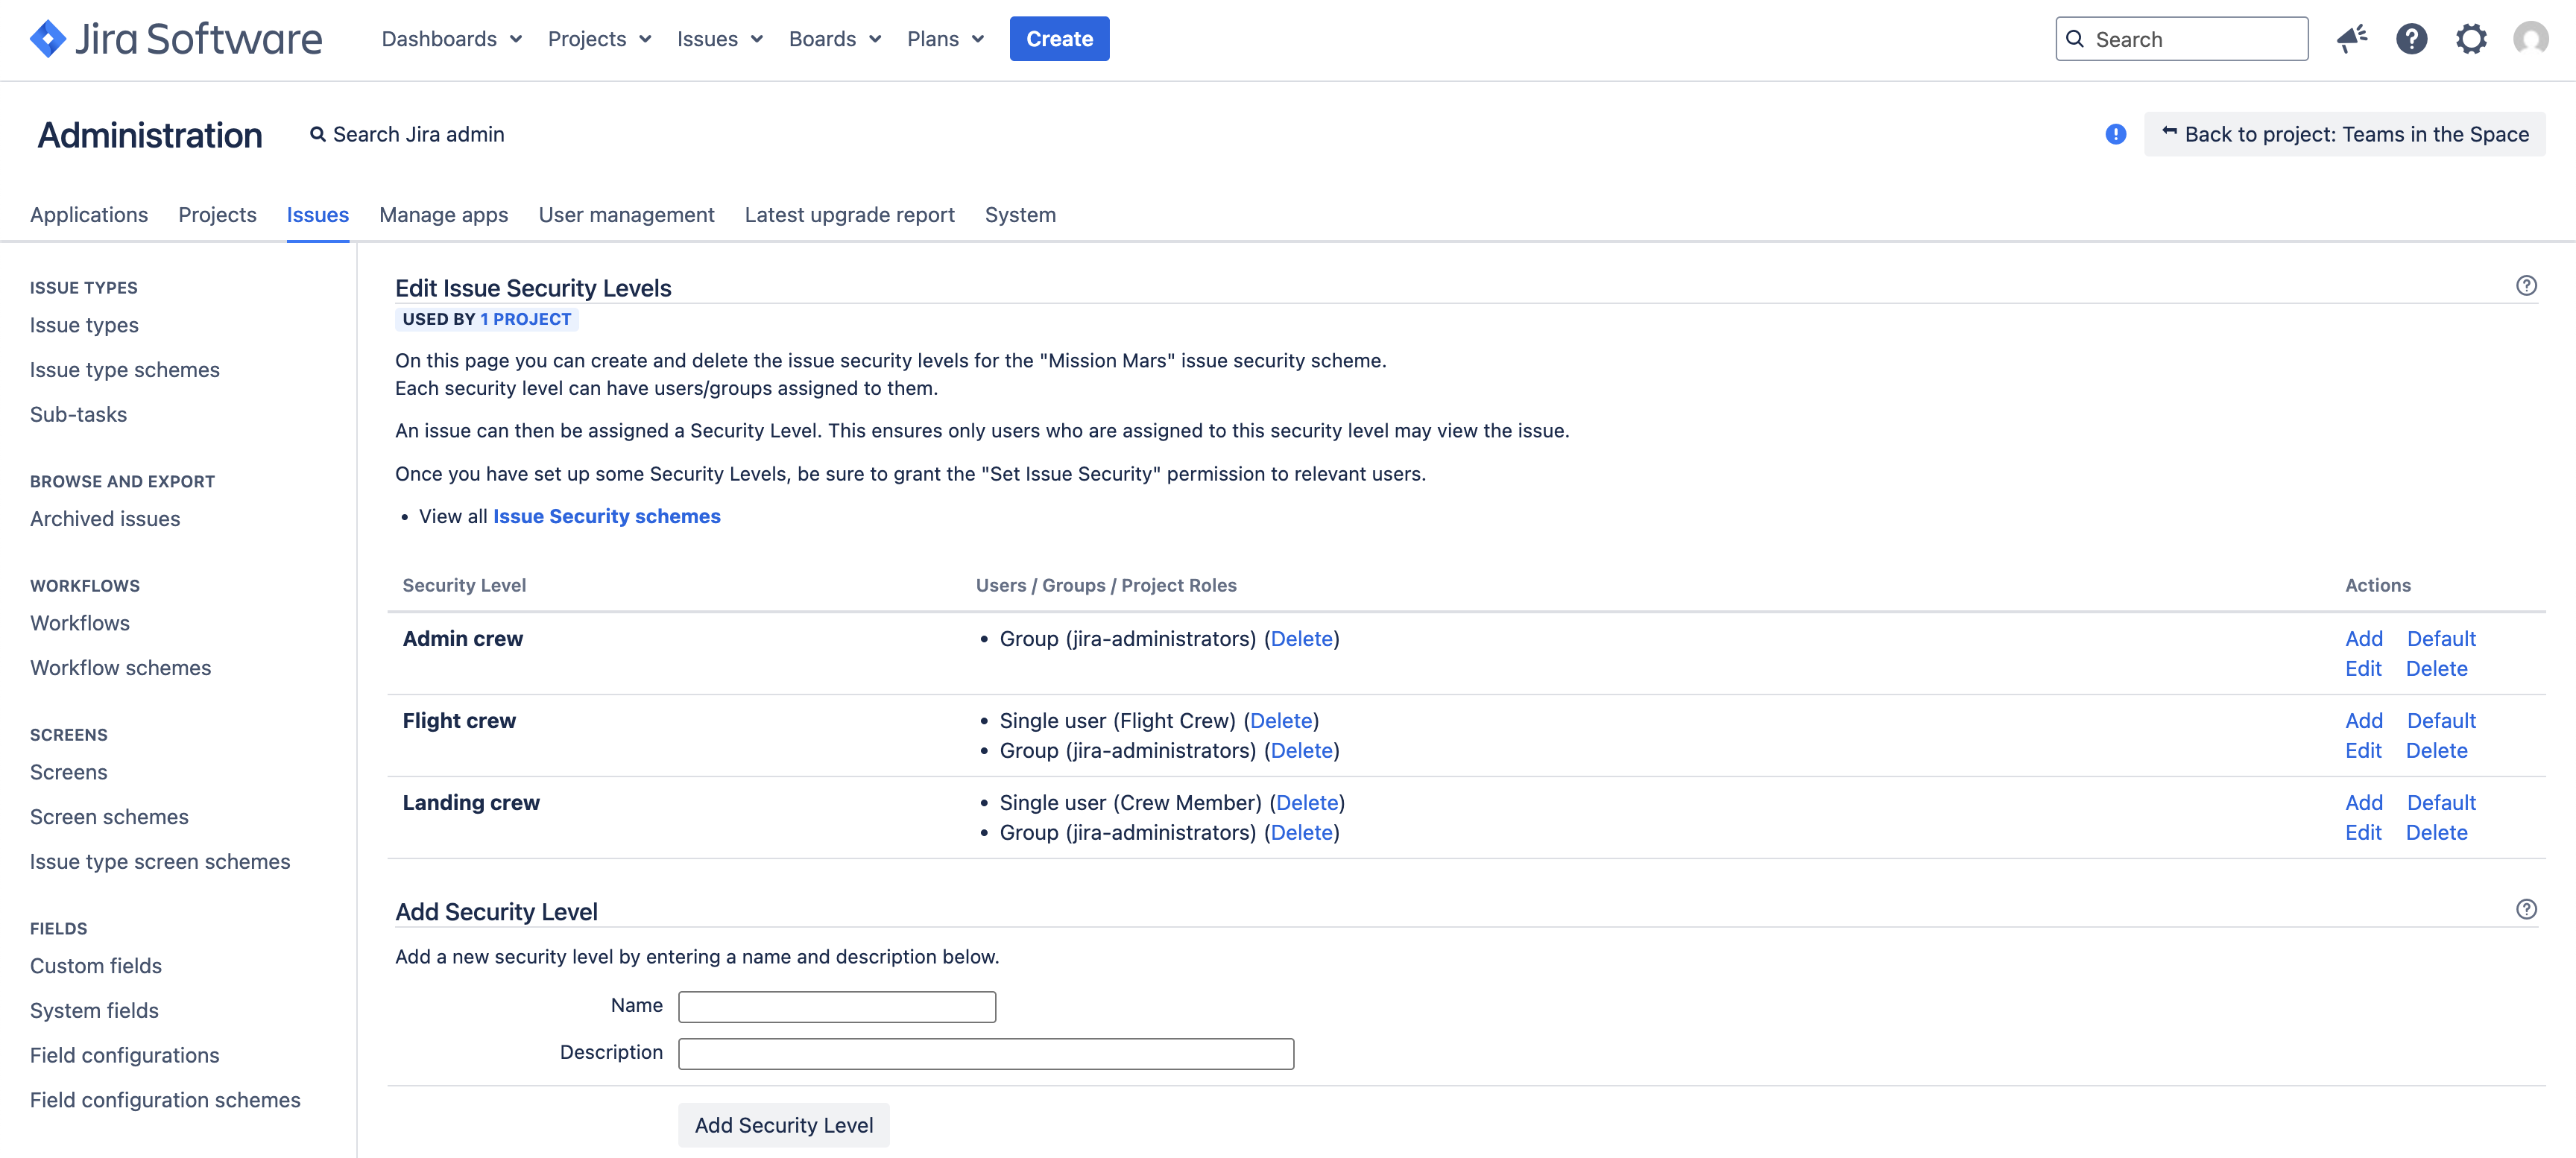
Adding issue security scheme
In this step, you’ll add or edit an issue security scheme, and then create the issue security levels for it. Each security level can have users or groups assigned to them. An issue can then be assigned a Security Level. This ensures only users who are assigned to this security level may view the issue.
To add or edit an issue security scheme:
- Open the needed project. In the lower-left corner of the screen, select Project settings.
- Select Issue Security.
- In the upper-right corner of the screen, select Actions.
- If your project already has the needed issue security scheme, select Edit issue security. The Edit Issue Security Levels page will open.
- If no scheme is added yet, click Select a Scheme, create it if needed, and then associate the scheme with your project. About creating and configuring the issue security schemes
- On the Edit Issue Security Levels page, under Add security level, and then fill in the Name and Description fields.

- Select Add security level. Repeat steps 4 and 5 for each security level.
- The new security level appears in the table. To configure its permissions, in the Actions column, select Add.
- On the Add User/Group/Project Role to Issue Security Level page, choose the project role you want to restrict issues to.

- Select Add. Repeat steps 7 and 8 for each security level that you’re configuring.
Make sure to add your user to each security level that you’re configuring. Otherwise, you won’t be able to configure automations in the next section.
As the result, you should see all the needed security levels associated with user, groups, or project roles.
Adding automation rule
The next step is to add an automation rule that will trigger when the issue changes its status and restrict issue visibility to the members of security levels that you’ve configured.
To add an automation rule:
- Open the needed project. In the lower-left corner of the screen, select Project settings.
- Select Automation, and then Create rule.
- In the New trigger step, select the Issue Transitioned trigger.
- Select the From status and To status you need, and then select Save.

- In the Add component step, select New Action.
- Select Edit Issue action.
- In the Choose field to set menu, find and select Security level.
- Select the desired security level from the dropdown and select Save. If you don’t see the needed security level, return to its settings and make sure your user is a member of security level in question.

- Enter the rule name and select Turn it on.
Now the security level will be updated whenever issue is transitioned.