Adding custom fields to emails
This tutorial will help you add a custom field to batched issue notifications. If you’re looking to add custom fields to separate issue notifications, see Adding custom fields to separate issue notifications instead.
This tutorial is for advanced users, and is out of scope of Atlassian support. You will be adding custom fields by editing the code in the Velocity templates, which email notifications are based on.
Overview
Notifications inform you about changes in the issue's fields (both built-in and custom fields). If a field's value did not change, it won't be included in the notification, because there's nothing to be notified about. After all, notifications are all about showing a change.
Here you can learn how to include a custom field, and its current value, in every notification for an issue, even if this field wasn't updated. You can use it to describe the issues you're being notified about more precisely. For example, you can include a custom field that specifies the issue's security level, and then properly categorize or even hide the notifications for this issue.
Before you begin
- Add your custom field to an issue.
- Limitation: Adding extra issue fields to your emails is not supported for batched notifications. You can only add custom fields. If you want to have issue fields displayed, you’ll need to switch to separate notifications, where these fields are supported.
Step 1: Find the ID of your custom field
You will add custom fields to your email templates by using their IDs. You can find the ID by examining the URLs of custom fields or by querying the database.
Examining the URL of a custom field
Go to Administration > Issues, and open the Custom fields page.
Find your custom field, and click Actions (
 ) to see more options.
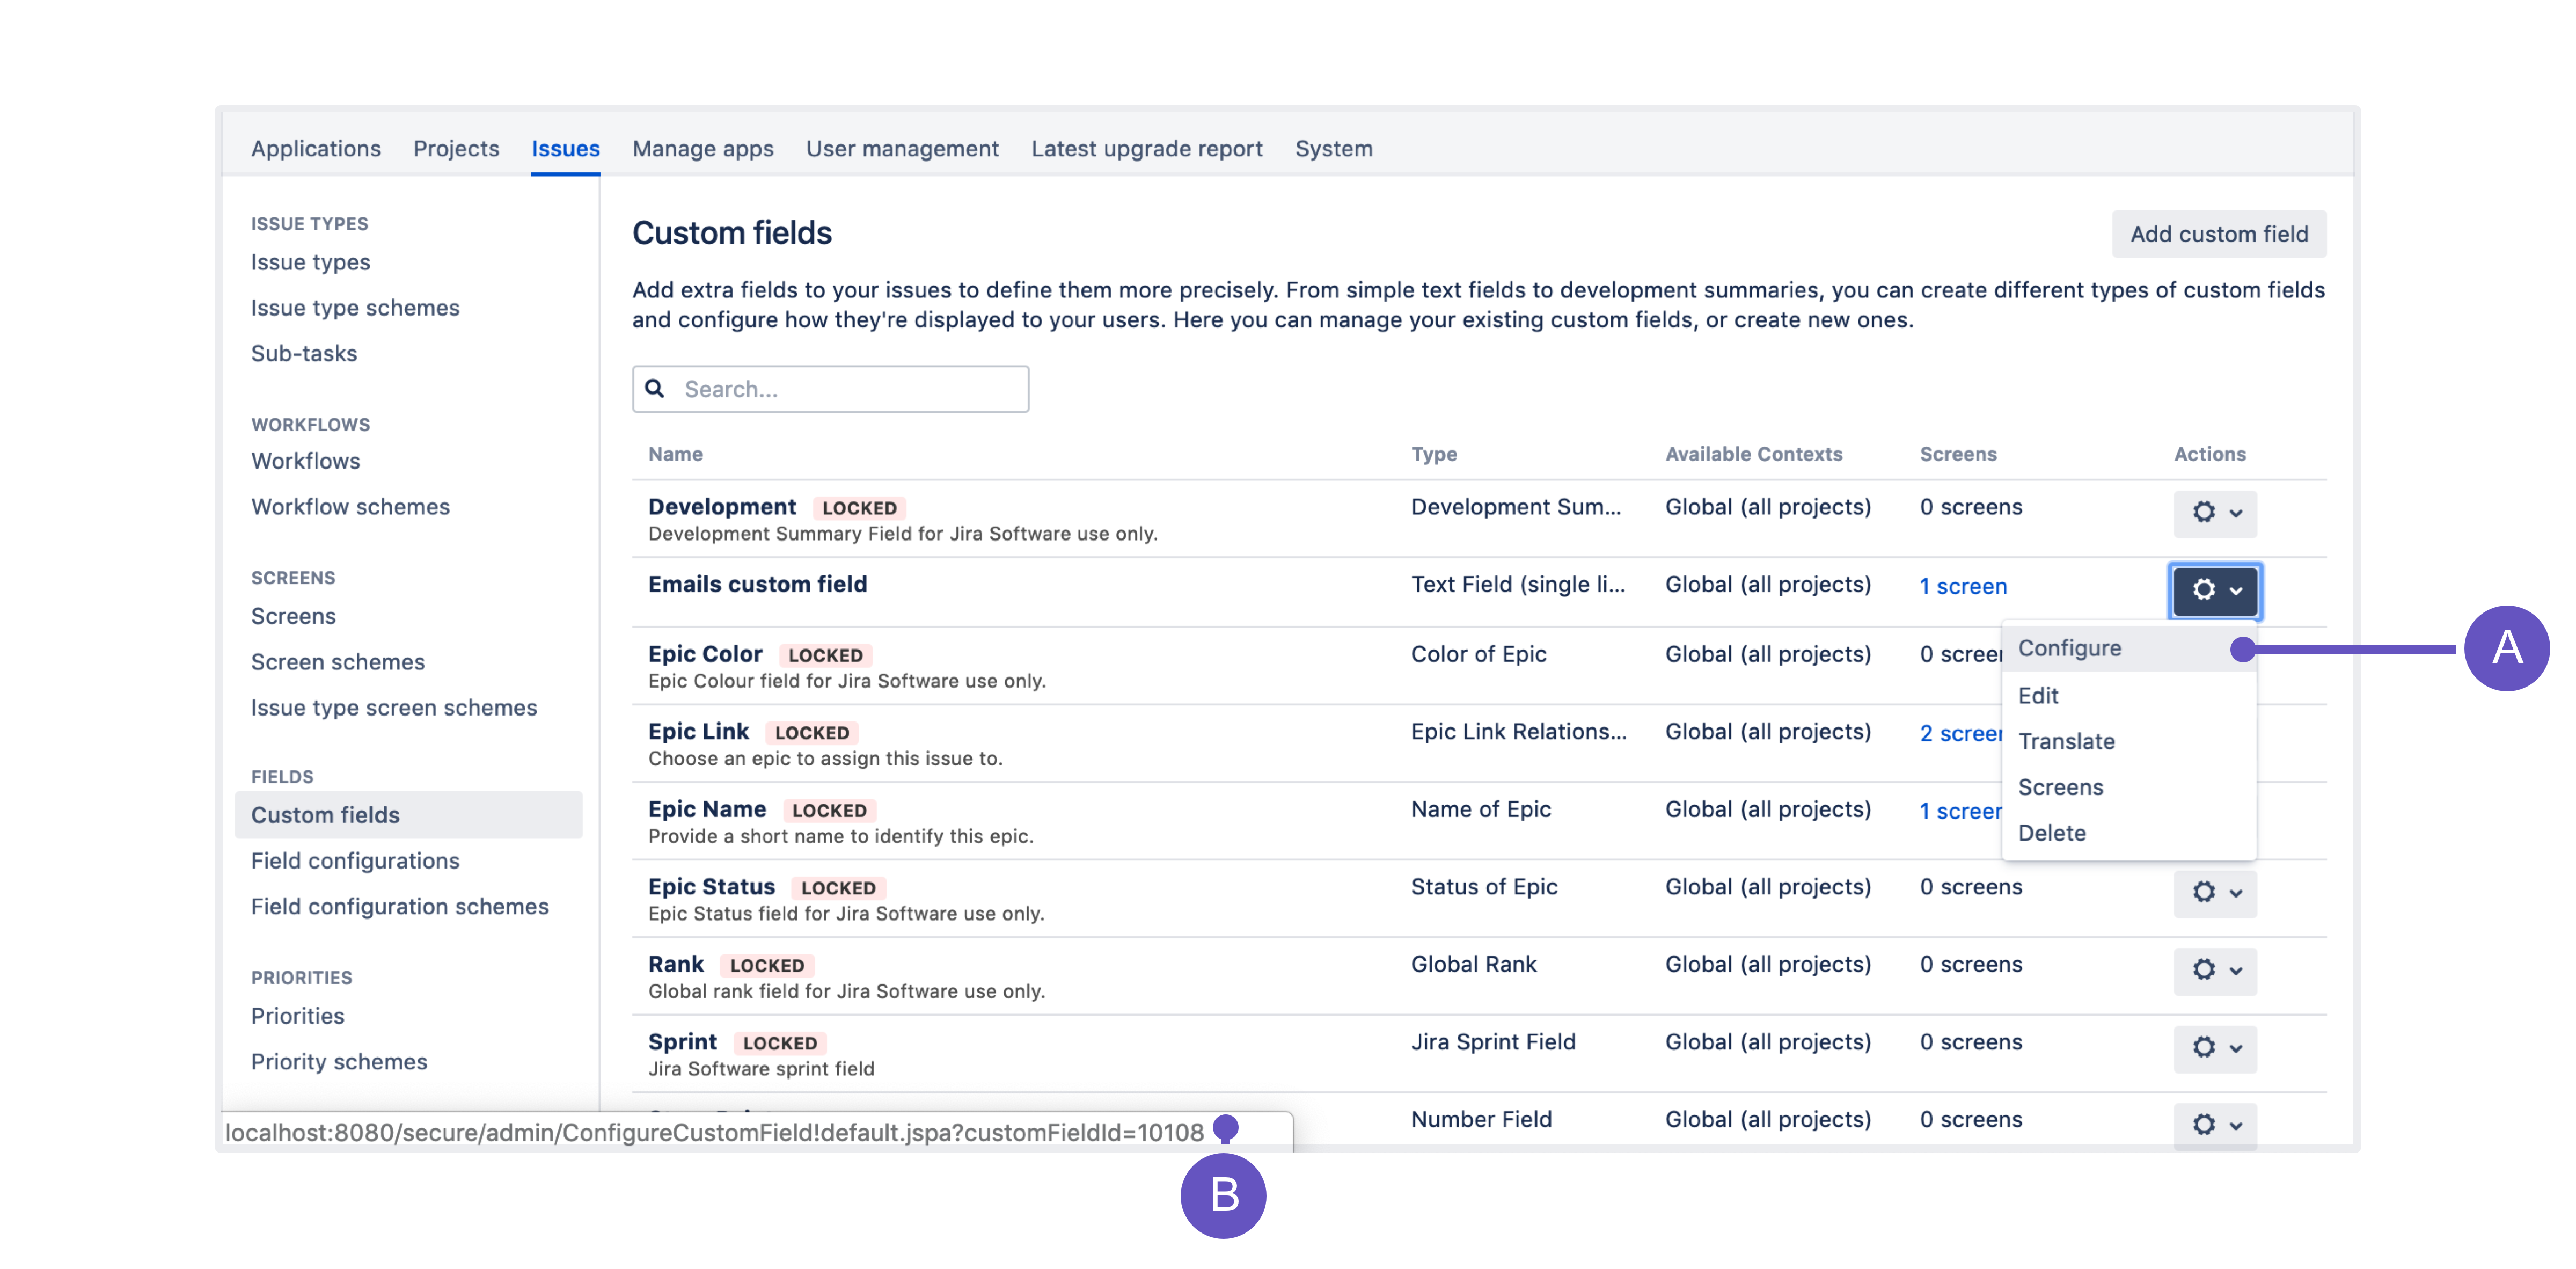
A. Hover your mouse over the Configure item in the drop-down menu. The URL will display in the footer of your browser.
B. Here’s the custom field’s ID. In this example, it’s 10108.
Querying the database
Run the following query on your database:
SELECT * FROM customfield WHERE cfname LIKE '%mycustomfield%';Where mycustomfield is the name of your custom field, for example assignee.
Step 2: Add the custom field to the Velocity context
Before you can add custom fields to the email templates, you need to define them in the Velocity context. These steps might require some knowledge about REST API. If you’re having problems, see Jira REST API.
1. Retrieve currently defined custom fields
You can use this command:
curl -D- \
    -u username:password \
    http://@localhost:8080/rest/inform-batchers/1.0/customfields
If you haven’t added any custom fields yet, the list should be empty, like in the following example:
    {
        "customFieldIds": []
    }
2. Add your custom field
To add your custom field to the Velocity context, you can use the following command. Replace <ID> with the ID of your custom field.
    curl \
       -D- \
       -u username:password \
       -X POST \
       -H "Content-Type: application/json" \
       http://localhost:8080/rest/inform-batchers/1.0/customfields?id=customfield_<ID>
The result of this command should look similar to this:
    {
        "customFieldIds": ["customfield_10108"]
    }
Removing a custom field
You can remove any of the custom fields from the Velocity context by using this command:
curl \
       -D- \
       -u username:password \
       -X DELETE \
       -H "Content-Type: application/json" \
       http://localhost:8080/rest/inform-batchers/1.0/customfields?id=customfield_<ID>
Step 3: Retrieve the Velocity templates
Retrieve your email templates so you can make the changes.
- For Jira Data Center, see Customizing email content.
- For Jira Server, see Customizing email content in Jira Server.
Step 4: Edit the Velocity templates
Once you’ve extracted the Velocity templates, you can edit them directly to add code snippets that will display your custom fields.
1. Choose a template to update
Batched email notifications are using several templates. If you don't know which one to edit, see Templates: Batched issue notifications.
2. Edit the template
Jira supports html and text email formats. You should choose instructions according to format set in your Jira.
Step 5: Upload the updated templates to Jira
Testing your changes
We recommend that you test your changes in a staging environment before applying them in production. If you break the Velocity syntax, emails won’t be sent at all.
- For Jira Data Center, see Customizing email content.
- For Jira Server, see Customizing email content in Jira Server.