Linking Bitbucket Cloud accounts
You can link your Bitbucket Cloud account and its repositories to Jira, and see the development information from pull requests displayed in your issues.
Prerequisite: Create the OAuth access token in Bitbucket Cloud
First you need to create the OAuth access token in Bitbucket Cloud to give Jira permissions to access it.
You need to be logged in as a user with administrative rights to the account in Bitbucket Cloud.
To create the OAuth access token in Bitbucket Cloud:
Select avatar > All workspaces.
- Select the workspace the connector is going to be added to.
- Select Settings > Apps and features > OAuth consumers.
Select OAuth under Access management.
Select Add consumer.
Enter the following details:
Name: A descriptive name, for example Jira DVCS.
- Description: A helpful reminder of the purpose of this token.
- URL: A URL for your Jira Software instance, for example https://example.atlassian.net
Select the following permissions:
Account: Write
Repositories: Admin (but not Repository: Write)
Pull requests: Read
- Webhooks: Read and write
Additionally, select the This is a private consumer checkbox.
- Select Save.
- Select the name of your new consumer to see the OAuth key and OAuth Secret. You’ll need them when adding your Bitbucket Cloud account in Jira.
Link your Bitbucket Cloud account
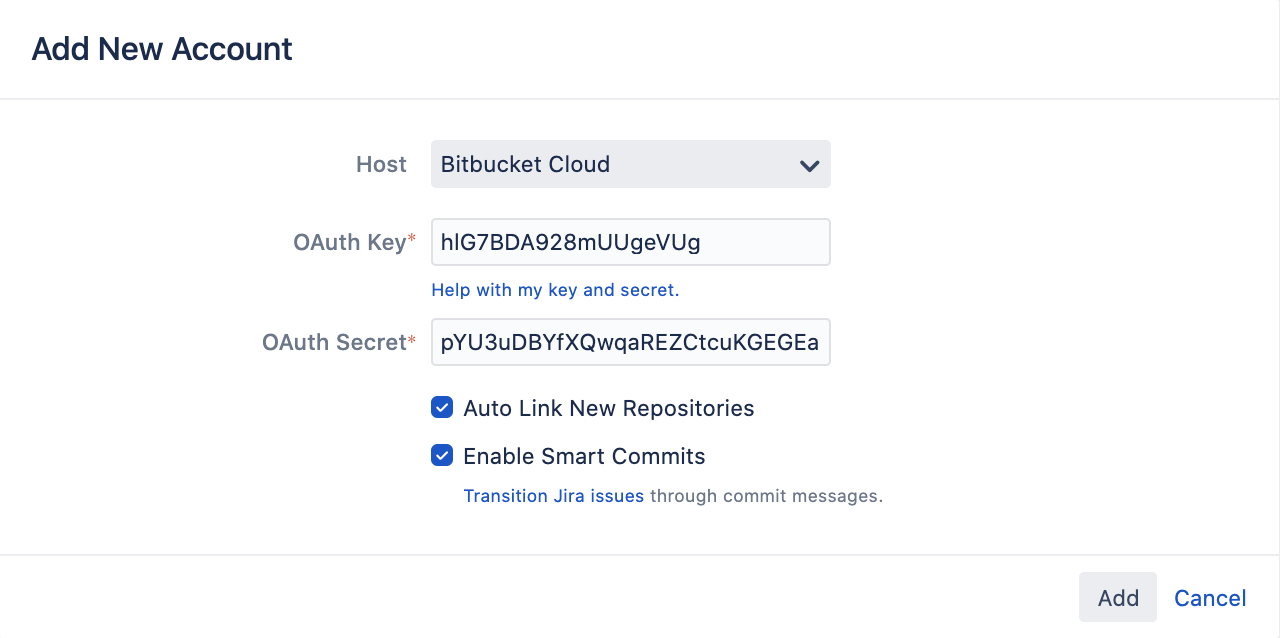
To add a Bitbucket Cloud account in Jira:
Go to Administration > Applications
In the sidebar, select DVCS accounts.
- Select Link an account.
In Host, select Bitbucket Cloud.
Example
If you want to link the account that owns the https://bitbucket.org/tutorials/markdowndemo repository, you would enter tutorials as your account. Linking the tutorials account links all of that account's repositories, not only the markdowndemo repository.
Copy OAuth Key and OAuth Secret from Bitbucket Cloud, and enter them as Client ID and Client Secret.
- Leave the default auto link and smart commits (recommended) as is or change them.
- Select Add.
What’s next?
Here’s what happens after adding your account:
Syncing repositories: Your account appears on the DVCS page and Jira starts syncing its repositories, if you decided to link them automatically. For details, see Integrating dev tools using DVCS.
Matching issues: If your commits and pull requests include issue keys, Jira will try to find them and add the relevant information to your issues. For details, see Referencing issues in your development work.
Displaying dev info: If referenced correctly, the dev information will be added to your issues to give everyone involved more context. For details, see Viewing the dev info for an issue.
Workflow triggers: One of the benefits of integrating your development tools is adding workflow triggers that, for example, lets you change the issue status after you create a new branch. For details, see Configuring workflow triggers.

