Search indexing
For all of the following procedures, you must be logged in as a user with the Jira Administrators global permission.
Re-indexing Jira
To re-index Jira:
- In the upper-right corner of the screen, select Administration , then System.
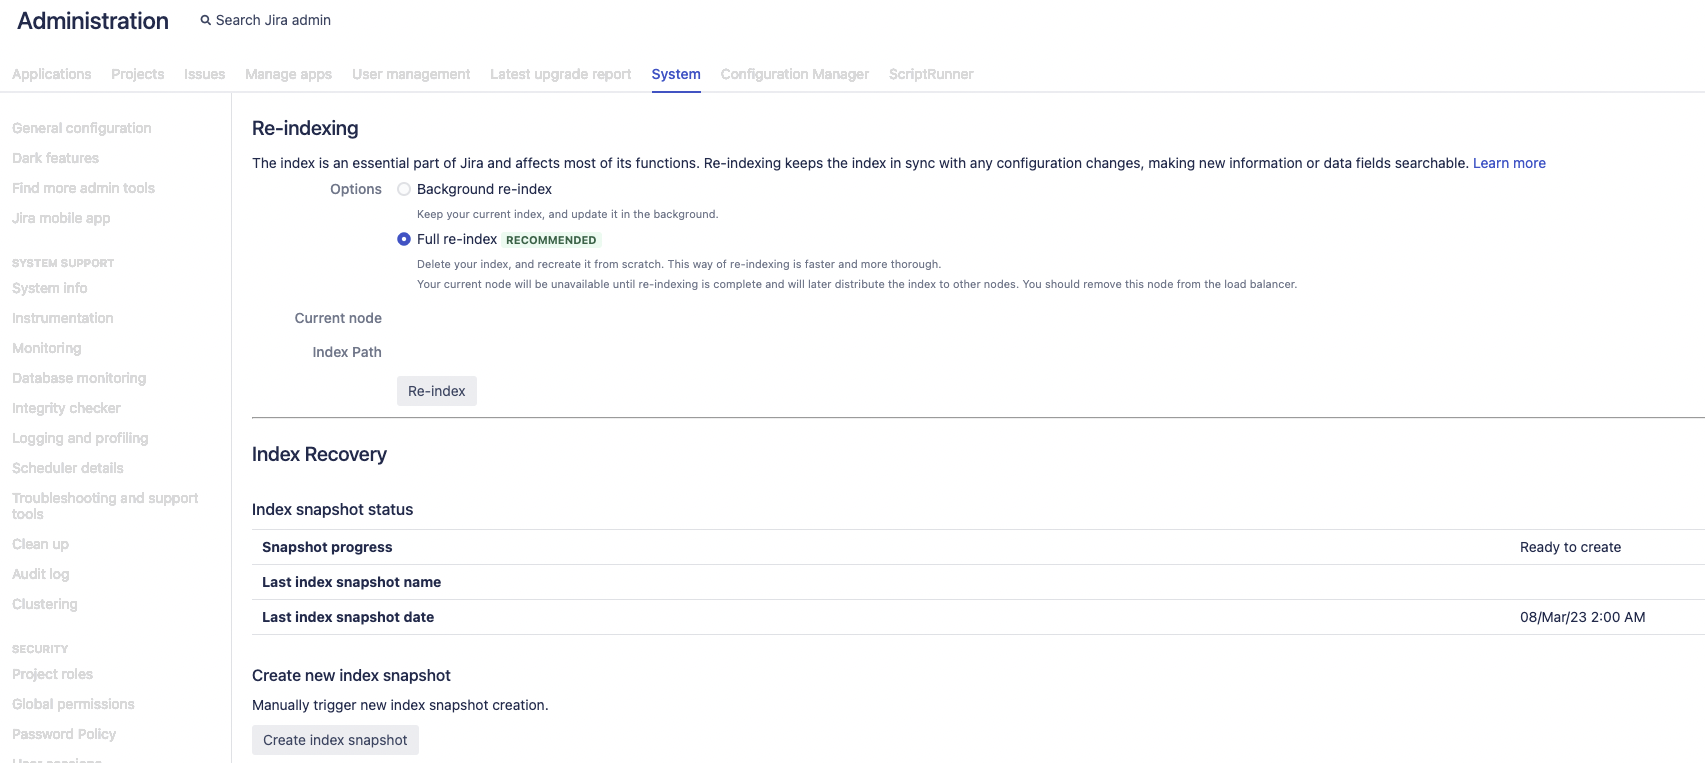
- Select Advanced > Indexing to open the Indexing page.
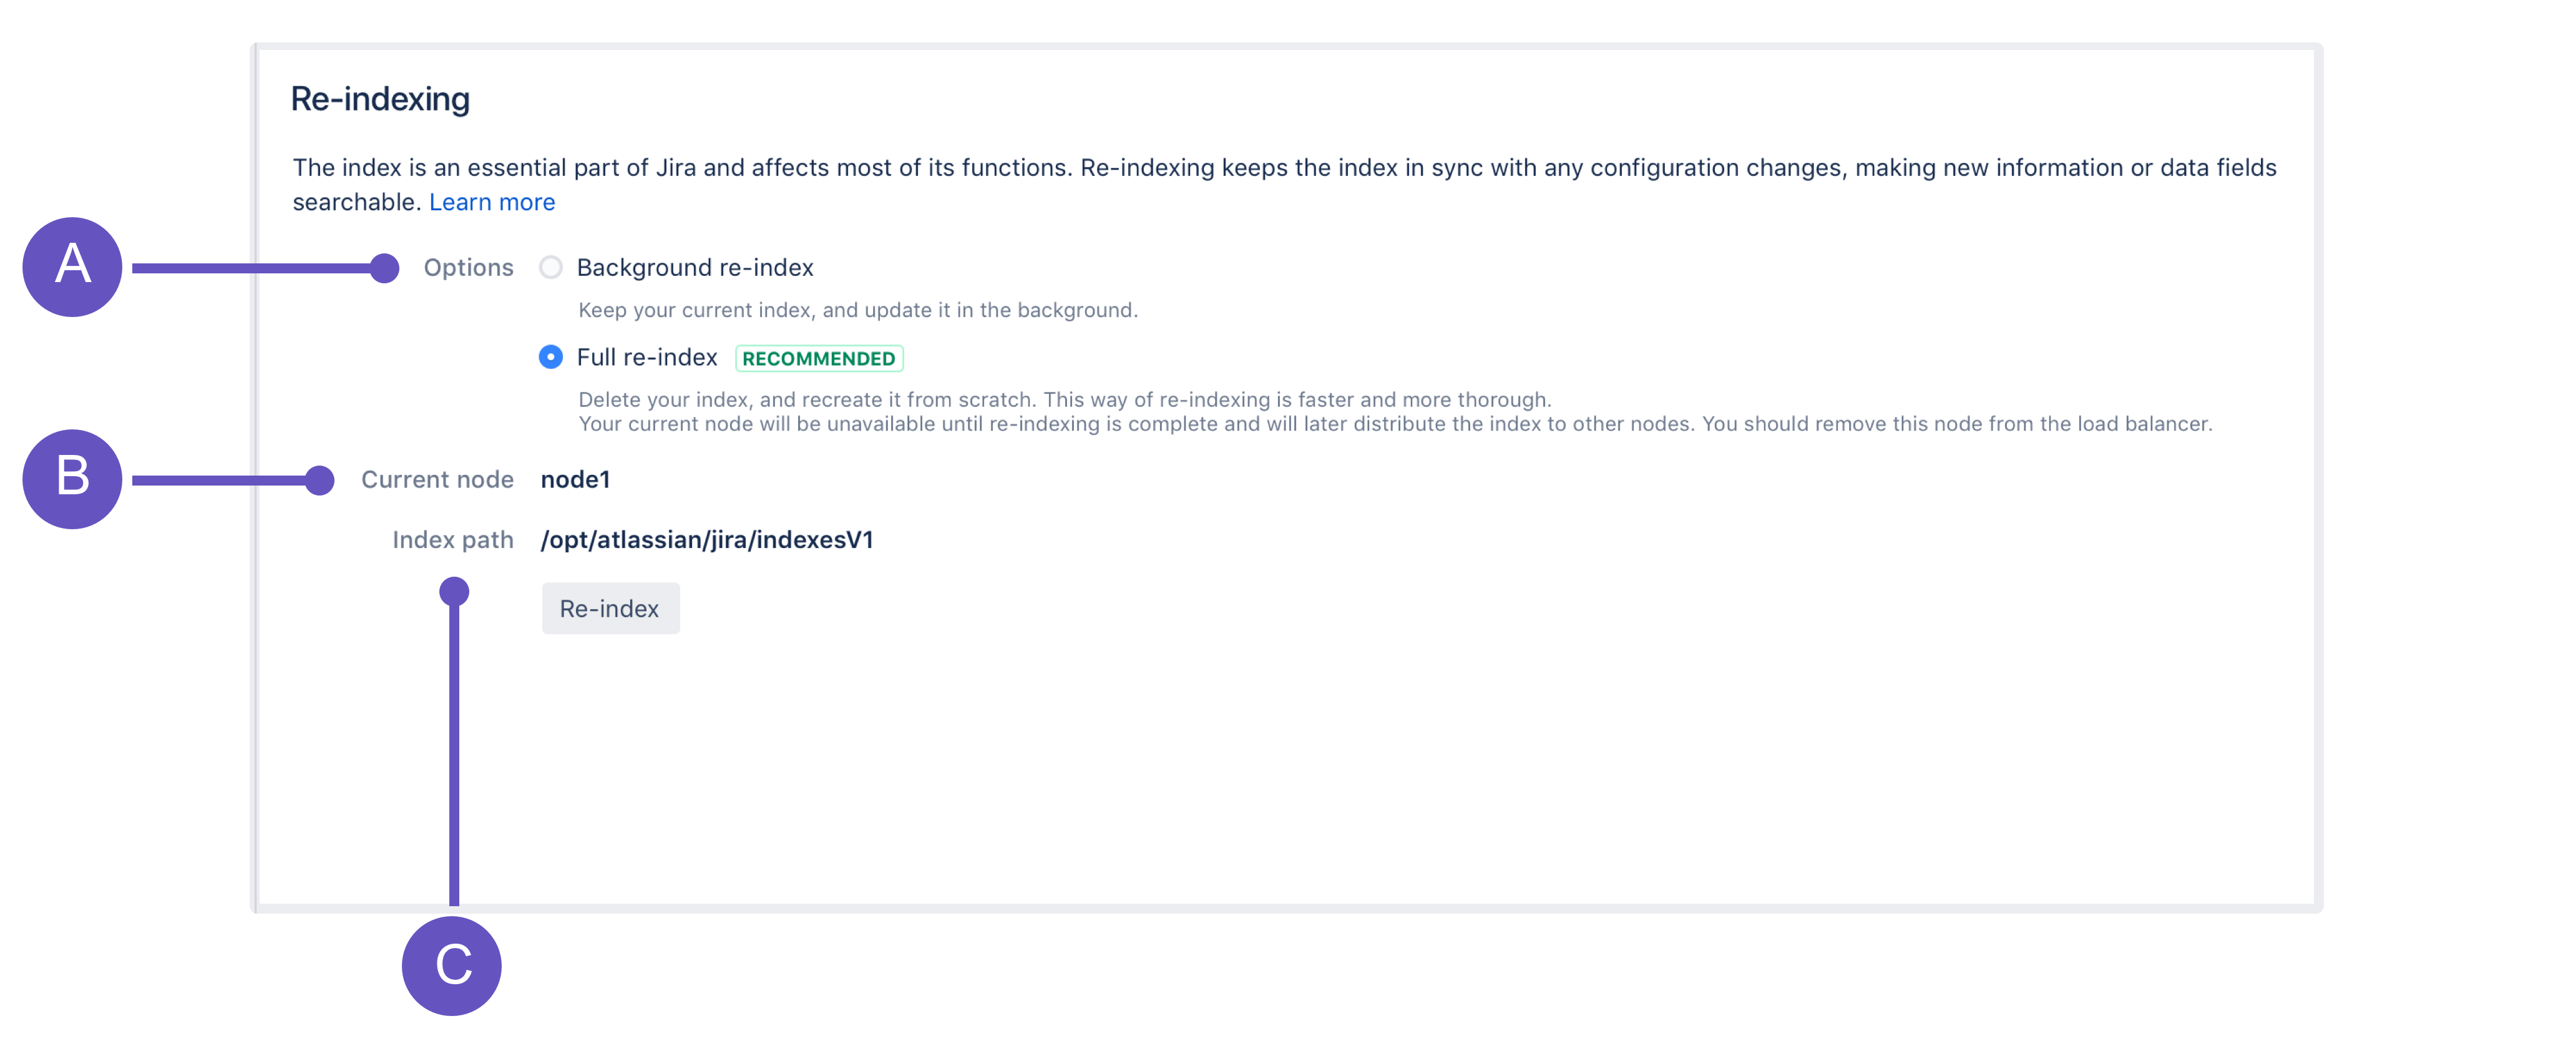
This page allows you to choose one of the following two re-indexing options:
- Background re-index: Re-index all issues in the background.
- Full re-index: Delete and rebuild the whole index, including the comment and change history indexes.
- Options: Background or full re-index. If you're not sure which one to choose, see Re-indexing options.
- Current node: A node on which the re-index will be performed. Available only in Jira Data Center.
- Index path: A directory where the index is stored.
Re-indexing options
Not sure which re-indexing option to choose? Here's some information that will help you decide.
If you have a multi-node environment, opt for a full re-index.
| Full re-index | Background re-index |
|---|---|
| Multi-threaded, faster to complete | Single-threaded, slower to complete (especially in large enterprise instances) |
| Can't be canceled once started | Can be canceled at any time |
| Rebuilds the index, optimizes it, and deletes the old one | Keeps current index and updates it in place |
| Eliminates disk fragmentation | Causes disk fragmentation |
| Doesn’t affect the local node performance | Affects the local node performance |
| Ensures consistency and re-indexes issues, comments, worklogs, and the history | Doesn’t guarantee consistency, since it only re-indexes issues, but not comments, worklogs, and the history |
Full re-index
Use this option when the indexes are corrupted, which may be caused by a system or disk failure. The full re-index deletes all indexes and rebuilds them.
Overall, the full re-index provides greater benefits. The only downside for this option is that it'll lock a single-node instance, making it unavailable to users during the re-index.
On a multi-node Jira Data Center, you can perform the full re-index without locking the instance. Therefore, if your Data Center instance has multiple nodes, you shouldn’t choose the background re-index. For instructions, navigate to Re-indexing Jira Data Center with no downtime.
You can also speed up a full re-index by increasing the number of threads it uses. See Tune number of index threads to make it go faster for details.
Instances with lower data complexity also perform full re-indexes faster. See Managing custom fields in Jira effectively for related information.
If you want to know if you need to re-index Jira after any configurations in your instance, check Reindexing in Jira after configuring an instance for tips.
Background re-index
This option allows any Jira instance to remain usable during re-indexing; however, the instance will be slower. If you have to perform this option, do so during a low-usage period.
Choosing a custom Index Path
To change the Index Path, you must be logged in as a user with the Jira System Administrators global permission.
- If you upgraded Jira with an XML backup from a Jira version prior to 4.2 and used a custom directory for your index path, you can choose between using this custom directory (which cannot be edited) or the default directory for your index path location. However, once you switch to using the default directory, you can no longer choose the custom directory option.
- The default directory location is the
caches/indexesV2subdirectory of the Jira application home directory.
NFS storage for Jira indexes is not supported. See Supported platforms for more information.
Re-indexing Jira Data Center with no downtime
Keeping the integrity of indexes is as important as having your Jira instance open to users all the time. These steps will help you run the Full re-index option, which deletes and recreates all indexes, with no downtime.
Before you begin:
Choose a node and remove it from the load balancer. You'll use it to perform the re-index.
To re-index Jira Data Center with no downtime:
- Access Jira on the node you've chosen, and select Administration () > System.
- Select Advanced > Indexing to open the Indexing page. Then, run Full re-index.
- After the re-indexing is complete, take a look around the Jira instance to make sure everything looks fine.
- Add the node back to the load balancer.
After completing the re-indexing, the rebuilt indexes will be automatically distributed to other nodes in the cluster (there might be some performance degradation during that time). If some changes were made to the indexes in the meantime, they will also be applied to maintain the integrity.
Backing up and recovering your index
Index recovery is enabled by default and set to create index snapshots everyday at 2 am. This allows you to recover your index quickly, rather than rebuilding the index, if there is a failure. This is particularly useful if you have a large Jira installation and you cannot afford for it to be offline for long. If you have a small Jira instance, it may not be worth enabling index recovery, as rebuilding the index won't take much time.
Whether a full index rebuild is faster than recovering from a snapshot depends on a number of factors, including how recent the snapshot being recovered was taken. Large and complex installations should test this process on a development/testing server before relying on it in production.
To enable index recovery:
- Navigate to the Indexing page (as described above).
- Click Edit Settings to enable index recovery and choose the frequency of snapshots.
- Snapshots are stored in the
<yourJirahome>/caches/indexesV2/snapshotsdirectory.
- Snapshots are stored in the
To recover an index:
- Navigate to the Indexing page (as described above).
- Enter the name of the previously saved index in File name and click Recover.
- Jira will not be available during the recovery of the index.
- If changes were made to the configuration that required a re-index after the snapshot was taken, then you will need to do a background re-index after the recovery. Note, Jira will be available after the recovery.
Along with having the default scheduled index snapshots, you can take them manually with one click at any time. This is helpful when, for example, you want to create an index backup before the Jira reindex.
To take an index snapshot manually:
- Navigate to the Indexing page (as described above).
On the Indexing page, go to Create new index snapshot and select Create index snapshot.
Since index snapshots can be taken manually, it's no longer possible to create snapshots in parallel cluster-wide. During the zero-downtime upgrade, some nodes respect this restriction while others still allow for snapshots to be created in parallel.
Additional information
- Jira will retain the last three snapshots at any time (in
<yourJirahome>/caches/indexesV2/snapshots). Older snapshots will be automatically deleted. Note, snapshots may occupy considerable disk space and may need to be moved to offline storage or deleted as appropriate. - The snapshot process is a relatively lightweight process and does not place much of a load on the system.
- The process of taking a snapshot will require temporary disk space equivalent to the index size. The resulting snapshots will each be about 25% the size of the index.
- All issues will be re-indexed appropriately during the recovery, including issues that were added, updated or deleted after the snapshot was taken.
You can use the index recovery process to bring your index up to date, if you need to restore your Jira database. The index snapshot must pre-date the database backup being restored.
Re-indexing a single project
If you have made a configuration change that affects a single project, you can re-index just that project. See Re-indexing after major configuration changes for more information on when you should re-index.
If you have Jira System admin permissions, you can re-index a single project as follows:
- In the upper-right corner of the screen, select Administration () > Projects.
- Go to the project that you want to reindex.
- Under the Project settings (the left-side panel), select Re-index project.
- Select Start project re-index.
For more information about types of permissions that can be set up in Jira, go to Permissions overview.


