Restoring data from an xml backup
Before you begin
Make sure that you have the password to a login in the backup file that has the Jira System Administrator global permission. Once the restoring procedure begins, all the existing data in the Jira application database is deleted, including all user accounts. |
If you are restoring data from a Jira Cloud application site to a Jira Data Center application, please read Migrating from Jira Cloud to Jira Data Center applications. |
| For all of the following procedures, you must be logged in with Jira System Administrators global permission. |
1. Disable email sending/receiving
If you are restoring production data into a test Jira instance for experimentation purposes, you have to disable all Jira application's email features before you begin:
- Disable email notifications — if Jira is configured to send emails about changes to issues, and you want to make test modifications to the copy, you should start Jira with the
-Datlassian.mail.senddisabled=trueflag. - Disable POP/IMAP email polling — if Jira is configured to poll a mailbox (to create issues from mails), you will have to disable polling on your test installation by setting the
-Datlassian.mail.fetchdisabled=trueflag.
Exactly how to set these flags is dependent on your particular application server, but for Jira, this is done by setting the DISABLE_NOTIFICATIONS environment variable before starting Jira (note, use startup.sh instead of startup.bat if you are not using Windows):
set DISABLE_NOTIFICATIONS=" -Datlassian.mail.senddisabled=true -Datlassian.mail.fetchdisabled=true -Datlassian.mail.popdisabled=true"
cd bin
startup.bat
You could also try un-commenting the DISABLE_NOTIFICATIONS=" -Datlassian.mail.senddisabled=true -Datlassian.mail.fetchdisabled=true -Datlassian.mail.popdisabled=true" line from your /bin/setenv.bat file (/bin/setenv.sh if you are not using Windows) and then running startup.
2. Restore the XML data
If you've used native database tools to back up your data, the restore process will be tool-specific and The stage 2 and 3 of these instructions don't apply to you.
- From the top navigation bar select Administration > System.
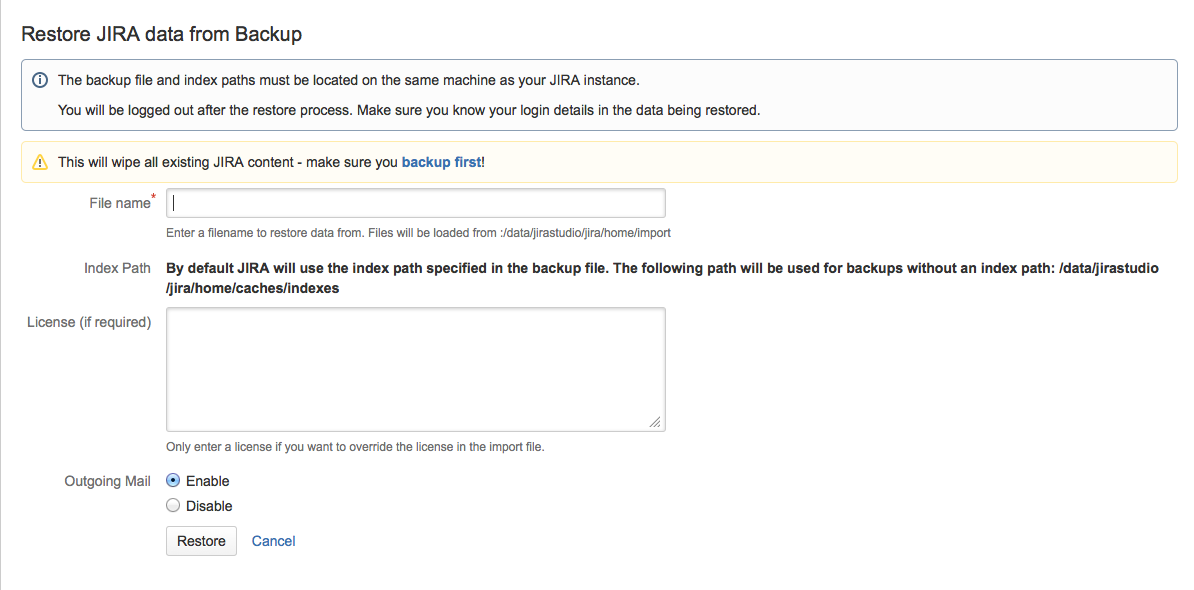
- Select Import & Export > Restore System to open the Restore Jira applications data from Backup page.
- In the 'File name' field, type the file name of the zipped XML backup file generated by Jira.
Ensure that this backup file has been moved or copied to the location specified below this field.
- The Index Path field indicates where Jira will restore the search index data from the zipped XML backup file. This location (which cannot be modified) matches the index path specified in the zipped XML backup file. If, however, this backup file does not specify an index path, Jira will restore the search index to the
caches/indexessubdirectory of the Jira application home directory.Please Note:
- The contents of the index directory may be deleted by the restore process.
- The index directory should only contain Jira index data.
- Click the 'Restore' button and wait while your Jira data is restored.
Once the data has been restored, Jira will inform you that you have been logged out. This happens because all Jira users which existed in Jira prior to Jira's data being restored will have been deleted and replaced by users stored in the Jira export file.
It is recommended that you avoid passing through a proxy when performing an XML restore, especially if your Jira instance is very large. Using a proxy may cause timeout errors.
3. Restore the attachments
If you created a backup of the attachments directory, you will need to restore the backup into a directory where Jira can access it. If you use a custom directory for storing your attachments, ensure that Jira has read and write permissions to this directory and its subdirectories.
The process of restoring the attachments backup depends on the way it was created. Usually you can use the same tool to restore the backup as the one that was used to create it (see Backing up attachments).
If you are restoring the attachments into a different location (i.e. a different directory path) from where they were previously located (e.g. this will be the case when moving servers), please follow the instructions provided in Configuring file attachments to change the location of the attachments directory so that Jira can find the restored attachments
