Upgrading Bamboo on Windows and moving from an unsupported Database Version to a supported one
Purpose
This article sketches the upgrade process from Bamboo Server 5.14.4.1 to version 6.9.1. As support for the PostgreSQL versions 9.2 and 9.3 is deprecated in Bamboo version 6.9.1 (also see Supported Platforms for Bamboo, this upgrade process involves a database migration from PostgreSQL 9.2 to 9.6.
Find this KB as a generic Bamboo upgrade + database migration documentation: Moving your Bamboo Data to a different Database.
Environment used in this document
| Current Versions (Bamboo and PostgreSQL) | Target version (Bamboo and PostgreSQL) |
|---|---|
|
|
For this example we'll be upgrading to Bamboo 6.9.1 and Bamboo's PostgreSQL database to version 9.6, though the same procedure can be applied to all recent versions of Bamboo and all PostgreSQL versions 9.4 and higher. Besides we upgrade from Bamboo 5.14.4.1 and that could be be any higher Bamboo version (so providing a need for database change). The original Bamboo database could also be PostgreSQL 9.3 instead of 9.2.
Upgrade Prerequisites
- Double check if your environment meets all requirements for Bamboo 6.9.1 according to Supported Platforms for Bamboo.
Checklist prior to Bamboo upgrade:
| Java |
|
|---|---|
| Database |
|
| Bamboo |
|
What else to do before your Upgrade?
- Make sure Bamboo is running successfully
- Backup of the current Bamboo 5.14.4.1 environment
- Make sure the JAVA_HOME variable is pointing to a valid JDK 1.8 installation
| Backups | Create backups for the following data:
|
|---|---|
| JAVA_HOME | Run the below commands in terminal:
The output should be something similar to this:
The output should be something similar to this: |
Run the Upgrade
Before starting the upgrade, please make sure to complete the previous steps ("Upgrade Prerequisites" and "What else to do before your Upgrade?").
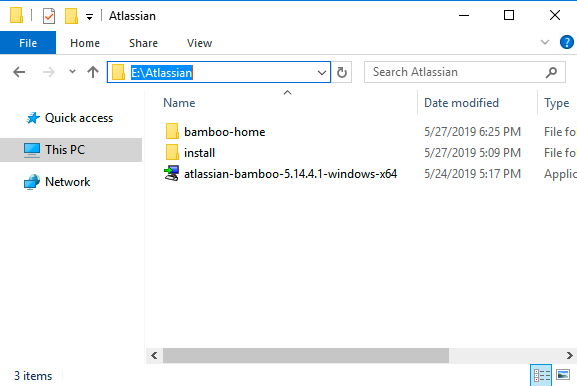
For this example, the Bamboo 5.14.4.1 paths are set as such:
<Bamboo home directory> → E:\Atlassian\bamboo-home
<Old and new Bamboo installation directory> → E:\Atlassian\install
Step 1 - Export the Bamboo 5.14.4.1 Data from the linked Database PostgreSQL 9.2
Create a Bamboo export from PostgreSQL 9.2. This feature is reachable via Bamboo UI.
For this, navigate to Overview >> Export as Bamboo administrator in Bamboo 5.14.4.1, select the items you want to move in your new Bamboo instance (e.g. build logs and/or artifacts or just your configurations) and press the "Export" button.
Your export will be created and copied to the defined Export directory path, as the name that you specified for your export, with extension zip (in XML format).
Find a KB for it here: Exporting Data for Backup
Step 2 - Stop original Bamboo 5.14.4.1 (as Service or Process)
- Bamboo running as a Windows Service
Run the following command on CMD / PowerShell:
PS C:\> net stop BambooExpected output:
PS C:\> net stop Bamboo
The Bamboo service is stopping..
The Bamboo service was stopped successfully.
Or open Control Panel >> Administrative Tools >> Services, find Bamboo service, right click on it and select "Stop Service"
- Bamboo running as a process, in console
Run the E:\Atlassian\bamboo-install\bin\stop-bamboo.bat script:
PS E:\Atlassian\install\bin> .\stop-bamboo.bat
Expected output:
PS E:\Atlassian\install\bin> .\stop-bamboo.bat

Bamboo Server Edition
   Version : 5.14.4.1

JAVA_HOME "C:\Program Files\Java\jdk1.8.0_131" contains spaces. Please change to a location without spaces if this cause
s problems.

If you encounter issues starting or stopping Bamboo Server, please see the Troubleshooting guide at https://confluence.a
tlassian.com/display/BAMBOO/Installing+Bamboo+on+Windows

Using CATALINA_BASE:   "E:\Atlassian\install"
Using CATALINA_HOME:   "E:\Atlassian\install"
Using CATALINA_TMPDIR: "E:\Atlassian\install\temp"
Using JRE_HOME:        "C:\Program Files\Java\jdk1.8.0_131"
Using CLASSPATH:       "E:\Atlassian\install\bin\bootstrap.jar;E:\Atlassian\install\bin\tomcat-juli.jar"
Java HotSpot(TM) 64-Bit Server VM warning: ignoring option MaxPermSize=256m; support was removed in 8.0
PS E:\Atlassian\install\bin>
Step 3A - Download Bamboo 5.14.4.1
Go to Bamboo Download Archives and download the following binary:
- 5.14.4.1 - Windows Installer, 64-bit binary (
atlassian-bamboo-5.14.4.1-windows-x64)
After the download finishes, you should see something similar to this:
Step 3B - Run the Bamboo 5.14.4.1 Setup Wizard triggering Update
![]() Make sure you have a backup from the bamboo-home folder and the database before proceeding.
Make sure you have a backup from the bamboo-home folder and the database before proceeding.
- Double click at the
atlassian-bamboo-5.14.4.1-windows-x64executable to start the setup wizard
At the first screen, select: "Yes, update the existing installation" and hit "Next":

Then select the location of the bamboo-home folder:

Wait until the installation process finishes:

Step 3C - Check the new Bamboo 5.14.4.1 configurations
While using Bamboo, you’ve probably added some custom modifications to Bamboo files. These may include connection details, settings related to memory allocation, or other JVM arguments. In this step, you need to re-apply the same modifications to the new files by copying them from your backups.
Double check if all customizations made to the following files are correct.
- Bamboo running as process, on console
E:\Atlassian\install\bin\setenv.bat
Common personalisations made to this file are:
Java arguments, i.e:
#
#  Occasionally Atlassian Support may recommend that you set some specific JVM arguments.  You can use this variable below to do that.
#
JVM_SUPPORT_RECOMMENDED_ARGS:="-Dbamboo.ec2.agent.endpoint=http://localhost:8085-XX:UseG1GC"
Heap memory size, i.e:
#
# The following 2 settings control the minimum and maximum given to the Bamboo Java virtual machine.  In larger Bamboo instances, the maximum amount will need to be increased.
#
JVM_MINIMUM_MEMORY="2048m"
JVM_MAXIMUM_MEMORY="2048m"
E:\Atlassian\install\bin\server.xml
This file contains the configuration for the ports where Bamboo service will be listening including ssl, reverse proxy configuration and so on.
- Bamboo running as Windows service
Identify the name of the service that Bamboo is installed as in Windows (Control Panel > Administrative Tools > Services):

Open a command prompt from Start > Run > type 'cmd' > Enter.
Change directory to the bin directory of your Bamboo installation directory.
Run:
tomcat8w //ES//%SERVICENAME%![]() In the above example, it would be
In the above example, it would be tomcat8w //ES//Bamboo
Click on the Java tab to see the list of current start-up options:

E:\Atlassian\install\bin\server.xml
This file contains the configuration for the ports where Bamboo service will be listening including ssl, reverse proxy configuration and so on.
Step 4 - Install and setup PostgreSQL 9.6
Install the new version of PostgreSQL that shall be used as the database for your upgraded Bamboo 6.9.1.
You may do this in various ways, e.g. from its sources and then via ./configure, make , make install, via per-built binaries, etc. The exact way and process depends on the above, but also on what Linux (Ubuntu, RHE, etc.) and version you use.
Please grab the relevant documentation for this or ask your DB Administrator to do it for you.
Goal: PostgreSQL 9.6 shall be up and running, but without data.
Step 5A - Start new Bamboo 5.14.4.1
Start Bamboo 5.14.4.1 by executing the E:\Atlassian\install\BambooConsole.bat file.
After bootstrap and initial upgrade activities, Bamboo is reachable via its UI.
Wait a little bit and then access Bamboo via http://<Your Bamboo URL or IP>:8085 in one of our supported WEB browsers, find the Setup Wizard starting.
If Bamboo did not start, please review the prerequisites and make sure you followed all the steps correctly. If the problem persists, you can also create a support ticket. To help us address the issue, attach the the content of <Bamboo installation directory>/logs/ folder to the ticket.
Step 5B - Database Configuration via Import within Bamboo's 5.14.4.1 Setup Wizard
As a part of the Setup Wizard, you need to select a database. Configure it so that it points to the new PostgreSQL 9.6. By this, you connect your new Bamboo 5.14.4.1 to PostgreSQL 9.6.
In a next step you will be asked if you want to Import existing data. Please do so and in this step specify the path to the file that you exported in Step 1. After confirming this operation, your PostgreSQL 9.2 data will be imported to PostgreSQL 9.6.
Step 6 - Run Database re-indexing
This is especially needed for your build results and needs always to be done after a Bamboo Import activity.
For this navigate to Overview >> Indexing in your Bamboo UI and press button "Perform a full reindex". See Reindexing data as a reference for it.
Step 7 - Perform Bamboo Upgrade from new 5.14.4.1 to 6.9.1
In order to finish Bamboo upgrade please follow the instruction of one of the following KBs:
There is no content with the specified labels
An alternative and equally working approach to the above is:
- Perform all steps from above till and including 5A
- Skip Step 5B in the sense of only linking the new Bamboo 5.14.4.1 to PostgreSQL 9.6, but without importing data.
- Consequently skip Step 6
- Once your new Bamboo 5.14.4.1 is up and running, trigger Bamboo Import via Overview >> Import as Bamboo administrator.
- After a succeeding import, run re-indexing as illustrated in above's Step 6
- Then run Step 7 so to have run Bamboo 6.9.1 in the end connected to PostgreSQL 9.6
Post-upgrade tasks
After you finish Bamboo upgrade:
- Make sure everything is working as expected
- Verify that all data is available as it was for your original Bamboo 5.14.4.1 and PostgreSQL 9.2
- Double check if your remote agents are back online
- Double check if the application links with other tools are working
Recovery Plan
If something goes wrong during the upgrade, please do the following:
- Stop the application (Step 2), though now for Bamboo 6.9.1
- Restore the backups created during the "What else to do before your Upgrade?" tasks
- Restore Bamboo's original database PostgreSQL 9.2
If you could not rollback the upgrade, please create a support ticket. To help us address the issue, attach the the content of the <Bamboo installation directory>/logs folder to the ticket.