Publish and link your build artifacts
You can download your artifacts directly from the pipeline result view. If you need to access your artifacts for longer than 14 days, there is a way to send your artifacts to 3rd-party storage and create a link in your commit view, using the Bitbucket build status API.
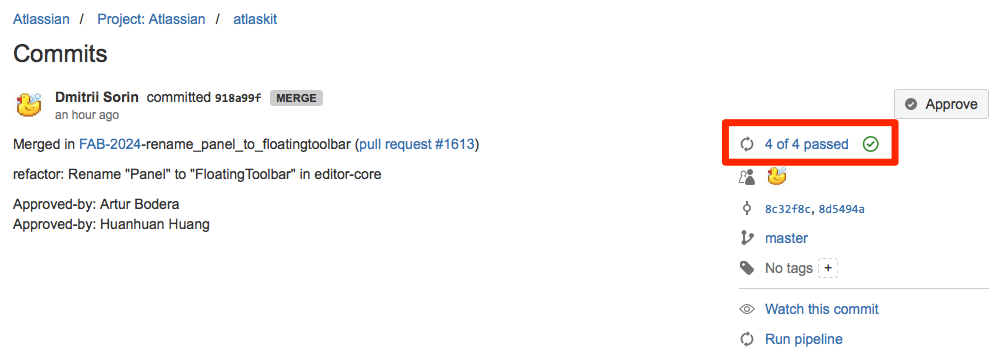
Once published and linked via the build status API, your artifact links will appear on your Bitbucket commit as shown below.
Step 1: Create an App password for the repository owner
Log in to Bitbucket as the repository owner (also the user who will upload the files) and go to Personal settings > App passwords.
Create a new app password with write permissions to your repositories, and take note of the generated password that pops up. The name of the password is only for your reference, so use "Pipelines" or any other name you like.
You should now have two values that you will need for the next step.
| Parameter | Value |
|---|---|
| <username> | Bitbucket username of the repository owner (and also the user who will upload the artifacts) |
| <password> | App password as generated by bitbucket |
Step 2: Create a Pipelines variable with the authentication token
Define a new secure variable in your Pipelines settings:
- Parameter name:
BB_AUTH_STRING - Parameter value:
<username>:<password>(using the values from step 1)
You can define this variable at either the repository or account level. The example below is shown with an account variable.
Step 3: Publish your artifacts to AWS
If you are new to AWS or S3, follow the instructions on our example S3 integration to create an S3 bucket and configure the relevant authentication variables in Bitbucket Pipelines.
python s3_upload.py <bucket-id> <artifact-file> <artifact-key>Otherwise, you can use your existing AWS tooling to upload the artifact to an appropriate location.
Step 4: Link your artifacts to your build using the Bitbucket REST API
With the variable and app password in place and your artifact published to S3, you can now use curl in your build script to link your artifact's S3 URL to your Bitbucket commit via the build status REST API:
export S3_URL="https://${S3_BUCKET}.s3.amazonaws.com/${S3_KEY_PREFIX}_${BITBUCKET_COMMIT}"
export BUILD_STATUS="{\"key\": \"doc\", \"state\": \"SUCCESSFUL\", \"name\": \"Documentation\", \"url\": \"${S3_URL}\"}"
curl -H "Content-Type: application/json" -X POST --user "${BB_AUTH_STRING}" -d "${BUILD_STATUS}" "https://api.bitbucket.org/2.0/repositories/${BITBUCKET_REPO_OWNER}/${BITBUCKET_REPO_SLUG}/commit/${BITBUCKET_COMMIT}/statuses/build"
Example bitbucket-pipelines.yml
Below is an example combining all the pieces in a sample Python project. You should adjust all the parameters in the examples to match your repository, and make sure you have all the necessary variables (including AWS authentication tokens) defined.
image: python:3.5.1

pipelines:
  branches:
    master:
      - step:
          script:
            - pip install boto3==1.3.0   # required for s3_upload.py
            - python run_tests.py
            - python s3_upload.py "${S3_BUCKET}" documentation.html "${S3_KEY_PREFIX}_${BITBUCKET_COMMIT}"   # upload docs to S3
            - export S3_URL="https://${S3_BUCKET}.s3.amazonaws.com/"${S3_KEY_PREFIX}_${BITBUCKET_COMMIT}"
            - export BUILD_STATUS="{\"key\":\"doc\", \"state\":\"SUCCESSFUL\", \"name\":\"Documentation\", \"url\":\"${S3_URL}\"}"
            - curl -H "Content-Type:application/json" -X POST --user "${BB_AUTH_STRING}" -d "${BUILD_STATUS}" "https://api.bitbucket.org/2.0/repositories/${BITBUCKET_REPO_OWNER}/${BITBUCKET_REPO_SLUG}/commit/${BITBUCKET_COMMIT}/statuses/build"
You can check your bitbucket-pipelines.yml file with our online validator.


