Connect Bitbucket to Pgpool-II
This page describes how to connect Bitbucket to Pgpool-II.
About Pgpool-II
Pgpool-II is a high-availability (HA) database solution based on Postgres. Here’s why we recommend moving to high-availability databases like Pgpool-II:
No single point of failure (SPoF). Pgpool-II addresses the challenges typical of PostgreSQL databases that expose a Single-Point-of-Failure resulting in business impact due to service downtimes.
Connection pooling. Pgpool-II offers connection pooling which allows multiple client applications to share a pool of database connections. This significantly reduces the overhead of establishing new connections for each client request, resulting in improved performance and reduced resource consumption.
Load balancing. Pgpool-II includes a built-in load balancer that distributes client requests across multiple PostgreSQL servers. This helps distribute the workload evenly and ensures optimal resource utilization across the available database servers.
High availability. Pgpool-II supports high availability configurations by implementing features such as automatic failover and online recovery. It can detect when a primary PostgreSQL server fails and automatically promotes a standby server to take its place, minimizing downtime and ensuring continuous availability of the database.
Visit Pgpool-II official documentation
Before you begin
Check whether your version of PostgreSQL is supported. For more details, refer to Supported platforms.
Backup
If you're migrating your Bitbucket data from the HSQL internal database, back up the home directory.
If you're migrating your Bitbucket data from another external database, back up that database by following the instructions provided by the database vendor before proceeding with these instructions.
More about recovery and backups
1. Run and configure the Pgpool-II environment
For illustration in this document, we're going to use Docker images from Bitnami by VMware. According to the official Pgpool documentation, this approach has several benefits:
- Bitnami closely tracks upstream source changes and promptly publishes new versions of this image using our automated systems.
- With Bitnami images, the latest bug fixes and features are available as soon as possible.
Setup
First, you need to set up Postgres nodes. They must be accessible to one another. They can be a part of the same private subnet or be exposed to the Internet, though exposure to the Internet isn’t recommended.
Create a primary PostgreSQL node on a separate machine. Run the following command:
docker network create my-network --driver bridgeThe launch of the node will look as follows:
docker run --detach --rm --name pg-0 \
  -p 5432:5432 \
  --network my-network \
  --env REPMGR_PARTNER_NODES={PG-0-IP},{PG-1-IP} \
  --env REPMGR_NODE_NAME=pg-0 \
  --env REPMGR_NODE_NETWORK_NAME={PG-0-IP} \
  --env REPMGR_PRIMARY_HOST={PG-0-IP} \
  --env REPMGR_PASSWORD=repmgrpass \
  --env POSTGRESQL_POSTGRES_PASSWORD=adminpassword \
  --env POSTGRESQL_USERNAME=customuser \
  --env POSTGRESQL_PASSWORD=custompassword \
  --env POSTGRESQL_DATABASE=customdatabase \
  --env BITNAMI_DEBUG=true \
  bitnami/postgresql-repmgr:latest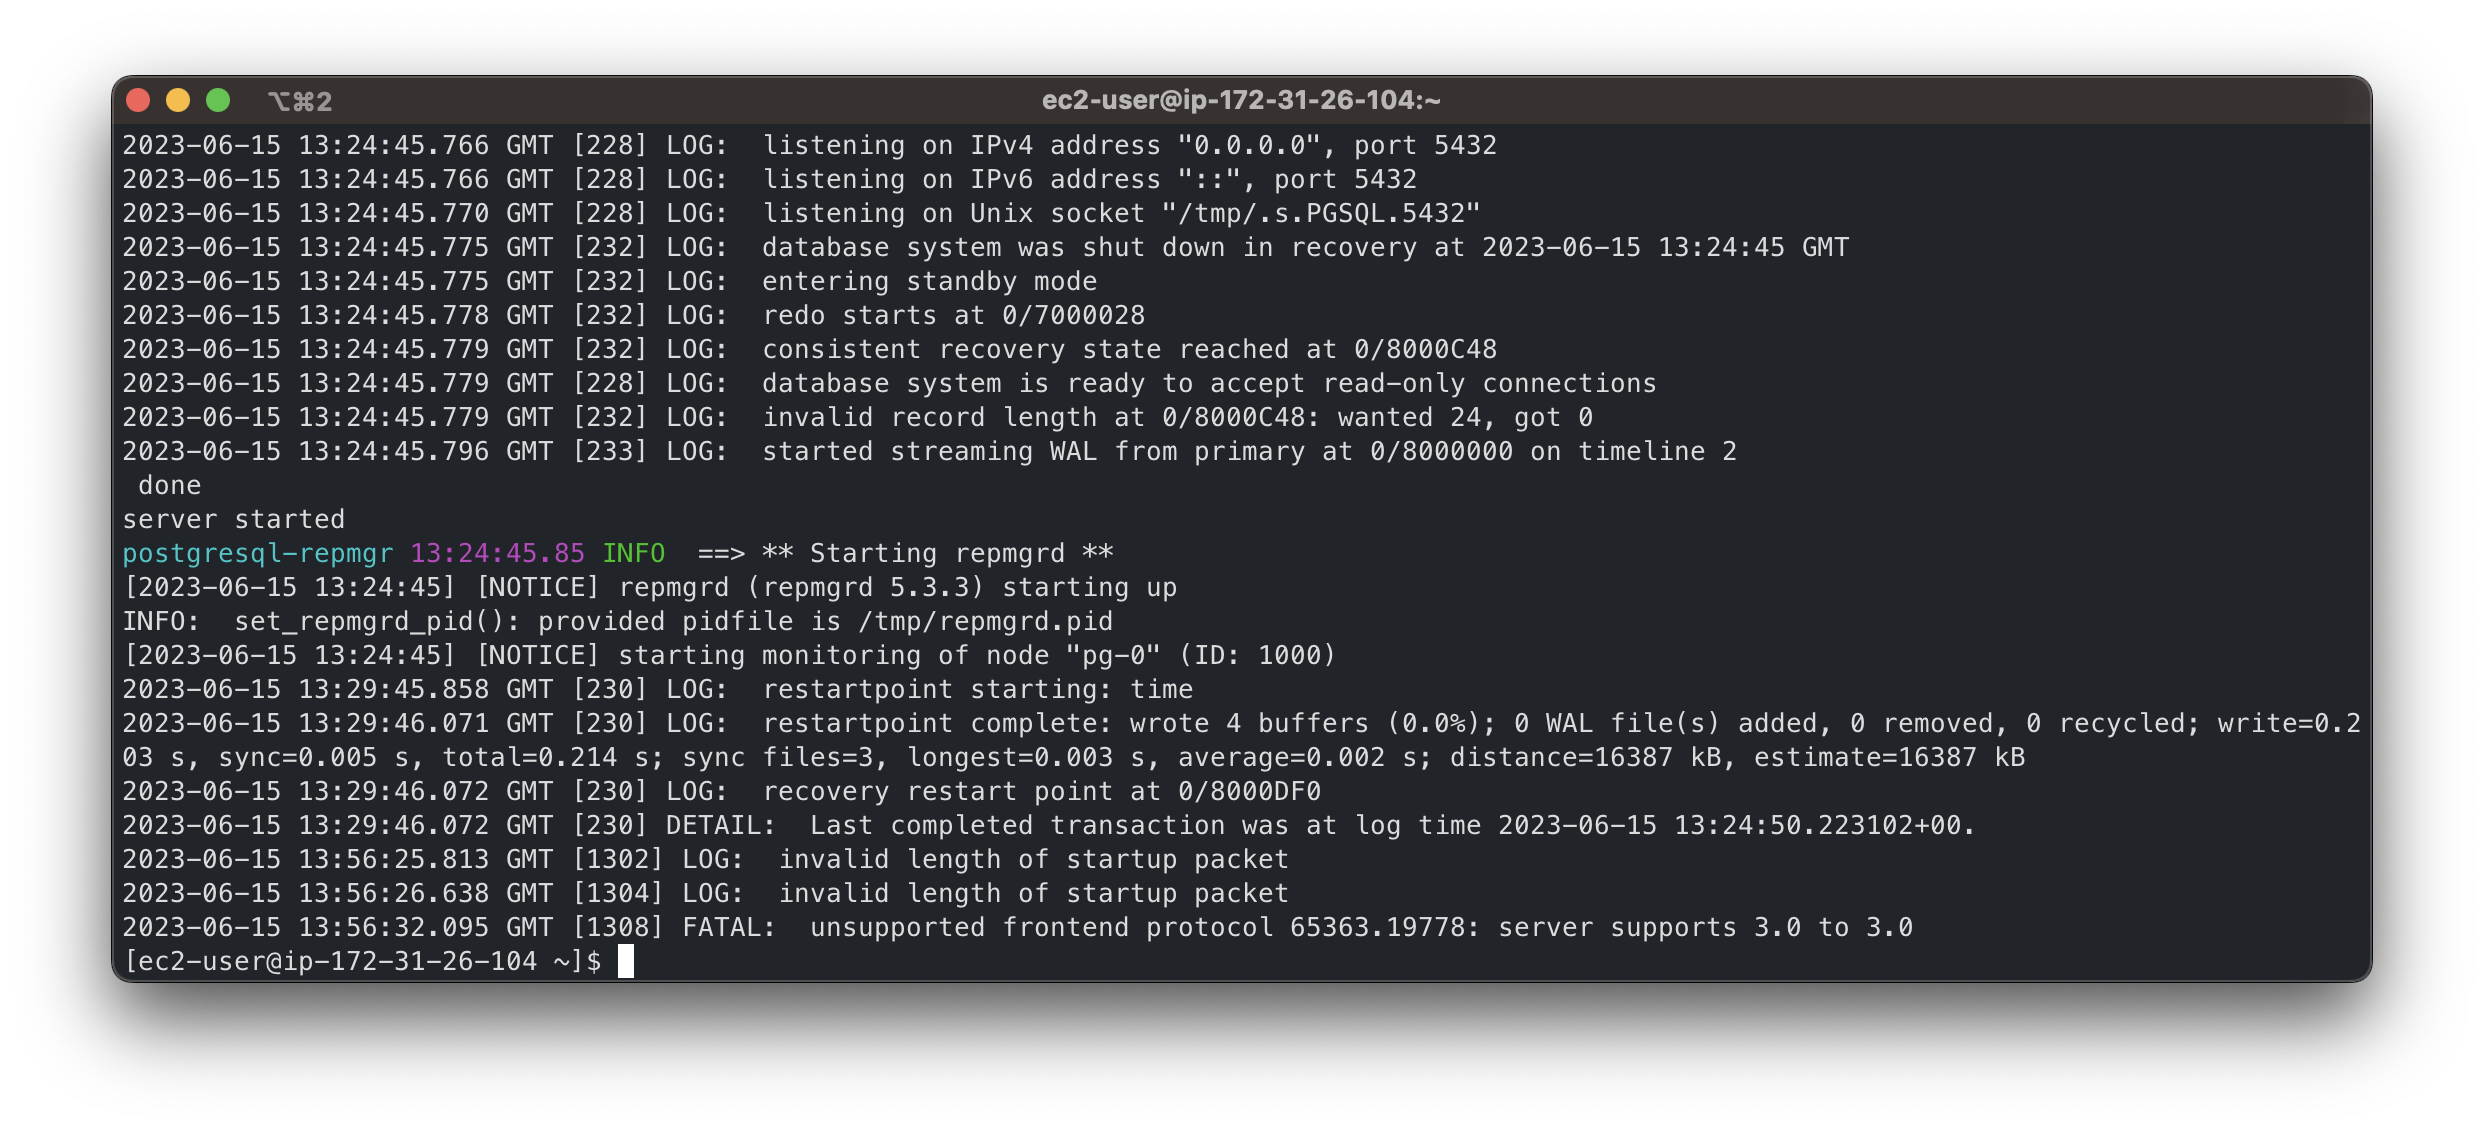
The message[NOTICE] starting monitoring of node "pg-0" (ID: 1000)confirms the successful creation of the primary node.Create a standby node on a separate machine. Run the following command:
docker network create my-network --driver bridgeThe launch of the node will look as follows:
docker run --detach --rm --name pg-1 \ -p 5432:5432 \ --network my-network \ --env REPMGR_PARTNER_NODES={PG-0-IP},{PG-1-IP} \ --env REPMGR_NODE_NAME=pg-1 \ --env REPMGR_NODE_NETWORK_NAME={PG-1-IP} \ --env REPMGR_PRIMARY_HOST={PG-0-IP} \ --env REPMGR_PASSWORD=repmgrpass \ --env POSTGRESQL_POSTGRES_PASSWORD=adminpassword \ --env POSTGRESQL_USERNAME=customuser \ --env POSTGRESQL_PASSWORD=custompassword \ --env POSTGRESQL_DATABASE=customdatabase \ --env BITNAMI_DEBUG=true \ bitnami/postgresql-repmgr:latest- Replace
{PG-0-IP},{PG-1-IP}in the code sample with comma-separated IP addresses that can be used to access pg-0 and pg-1 nodes. For example,15.237.94.251,35.181.56.169. - To establish a mutual connection, the standby node tries to access the primary node right after starting.
- Replace
Create a Pgpool balancer middleware node with the reference to the other nodes. Run the following command:
docker network create my-network --driver bridgeThe launch of the node will look as follows:
docker run --detach --name pgpool --network my-network \ -p 5432:5432 \ --env PGPOOL_BACKEND_NODES=0:{PG-0-HOST},1:{PG-1-HOST} \ --env PGPOOL_SR_CHECK_USER=postgres \ --env PGPOOL_SR_CHECK_PASSWORD=adminpassword \ --env PGPOOL_ENABLE_LDAP=no \ --env PGPOOL_USERNAME=customuser \ --env PGPOOL_PASSWORD=custompassword \ --env PGPOOL_POSTGRES_USERNAME=postgres \ --env PGPOOL_POSTGRES_PASSWORD=adminpassword \ --env PGPOOL_ADMIN_USERNAME=admin \ --env PGPOOL_ADMIN_PASSWORD=adminpassword \ --env PGPOOL_ENABLE_LOAD_BALANCING=no \ --env PGPOOL_AUTO_FAILBACK=yes \ --env PGPOOL_BACKEND_APPLICATION_NAMES=pg-0,pg-1 \ bitnami/pgpool:latest- Replace
{PG-0-HOST},{PG-1-HOST}in the code sample with the host addresses of the pg-0 and pg-1 nodes, including ports. For example,15.237.94.251:5432.
More about the configuration of the Bitnami containers
- Replace
Now, you can use the
pgpoolcontainer as an entry point to the database cluster. To connect to thepgpoolcontainer, use the following command:psql -h {PGPOOL-HOST} -p 5432 -U postgres -d repmgrReplace
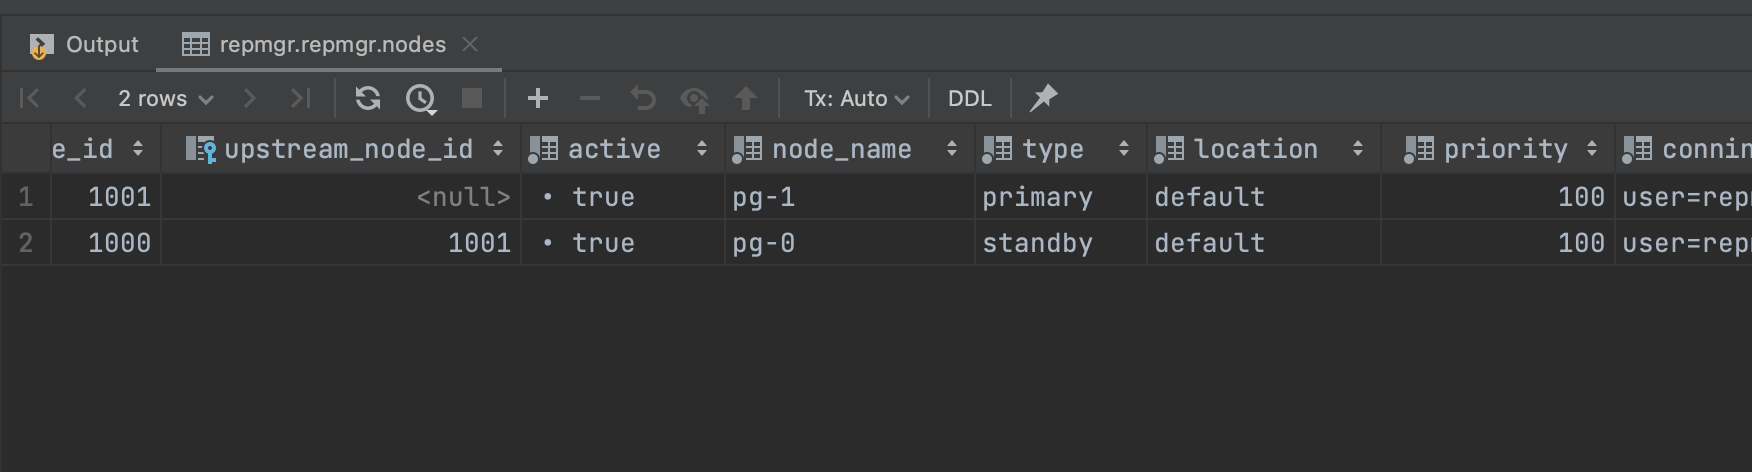
{PGPOOL-HOST}in the code sample with thepgpoolnode address. For example,34.227.66.69. To confirm the successful deployment, access the tablerepmgr.nodesby using the following SQL query:SELECT * FROM repmgr.nodes;The output must show all the information about each node’s state:
Create the Bitbucket database
Before you can use Bitbucket with PostgreSQL, you must:
- Create a role for Bitbucket to use when it connects to the database.
We strongly recommend that this role be established for Bitbucket's use exclusively; it should not be shared by other applications or people. - Create a database in which Bitbucket can store its data.
The database must be configured to use the UTF-8 character set.
During normal operation, Bitbucket will acquire 25–30 connections to the database. The maximum number of connections is a configurable system property – see Database pool. - Note that Bitbucket requires the database to keep idle connections alive for at least 10 minutes. If the database is configured with less than a 10-minute connection timeout, there will be seemingly random connection errors.
Here is an example of how to create a user called bitbucketuser with password jellyfish
, and a database called bitbucket , which is configured for use by bitbucketuser. Using a PostgreSQL client application like psql or pgAdmin, run the following commands, replacing the user name, password, and database name with your own values.
CREATE ROLE bitbucketuser WITH LOGIN PASSWORD 'jellyfish' VALID UNTIL 'infinity';

CREATE DATABASE bitbucket WITH ENCODING='UTF8' OWNER=bitbucketuser CONNECTION LIMIT=-1;
Ensure that the Bitbucket server can connect to the Pgpool server.
Connect Bitbucket to Pgpool-II
You can now connect Bitbucket to Pgpool-II, either:
- when you run the Setup Wizard, at install time,
- when you wish to migrate to PgPool-II, either from the embedded HSQL database or from another external database.
The instructions below are the same as for connecting to a Postgres database, except that the host and port are those of the Pgpool-II server rather than connecting to the Postgres database server directly.
If migrating to Pgpool-II without using the setup or migration wizards, it's important to ensure the jdb.url property in $bitbuckethome/shared/bitbucket.properties doesn't contain a "targetServerType" parameter. This was added automatically in previous versions of Bitbucket but will cause issues with Bitbucket startup when using Pgpool after a failover to the secondary has occurred. If it is there it is safe to remove. Previous versions of Bitbucket would add it back in when the driver is org.postgresql.Driver and there is no "?" in the jdbc.url property.
When running the Setup Wizard at install time
- At the Database step, select External.
- Select PostgreSQL for Database Type.
- Complete the form. Refer to the table below for details.
- Select Next, and follow the instructions in the Bitbucket Setup Wizard.
When migrating to PostgreSQL
- In the Bitbucket administration area, select Database.
- Select Migrate database.
- Select PostgreSQL for Database Type.
- Complete the form:
- Hostname: The hostname or IP address of the computer running the Pgpool-II server.
- Port: The TCP port with which Bitbucket can connect to the database server. The default value is the default port that PostgreSQL runs against. You can change that if you know the port that your Pgpool-II instance is using.
Database name: The name of the database that Bitbucket should connect to.
Database username: The username that Bitbucket should use to access the database.
Database password: The password that Bitbucket should use to access the database.
- Select Start Migration.
