How to restrict project access for teams in Jira Cloud
This article applies to company-managed projects.
For team-managed projects, check out (Jira Software) Team-managed project permissions or (Jira Service Management) Overview of permissions in team-managed service projects
Overview
Since Jira is usually shared by different teams, it's common to have the need to restrict project access. Here we'll illustrate how to restrict project access so that each group can only access their corresponding project in Jira Cloud.
Before restricting access, there are three concepts that are important to understand: permission schemes, groups, and project roles. We'll then use these to restrict access to projects.
Permission Schemes
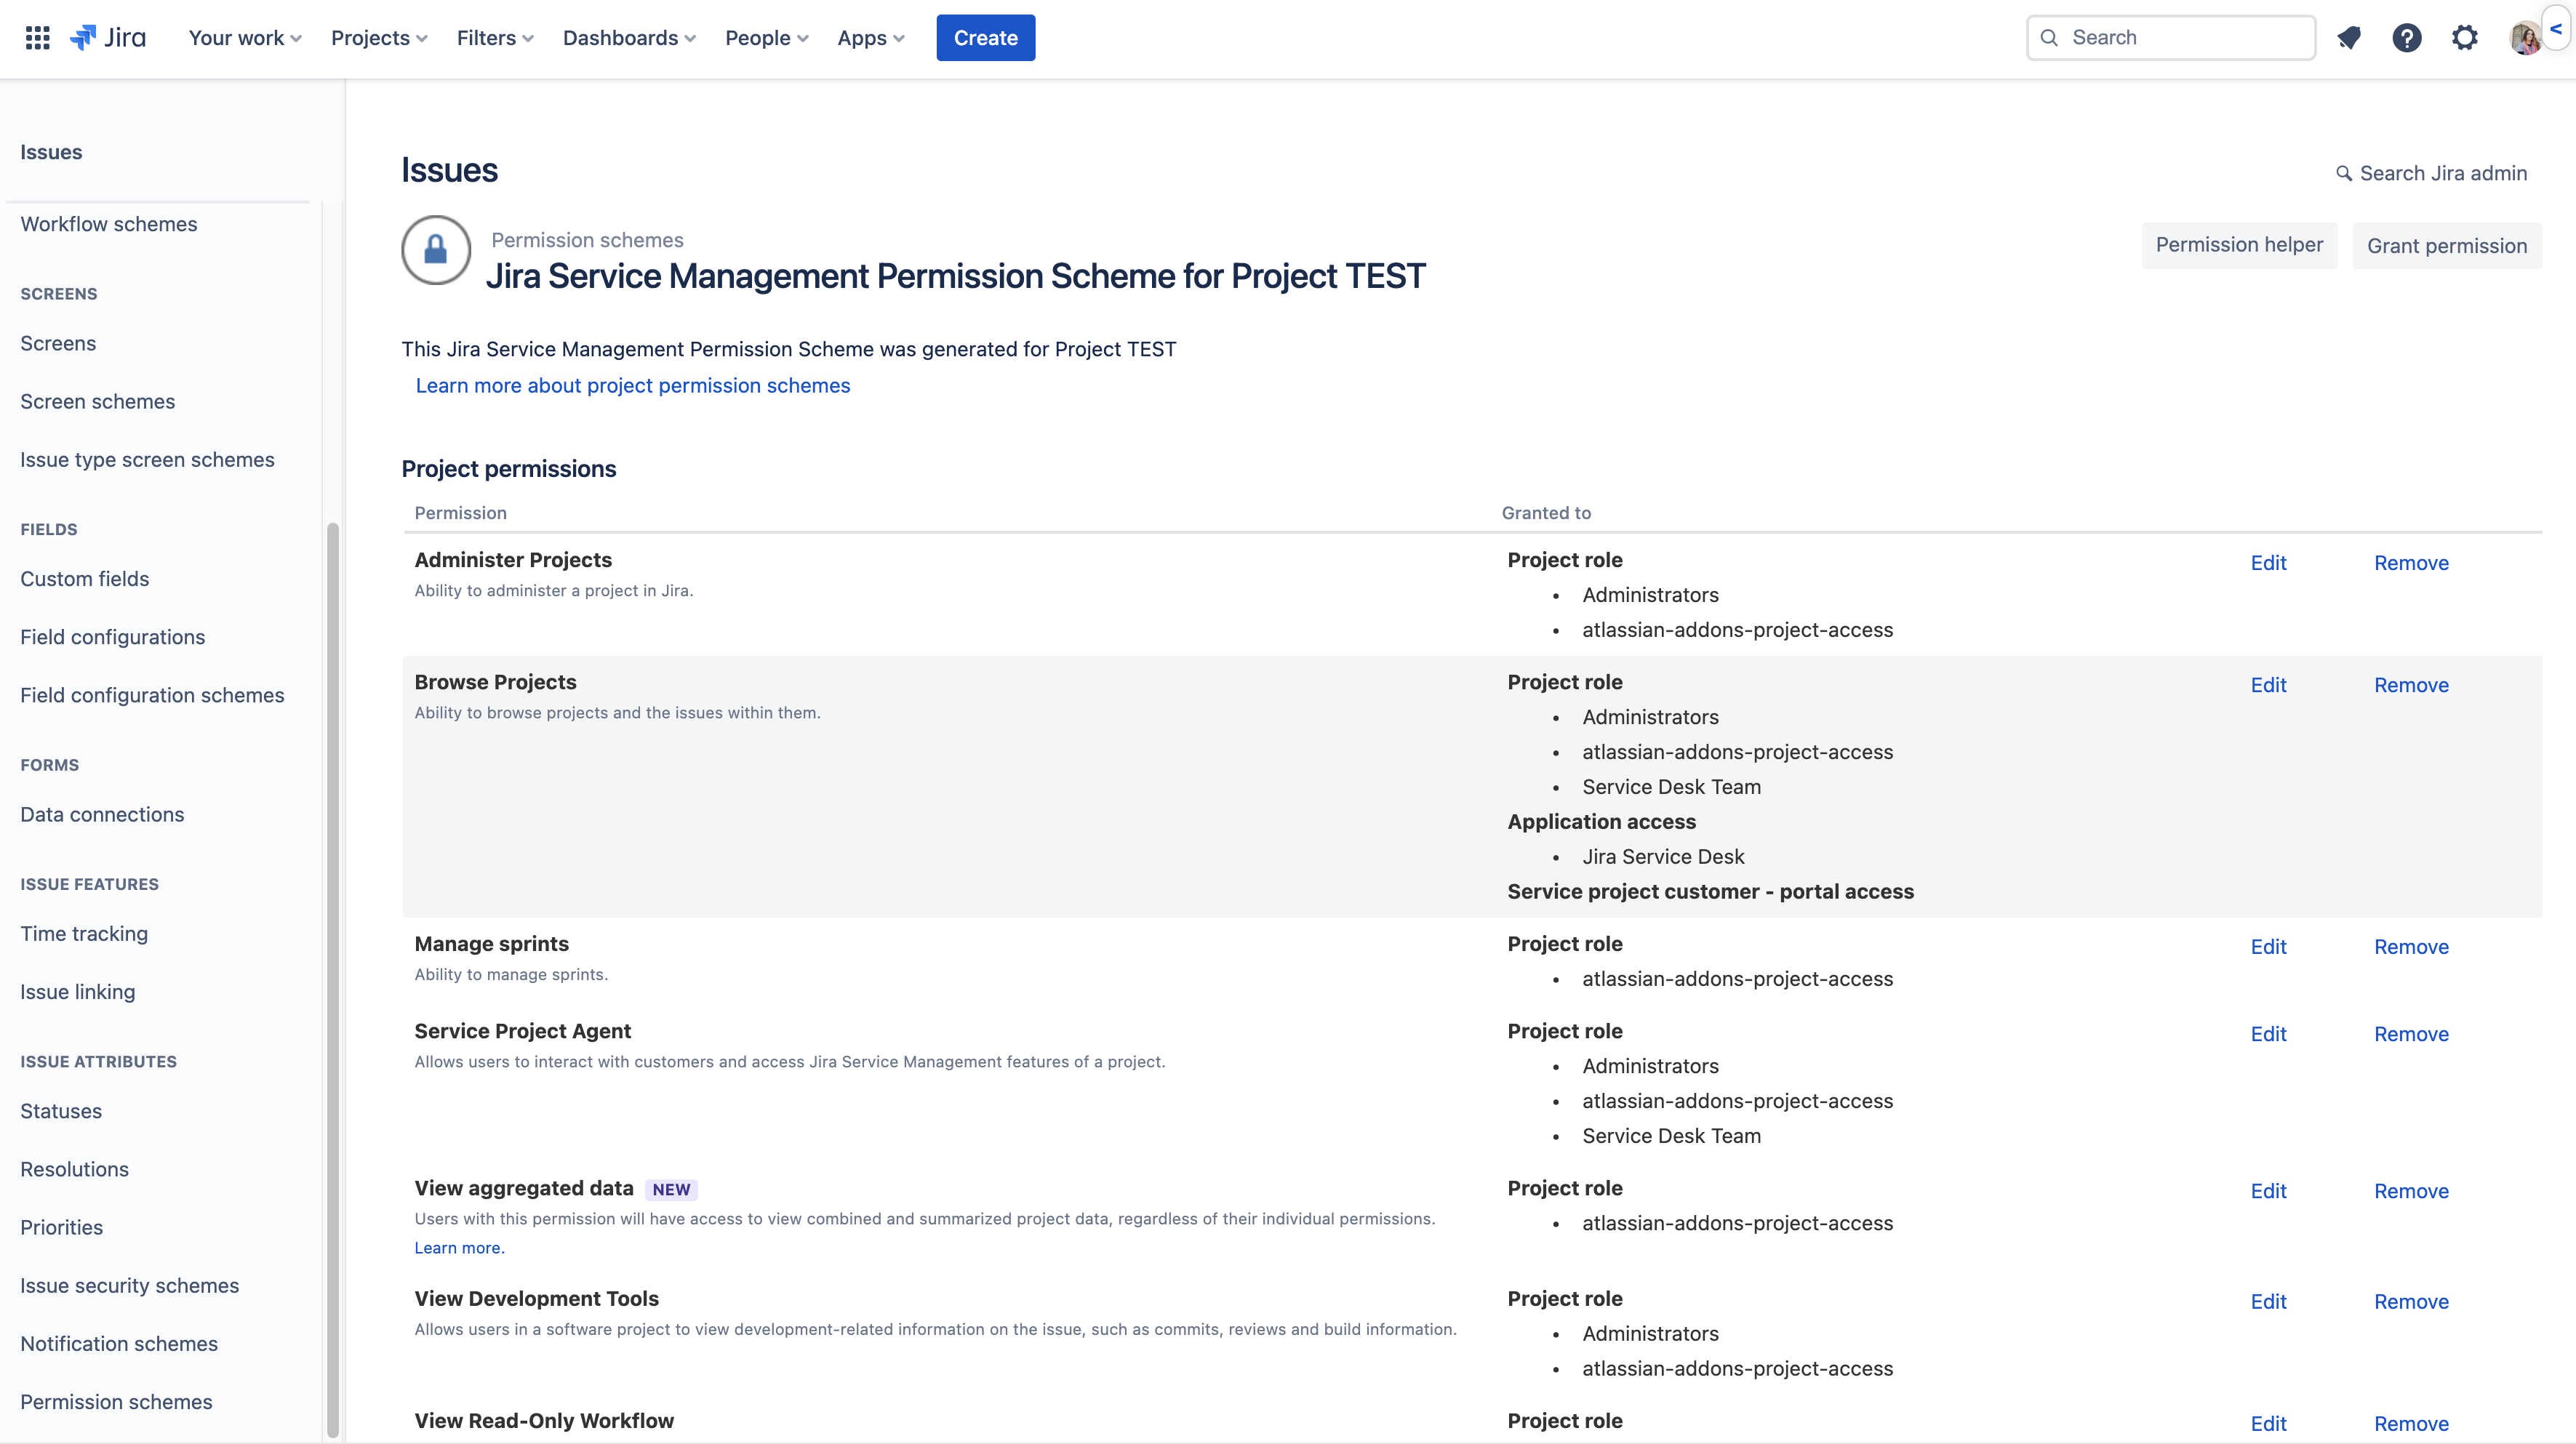
The permission scheme (Jira settings > Issues > Permission schemes) dictates all the permissions in the projects it's associated with. To be able to access a project and view its issues, you need the Browse Projects permission on the permission scheme associated with the project.
See Managing project permissions for more information.
Groups
Only site administrators can manage groups.
Groups are global, meaning that if you're a member of a group like administrators, you're a member of the group for all of Jira. You can create and manage groups at Jira settings > User management > Groups.

If only users of the group Teams-in-Space should have access to the Teams In Space project, you need to make sure that that group—and no other group—has Browse Projects permission on the permission scheme associated with the project.
See Create and update groups for more information.
Project Roles
Project roles work like groups, but they're not global. The membership of project roles is defined in the project settings and is valid only for that project.
To create a new project role, go to Jira settings > System > Project roles. To configure project role membership within a project, go to the project and choose Project settings > People.

See Managing project roles for more information.
Scenario
We're going to use a scenario to demonstrate how this works. We have three projects: Teams in Space (TIS), Human Resources (HR), and Technical Crew (TC).

In our example, we also have 3 groups: Human-Resources, Teams-in-Space, and Technical-Crew. Each group should only be able to access their corresponding project. By using project roles as well as groups to achieve this, we'll only need to use one permission scheme.
Create groups if you don't have any
If you already have a group or groups set up, you can skip this step. If not, you'll need at least one group to assign to our project role later on. You need to be a site admin to create groups. If you're not a site admin, ask your site admin to set up any groups you need.
To create groups:
- Go to Jira settings > User management > Groups.
- Choose Create group, give the group a name and choose Create group.
- Click Add to add people to your group.
- Add people (you can add multiple people) and choose Add user.
Configure the permission scheme
Create a project role
We're going to create a new project role and call it "Browse". This is the project role that's going to grant our groups access to the projects.
- Go to Jira settings > System > Project roles.
- At the bottom of the page, add a Name and Description and choose Add project role (You can use an existing project role if you like. We're creating a new one for clarity, though).

Add the project role to the Browse Projects permission
- Go to Jira settings > Issues > Permission schemes.
- Find the permissions scheme associated to the relevant project, and click Permissions.
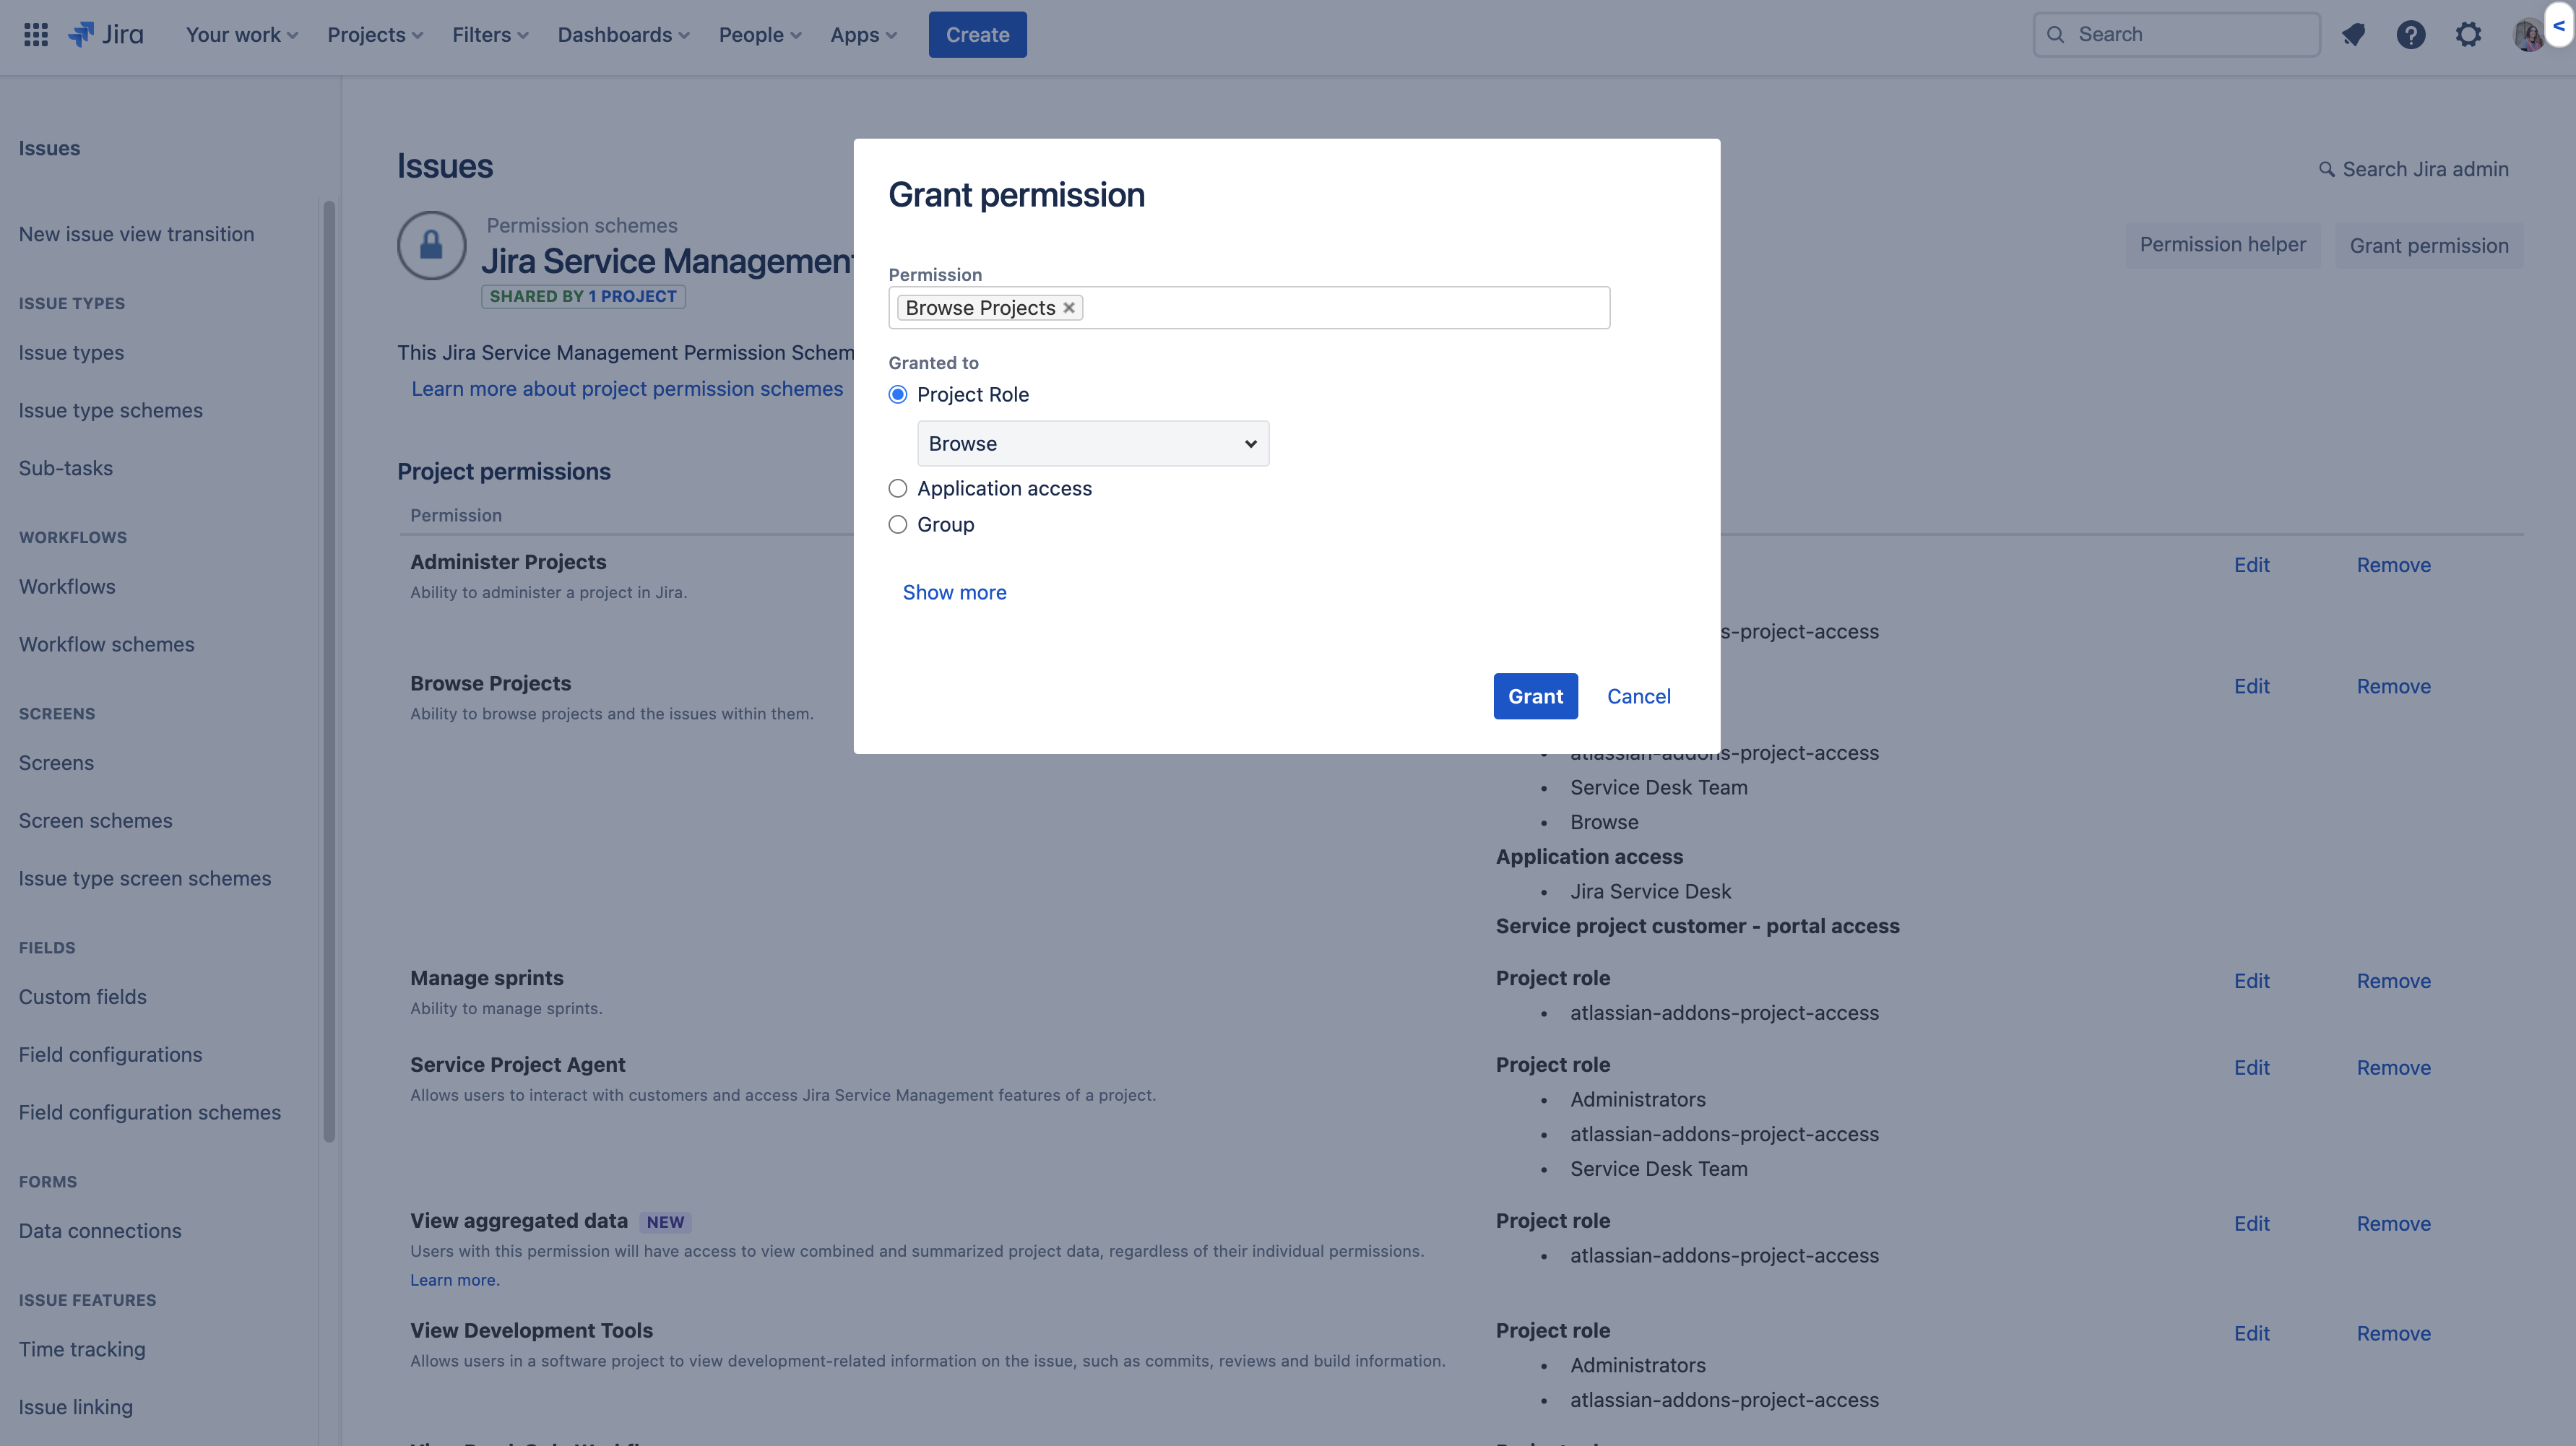
- Click Edit, choose Project Role, and select the Browse project role we previously created.
- Click Grant.
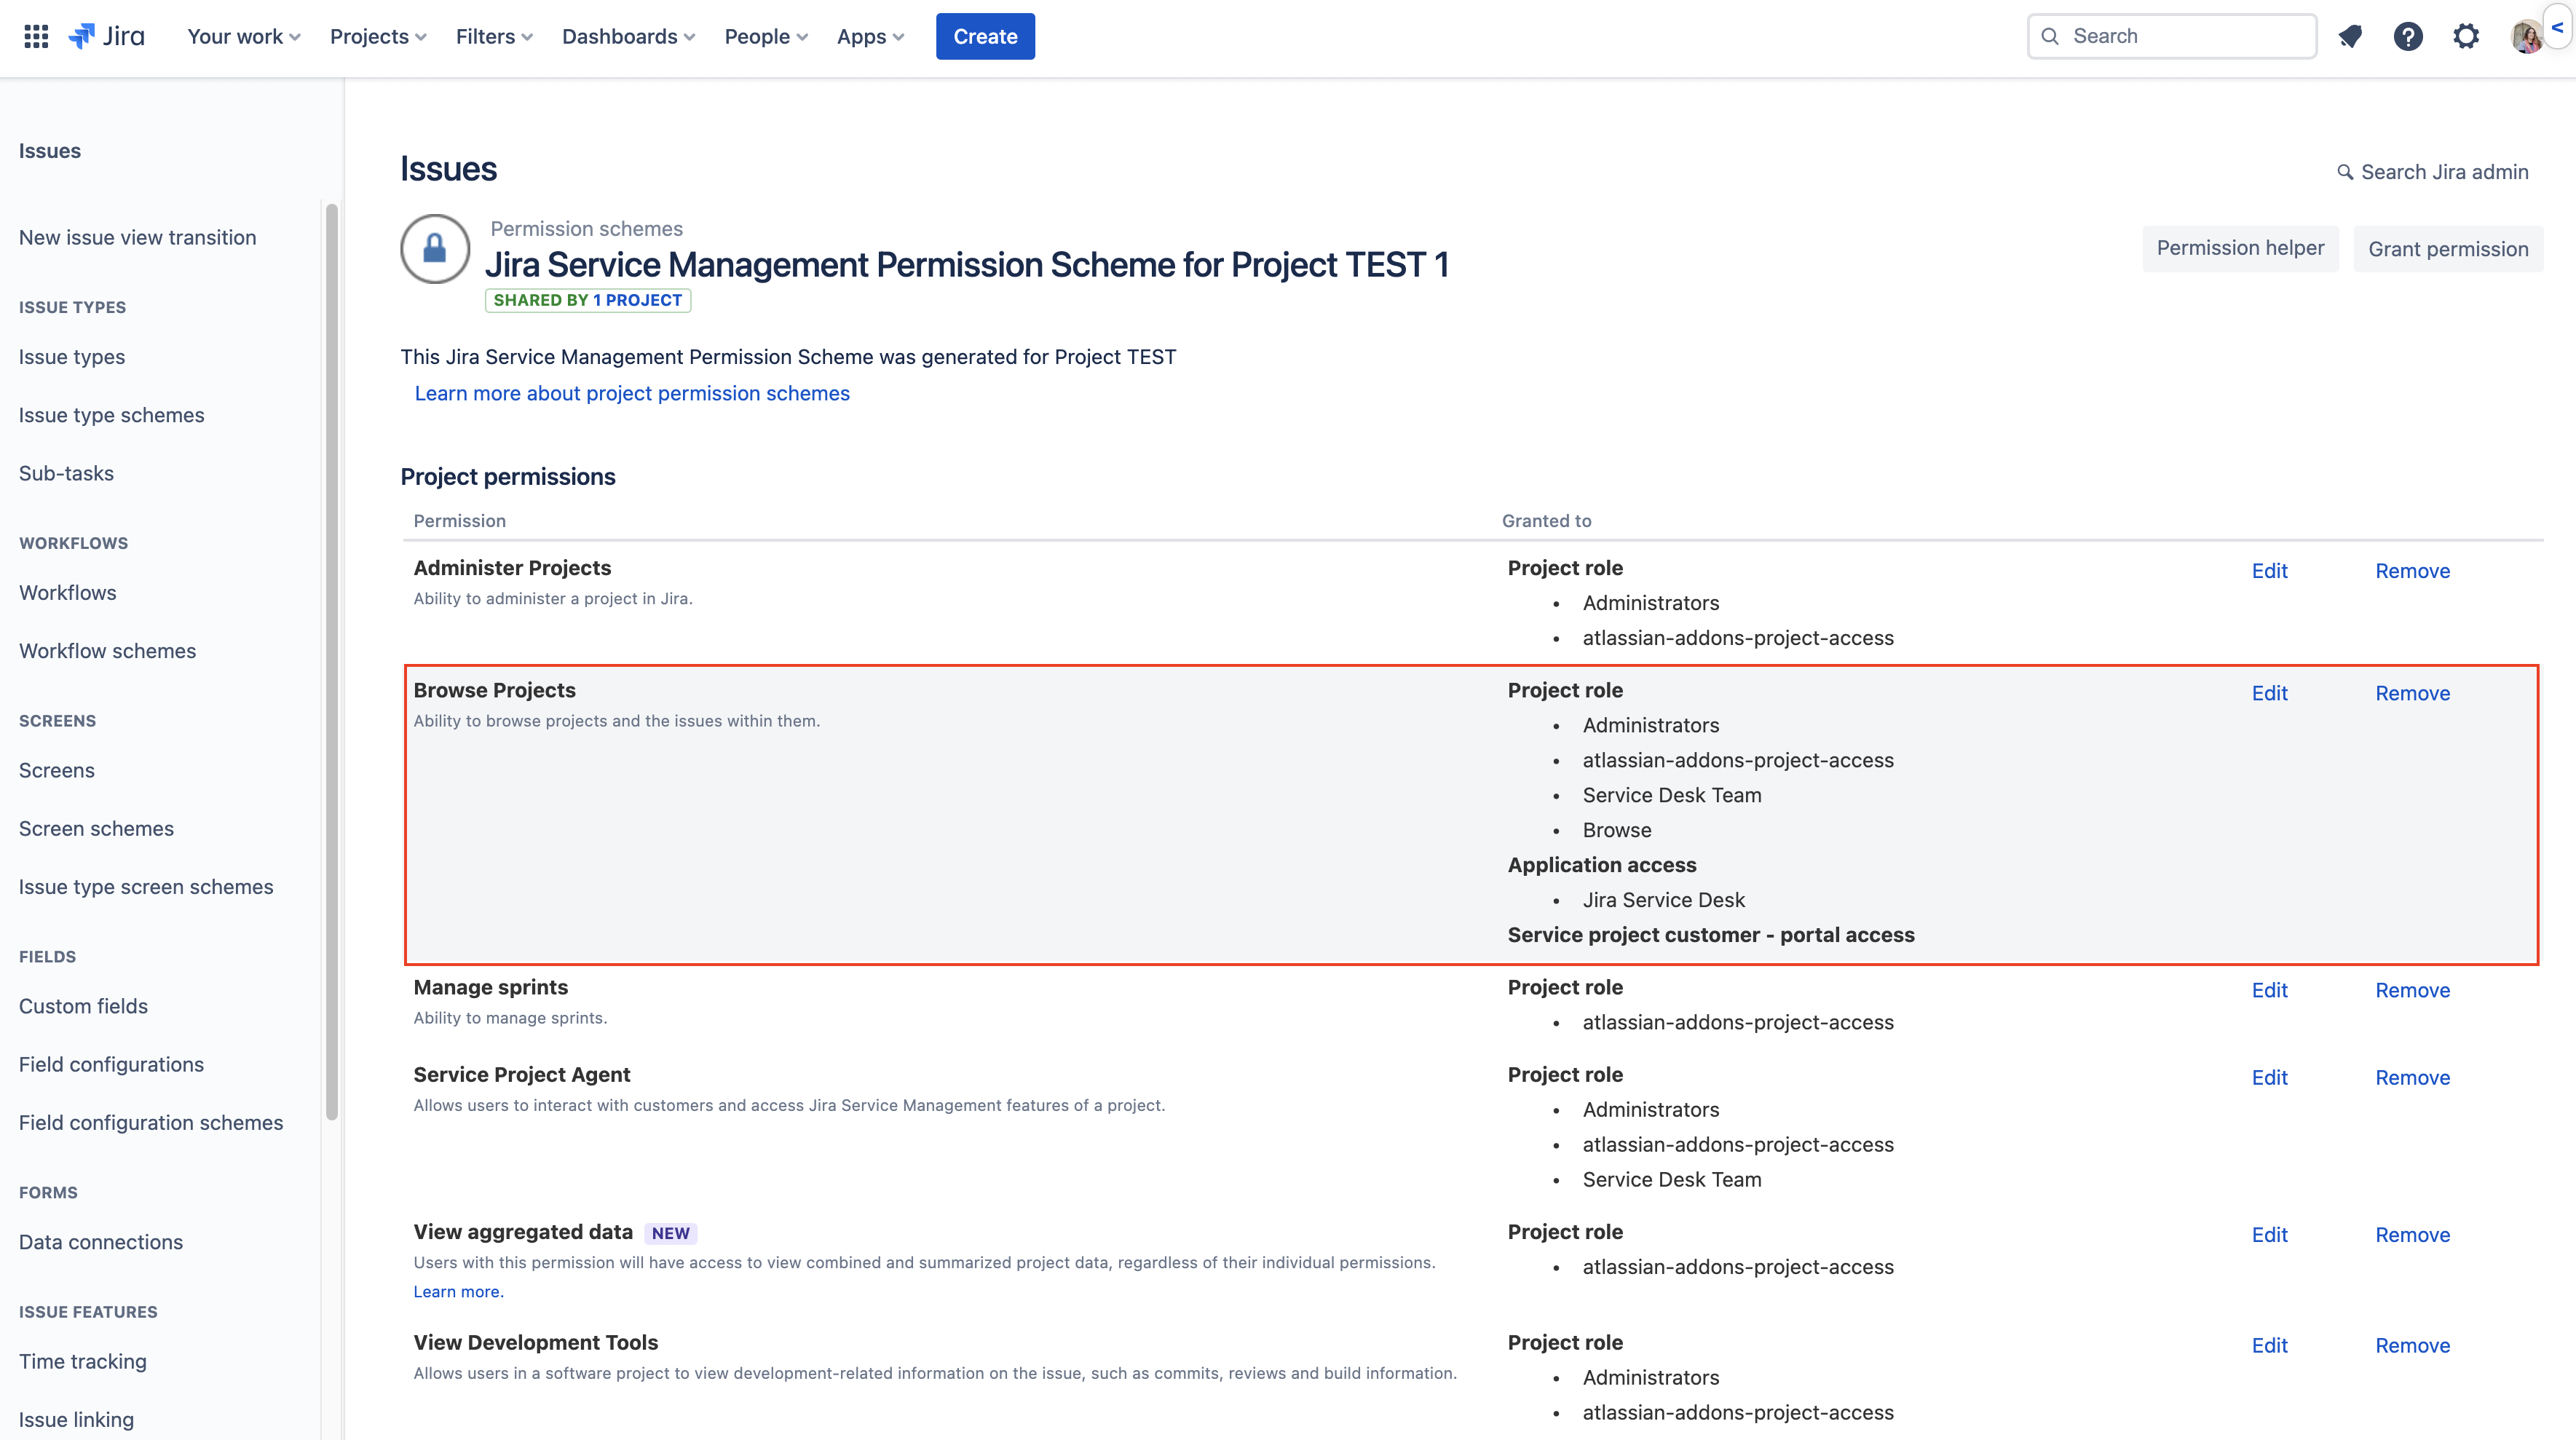
We now have a permission scheme with the Browse project role configured for the Browse project permission.
If you'd like the users to also have permission to create issues, comments, etc, please be sure to also add the project role to these other permissions on the permission scheme.
Add the group to the project role
We're now going to add the groups to the appropriate project role to give them access again. As we've explained before, membership in project roles is only valid for that project.
Go to the People settings of each project and add the corresponding group to the Browse project role.
For example, for the Teams in Space project we would:
Go to Project settings > People.
Choose Add people.
Start typing "Teams-In-Space" then select the group.
Choose the Browse project role and click Add.
Now, all users of the Teams-In-Space group have access to the Teams in Space project. Repeat this for the other projects, choosing the appropriate group in each project.
Remove unnecessary browse projects permissions
To help ensure the project will only be visible to the right users, you can remove any groups and also application access from the browse projects permission. To grant users access to the project, add them (users or groups) to the project (Project settings > People) and assign them to the role created.
If you don't remove groups and application access, respectively, any user added to the group or any logged-in user on your site will still be able to access all projects associated with that permission scheme. If you don't see either on your project's permission scheme, the permission hadn't been granted and you don't need to make this change.
- Choose Remove next to the Browse Projects permission.
- Select any groups and also application access.
- Click Remove.

All the steps listed in this KB are available in the video below:
If you need any help implementing this on your site, you can always check our documentation and get in touch with our support team!
Related article: Jira Cloud - How to Create a Read Only User