How to migrate global templates with the Confluence Cloud Migration Assistant - EAP
Related content
- No related content found
Purpose
Thank you for participating in the early access program (EAP). The purpose of this document is to provide information about the Templates EAP and instructions on how to use feature flags to migrate some of the global templates via Confluence Cloud Migration Assistant.
About the Templates EAP
How to be a part of the EAP
If you wish to be part of the EAP, you can fill out the EAP participation form. After assessing your request, someone from our support team will reach out to take your Templates migration forward.
How to provide feedback
To provide feedback for the feature, use the Provide feedback about this article link at the end of this page or the MOVE ticket created when you joined the EAP. We will use the feedback to improve our product and documentation.
Learn more about the EAP announcement for Templates.
What we migrate with the EAP
The global templates for Confluence are still under active development; some template entities and macros are not yet supported. The table below outlines what is and isn’t currently migrated.
|
|
|---|---|
|
|
Environment
We recommend you upgrade to the following versions to use the feature flag:
Confluence 6.15 and higher
Confluence Cloud Migration Assistant version 3.4.8 or higher
Instructions
The migration of global templates is implemented via a feature flag (known as dark features). Enable the feature flag before you run the migration using the Confluence Cloud Migration Assistant.
Important
Customers should be aware that this feature flag is experimental. We’ll do our best to offer support if this feature flags breaks migrations. However, this feature flag doesn’t cover all edge cases today. If you need to contact the support team, use the MOVE ticket created when you joined the EAP.
Step 1: Enable the feature flag
To enable or disable dark features, you must be a Confluence admin.
To enable the feature flag:
1. Navigate to URL: <Confluence_URL>/admin/darkfeatures.action
2. Specify migration-assistant.enable.global-entities in the Enable dark feature field.
3. Select Submit.
Step 2: Perform your migration
After enabling the feature flag, you can use the Confluence Cloud Migration Assistant to perform your migration.
To perform your migration:
1. Go to Confluence Administration > look for the Atlassian Cloud category > select Migration Assistant.
2. On the Migration assistant home screen, select Migrate your data.
3. Select Create new migration.
4. Review the information on this screen, and select Connect to Cloud to continue.
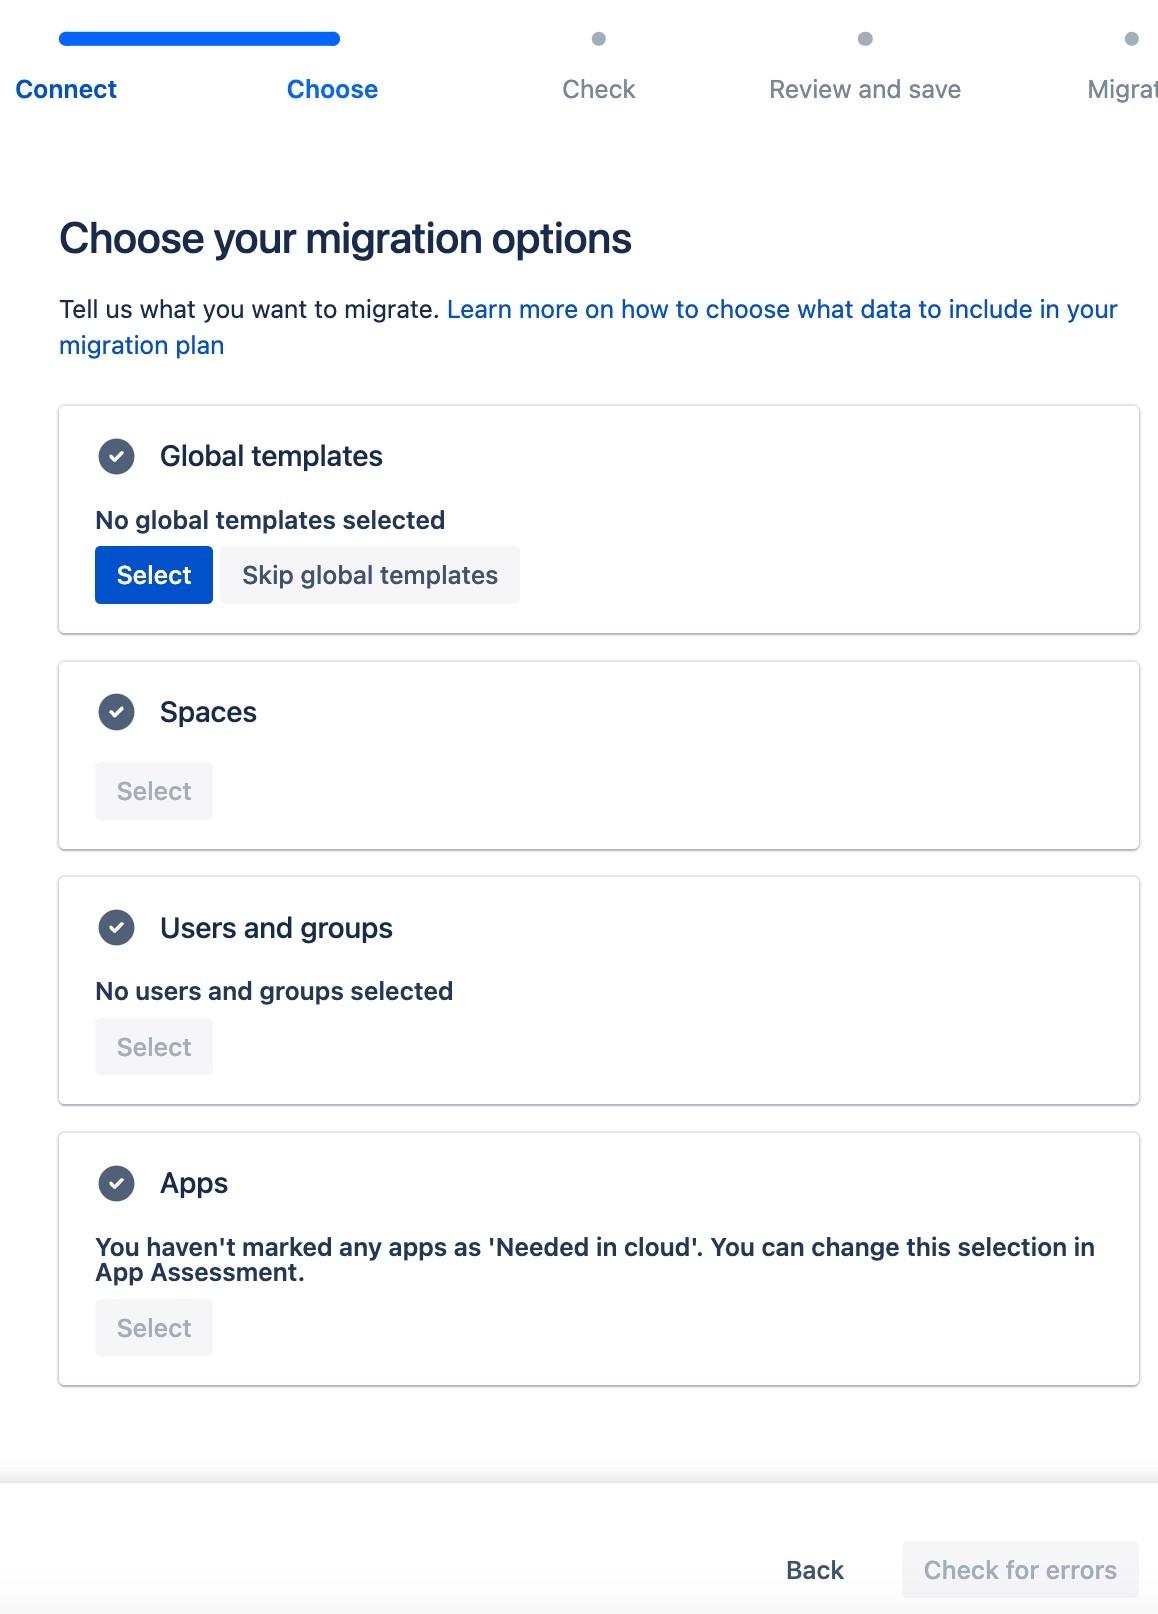
5. On the Choose your migration options screen, select the data to include in your migration; you can add the following items:
Global templates
Spaces (and their attachments)
Attachments only
All users and groups from the Confluence directory or only users related to the spaces you’re migrating in the same plan
All apps that you marked as Needed in the cloud when assessing your apps
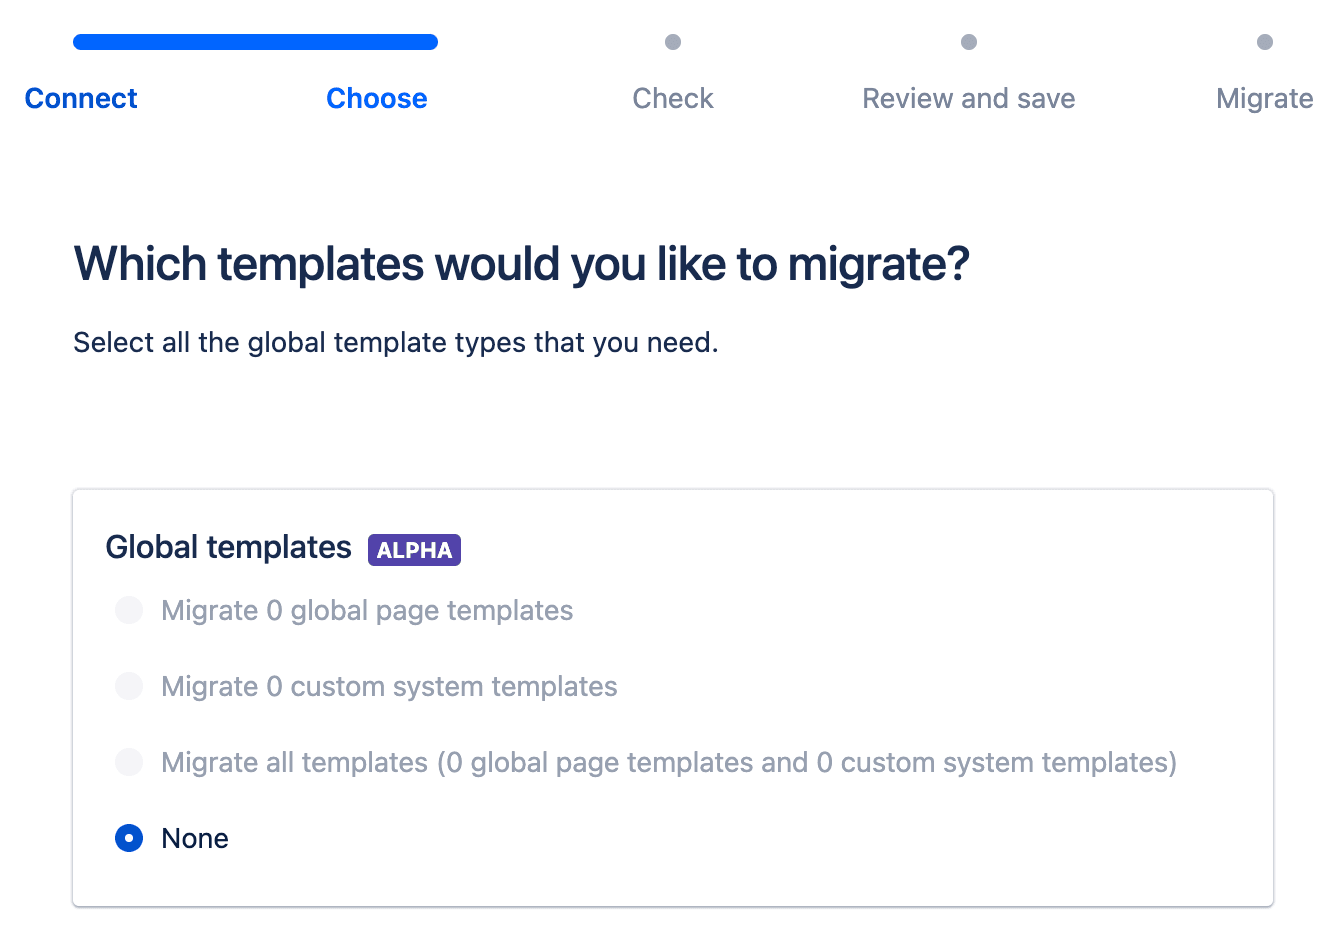
6. In the Global templates section, select the template you want to migrate from the following options:
Migrate all global page templates in your server instance
Migrate the system templates that you have edited in your server instance, referred to as custom system templates
Migrate all global page templates and all custom system templates in your server instance
Skip migrating any global templates
7. Select Add to migration.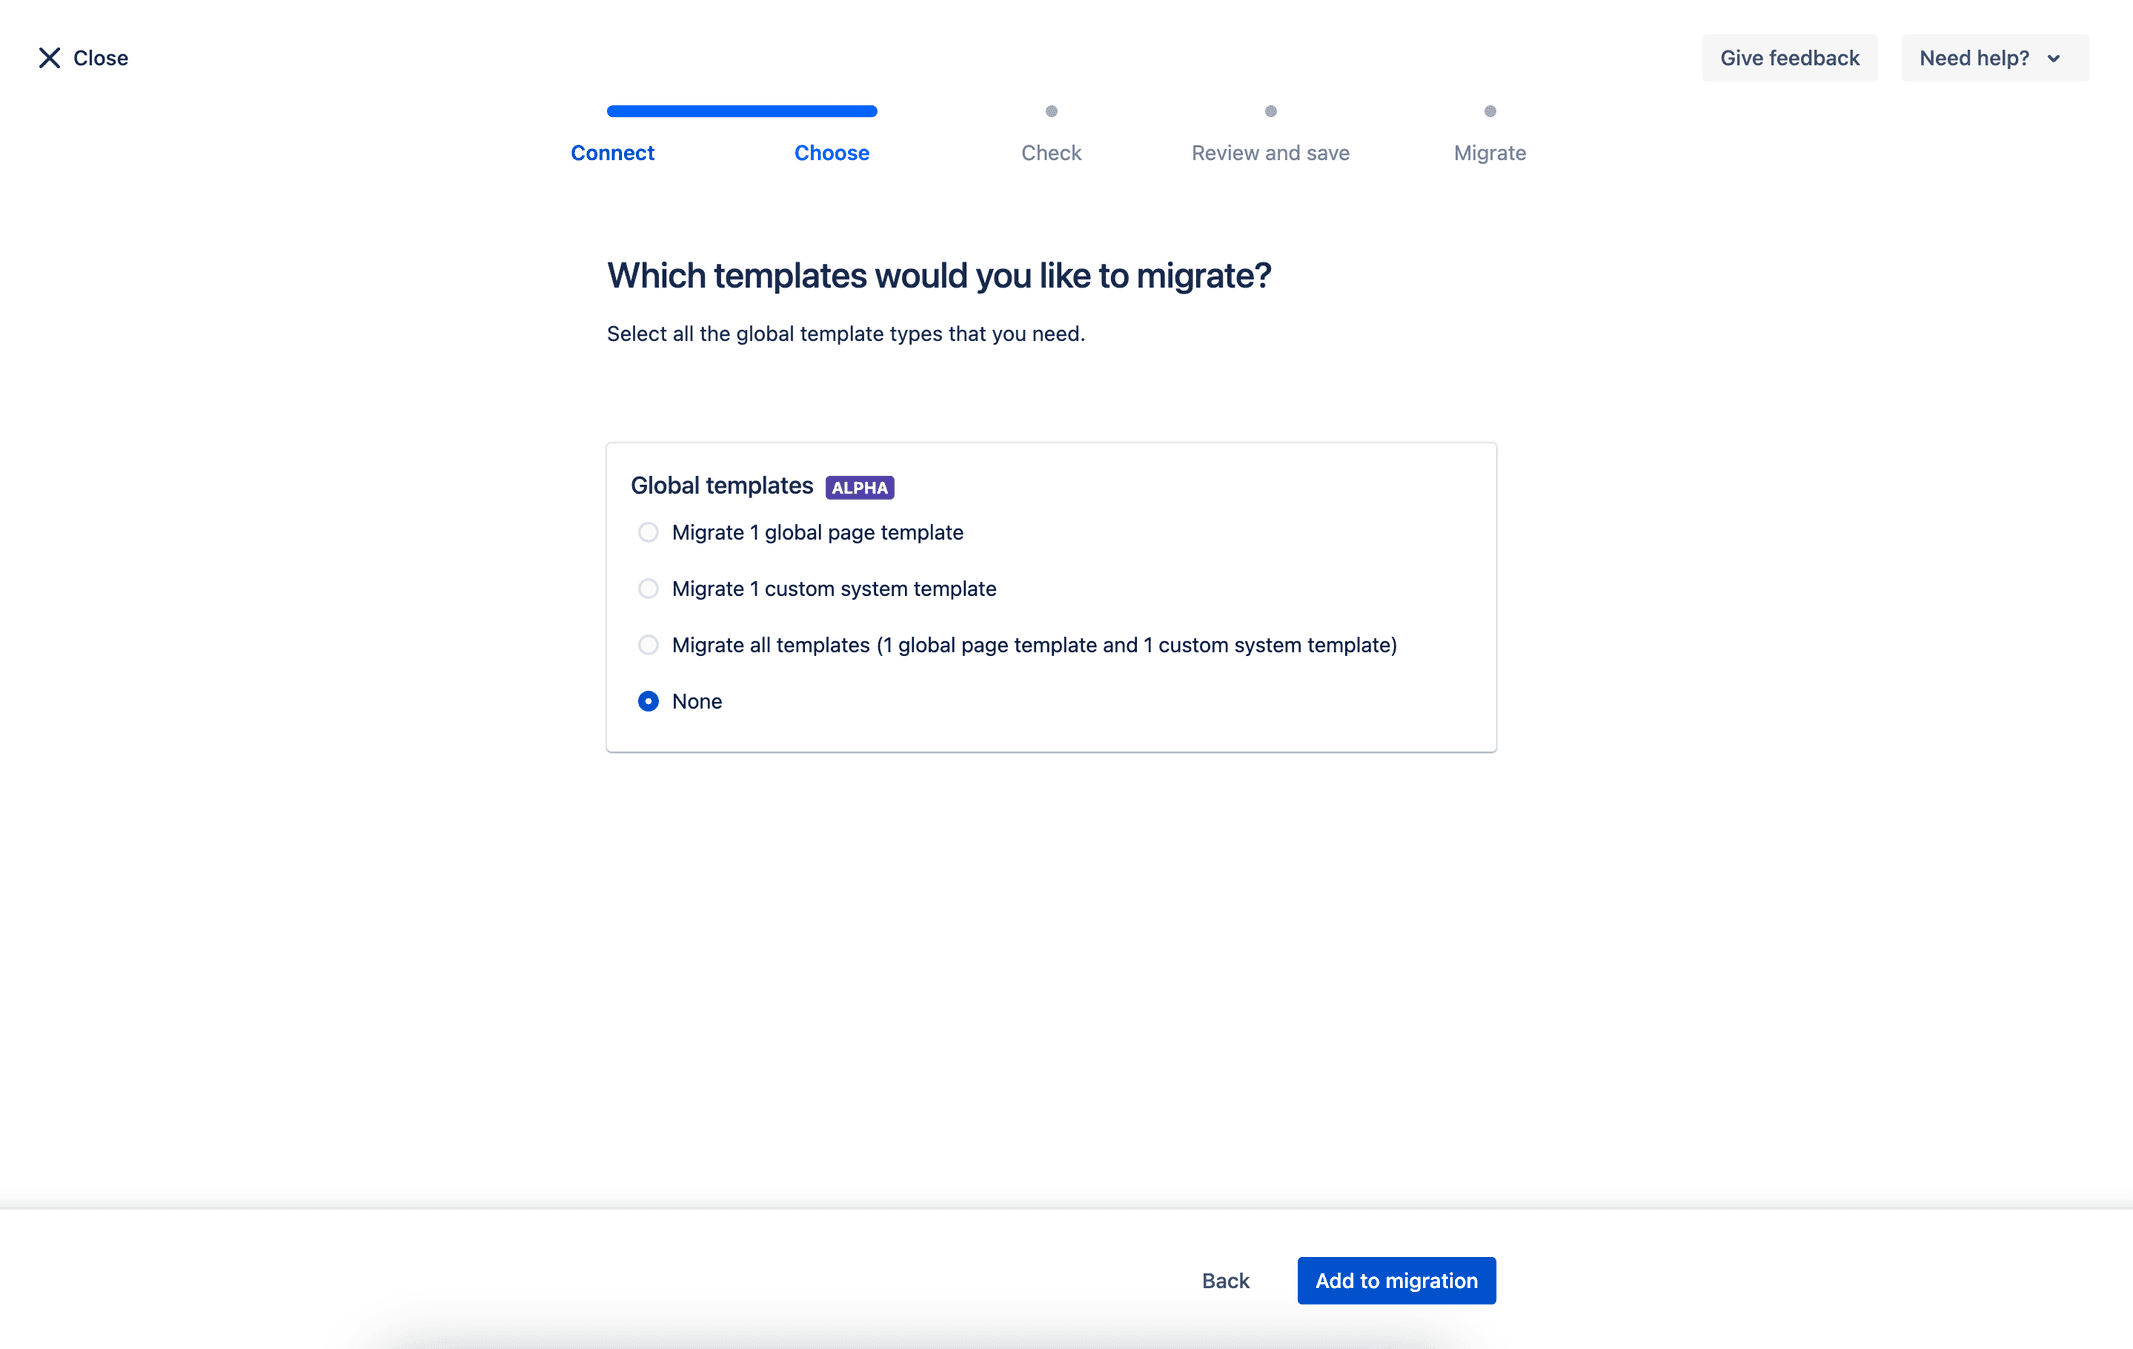
8. Fix the errors in case you have duplicate templates.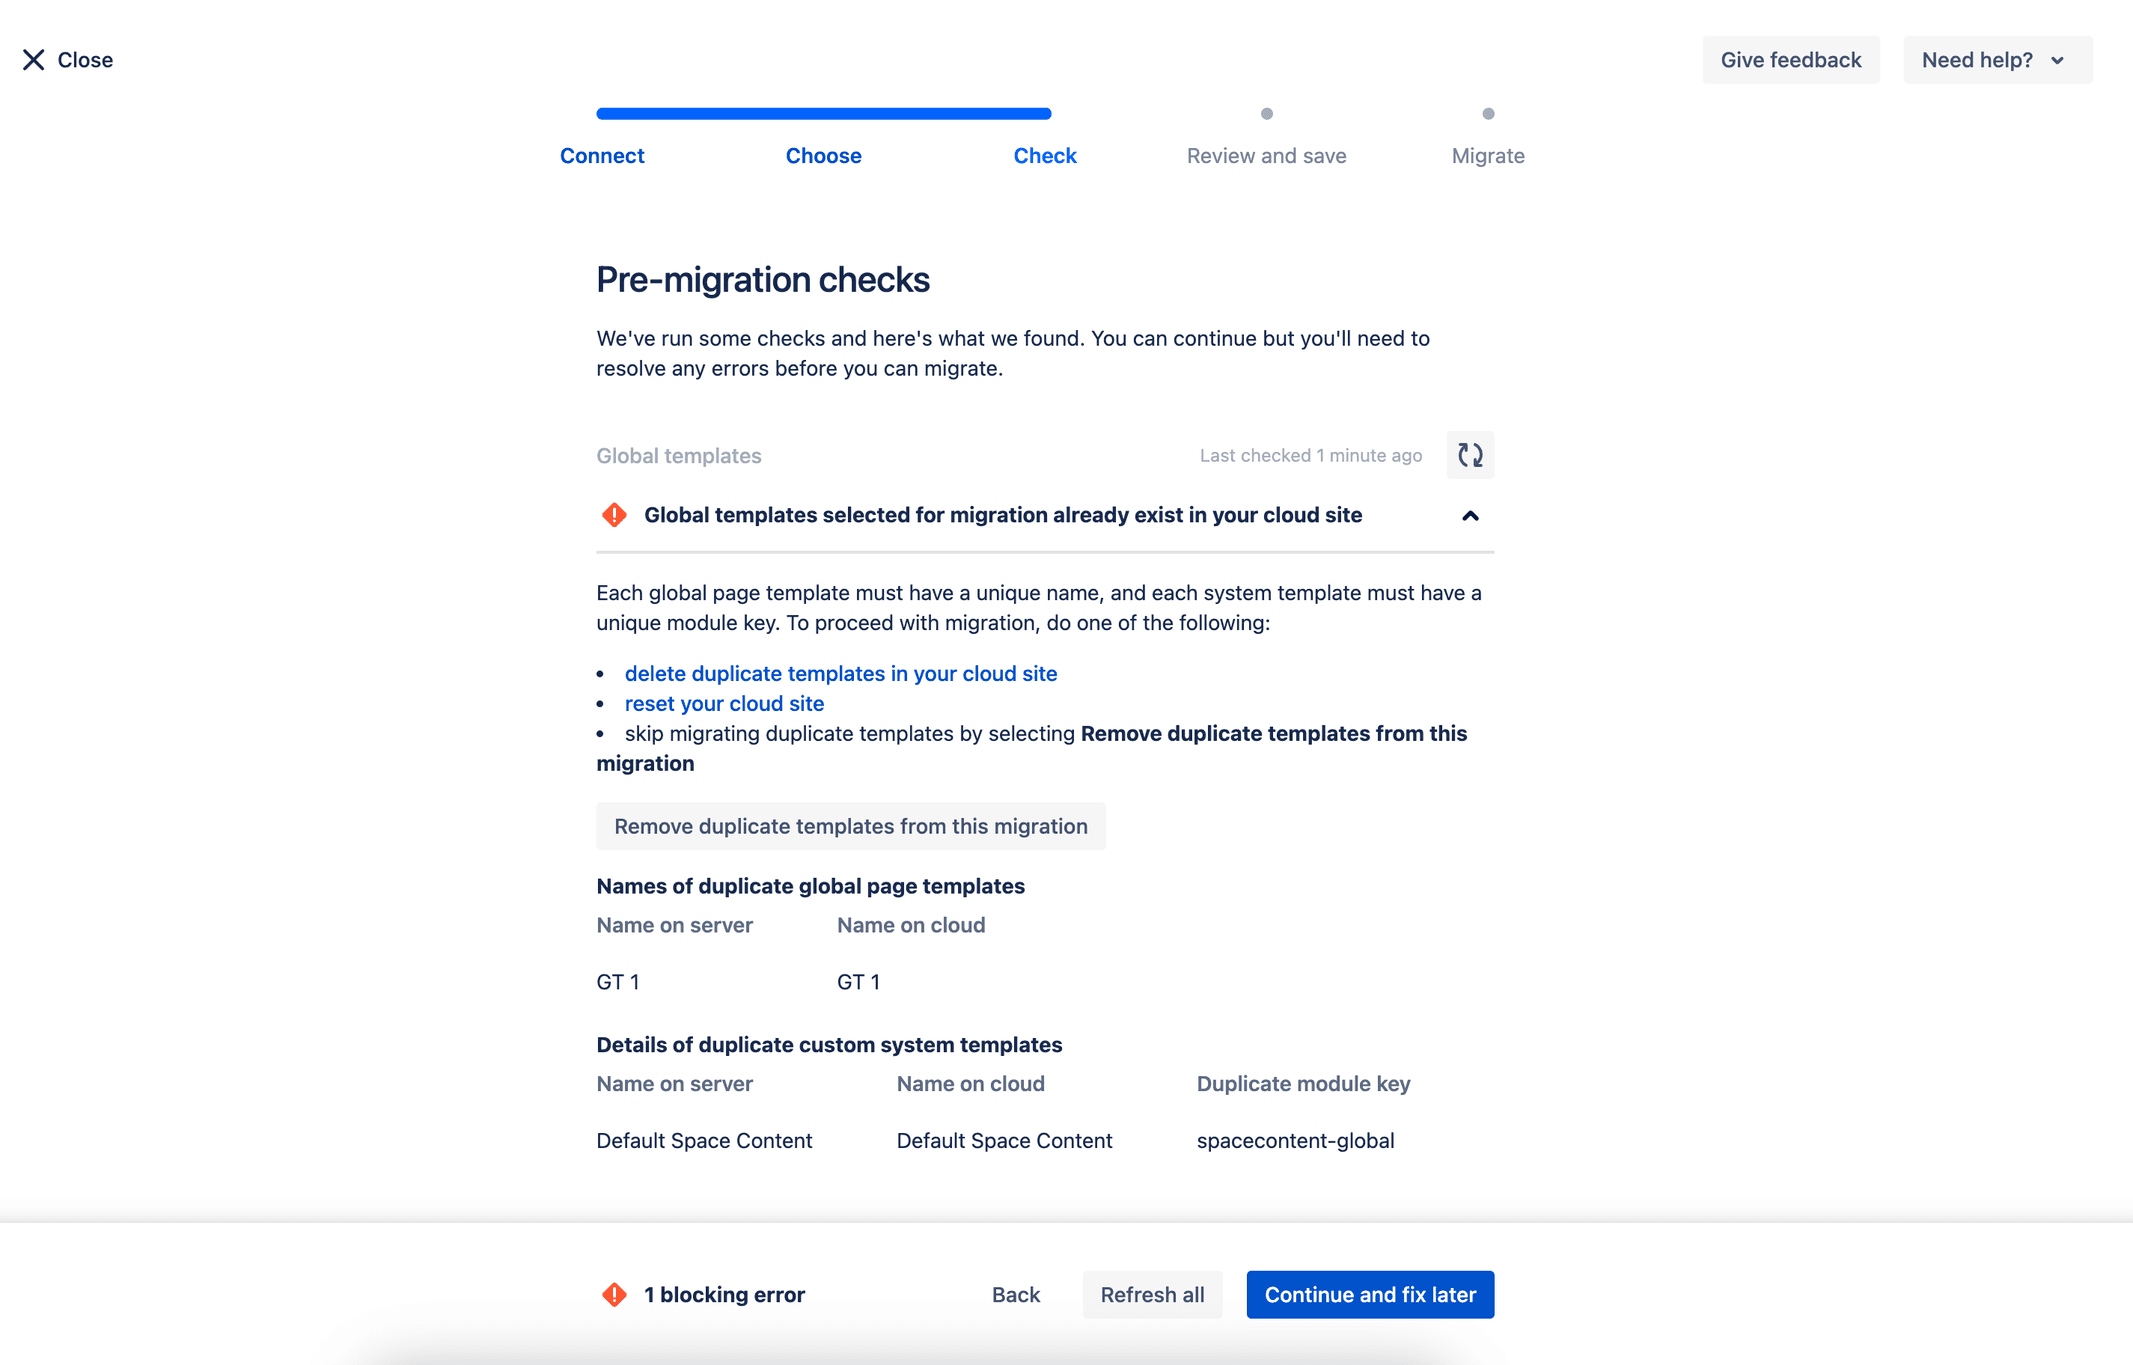
9. Review your migration.
10. Manage and run your migrations.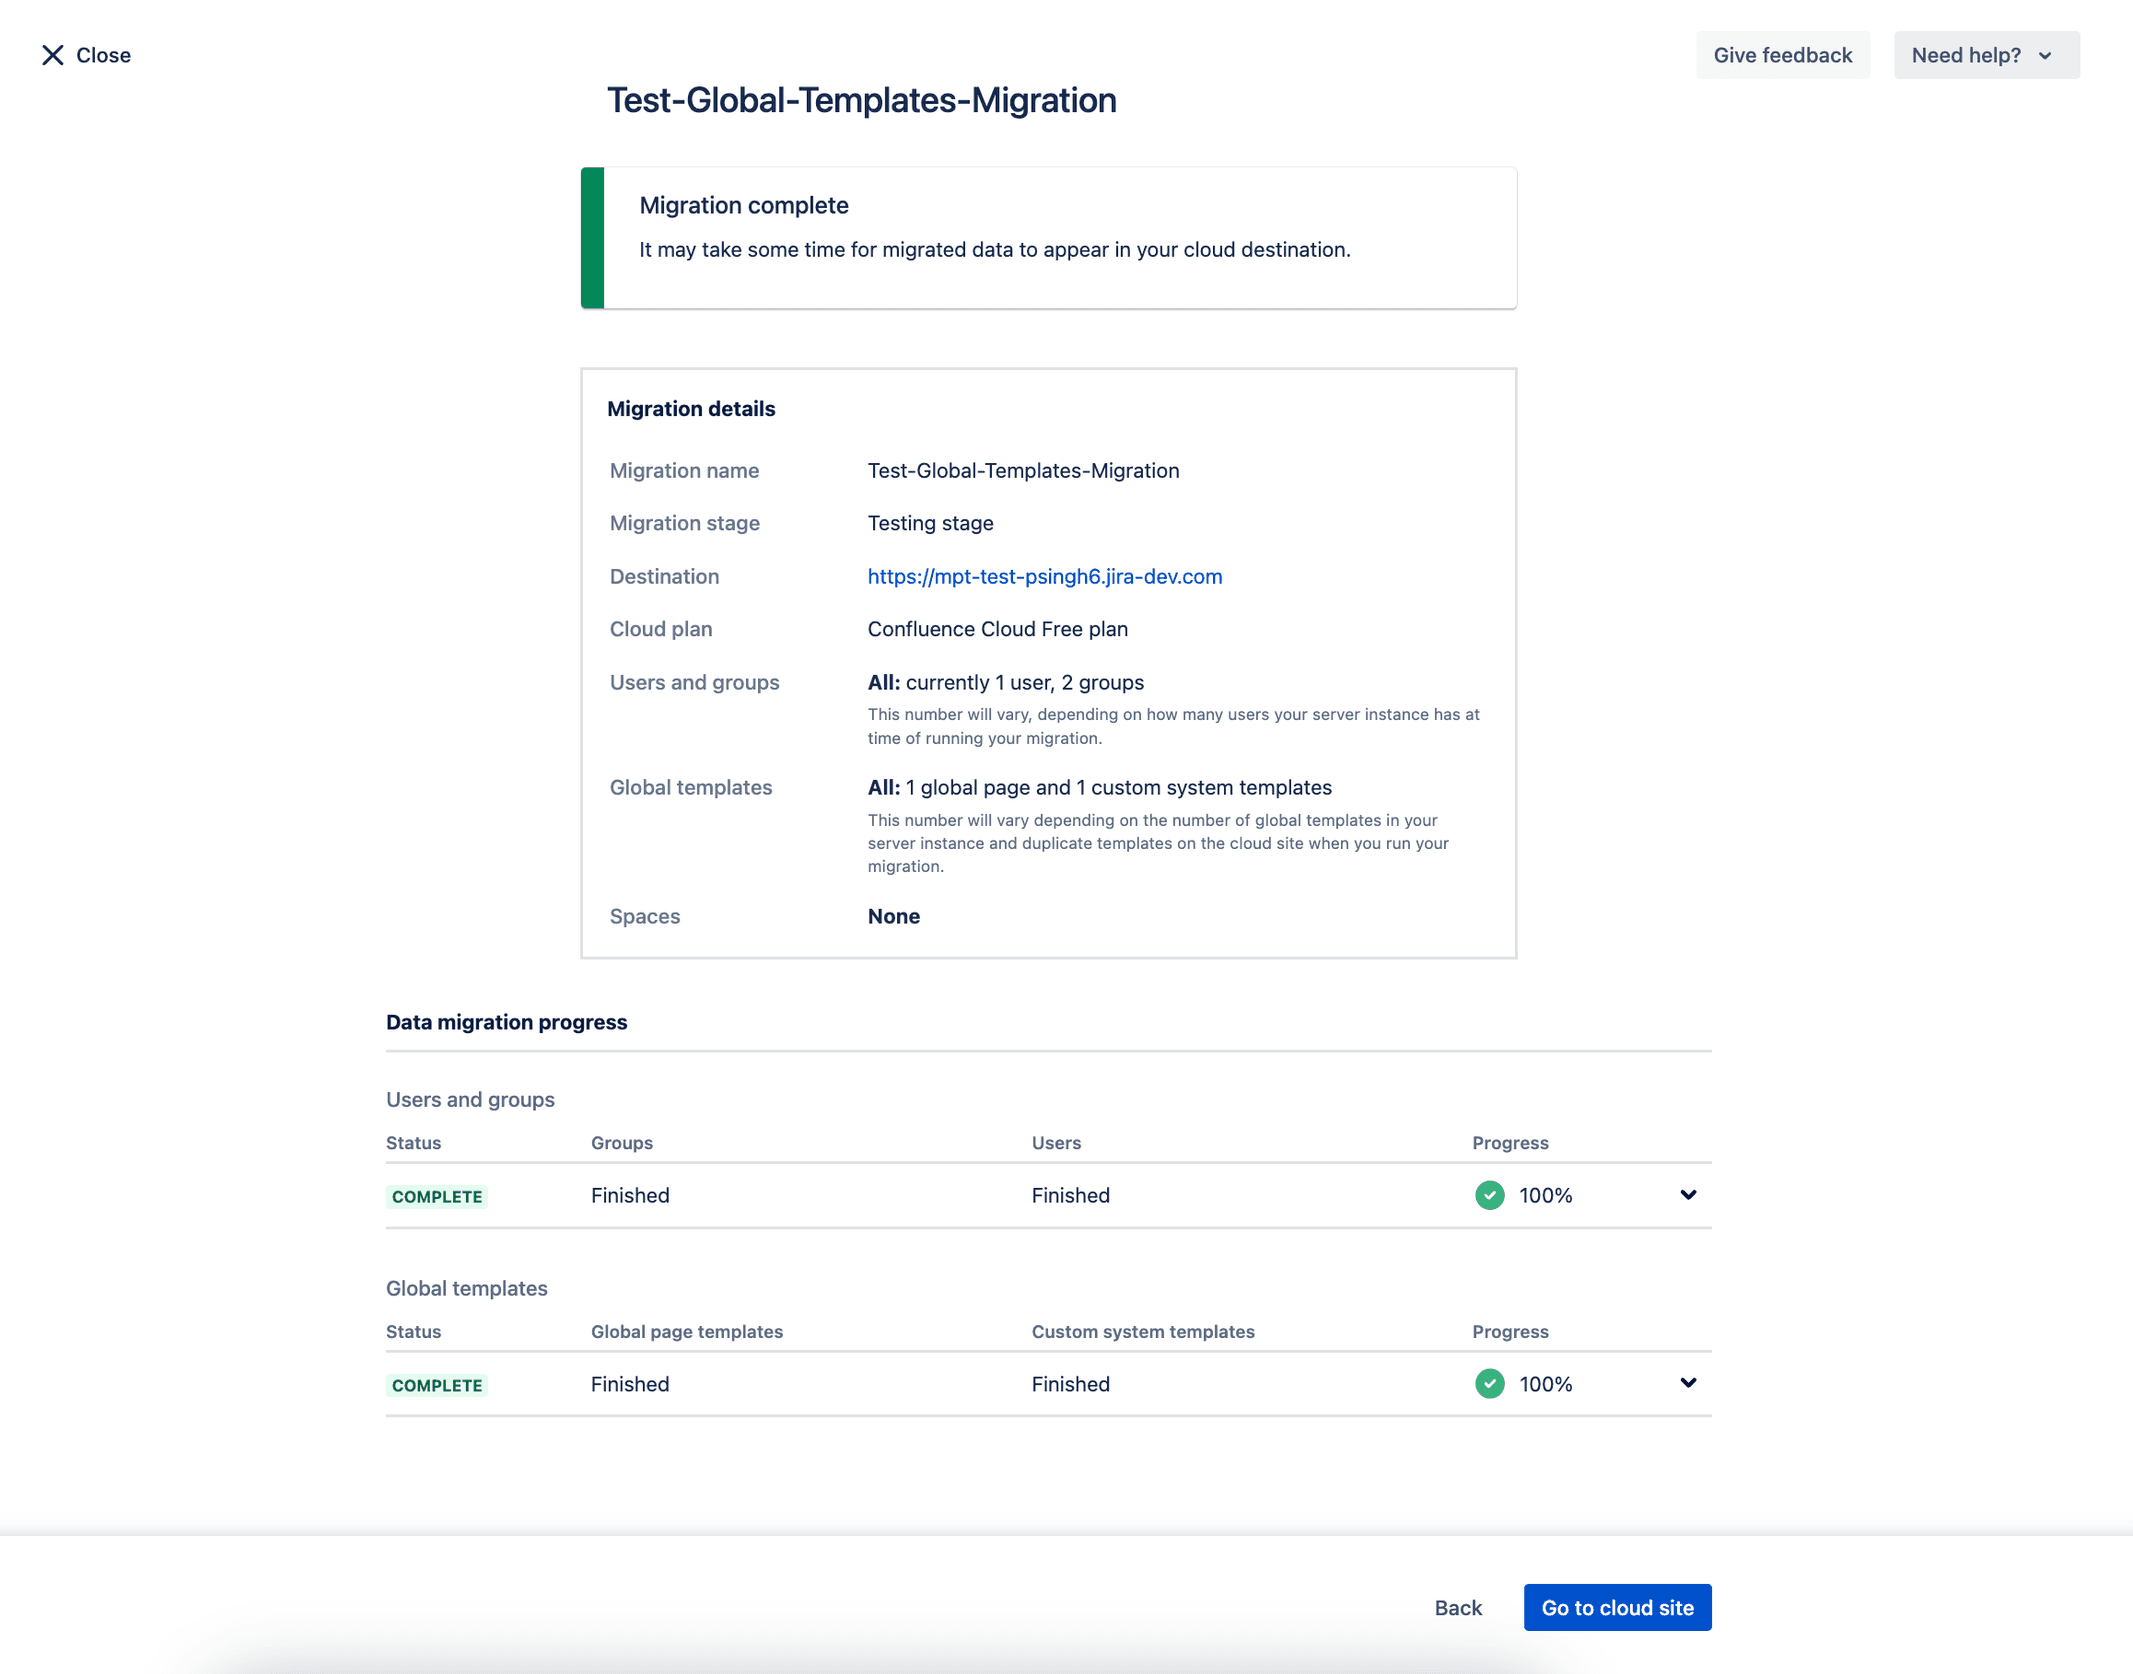
Useful links
Link | Description |
|---|---|
Watch this ticket to stay updated on the progress of this feature request. | |
Visit the Atlassian Cloud Migration Center for more migration planning information and FAQs. | |
Looking for help with cloud-to-cloud migrations? Get in touch. | |
Looking for peer advice? Ask the Atlassian Community. | |
Want expert guidance? Work with an Atlassian Partner. |
Related content
- No related content found