Providing database dump with anonymized content
Platform Notice: Data Center - This article applies to Atlassian products on the Data Center platform.
Note that this knowledge base article was created for the Data Center version of the product. Data Center knowledge base articles for non-Data Center-specific features may also work for Server versions of the product, however they have not been tested. Support for Server* products ended on February 15th 2024. If you are running a Server product, you can visit the Atlassian Server end of support announcement to review your migration options.
*Except Fisheye and Crucible
Various issues can be investigated properly when working with the same data structure and settings. For this a database dump is the appropriate way to provide data; however some of your content may be sensitive. Below you can find examples on how to provide a database dump with content/password sanitized.
- These steps will update all content on pages to "a", reset the password to "admin", and reset all users email address to "test@mail.com".
- This only anonymizes the data on pages, comments and blog posts and user passwords. It does not anonymise the titles of pages, usernames or labels.
- You will have to export the newly created database/schema and provide this dump for investigation.
Please note that these instructions may not be suitable for all environments, be sure to consult your database administrator. Please also note that some databases handle exporting in a way that could result in temporary performance degradation. This should be considered when you have other applications using the same database server.
Be sure to shut down Confluence before exporting its data if your database engine does not support creating the dump against a consistent state.
PostgreSQL
1) Take the Postgres dump of your Confluence database:
pg_dump -U username confluenceDB > outfile.dump
2) Create a test database:
createdb -U username tempDB
3) Load the dump into a test database:
psql -U username tempDB < outfile.dump
4) Run the following query against your test database:
update BODYCONTENT set BODY='a';
update cwd_user set CREDENTIAL='{PKCS5S2}ymGp6ZB7V+CS6xORA4DEDNDnv+RHyLlZl43Rc25gJ+Vw7ZTUGpzxuDhJv7hAgruT';
update cwd_user set email_address='test@mail.com';
update cwd_user set lower_email_address='test@mail.com';
MySQL
1) Take the mysql dump of your confluence database:
mysqldump -u username -ppassword database_name --routines > FILE.sql
2) Load it into a test database
mysql -u username -ppassword test_database < FILE.sql
3) Run the following query against your test database:
update BODYCONTENT set BODY='a';
update cwd_user set CREDENTIAL='{PKCS5S2}ymGp6ZB7V+CS6xORA4DEDNDnv+RHyLlZl43Rc25gJ+Vw7ZTUGpzxuDhJv7hAgruT';
update cwd_user set email_address='test@mail.com';
update cwd_user set lower_email_address='test@mail.com';
Oracle
1) Export your Confluence database with the exp utility (this tool is by default shipped with Oracle installations and is located under $ORACLE_HOME/bin)
exp username/password file=export.dmp log=export.log
2) Create a temporary schema in Oracle to load the data back
3) Import the exported data with the imp utility (origschema is the name of the original schema where the tables were exported from, destschema is the newly created schema's name)
imp destschema/password file=export.dmp fromuser=origschema touser=destschema
4) Run the following query against your newly created database schema:
update destschema.BODYCONTENT set BODY='a';
update destschema.cwd_user set CREDENTIAL='{PKCS5S2}ymGp6ZB7V+CS6xORA4DEDNDnv+RHyLlZl43Rc25gJ+Vw7ZTUGpzxuDhJv7hAgruT';
update destschema.cwd_user set email_address='test@mail.com';
update destschema.cwd_user set lower_email_address='test@mail.com';
Be sure to execute commit; if you do not have autocommit on, so that the changes you made to the database are stored.
Microsoft SQL
Using command line tools
1) Export your database using the sqlcmd utility.
sqlcmd -S <SERVER-STRING> -Q "BACKUP DATABASE <DATABASE-NAME> TO DISK='backup-filename.bak'" -U <USERNAME> -P <PASSWORD>If you are using Windows authentication:
sqlcmd -S <SERVER-STRING> -Q "BACKUP DATABASE <DATABASE-NAME> TO DISK='backup-filename.bak'" -E2) Create a new database where you can load your data back
3) Import the exported data back to your newly created database.
sqlcmd -S <SERVER-STRING> -Q "RESTORE DATABASE <NEWLY-CREATED-DATABASE-NAME> FROM DISK='backup-filename.bak'" -U <USERNAME> -P <PASSWORD>
If you are using Windows authentication:
sqlcmd -S <SERVER-STRING> -Q "RESTORE DATABASE <NEWLY-CREATED-DATABASE-NAME> FROM DISK='backup-filename.bak'" -E4) Run the following query against your newly created database:
update BODYCONTENT set BODY='a';
update cwd_user set credential ='{PKCS5S2}ymGp6ZB7V+CS6xORA4DEDNDnv+RHyLlZl43Rc25gJ+Vw7ZTUGpzxuDhJv7hAgruT';
update cwd_user set email_address='test@mail.com';
update cwd_user set lower_email_address='test@mail.com';
Using Microsoft SQL Server Management Studio
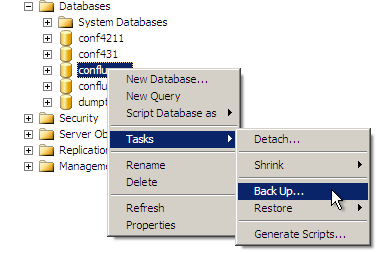
1) Right-click on your Confluence database and select Tasks > Backup
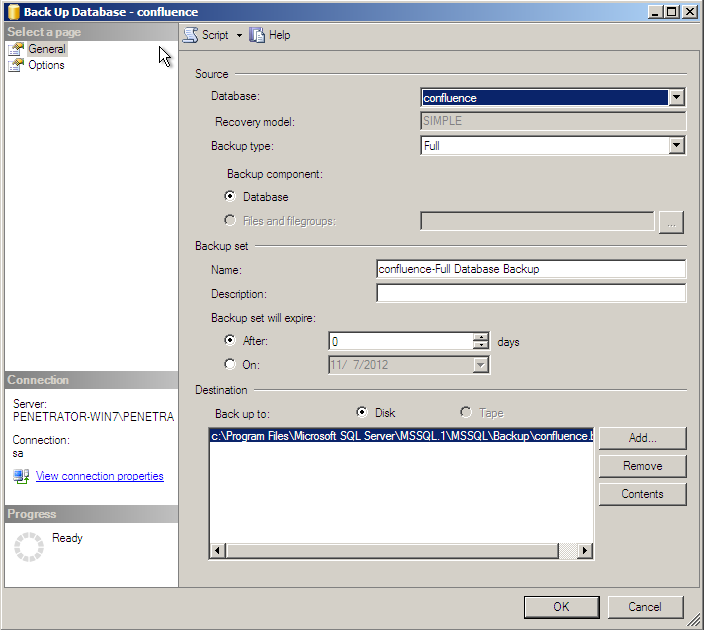
2) Create a disk backup with the default settings
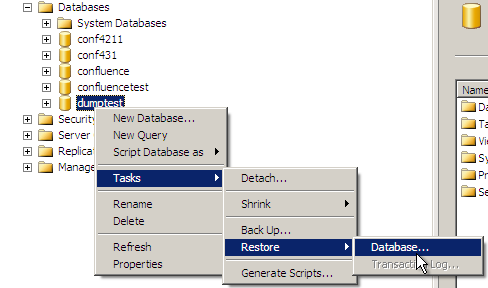
3) Create a new database where you will restore this data from the created backup.
4) Right-click on the newly created database and select Tasks > Restore > Database...
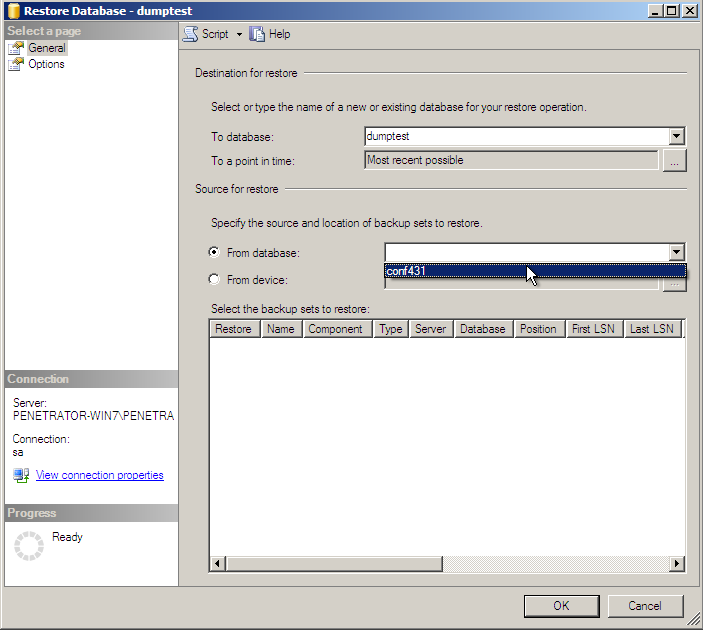
5) Select the From database field and chose the database name where you created the backup and click OK. You may optionally load the backup from device if you are using a backup created on a different SQL server.
4) Run the following query against your newly created database:
update BODYCONTENT set BODY='a';
update cwd_user set CREDENTIAL='{PKCS5S2}ymGp6ZB7V+CS6xORA4DEDNDnv+RHyLlZl43Rc25gJ+Vw7ZTUGpzxuDhJv7hAgruT';

update cwd_user set email_address='test@mail.com';
update cwd_user set lower_email_address='test@mail.com';
Removing Attachments from the Database
If you store your attachments into your database, please also run the below queries to remove the attachments' information as well before sending the anonymized database dump:
For Confluence 5.7.0 or Latest:
 delete from IMAGEDETAILS;
 delete from ATTACHMENTDATA;
For Confluence 5.6.5 or Previous:
 delete from CONTENT_LABEL where
 ATTACHMENTID in (select ATTACHMENTID FROM ATTACHMENTS);
 delete from IMAGEDETAILS;
 delete from ATTACHMENTDATA;
 delete from ATTACHMENTS;
Other Databases
Please consult your database documentation on how to take database dump and restore. Once a copy database has been created, you can execute the update queries above.