Startup check: add or remove Confluence system properties
Platform notice: Server and Data Center only. This article only applies to Atlassian products on the Server and Data Center platforms.
Support for Server* products ended on February 15th 2024. If you are running a Server product, you can visit the Atlassian Server end of support announcement to review your migration options.
*Except Fisheye and Crucible
This page describes how to set Java properties and options on startup. This can be useful if you need to start Confluence with a particular system property for debugging or troubleshooting purposes.
See Recognized System Properties for the full list of system properties available to your Confluence version.
Linux
To configure System Properties in Linux installations:
- Edit the
<installation-directory>/bin/setenv.shfile. - Find the section CATALINA_OPTS=
(this is JAVA_OPTS= in Confluence 5.5 and earlier) - Refer to the list of parameters in Recognized System Properties.
Add all parameters in a space-separated list, inside the quotations. Make sure to keep the string ${CATALINA_OPTS}" in place.
Windows (starting from .bat file)
To Configure System Properties in Windows Installations When Starting from the .bat File:
- Edit the
<installation-directory>/bin/setenv.batfile. - Find the section set CATALINA_OPTS=%CATALINA_OPTS%
(this is JAVA_OPTS=%JAVA_OPTS% in Confluence 5.5 and earlier) - Refer to the list of parameters in Recognized System Properties.
Add all parameters in a space-separated list. Make sure to keep the string %CATALINA_OPTS% in place.
Windows service
There are two ways to configure system properties when you Start Confluence Automatically on Windows as a Service, either via command line or in the Windows Registry
Setting properties for Windows services via command line
To set properties for Windows services via a command line:
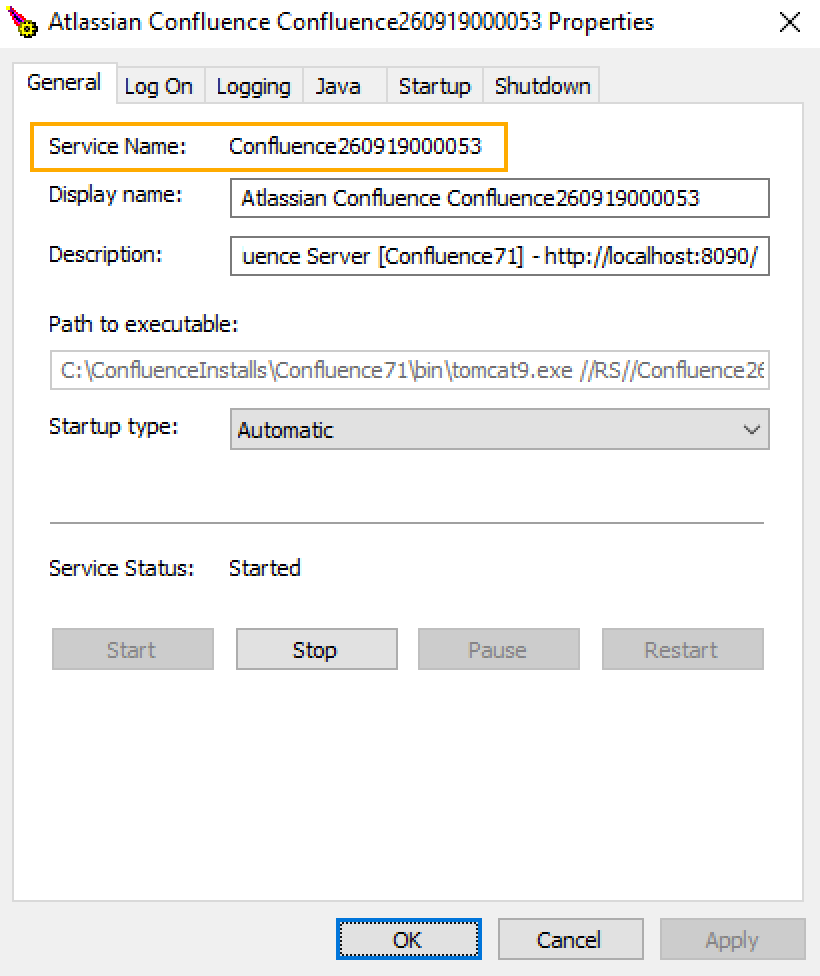
- Identify the name of the service that Confluence is installed as in Windows (Go to Control Panel > Administrative Tools > Services):
In the above example, the service name is Confluence260919000053.
- Open the command window (Choose Start > cmd.exe)
cdto thebindirectory of your Confluence instance and run the following command:tomcat9w //ES//<SERVICENAME>In the above example, it would be
tomcat9w //ES//Confluence260919000053
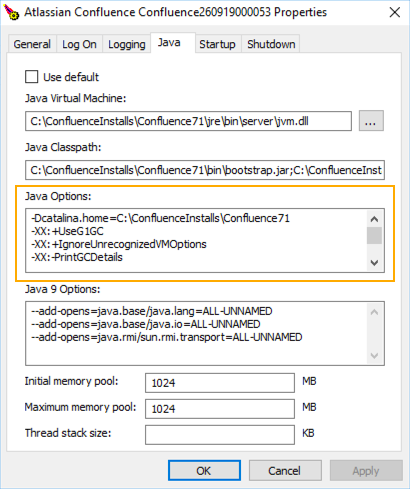
The Tomcat version number may be different if you are using an earlier version of Confluence.- Click on the
Javatab to see the list of current start-up options: - Append any new option on its own new line by adding to the end of the existing Java Options. Refer to the list of parameters in Recognized System Properties.
Setting properties for Windows services via the Windows registry
In some versions of Windows, there is no option to add Java variables to the service. In these cases, you must add the properties by viewing the option list in the registry.
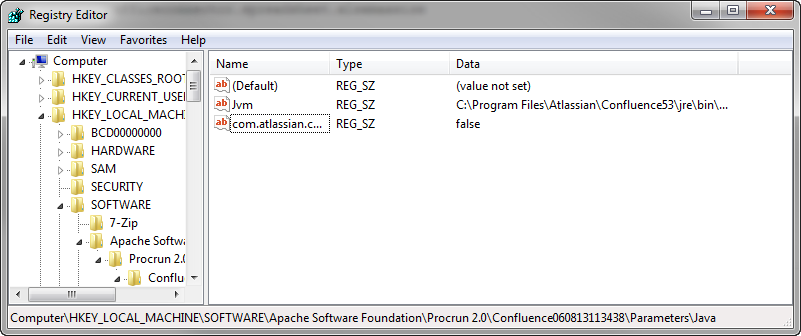
- Go to the Registry Editor (Start > regedit.exe).
- Find the Services entry:
64bit:HKEY_LOCAL_MACHINE >> SOFTWARE >> WOW6432Node >> Apache Software Foundation >> Procrun 2.0 >> Confluence service name
32bit:HKEY_LOCAL_MACHINE >> SOFTWARE >> Apache Software Foundation >> Procrun 2.0 >> Confluence service name - To change existing properties double-click the appropriate value.
- To change additional properties, double-click options.
- Refer to the list of parameters in Recognized System Properties. Enter each on a separate line.
Confluence Data Center deployed in AWS
If you've used the Quick Start or CloudFormation template to deploy Confluence Data Center in AWS, you will pass system properties via the Cloud Formation Template, and not using the methods described above.
- In the AWS Console, choose Update Stack
Under Advanced, enter system properties in the Catalina Properties field as follows:
-Xms1024m -Xmx1024m -Dsystemproperty=value- Changes are applied when a new nodes are provisioned.


