2.4 Allowing or denying a login
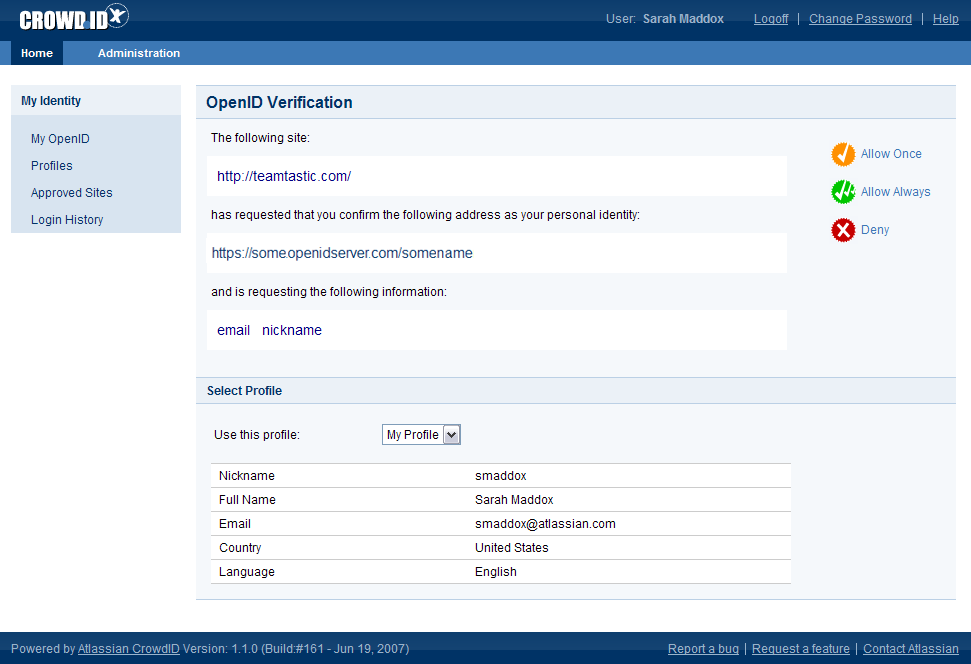
When you use your OpenID to log in to a website, CrowdID will present the 'OpenID Verification' page where you can allow or deny the login.
If you have previously instructed CrowdID to allow this site always, you will not see this page. You can remove a site from the 'Allow Always' list in CrowdID.
You can instruct CrowdID to:
- Allow the login for this session only ('Allow Once').
- Allow login to this site every time you use your OpenID ('Allow Always').
- Refuse login to this site ('Deny').
- Use a specific profile.
If you move away from the 'OpenID Verification' page within CrowdID, you can go back to the page and resume approval.
Screenshot: OpenID Verification page
To allow the login for this session only,
- Click 'Allow Once' on the right of the CrowdID 'OpenID Verification' page.
- CrowdID will send you back to the original site, passing your profile information as well as the confirmed login. The website you are visiting may ask you to complete your profile information.
To allow login to this site every time you use your OpenID,
- Click 'Allow Always' on the right of the CrowdID 'OpenID Verification' page.
- CrowdID will add the website to your list of approved sites and send you back to the original site, passing your profile information as well as the confirmed login. The website you are visiting may ask you to complete your profile information.
To refuse login to this site,
- Click 'Deny' on the right of the CrowdID 'OpenID Verification' page.
- CrowdID will send you back to the original site and refuse the login. The original site will probably show a message something like 'Verification canceled'.
To use a specific profile,
- If you have defined more than one profile, you can choose a specific profile for the website you are visiting. Select a profile from the dropdown list labeled 'Use this profile' on the CrowdID 'OpenID Verification' page.
- The profile details will change in the 'Select Profile' section of the page. CrowdID will pass these profile details to the website when you allow the login.
To go back to the 'OpenID Verification' page and resume approval,
- Click 'Resume Approval' in the left-hand navigation panel.
This option will appear if you move away from the 'OpenID Verification' page during the login process.
- CrowdID will return to the 'OpenID Verification' page, where you can allow the login.
RELATED TOPICS
- 2.1 Does the website support OpenID?
- 2.2 Entering your OpenID URL
- 2.3 Logging in to CrowdID
- 2.4 Allowing or denying a login
- 2.5 Providing additional profile information to a website

