Use automation with GitHub
In this article, we’re going to look at using Jira automation to integrate workflows between Jira and GitHub using Webhooks.
What’s a webhook? Quite simply, a webhook is a mechanism for one application to send data to another application in real time. I’m big on ‘to-do lists’ as a way of prioritizing tasks. So in our first example, we’ll automate the creation of a Jira issue to track pull requests that need reviewing on a GitHub repository. After that, we’ll automate releasing a version in Jira when it is created on GitHub.
Creating a webhook rule
First up, we’ll create a rule in Jira automation to handle a Pull Request created webhook. It may seem backward to do the receiving of the webhook first. However, GitHub needs a URL to send to - in order to create a webhook.
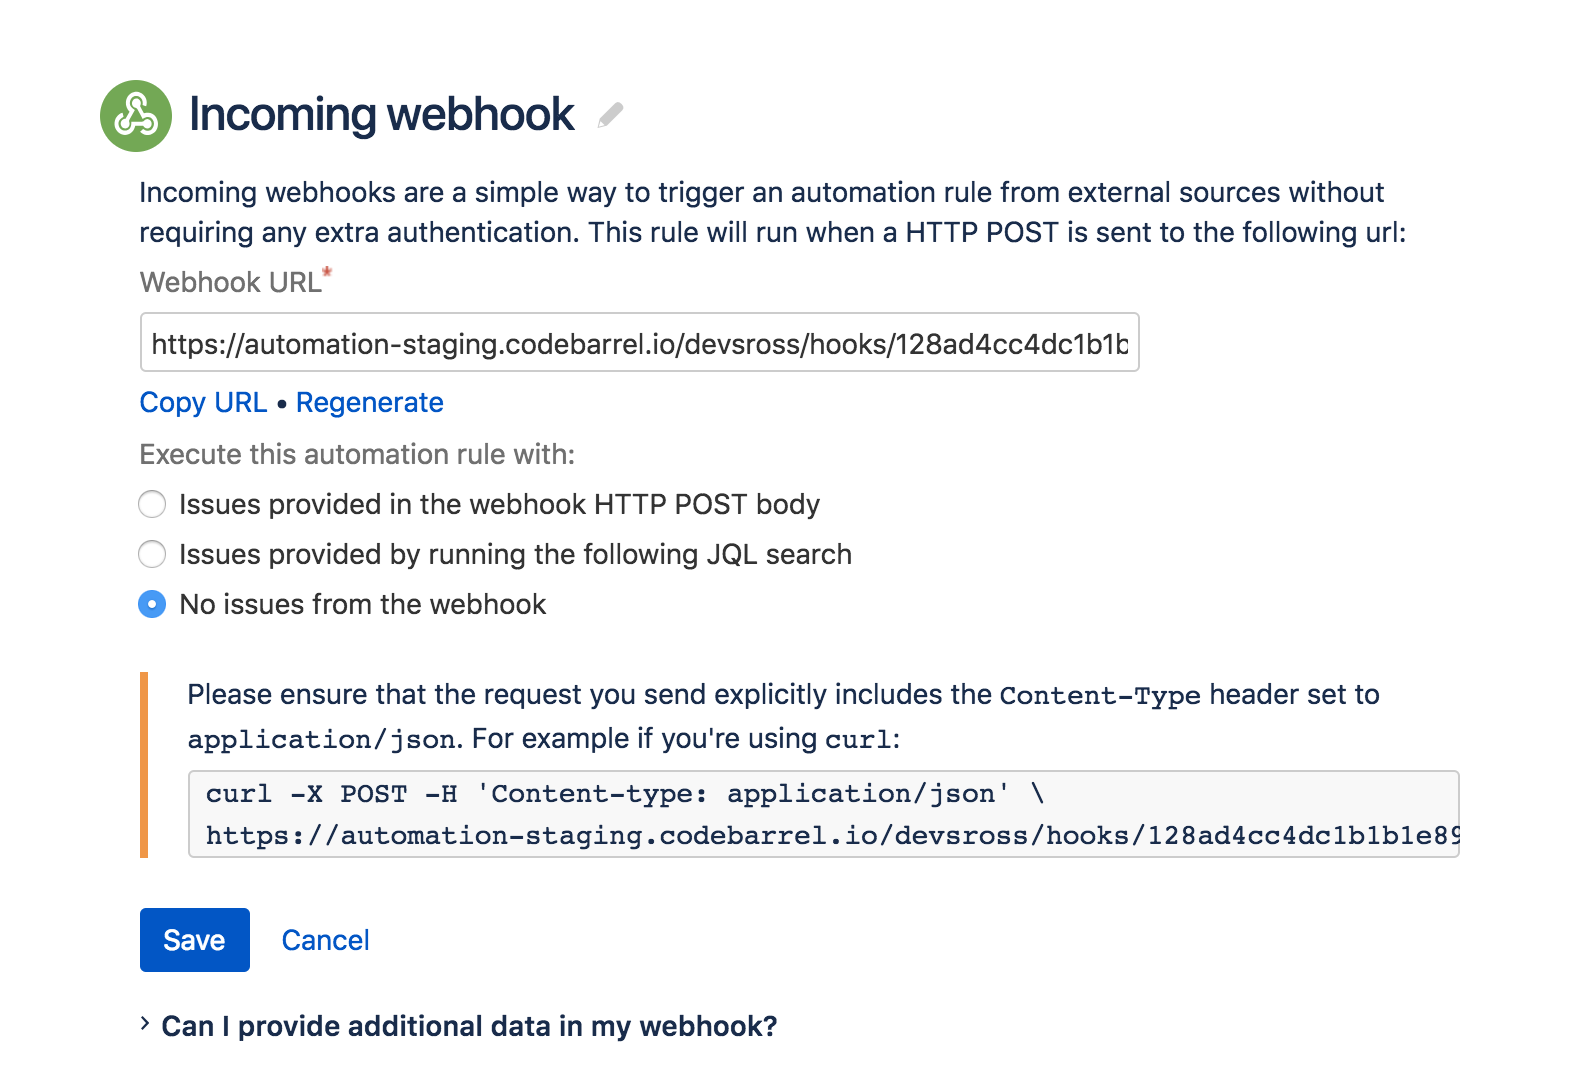
We’ll start off by creating a new rule in Automation and choosing an Incoming Webhook Trigger. We’ll need to copy the URL that is provided here so that we can use it in the next step. The other really important thing to note is the section that mentions the ‘Content-Type’. Automation for Jira understands application/jso so we'll need to make sure that we tell GitHub to send in this format.
We’re not expecting the webhook from GitHub to have issue information in the message body so we’ll just choose ‘No issues from the webhook’ and save it.
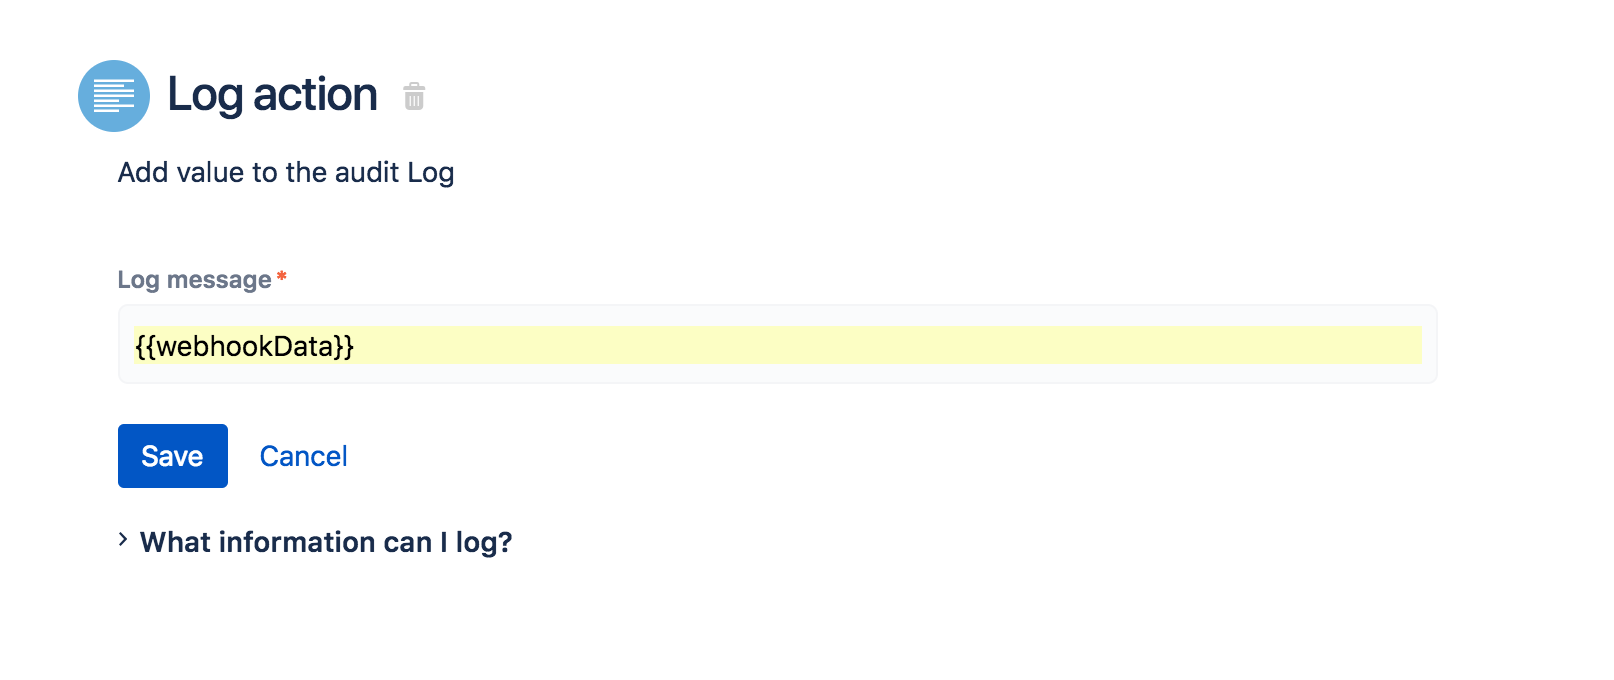
Next, we’ll create a Log action so that we can see what we receive from GitHub in the webhook payload. The payload information is covered in detail in the GitHub developers guide however logging it out is an easy way to see what we’re receiving from GitHub.
Then name and save the rule, I’ve named my rule ‘New Pull Request created in GitHub.’
Add a Webhook to GitHub
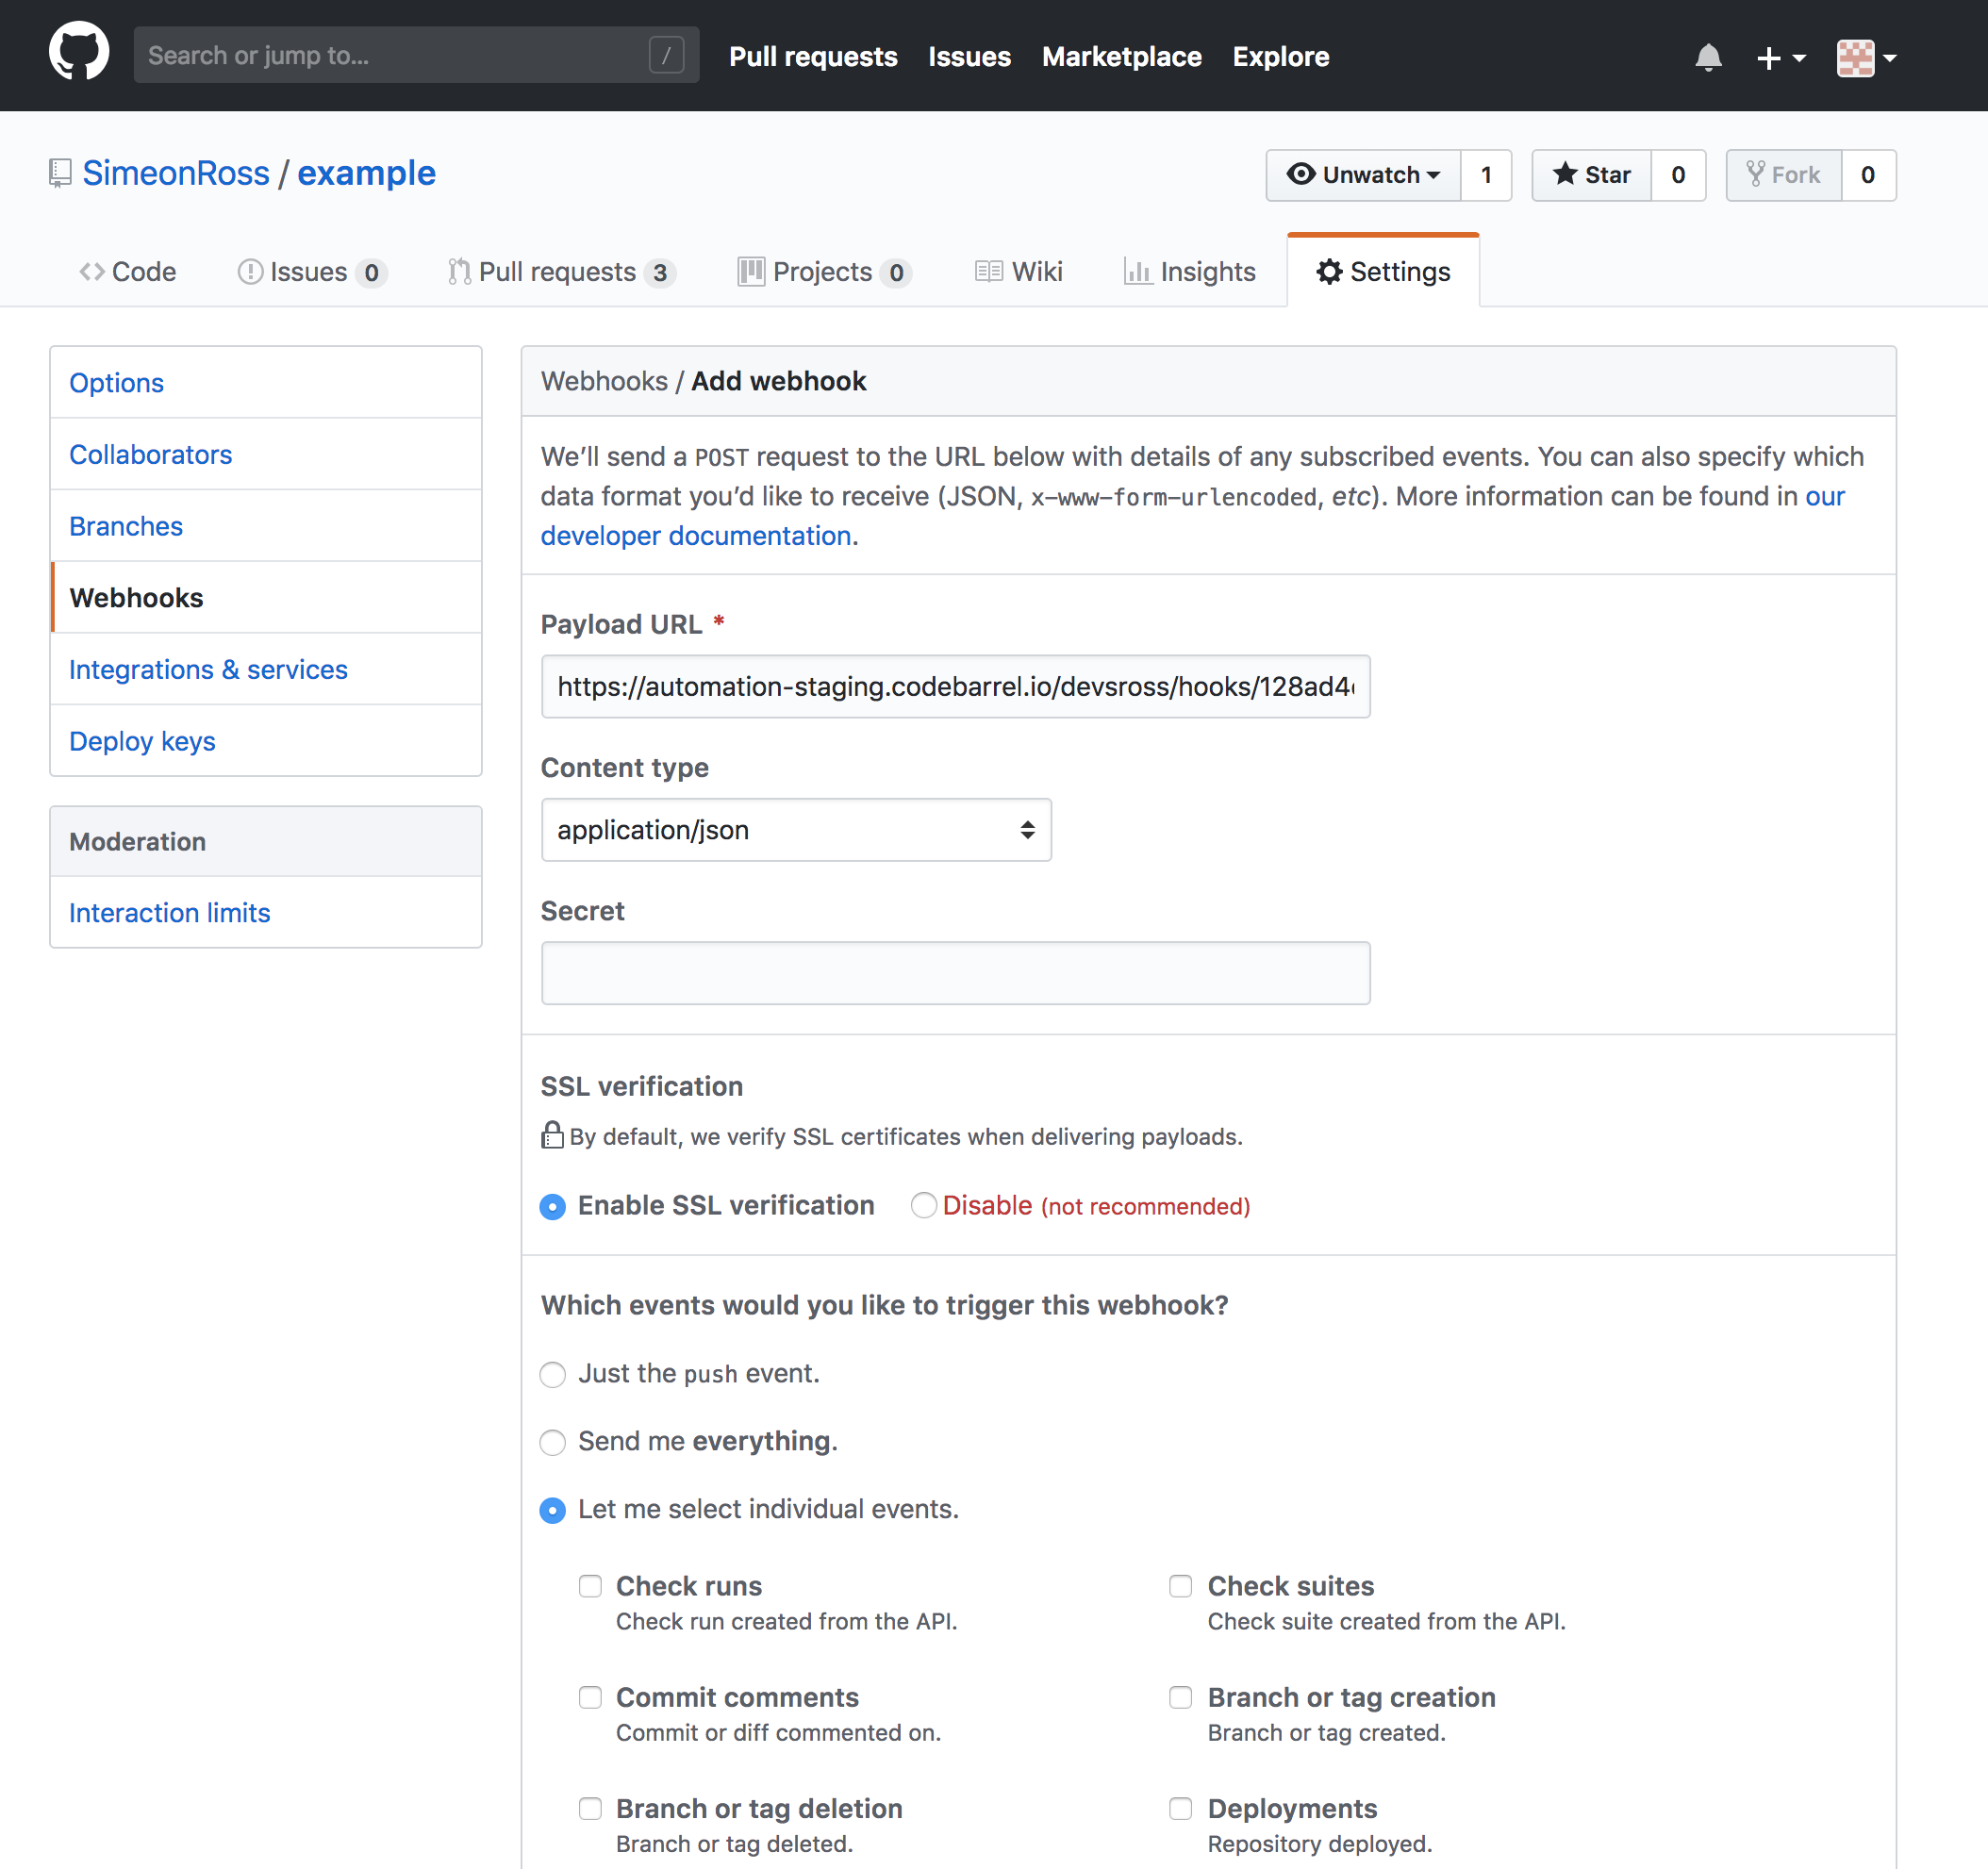
Next, we’ll head over to GitHub. Find the repository that you’re hooking up. In my case its imaginatively called ‘example’. Under the settings tab, choose Webhooks and choose ‘Add Webhook’.
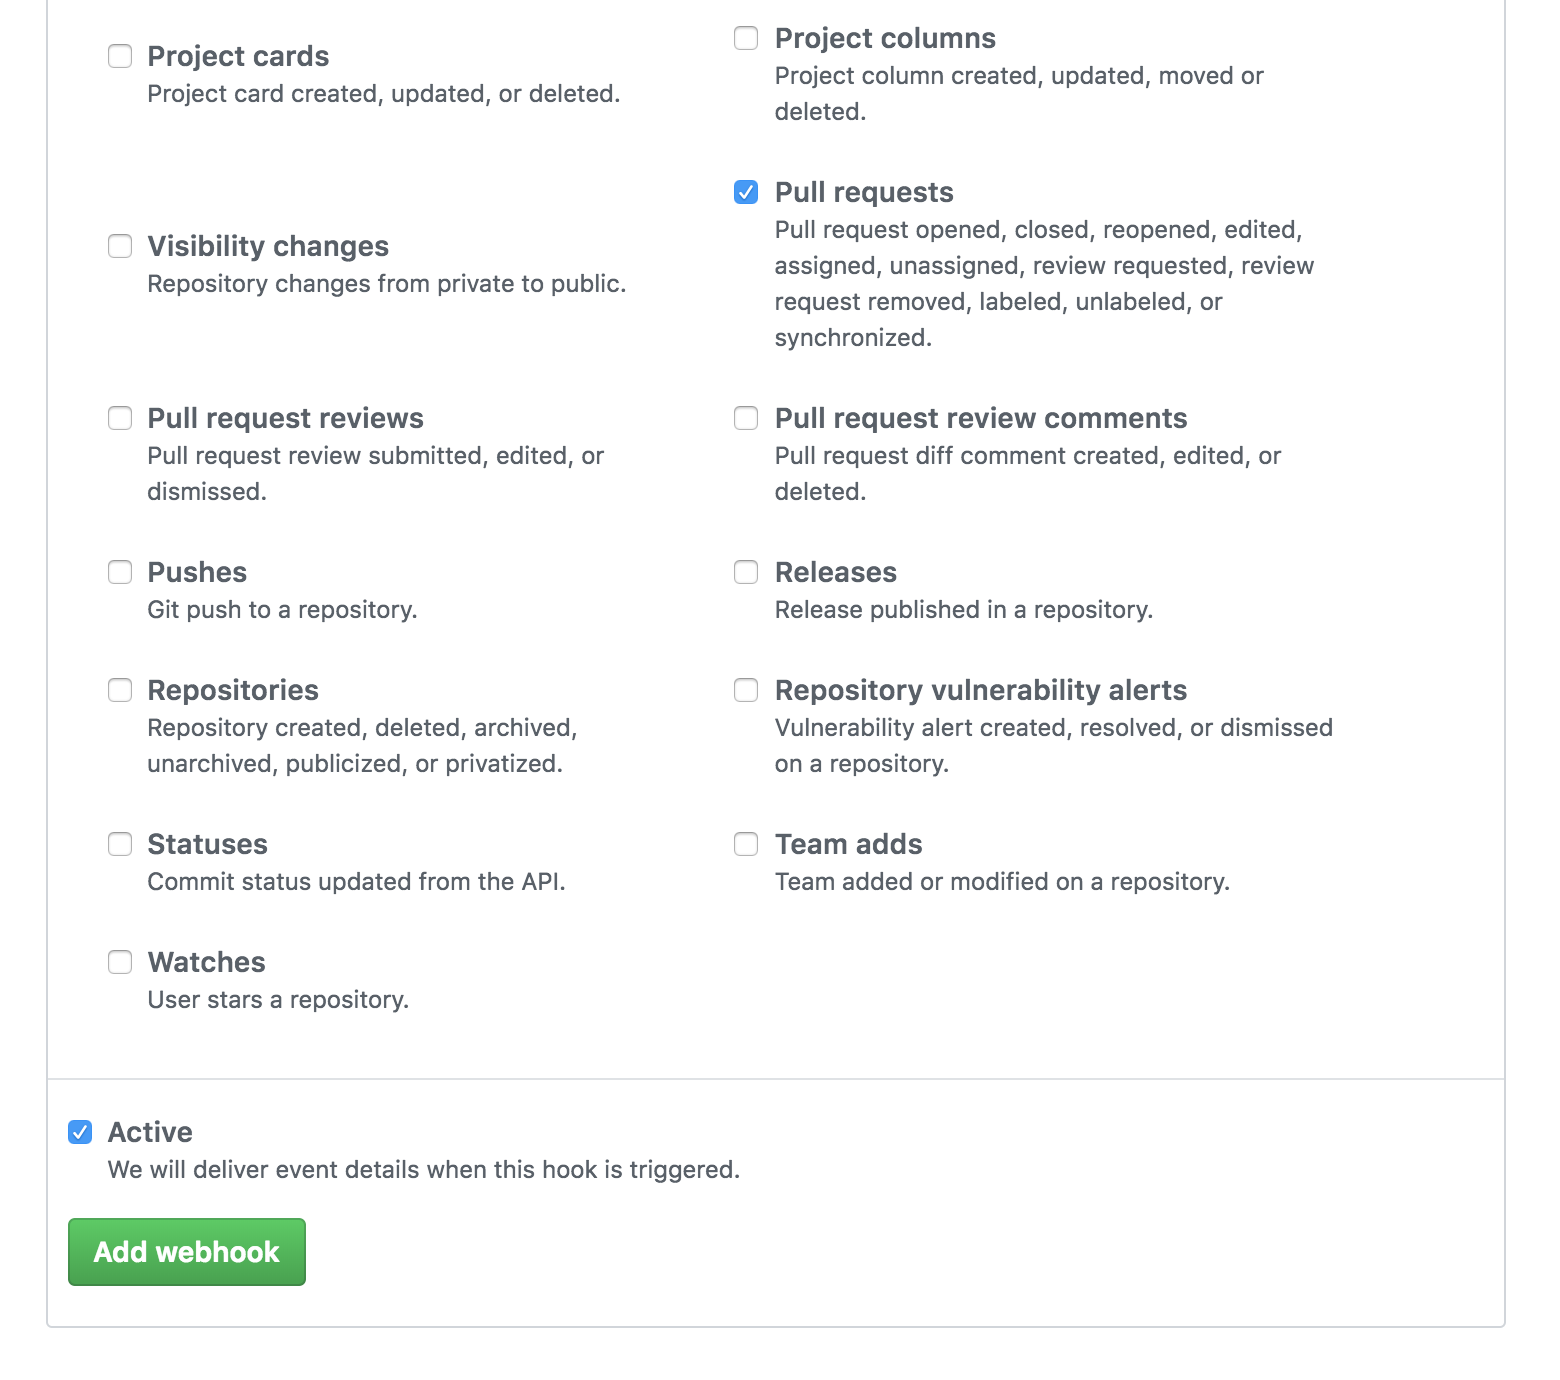
We input the URL from Automation for Jira, that we created in the previous step and send the content type to application/json. Then all we need to do is decide what events we want to send to Automation. For this example we're only interested in Pull Requests, so choose "Let me select individual events" and just tick ‘Pull Requests’.
We want the webhook active, so leave ‘Active’ ticked and add the webhook. That’s it! The basics are done. Now let’s tie it all together.
Creating the issue
Let’s test that we’ve got everything integrated correctly. I’ve created a pull request on a branch in my repository which should mean that we see something over in the audit log for “New Pull Request created” rule.
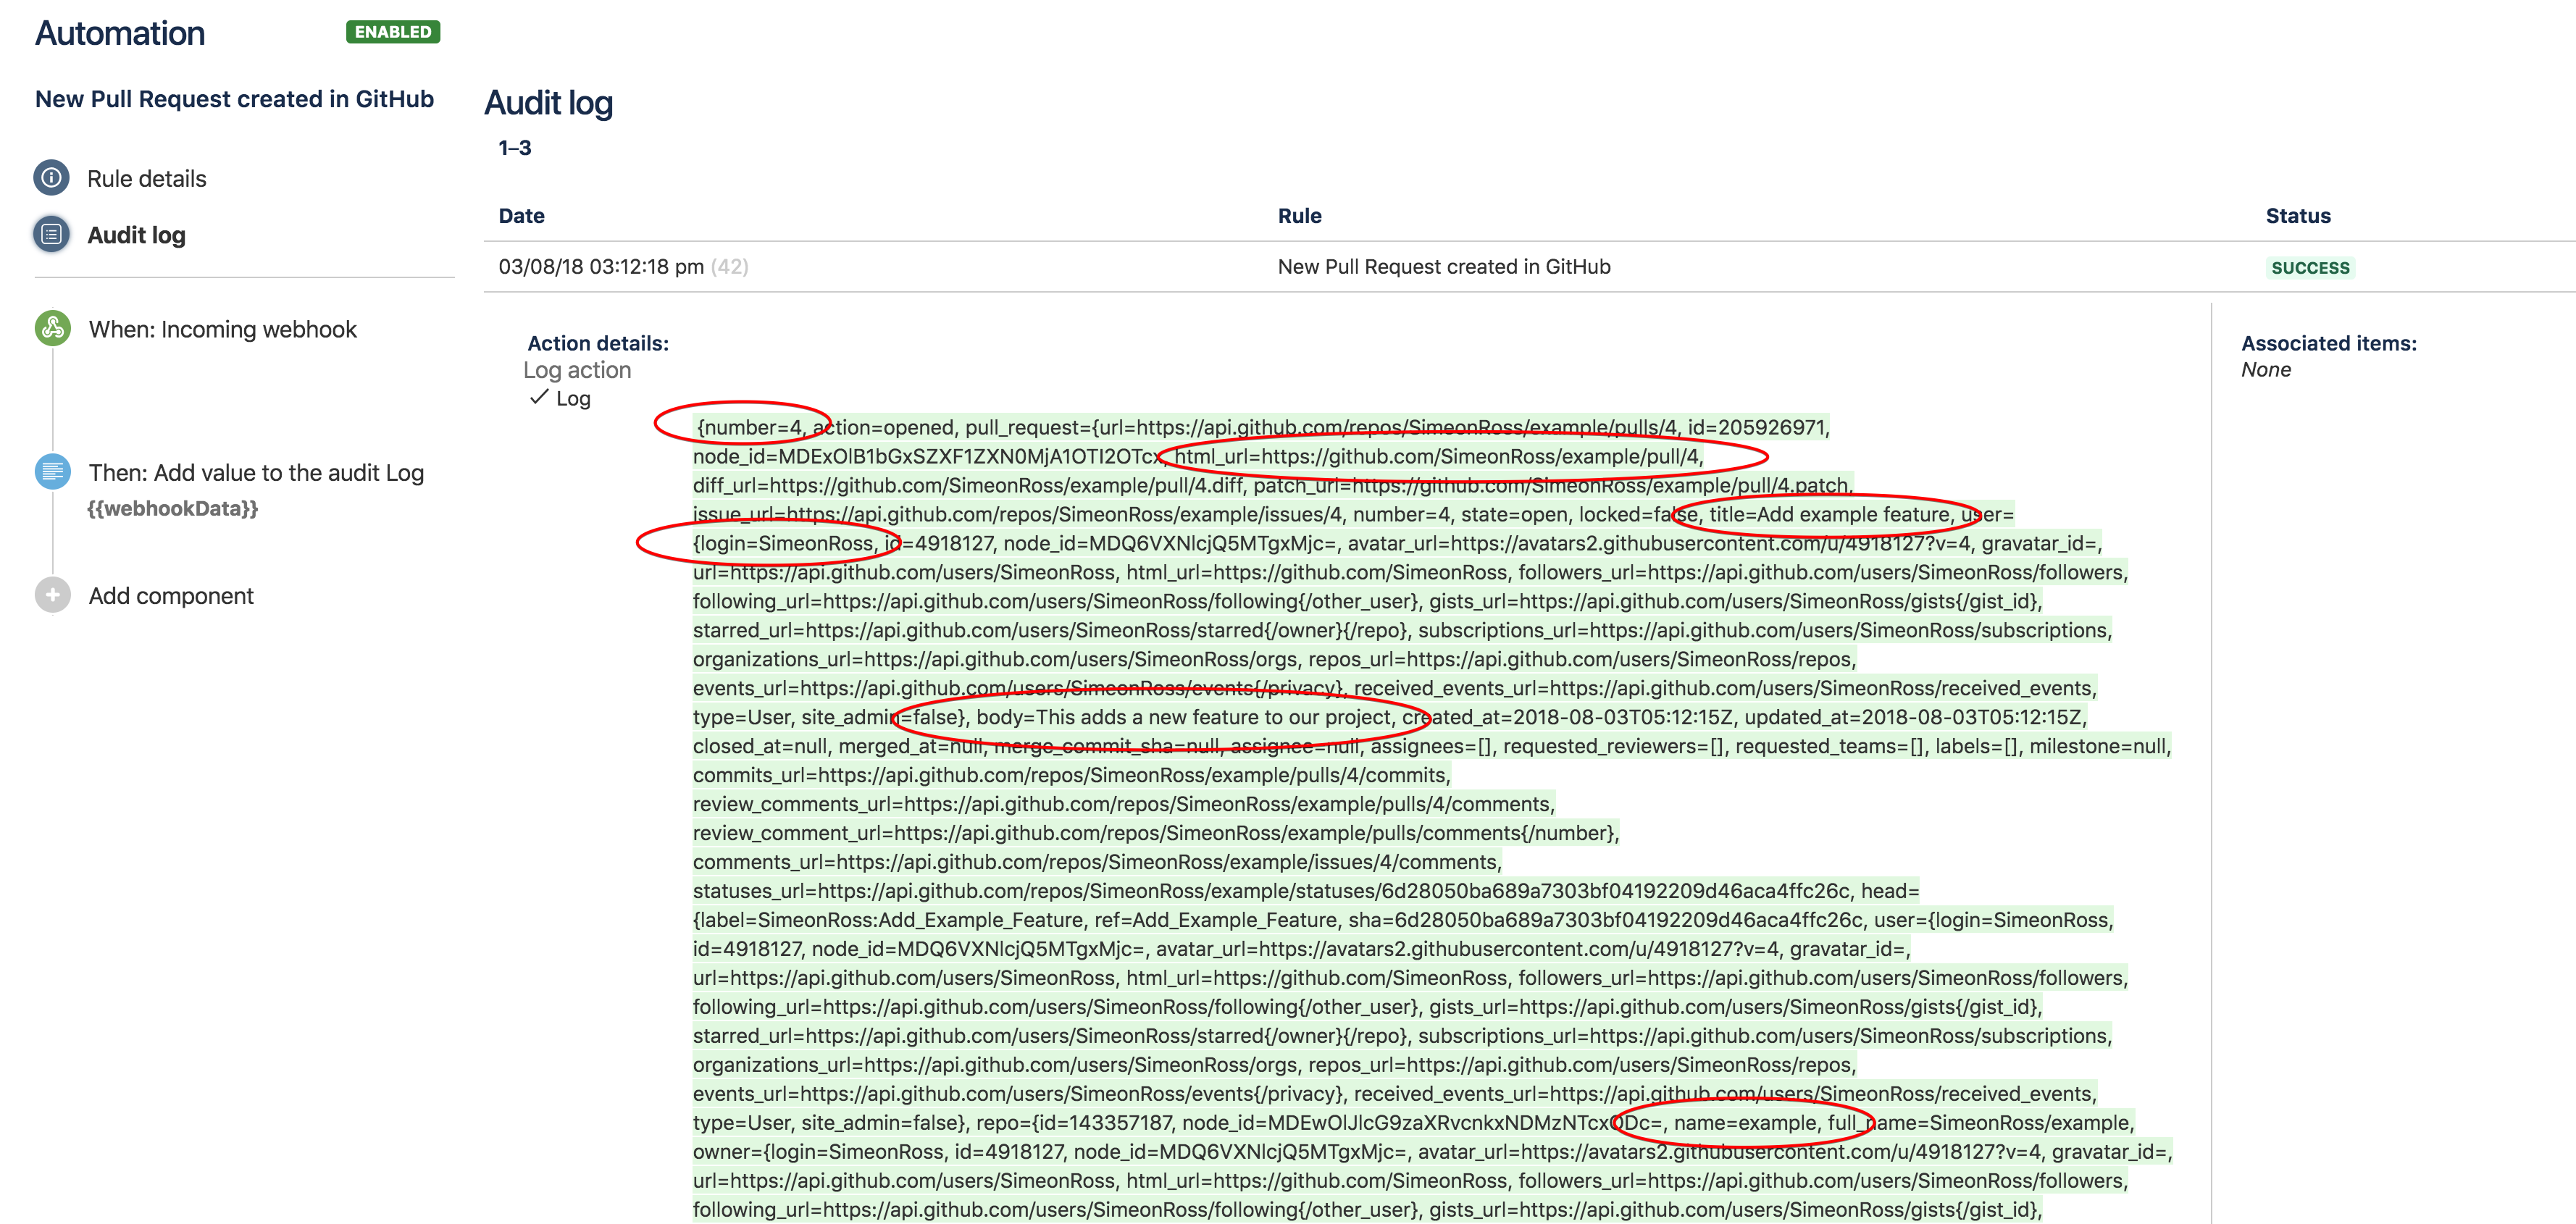
Sure enough, GitHub has sent us a webhook and our action has logged it in the audit log. The big block of green text that we see above is all the data about the pull request create event in JSON format. From this, I can see the pieces of information that I’m interested in.
I want to know the name of the repository, what number the pull request is, the user that created it, its title and description and it might also be good to include a link to ‘pull request’ to make accessing it easy.
Now the final piece of the puzzle. Let's create an issue to review the pull request.
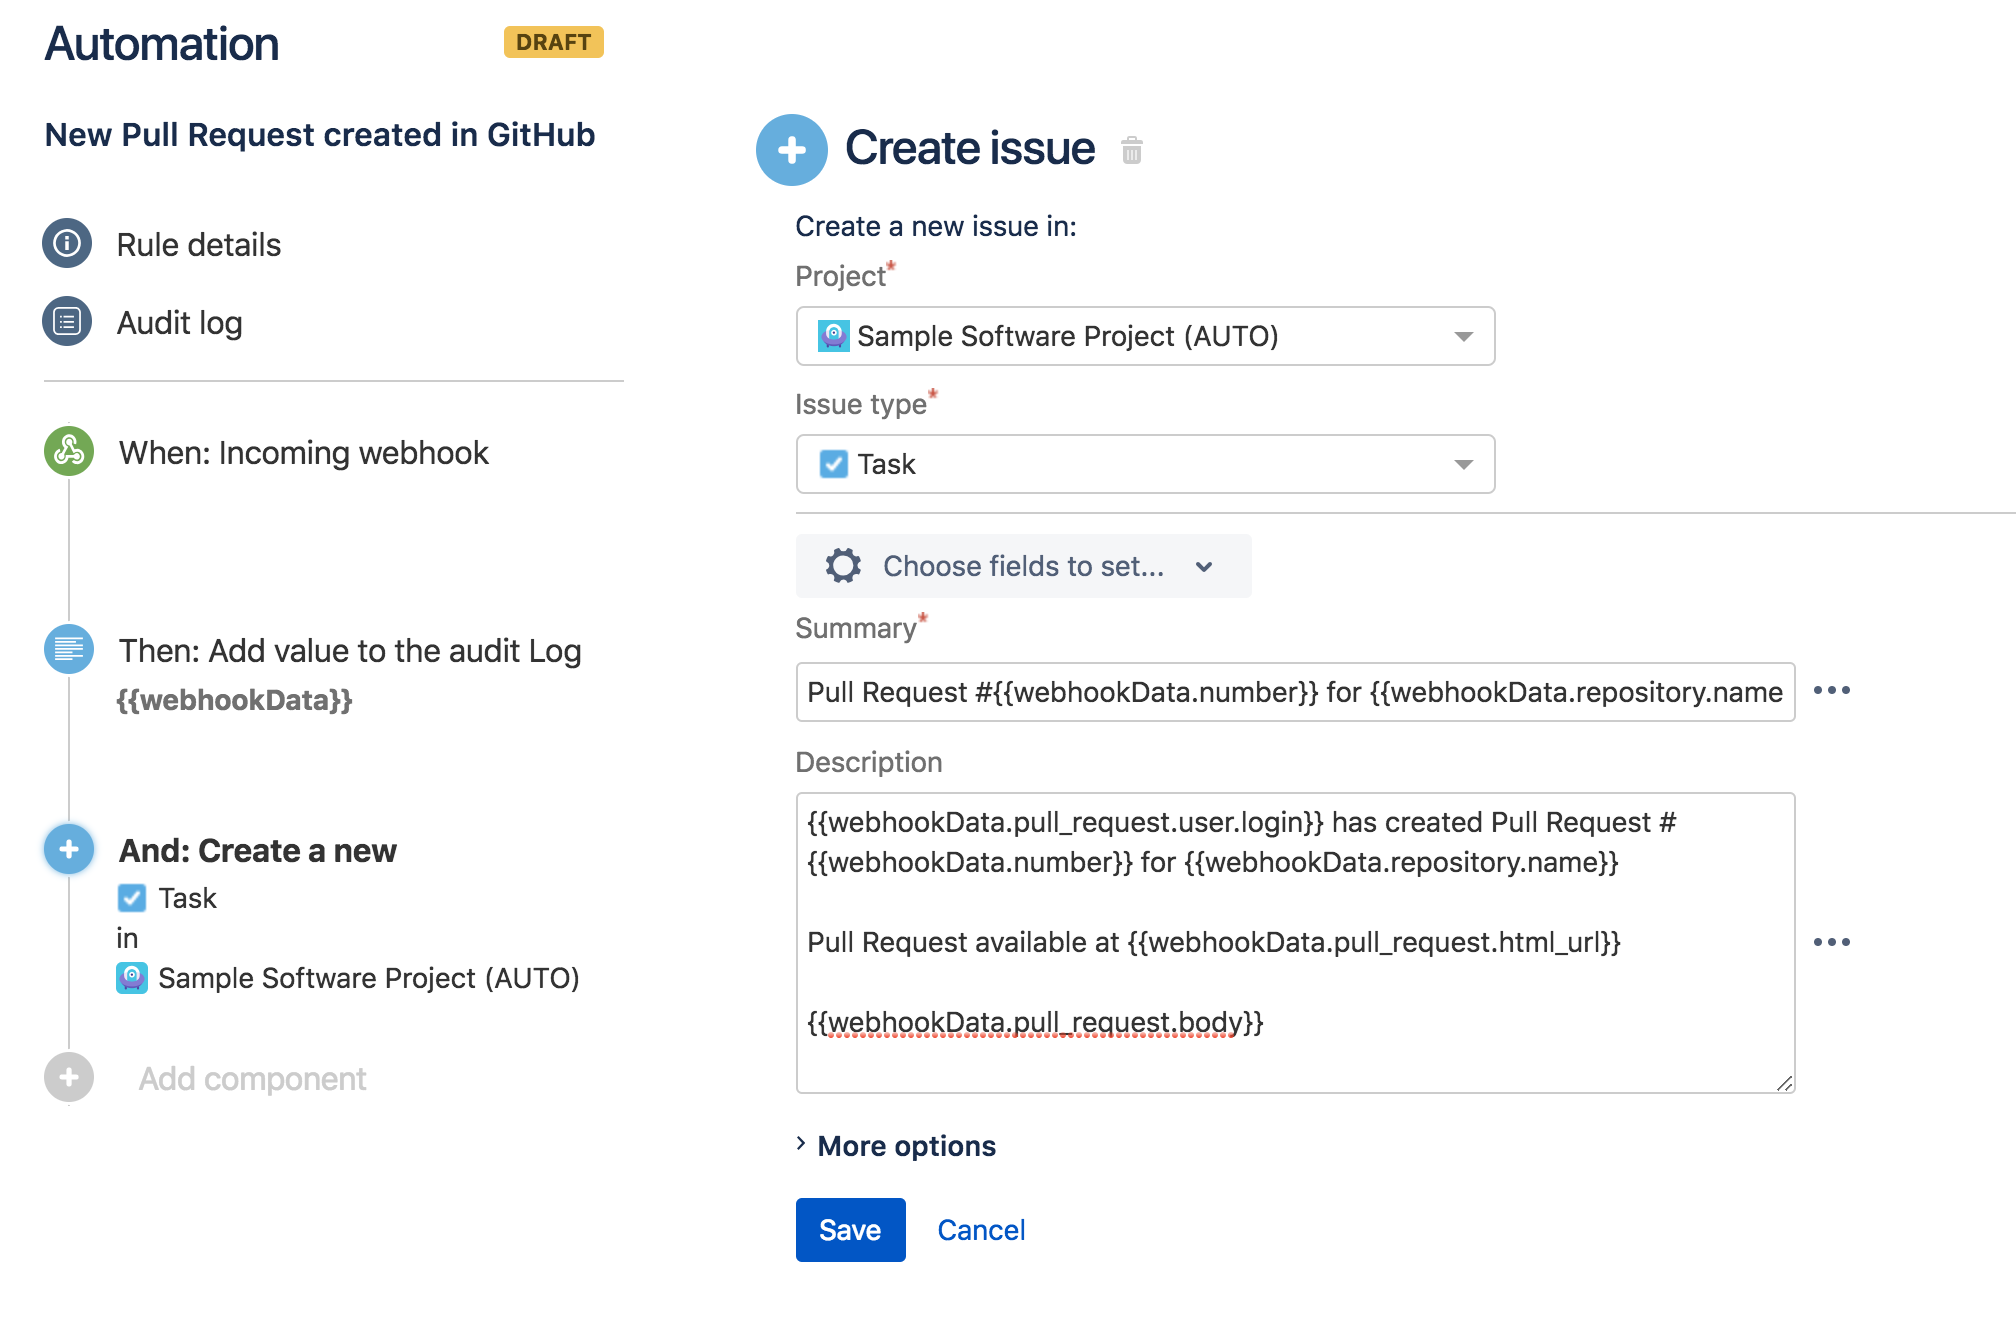
As you can see, I’ve created a description using Smart Values to pull out the pieces of information that we identified. Saving and publishing this means that the next time a Pull Request is created, we should have an issue created.
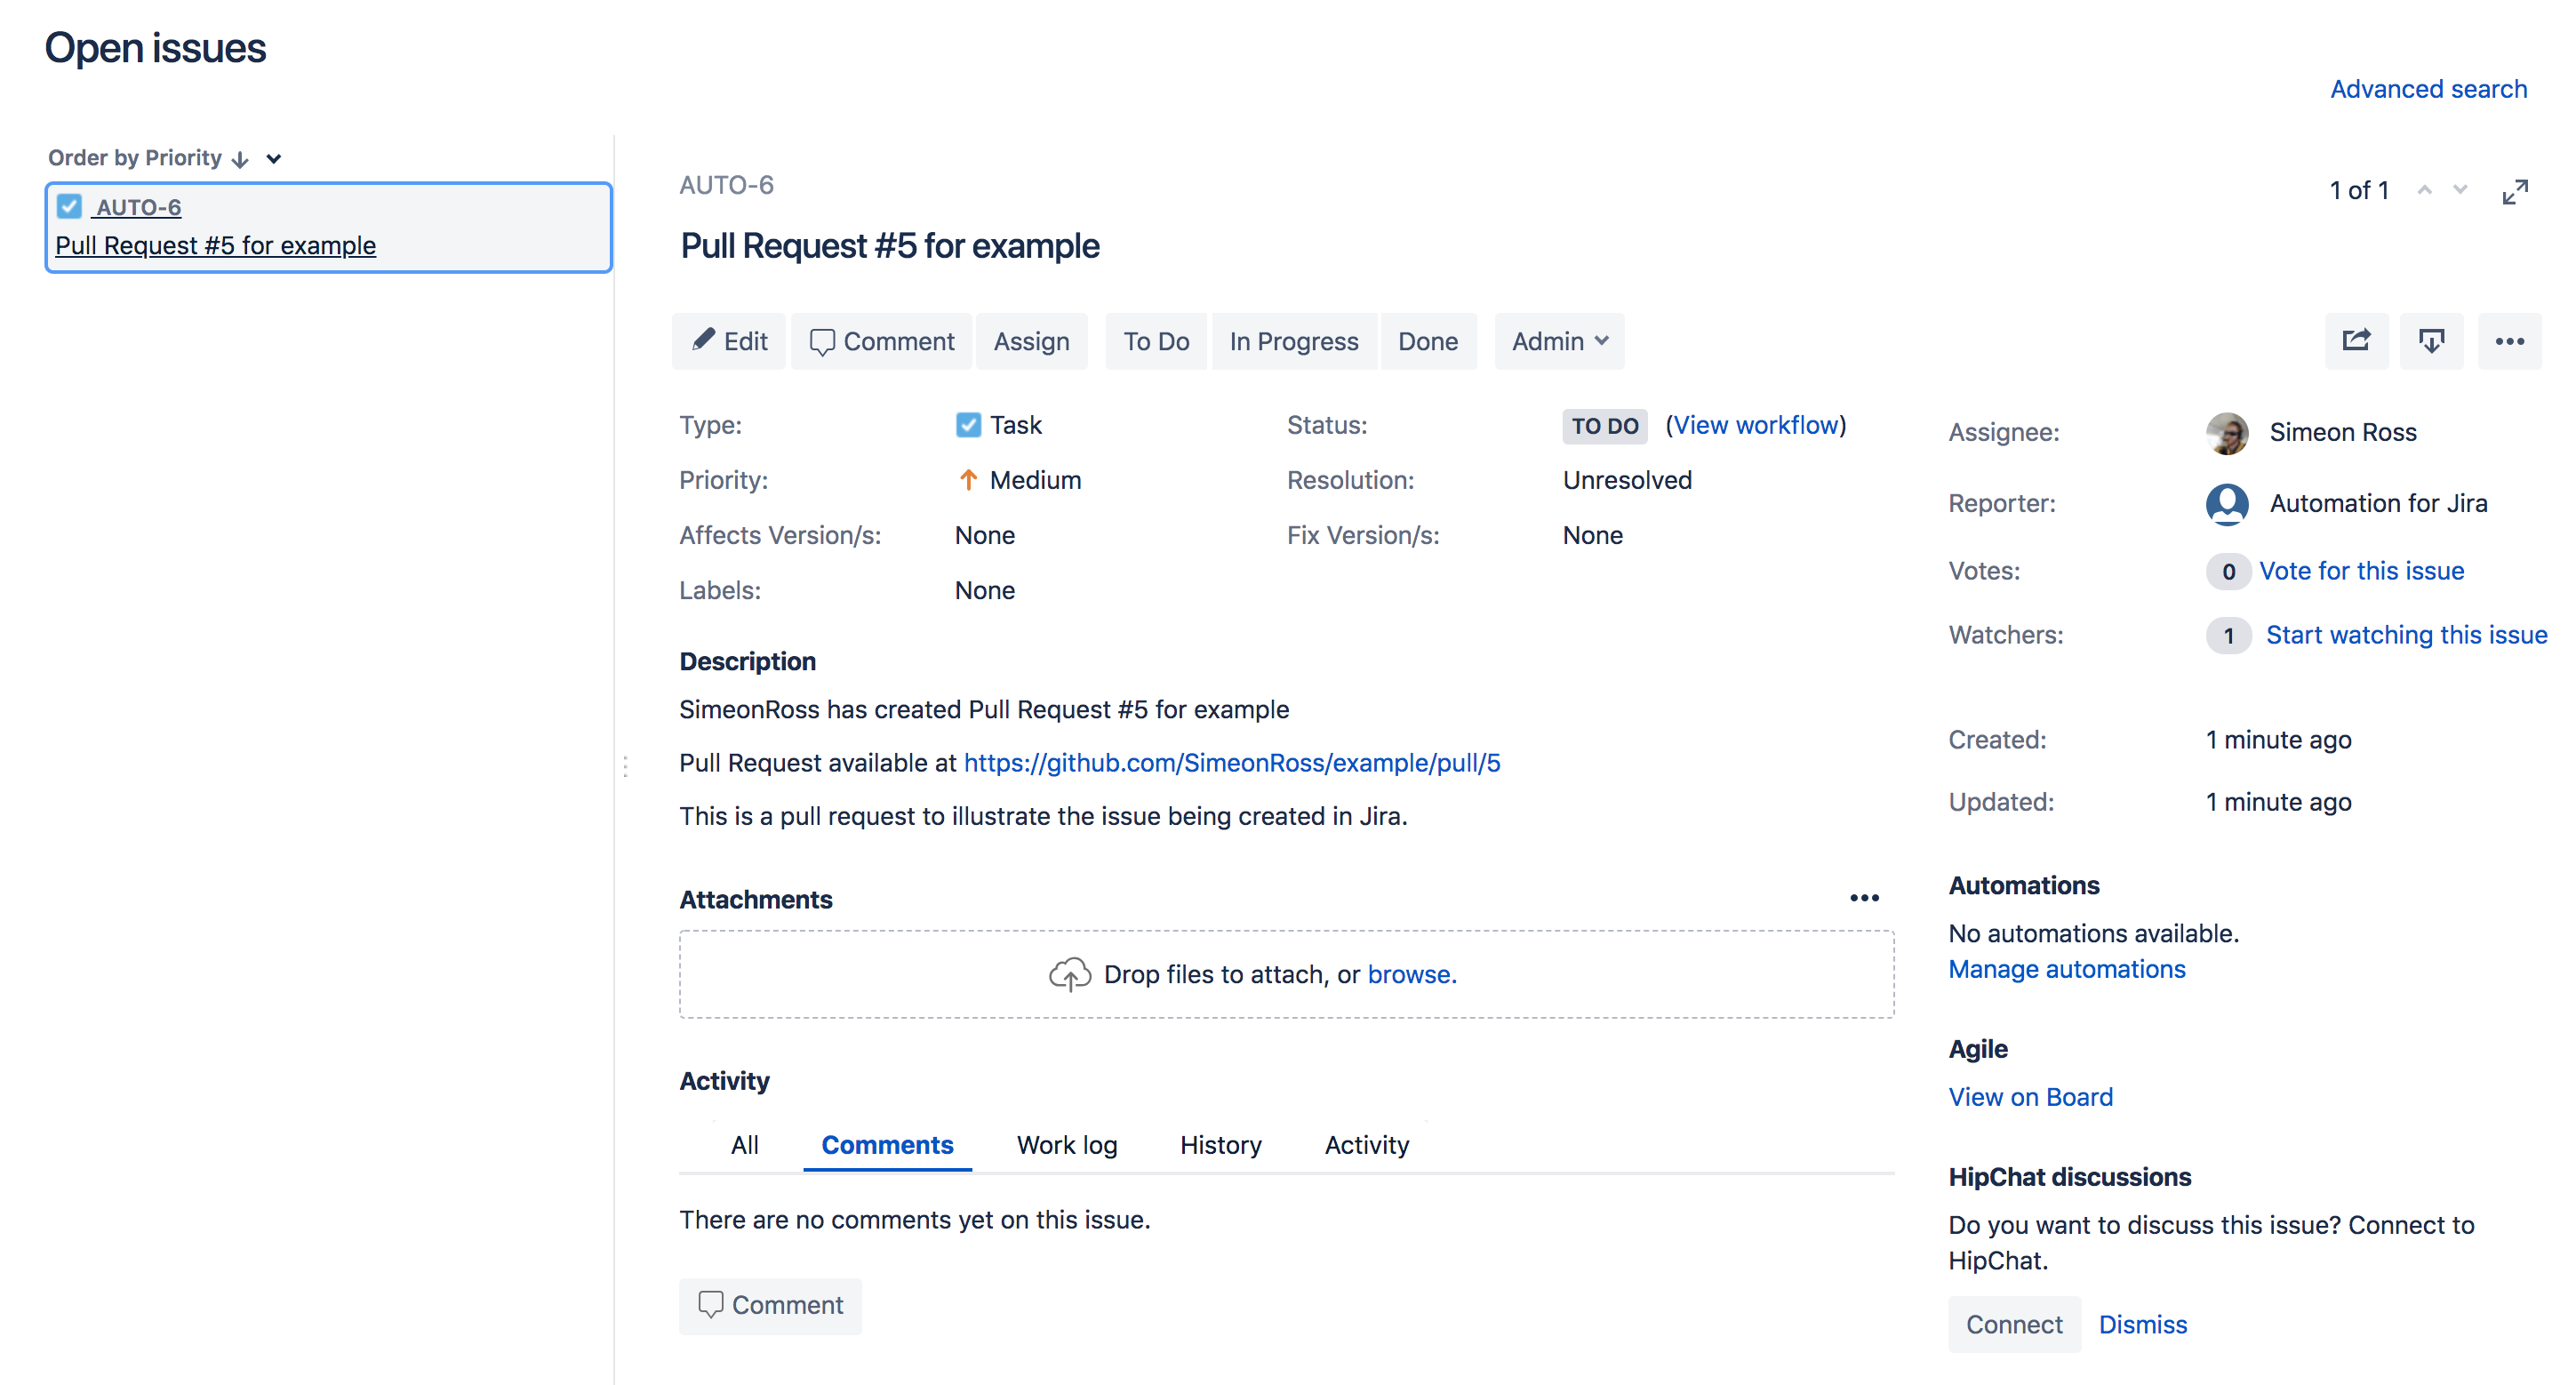
And there we have it! An issue created from a Pull Request on Jira with the details we’re interested in.
Releasing a Jira version from GitHub
Before you go — we have a second example! Here we’ll quickly show how you can release an existing Jira version from webhook on GitHub. In my example project, I have a version which hasn’t been released yet; 4.1.0.
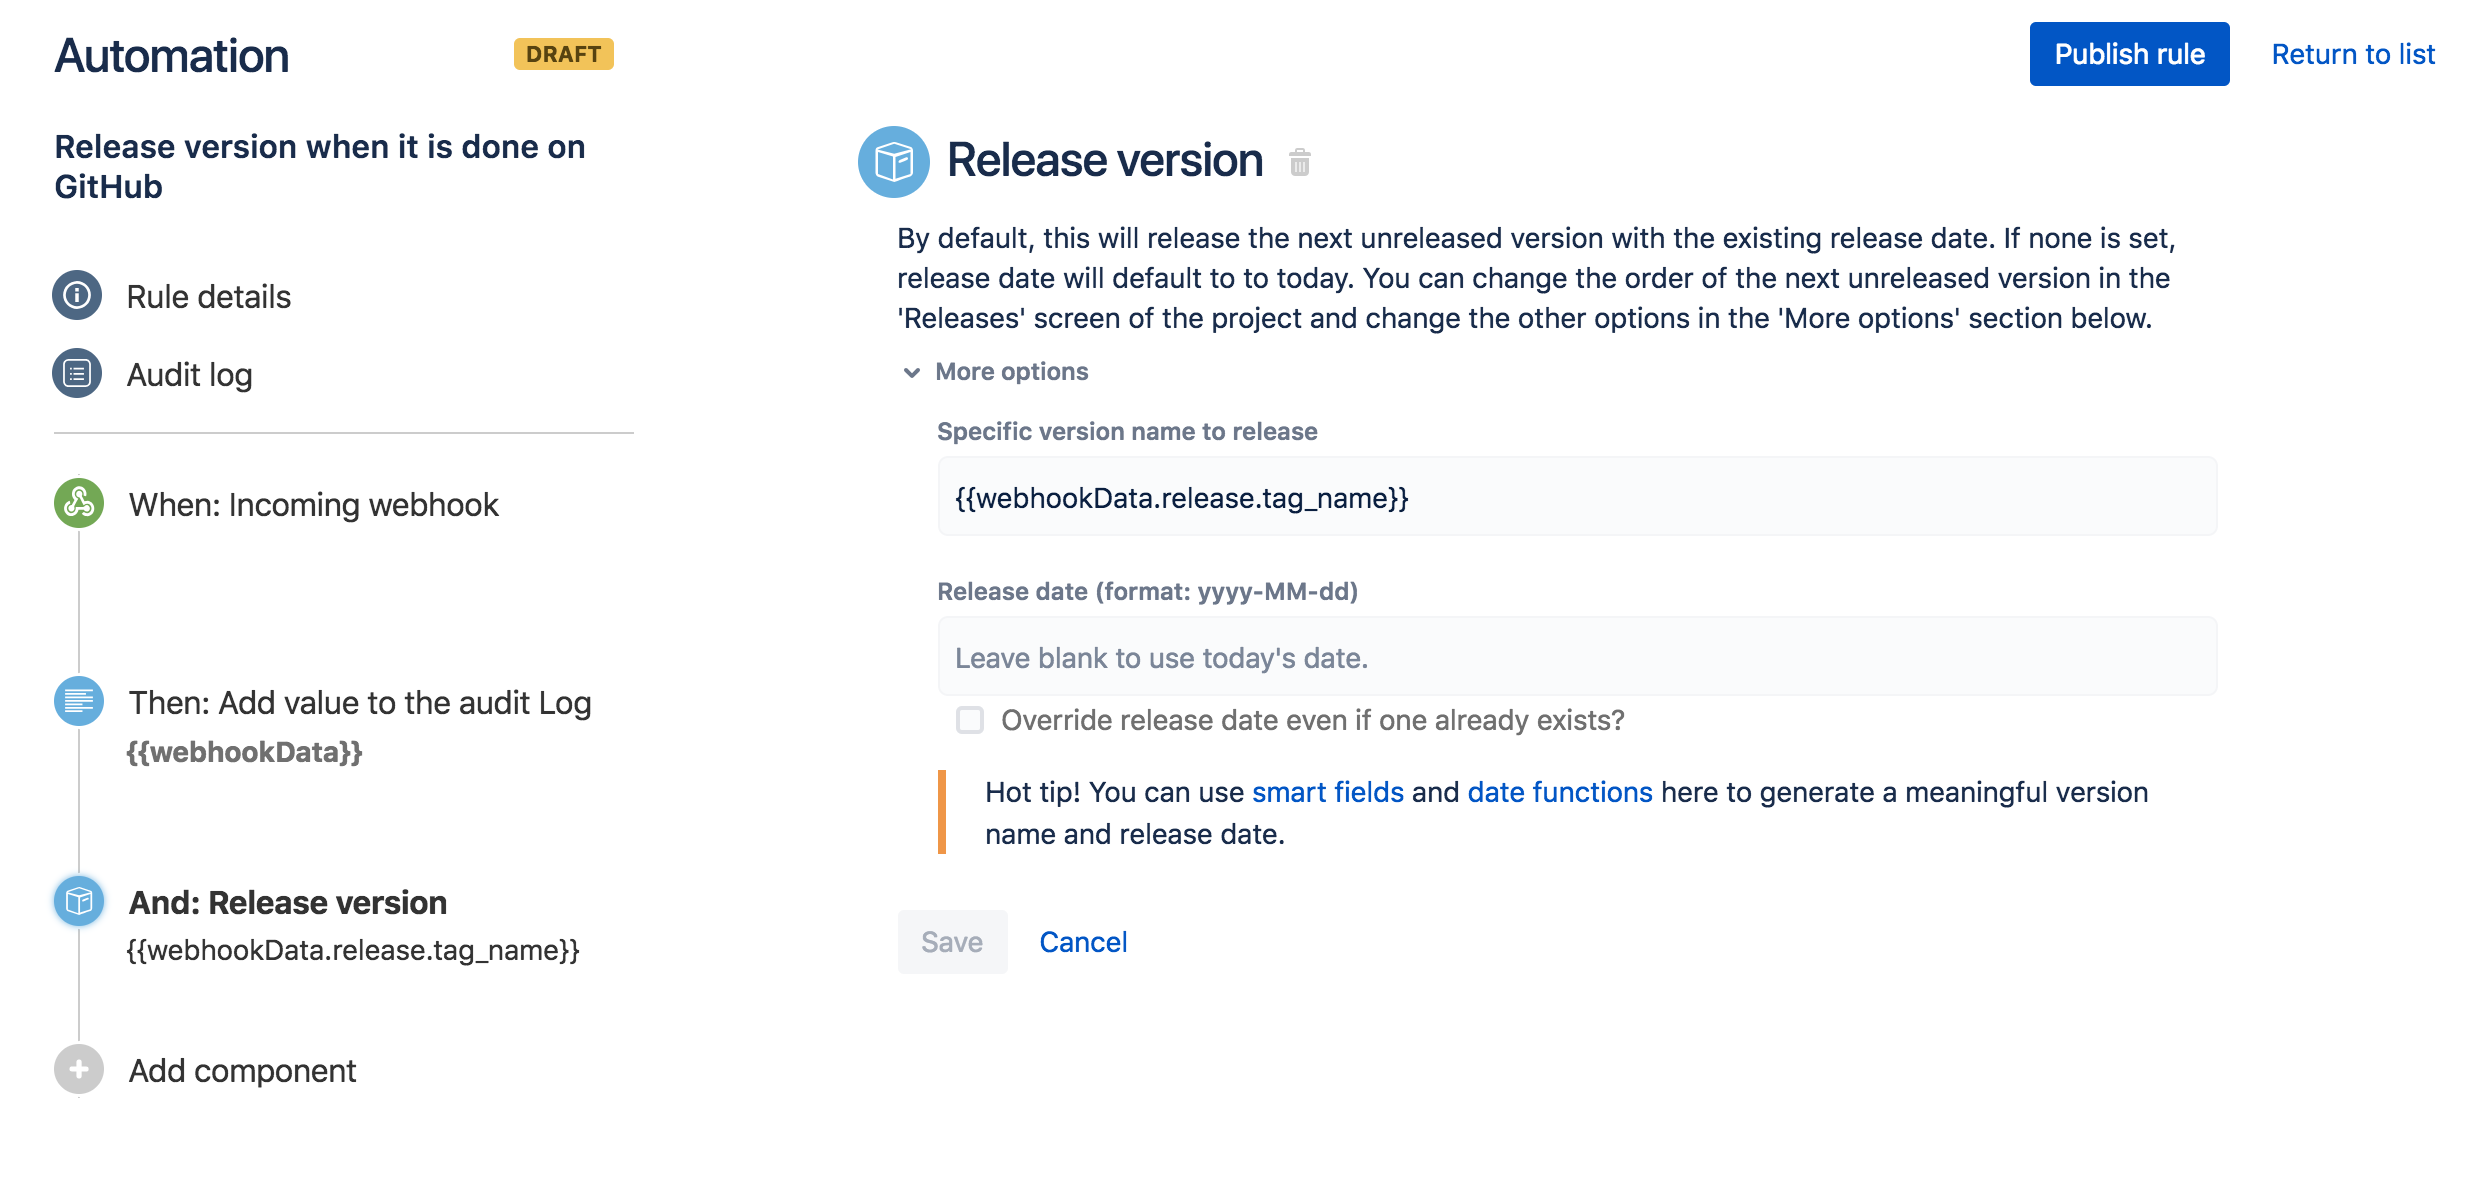
I’ve created a webhook in the project that will contain the versions to release, following the same steps as the previous rule. I used the ‘Log Action’ to have a look at the payload from GitHub and now I’m adding a ‘Release Version’ action. Since I want to make sure that the exact version from GitHub is released, I’ve expanded more options and am using the version from the webhook.
Head over to GitHub and create a webhook, as per the previous example - only this time tick Releases.
And that’s it! When you release the version on GitHub, you’ll find that Jira will mark the same version as released, as you can see in the example below
