Sharing artifacts
Sharing artifacts between jobs
You can share artifacts between jobs in different stages using artifact dependencies. For example, you may want to run acceptance tests on a build, sharing the same WAR from one job to another without rebuilding it each time.
Each time the artifact is shared with a subsequent job, it is copied to the job's agent.
To share an artifact between two jobs in different stages:
- Navigate to the configuration pages for the job that will produce the artifact, as described in Configuring jobs, and select the Artifacts tab (see Configuring a job's build artifacts).
- Either select Share for an existing artifact, or create a new artifact definition, as described above.
Navigate to the job in a subsequent stage that will consume the artifact, and select the Artifacts tab.
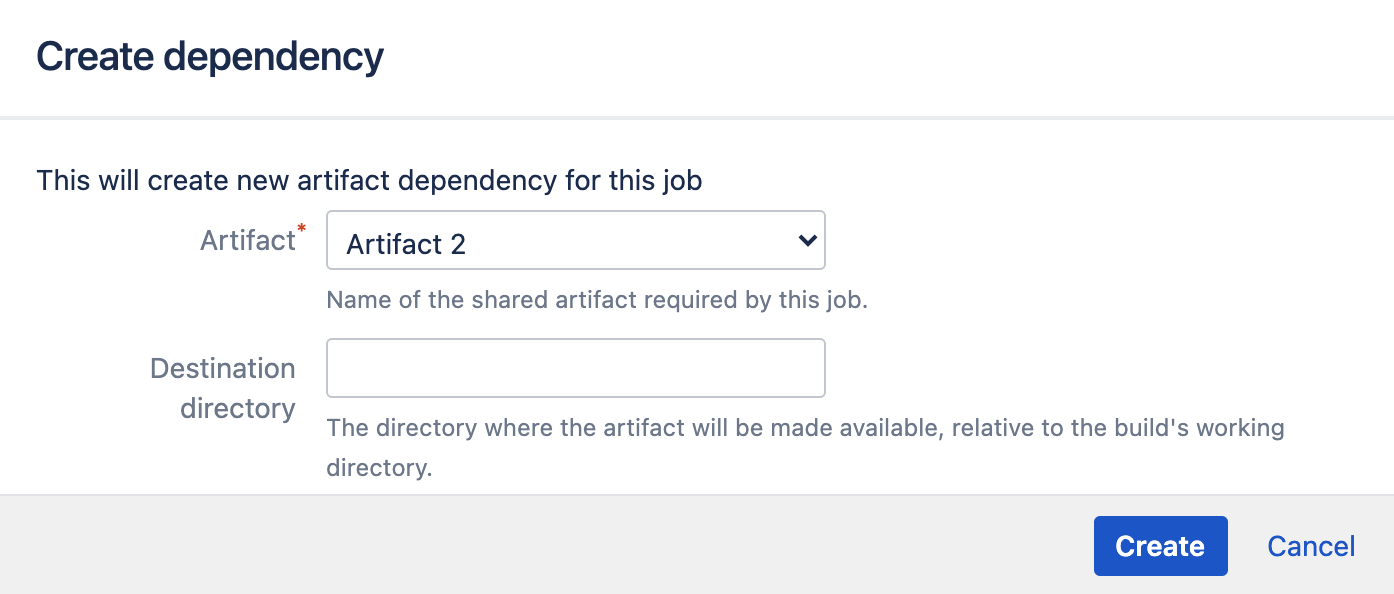
Select Create dependency, then:
Select from the Artifact list.
Specify the Destination directory, then select Create.
- The Artifact list only shows artifacts from jobs in previous stages that have been marked as shared. This is described in Configuring a job's build artifacts.
- Destination directory is relative to the build directory. Do not use the absolute path to refer to the destination directory.
- The artifact from the most recent successful build will be used. If there are no successful builds from the artifact-producing plan or the artifacts have expired, the artifact-consuming job will fail.
Sharing artifacts between build plans
You can share artifacts between different build plans, however you need to use the Artifact downloader task to do so. For example, you may want to run acceptance tests on a particular build from a different plan by sharing the same WAR from one plan to another without rebuilding it each time.
To share an artifact between two build plans:
- Locate the build plan that you wish to associate an artifact with.
- Select Actions > Configure plan.
- Select Stages & jobs and select a job or create a new job if one does not already exist.
- Select the Tasks tab for the selected job.
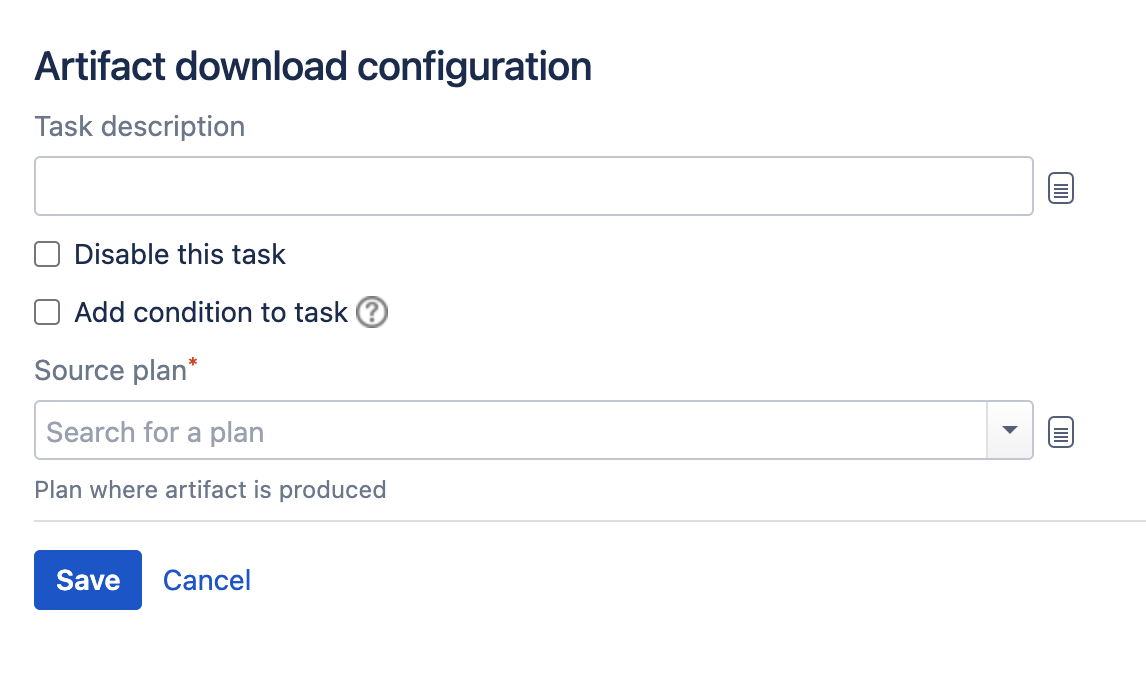
Select Add task > Artifact downloader.
Complete the configuration using the following options:Field Description Optional? Task description A brief description of the artifact downloader task. Disable this task Select this checkbox to disable the task. - Add condition to task Make task run only when a certain condition is met.
You can find conditions on Atlassian Marketplace or implement your own.Source plan The build plan that is the source of the artifact you need to download. - Select Add another artifact to add another artifact to the download list. Alternatively, use the grey cross icon to delete an artifact from your configuration.
- Select Save.
- The Artifact dropdown menu only shows artifacts from jobs in previous stages that have been marked as shared. This is described in Configuring a job's build artifacts.
- Destination directory is relative to the build directory. Do not use the absolute path to refer to the destination directory.
Sharing artifacts from a build plan to a deployment environment
You can also share artifacts from a build plan into a deployment environment. For example, you may wish to share a particular build result from a plan with a deployment environment. To do this, you need to add the Artifact downloader task to a deployment environment during or after the environment creation process.
To share an artifact from a build plan to a deployment environment:
- Open your deployment project. Expand the relevant environment panel, and select Edit tasks. Select Add task > Artifact download.
Complete the configuration using the following options:
Field Description Optional? Task description A brief description of the artifact downloader task. Disable this task Select this checkbox to disable the task. - Add condition to task Make task run only when a certain condition is met.
You can find conditions on Atlassian Marketplace or implement your own.Artifact name Use the dropdown menu to locate the name of the artifact that you want to download. Destination path The location of the working directory into which you want the artifact downloaded. - Select Add another artifact to add another artifact to the download list.
- Select Save.
- The Artifact dropdown menu only shows artifacts from jobs in previous stages that have been marked as shared. This is described in Configuring a job's build artifacts.
- Destination directory is relative to the build directory. Don't use the absolute path to refer to the destination directory.


