Confluence Setup Guide
Before running the Confluence Setup Wizard, as described below, you should have already completed installing Confluence.
When you access Confluence in your web browser for the first time, you will see the Confluence Setup Wizard. This is a series of screens which will prompt you to supply some default values for your Confluence site. It will also offer some more advanced options for setting up data connections and restoring data from a previous installation.
1. Start the setup wizard
- Start Confluence (if it is not already running)
For Windows, go to Start > Programs > Confluence > Start Confluence Server.
Or, run the start-up script found in thebinfolder of your installation directory:start-confluence.batfor Windows.start-confluence.shfor Linux-based systems.
- Go http://localhost:8090/ in your browser
If you chose a different port during installation, change '8090' to the port you specified
If you see an error, check you are using the port you specified during installation.
2. Choose your installation type
In this step, you'll choose whether you want a trial or a production installation.
- Trial installation
Choose this option if you don't have a license, and want to try Confluence for the first time. You'll need an external database.
- Production installation
Set up Confluence with your own external database. This option is recommended for setting up Confluence in a production environment.
3. Enter your license key
Follow the prompts to generate an evaluation license, or enter an existing license key. To retrieve an existing license key head to my.atlassian.com, or to purchase a new commercial license go to www.atlassian.com/buy.
If you selected a Trial installation in the previous step, Confluence will generate your license. This will take a few minutes. Once complete, go to step 8 below.
If you selected a Production installation, go to the next step to set up your external database.
4. Production installation: database configuration
Next it's time to set up your database. Some things to consider:
- Check the supported platforms list to confirm that your chosen database and version is supported.
- See database configuration for information on setting up your database, including UTF-8 character encoding requirements.
- If you are using Confluence as a production system you must use an external database.
- The embedded H2 database is only supported for testing and app development purposes on non-clustered (single node) Confluence Data Center installations.
Screenshot: Database configuration

5. Production installation: external database
Before you Start
- Character encoding:
- We strongly recommend that character encoding is consistent across your database, application server and web application, and that you use UTF-8 encoding.
- Before setting up your database, please read about configuring character encoding.
- Database name: When creating a new external database, give it the name 'confluence'.
Choose how you want Confluence to connect to your database either via a direct JDBC connection or via a server-managed datasource connection.
Screenshot: Connection options
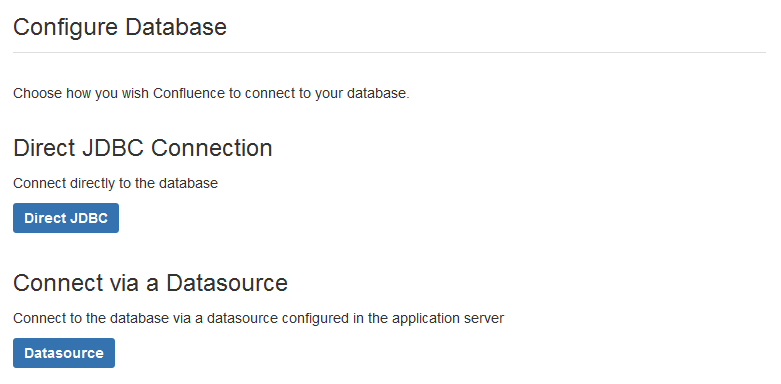
Direct JDBC
This uses a standard JDBC database connection. Connection pooling is handled within Confluence.
- Driver Class Name – The Java class name for the appropriate database driver. This will depend on the JDBC driver, and will be found in the documentation for your database. Note that Confluence bundles some database drivers, but you'll need to install the driver yourself if it is not bundled. See Database JDBC Drivers for details.
- Database URL – The JDBC URL for the database you will be connecting to. This will depend on the JDBC driver, and will be found in the documentation for your database.
- User Name and Password – A valid username and password that Confluence can use to access your database.
You will also need to know:
- The size of the connection pool Confluence should maintain. If in doubt, just go with the default provided.
- What kind of database you're connecting to, so you can tell Confluence which dialect it needs to use.
Datasource
This asks your application server (Tomcat) for a database connection. You will need to have configured a datasource in your application server. For information about configuring an external database, see Database Configuration.
- Datasource Name - The JNDI name of the datasource, as configured in the application server.
Note: Some servers will have JNDI names likejdbc/datasourcename; others will be likejava:comp/env/jdbc/datasourcename. Check your application server documentation.
You will also need to know:
- What kind of database you're connecting to, so you can tell Confluence which dialect it needs to use.
6. Production installation: load content
We can help you get your new Confluence site started with some demonstration content (which you can remove once you're up and running), or you can choose to proceed with an empty site. You'll need to create a space in your new site before you can start adding content.
If you're migrating from another Confluence installation choose Restore from backup to import your existing Confluence data.
7. Production Installation: restore data from backup
This option allows you to import data from an existing Confluence installation as part of the setup process. You'll need a manual backup file from your existing Confluence installation to do this (go to Backup and Restore in the administration console of your existing Confluence site).
Screenshot: restore data options

There are two ways to restore your data - upload the file, or restore from a location on your file system.
- Upload a backup file
This option will load the data from a zipped backup file. If your backup file is very large, restoring from the file system is a better option. Follow the prompts to browse for your backup file. Ensure select Build Index is selected so the search index is generated.
Restore a backup file from the file system
This option is recommended if your backup file is very large (100mb or more), or your backup file is already on the same server.Copy your XML backup file into the
<confluence-home>/restoredirectory. Your backup file will appear in the list. Follow the prompts to restore the backup. Ensure select Build Index is selected so the search index is generated.
When the restore process has you'll be ready to log in to Confluence. The system administrator account and all other user data and content has been imported from your previous installation.
8. Set up user management
You can choose to manage Confluence's users and groups inside Confluence or in a Jira application, such as Jira Software or Jira Service Management.
- If you do not have a Jira application installed, or if you would prefer to set up external user management later, choose Manage users and groups within Confluence.
- If you have a Jira application installed, the setup wizard gives you the opportunity to configure the Jira connection automatically. This is a quick way of setting up your Jira integration with the most common options. It will configure a Jira user directory for Confluence, and set up application links between Jira and Confluence for easy sharing of data. Choose Connect to Jira.
9. Connect to your Jira application

Enter the following information:
Jira Base URL - the address of your Jira server, such as
http://www.example.com:8080/jira/orhttp://jira.example.com- Jira Administrator Login - this is the username and password of a user account that has the Jira System Administrator global permission in your Jira application.
Confluence will also use this username and password to create a local administrator account which will let you access Confluence if Jira is unavailable. Note that this single account is stored in Confluence's internal user directory, so if you change the password in Jira, it will not automatically update in Confluence.
- Confluence Base URL - this is the URL Jira will use to access your Confluence server. The URL you give here overrides the base URL specified in Confluence, for the purposes of connecting to the Jira application.
- User Groups - these are the Jira groups whose members should be allowed to use Confluence. Members of these groups will get the 'Can use' permission for Confluence, and will be counted in your Confluence license. The default user group name differs depending on your Jira version:
- Jira 6.4 and earlier:
jira-users. - Jira Software 7.x and later:
jira-software-users - Jira Core 7.x and later:
jira-core-users - Jira Service Management (formerly Jira Service Desk) 3.x and later:
jira-servicedesk-users
- Jira 6.4 and earlier:
- Admin Groups – Specify one or more Jira groups whose members should have administrative access to Confluence. The default group is
jira-administrators. These groups will get the system administrator and Confluence administrator global permissions in Confluence.
For full details and a troubleshooting guide, see Configuring Jira Integration in the Setup Wizard.
10. Set up system administrator account
The system administrator has full administrative power over your Confluence instance. This person will be able to add more users, create spaces, and set further Confluence options. Please refer to the overview of global permissions for more information.
If you've delegated user management to a Jira application, we'll use the Jira system administrator account you specified as Confluence's system administrator account.
11. Setup is Complete
That's it, Confluence is ready to go. Click Start to jump straight in to Confluence.
Choose Further Configuration if you want to go directly to the Administration Console and complete administrator's tasks including configuring a mail server, adding users, changing the base URL and more.