Symbols, emojis and special characters
You can add various symbols, emojis and special characters to Confluence pages. You can also use them in other places that display content, such as pages, blog posts, inline and page comments, and the dashboard welcome message.
Using Confluence Cloud? Check out our info on how to Use symbols, emojis and special characters in the new editor.
Insert symbols and special characters
- Edit the page (if you're viewing the page, press E on your keyboard)
- Choose Insert
 > Symbol
 - Choose a symbol to insert it

Insert emojis
There are a few ways you can add an emoji to your page.
Select it from the emoji menu
- Edit the page
- Select where you want to add the emoji
- Open the emoji menu
 from the editor toolbar
 - Select an emoji to insert it.

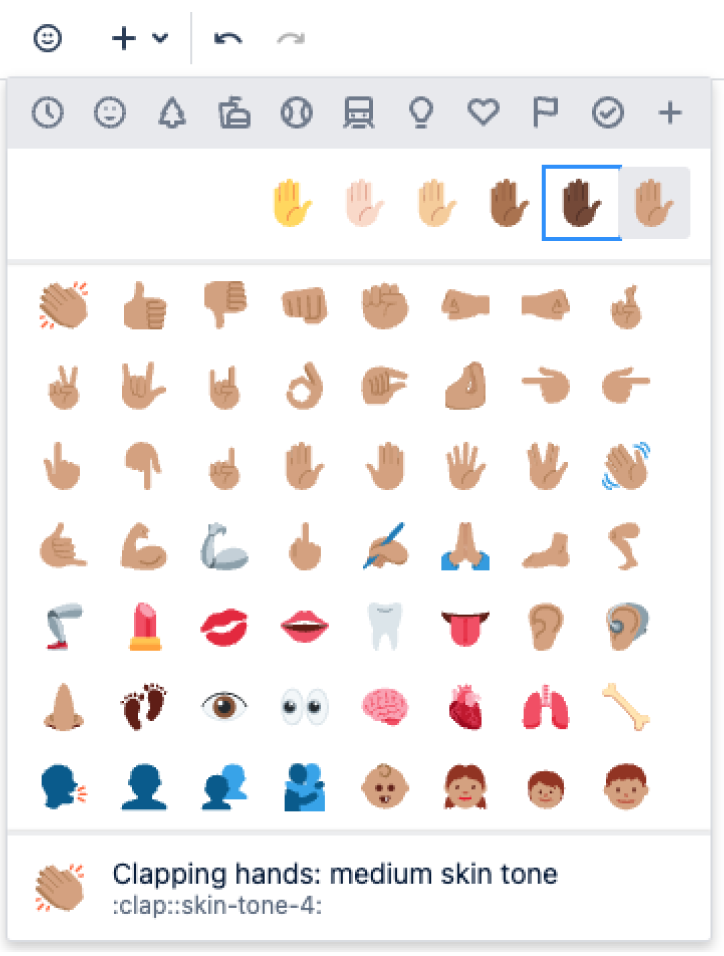
You can also personalize skin tone for certain emojis. Select the hand emoji (next to the emoji search bar) and it will expand to show the skin tone variations.
Type the emoji shortcut
- Edit the page
- Select where you want to insert the emoji
- Type its keyboard shortcut
Emoji shortcuts start and end with a colon ":", for example :wave:. To learn an emoji's shortcut, hover over an emoji in the emoji menu. The emoji shortcut is visible in the preview panel.
Knowing an emoji shortcut is helpful when the emoji menu isn't available, for example in an inline comment.
You must have autoformatting enabled in the editor for this to work. See Edit Your User Settings
Screenshot: The keyboard shortcuts for our original emoticon set

Trigger the emoji autocomplete
- Edit the page
- Select where you want to add the emoji
- Type a colon ":" to activate the emoji autocomplete menu
- Type the emoji name, shortcut, or browse the suggestions using your up and down arrows or mouse
- Select the relevant emoji to insert it
The emoji autocomplete menu will continue to change as you type to predict and match your input.
You must have autocomplete enabled in the editor for this to work. See Edit Your User Settings
Screenshot: The emoji autocomplete feature is activated when you type a colon in the editor
![]()
Add your own emojis
You can upload your own emojis using the emoji menu in the editor.
Files must be JPG, PNG, or GIF, and no larger than 1 MB. Regardless of the original file's dimensions, the emoji created will be 36 x 36 pixels.
To upload a custom emoji:
Open the emoji menu from the editor toolbar
Select +Add your own emoji
Select the icon under ‘Select an image'
Browse for and select the image file (we accept JPG, PNG, and GIF files up to 1MB)
Select Open
Give your emoji a name
Give your emoji a shortcut (this must be unique)
Select Add emoji
Confluence and system admins can view and delete custom emojis uploaded to their site at https://[yourdomain]/admin/emojis/globalsettings.action
View and delete custom emojis
Custom emojis will appear in the emoji menu under 'All uploads' (+).
To see the emojis you’ve uploaded:
Open the emoji menu from the editor toolbar
Select the + tab
Any emojis you've added will appear under ‘Your uploads’
To delete an emoji you’ve uploaded:
Open the emoji menu from the editor toolbar
Select the + tab
Under ‘Your uploads’, select the emoji you want to delete
Select the cross (x) to the top right the image or use the backspace keyboard shortcut
You will receive a confirmation message, select Remove
Prevent emojis from appearing
To undo the conversion of a character combination or shortcut into an emoticon or emoji, press Ctrl+Z (Windows) or Cmd+Z (Mac).
To close the emoji autocomplete dialog after typing the colon : character, press Space.
To prevent Confluence from converting text to emojis automatically, disable 'Autoformatting' in your user profile. See Edit Your User Settings.