How to Configure Google Single Sign On with Jira Align
Summary
This article shows the steps required to configure Google IDP for Single Sign-On with Jira Align
Environment
Jira Align
Solution
Part 1 - Google Settings
- Log into https://admin.google.com
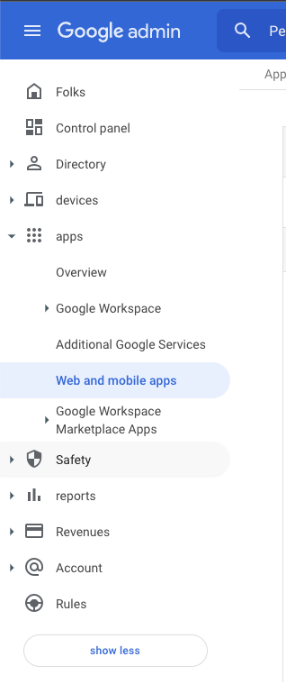
- Click on Web and Mobile Apps on the left menu
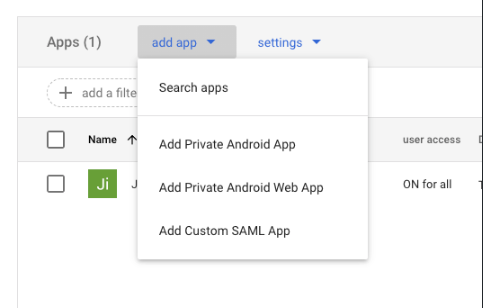
Add App
Click on “Add App"
Click on “Add Custom SAML App"
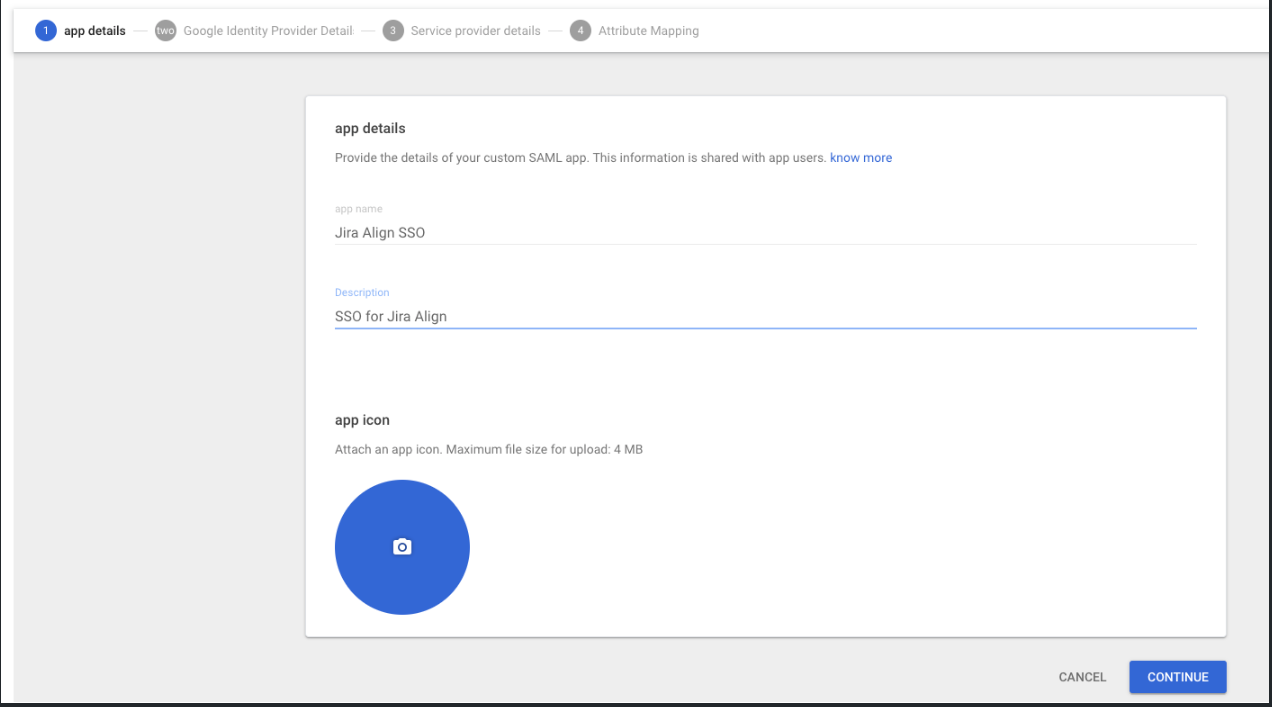
Enter an App name and description of your choice
Click Next/Continue
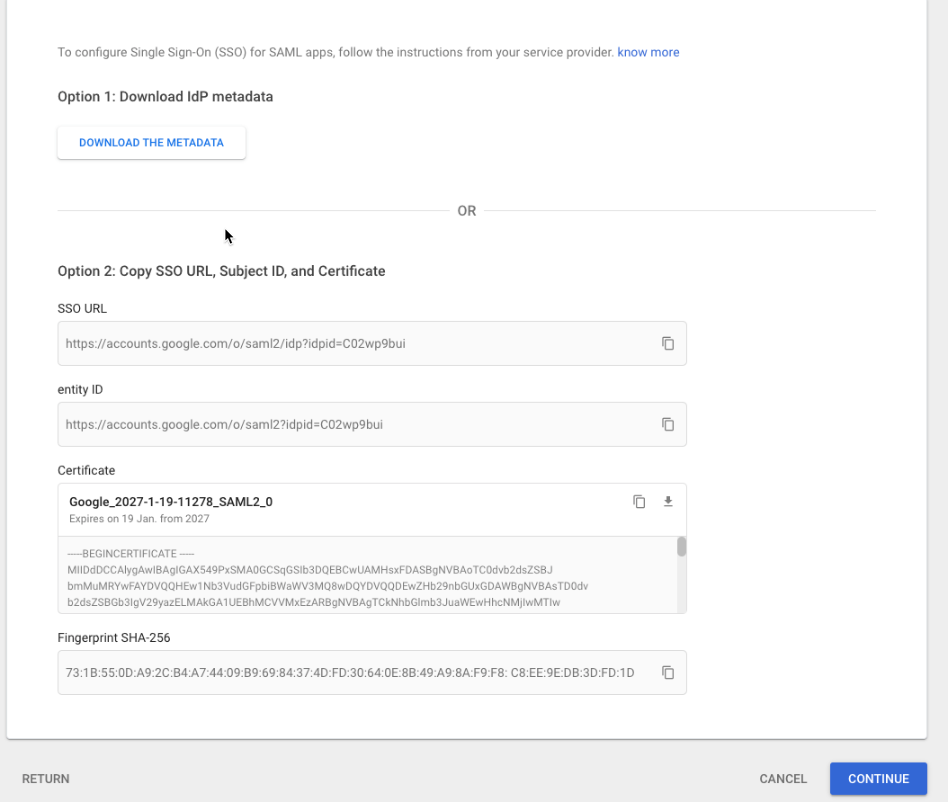
- Metadata
Click to Download the Metadata
It will be imported on Jira Align in later steps
Take note of the SSO URL,
In this example https://accounts.google.com/o/saml2/idp?idpid=C02wp9bui
Click Next/Continue
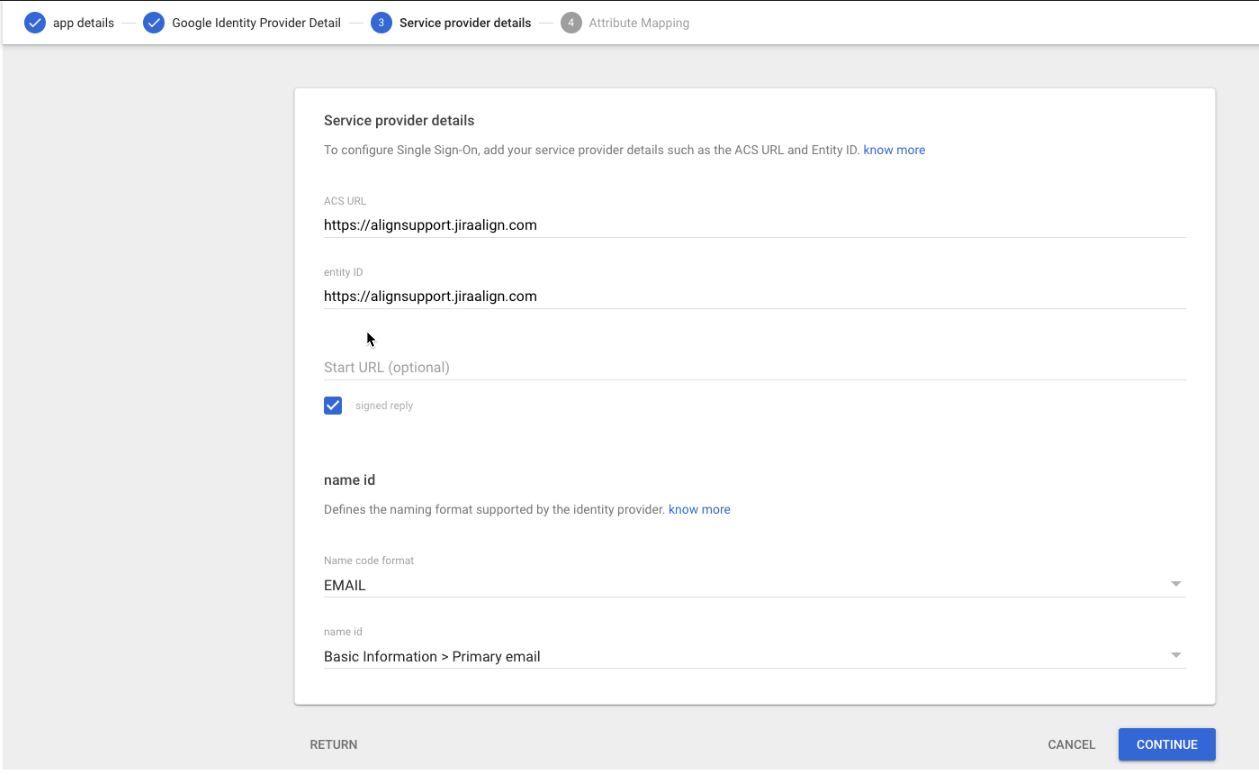
- Service Provider Details
Set the ACS URL and Entity id with your JIra Align URL
Check the box “Signed Reply"
Set “Name Code format" to “EMAIL"
Set “Name id" to “Basic Information > Primary Email"
Click Next/Continue
- It is not required to add an Attribute mapping, click on Conclude
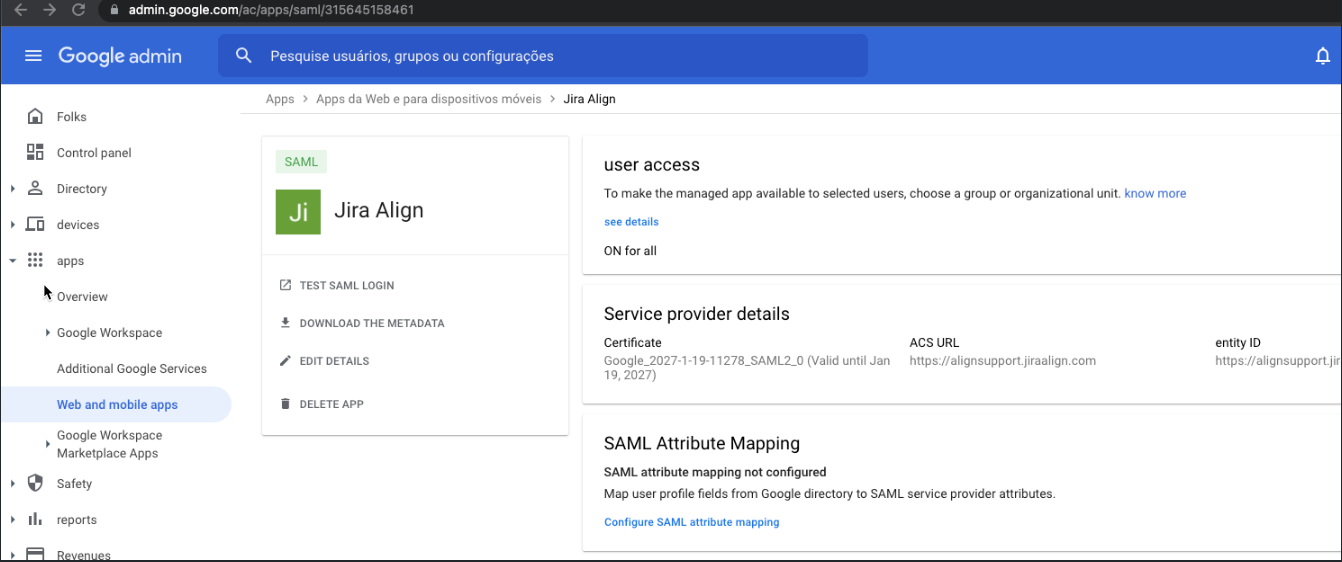
Now on the SAML App you just created, take note of the URL, it contains the APP ID
In this example https://admin.google.com/ac/apps/saml/315645158461
Part 2 - Jira Align Settings
Go to Jira Align
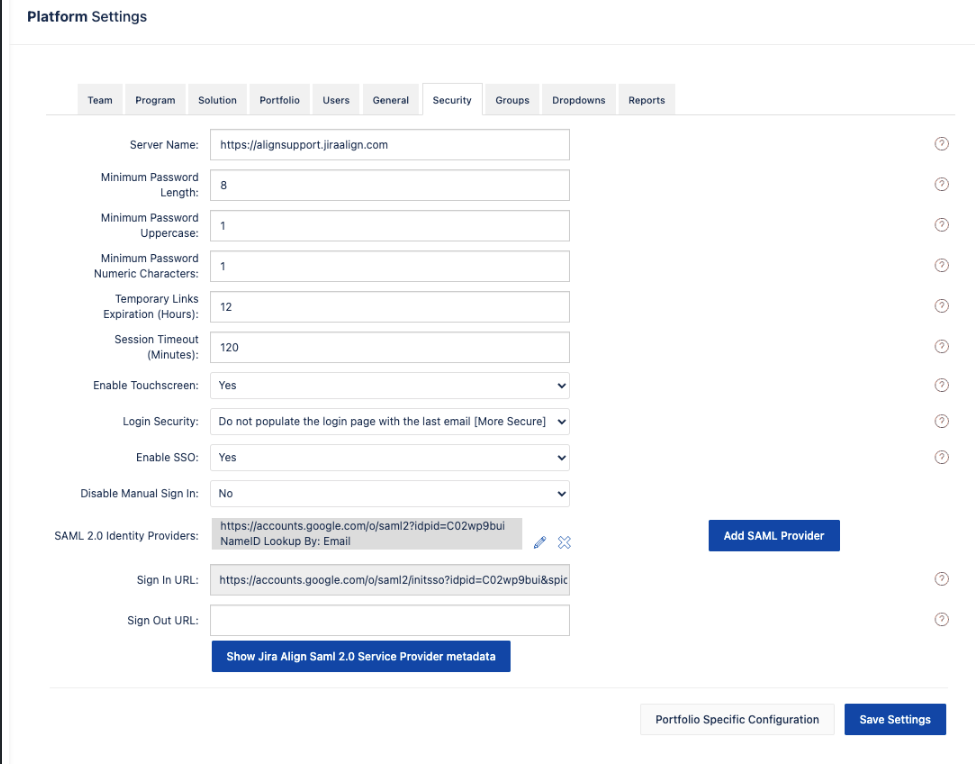
Go to Administration > Security
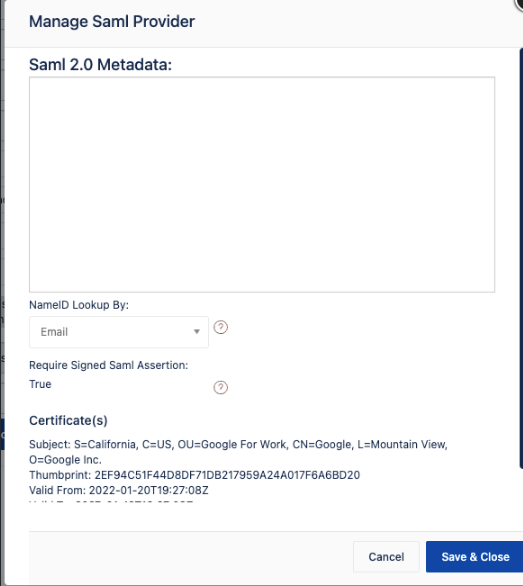
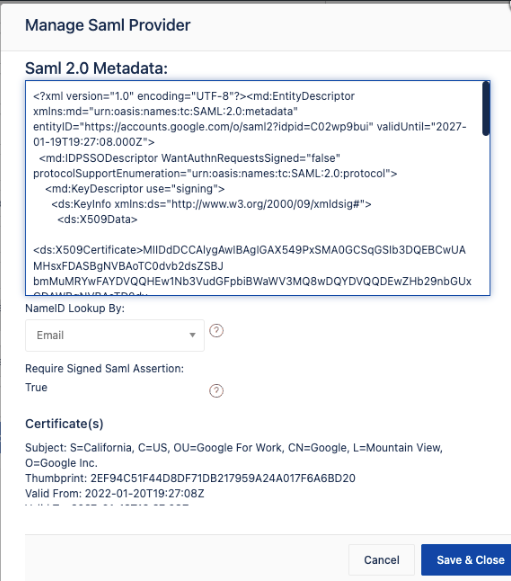
Click on the “Add SAML Provider” button
Copy the content from the GoogleIDPMetadata.xml file you download on Step 5
To copy the content, open the file using any text editor app, select all the text and copy
Paste on the “SAML 2.0 Metadata" text field
Set the “NameID Lookup by" to Email
Click on Save and Close
Part 3 - Testing SAML Login and Sign-In URL
Before Disabling the Manual Sign-In, test the SSO authentication
Access your Google SAML Application
URL you Saved on STEP 8
- Similar to the example: https://accounts.google.com/o/saml2/initsso?idpid=C02wp9bui&spid=315645158461
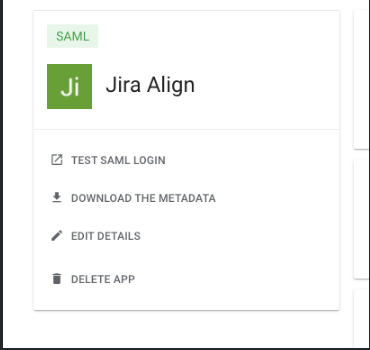
Click on “TEST SAML LOGIN"
Test the URL that will be used as Sign in URL
- The URL must be like the following:
https://accounts.google.com/o/saml2/initsso?idpid=C02wp9bui&spid=315645158461 About the URL:
The IDPID is the id from the URL captured on STEP 5
the SPIDP is the ID from the URL captured on STEP 8
Once you confirm you can log in to Jira Align successfully using the above URL (with the correct IDPID and SPID), you can set the URL to be the Sign in URL on Jira Align
- The URL must be like the following:
Part 4 - Finishing the Configuration
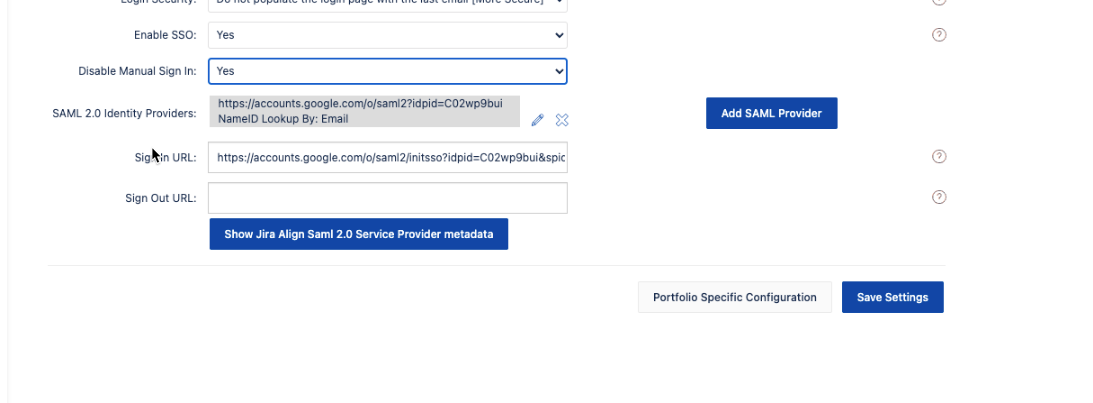
On Jira Align > Admin > Platform > Security
Change “Disable Manual Sign-in" to “Yes"
on the “Sign In URL" enter the URL tested on STEP 12
Click Save Settings
