How to automatically change the assignee when transitioning the workflow
Platform notice: Server and Data Center only. This article only applies to Atlassian products on the Server and Data Center platforms.
Support for Server* products ended on February 15th 2024. If you are running a Server product, you can visit the Atlassian Server end of support announcement to review your migration options.
*Except Fisheye and Crucible
Purpose of this article
The purpose of this article is to describe various ways to automatically change the Assignee when transitioning a Jira issue from one status to another.
Environment
- Jira Server/ Data Center on any version from 8.0.0
- Automation For Jira on any version from 7.4.0 (for Solution 2)
Solution 1 - Using a workflow transition
- Log in as a user with the Jira administrator global permission.
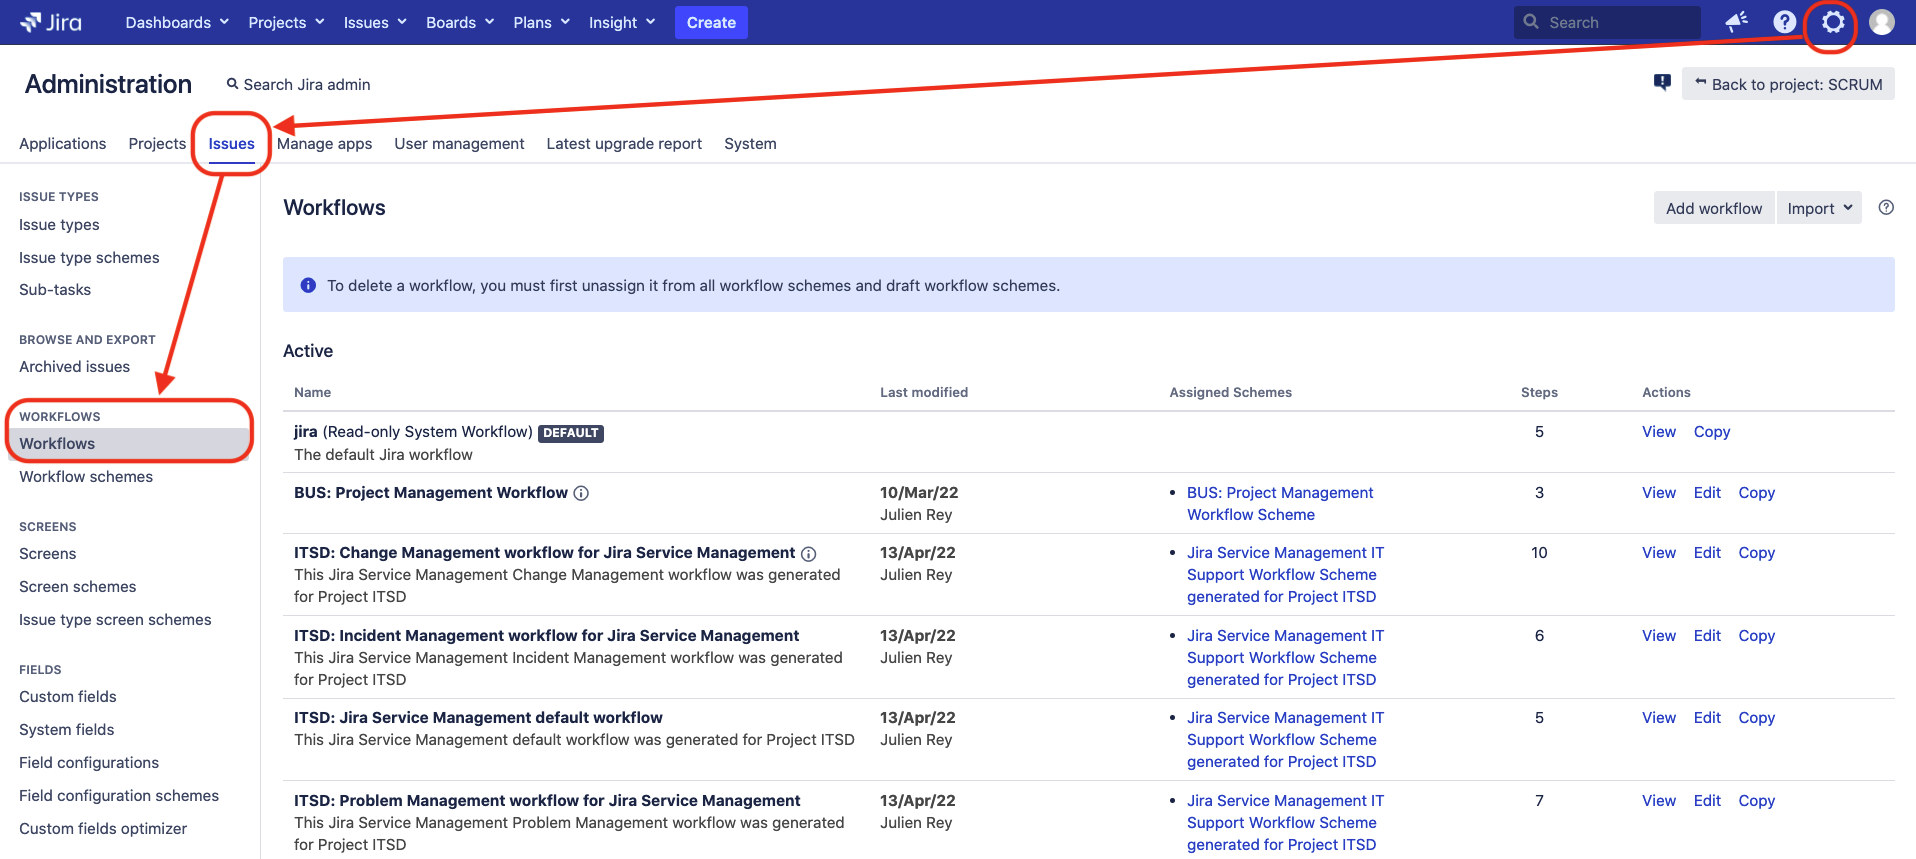
- Go to ⚙ > Issues > Workflows
- Locate the workflow to edit and choose Edit.
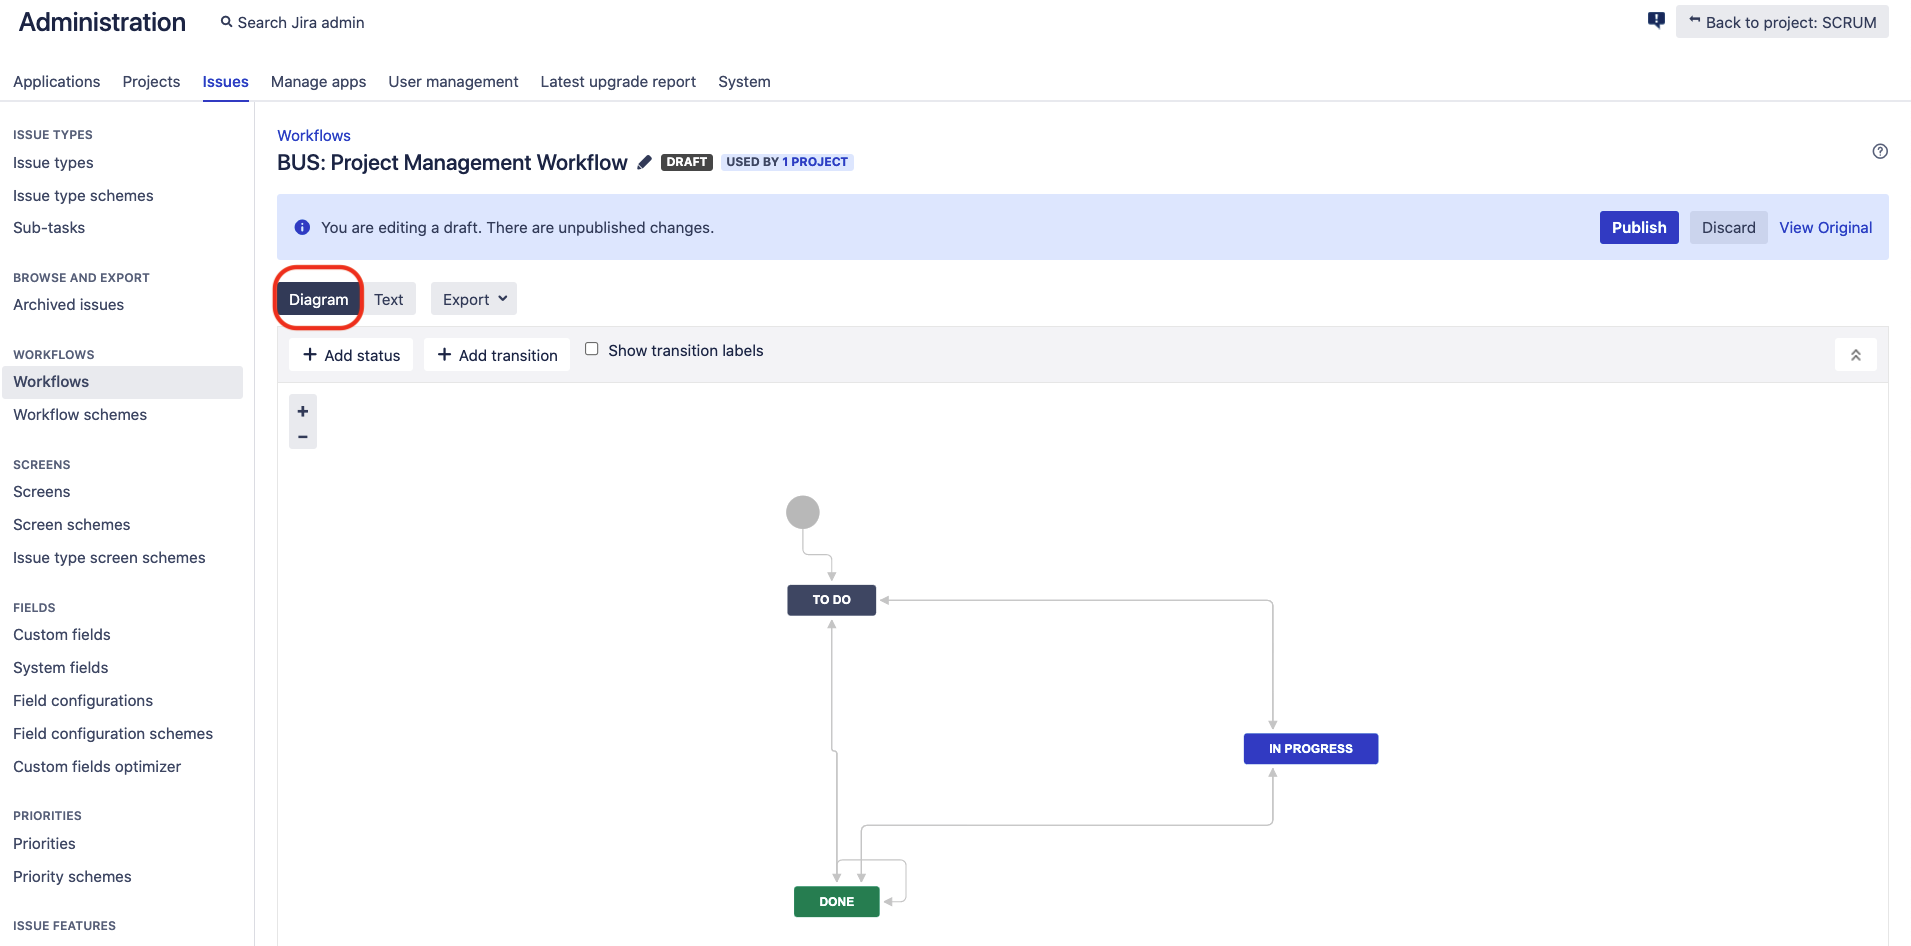
- If you're not in diagram mode, choose Diagram.
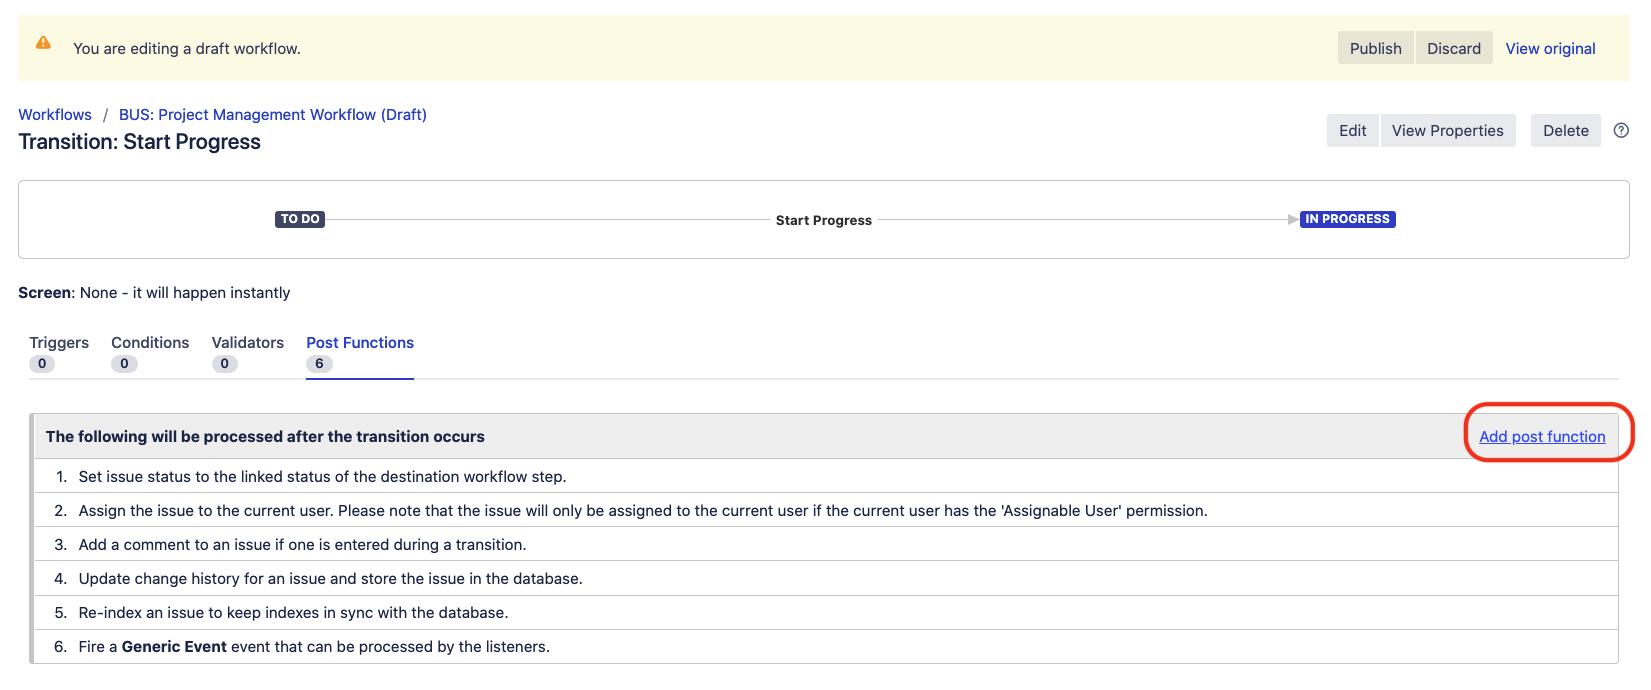
- Select a transition to add the post function to (hover over the transition line and click the line or name that appears), and click Post functions:
- Click Add Post Function:
- Select Update Issue field and choose Add:
- Select Assignee as the Issue Field to update:
- Click in the text field and type the name of a user, then select the appropriate user (or choose Unassigned or Automatic)
- Click Add then choose Publish Draft to finalize your changes:
Solution 2 - Using an automation rule
For this alternative solution, you must have the Automation for Jira (A4J) application installed on top of Jira (note that A4J has been bundled with Jira from the version 9.0.0).
This solution might be advantageous, if you want to automatically set the assignee field through the whole project (regardless of the workflow associated to the issue type), and don't want to modify multiple workflows in the same project.
Once you have installed the add-on Automation for Jira, you can follow the steps below:
- Go to the page Project Settings > Project Automation for the project where you wish to implement the solution
- Click on Create rule to create a new automation rule
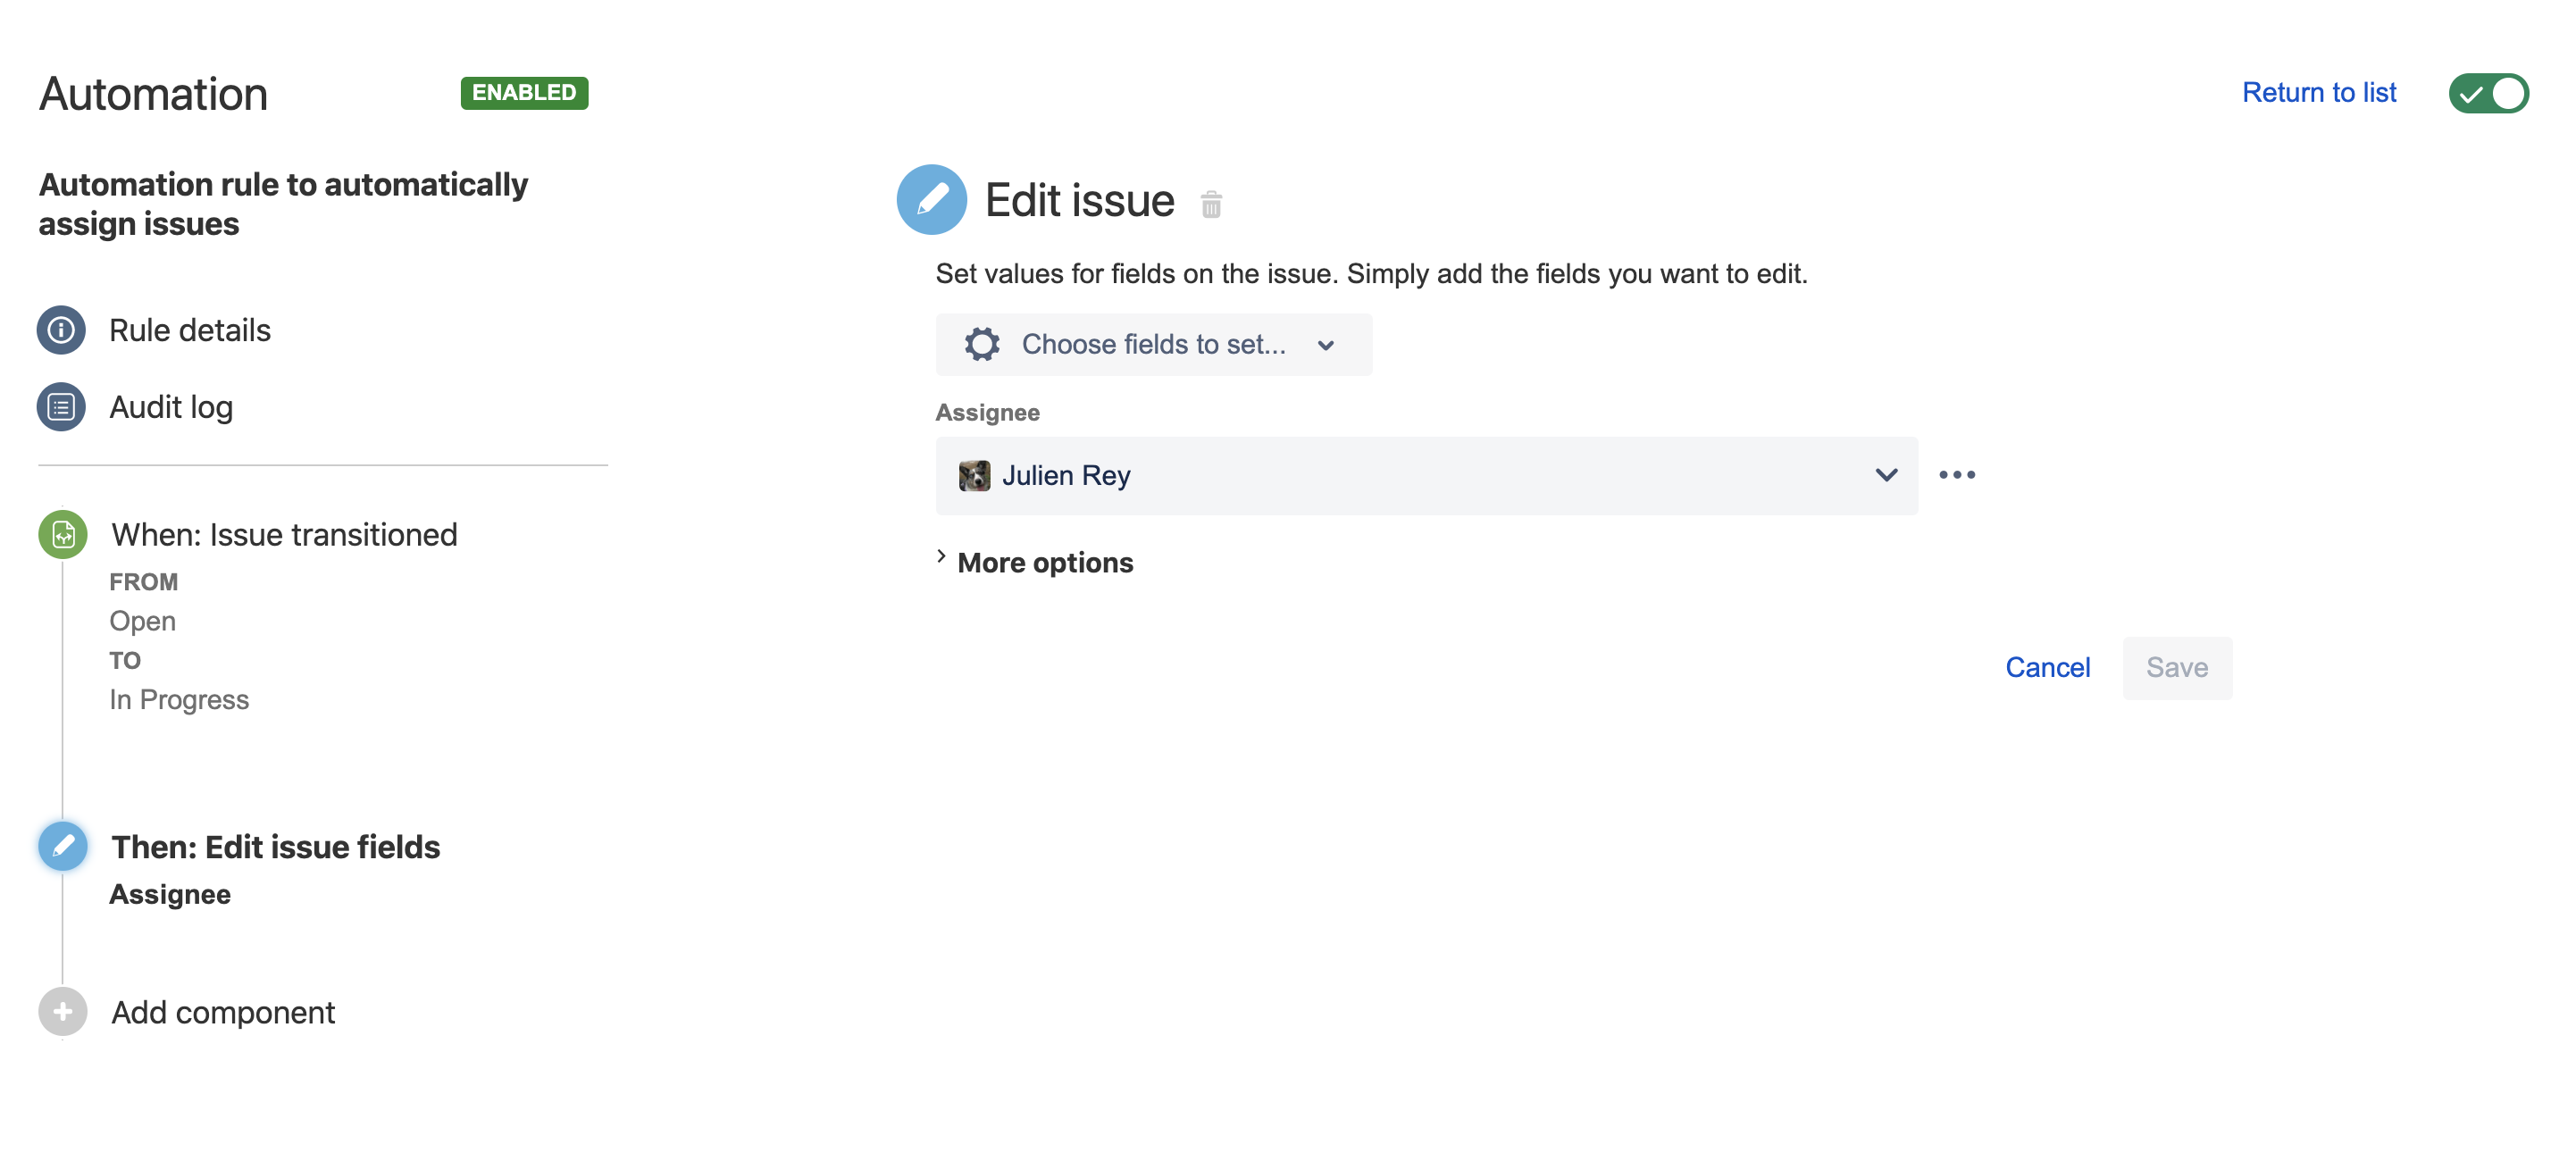
- Configure the rule as follows:
- Trigger: Issue transitioned (select the statuses from which to which you would like to automatically set the assignee field)
- Action: Edit issue (select the Assignee field as the field that needs to be set, and select the user)
- Give a name to the automation rule, and turn it on


