How to change the status on a Workflow in Jira
Platform notice: Server and Data Center only. This article only applies to Atlassian products on the Server and Data Center platforms.
Support for Server* products ended on February 15th 2024. If you are running a Server product, you can visit the Atlassian Server end of support announcement to review your migration options.
*Except Fisheye and Crucible
Context
This KB is focused on those cases that need to update the status of your workflow as you may face one of the next scenarios:
- You may have duplicated or similar statuses.
- You have created a new status, and want to link this status to the step that is already in place.
Steps:
Workflow
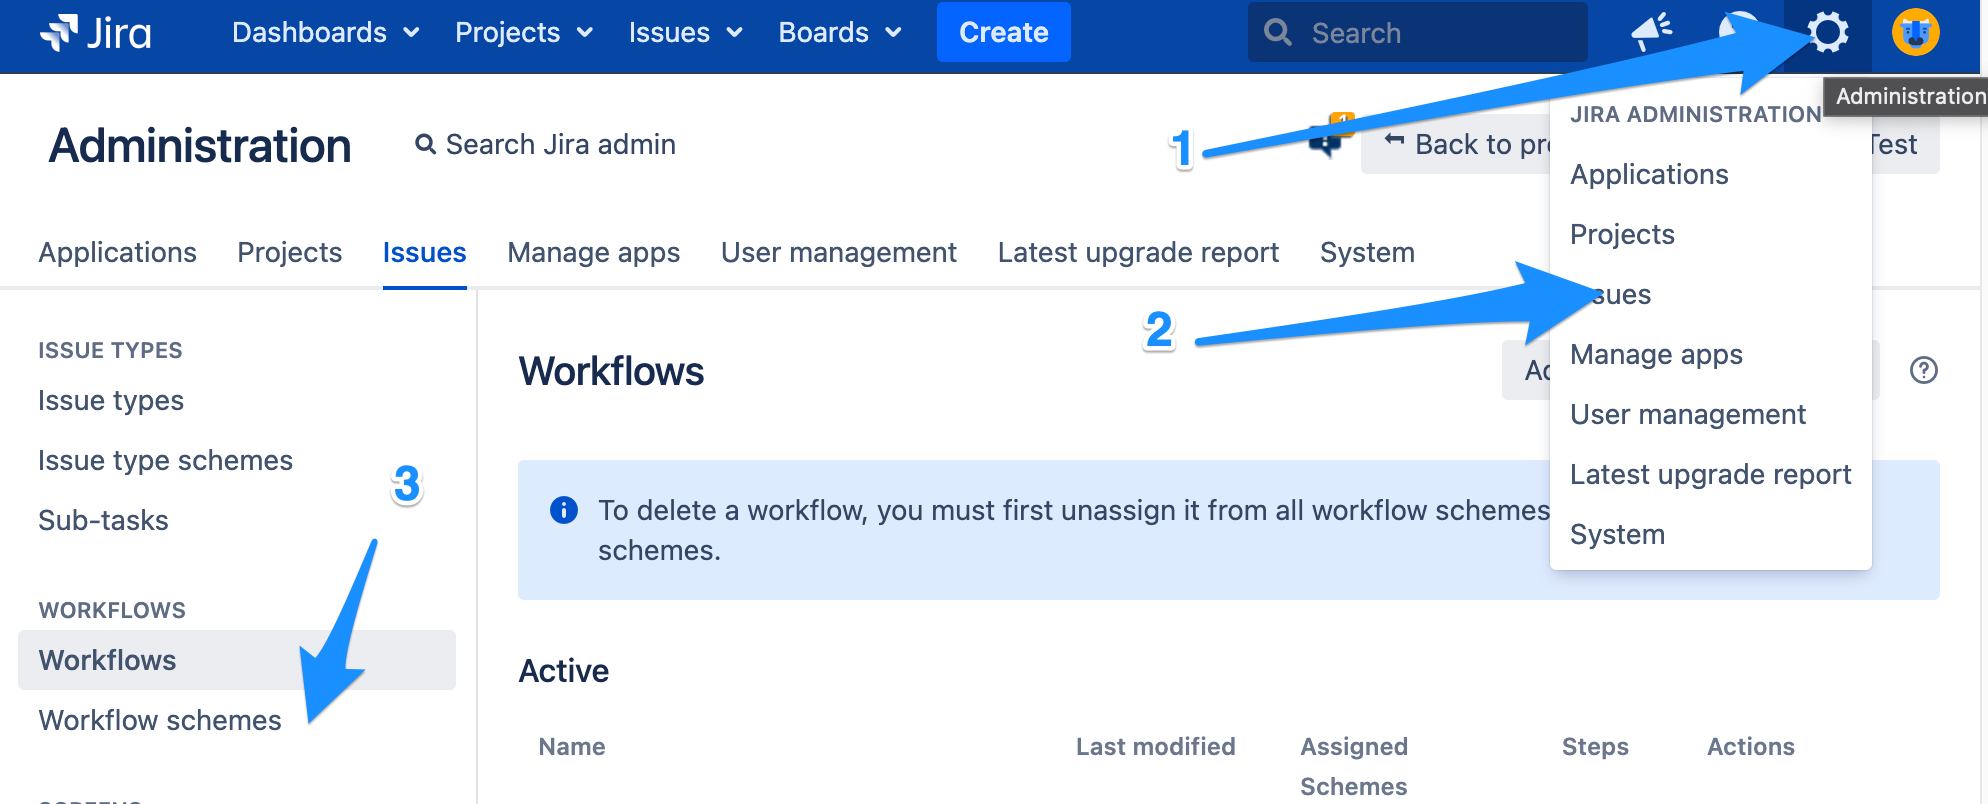
- Go to Administration > Issues > workflows
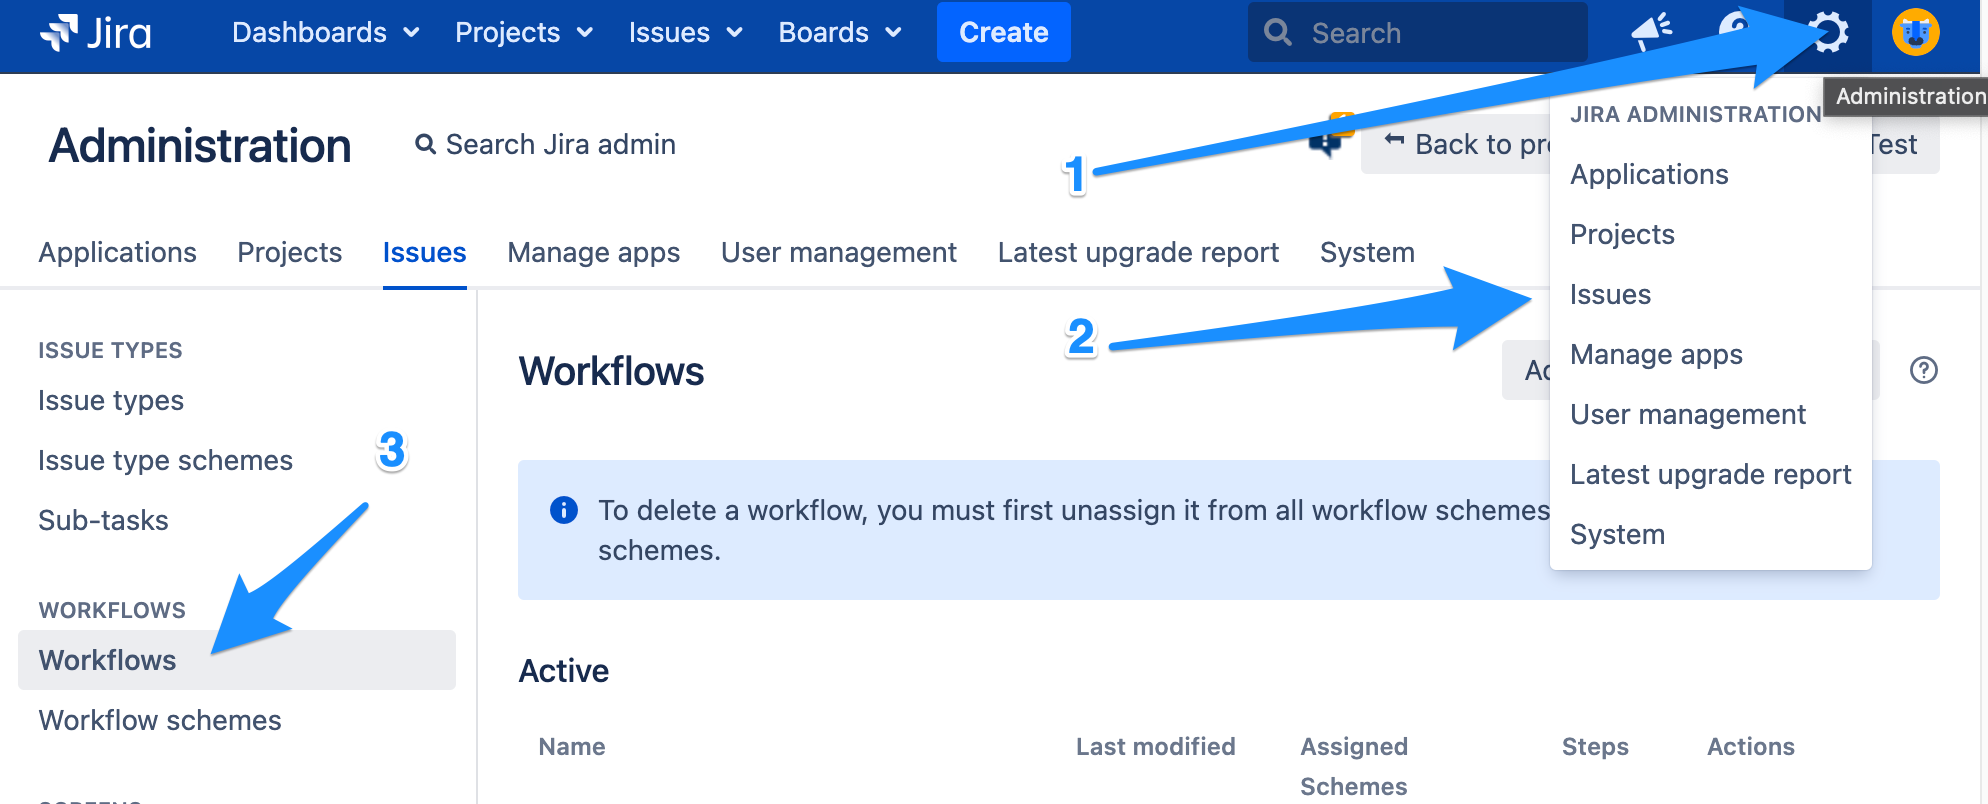
- Select the workflow you want to update and click on copy.
- It will pop up a screen where you can update the new name of the workflow.
 Suggested to keep the same name, but adding the postfix of the version like: "Workflow_v2"
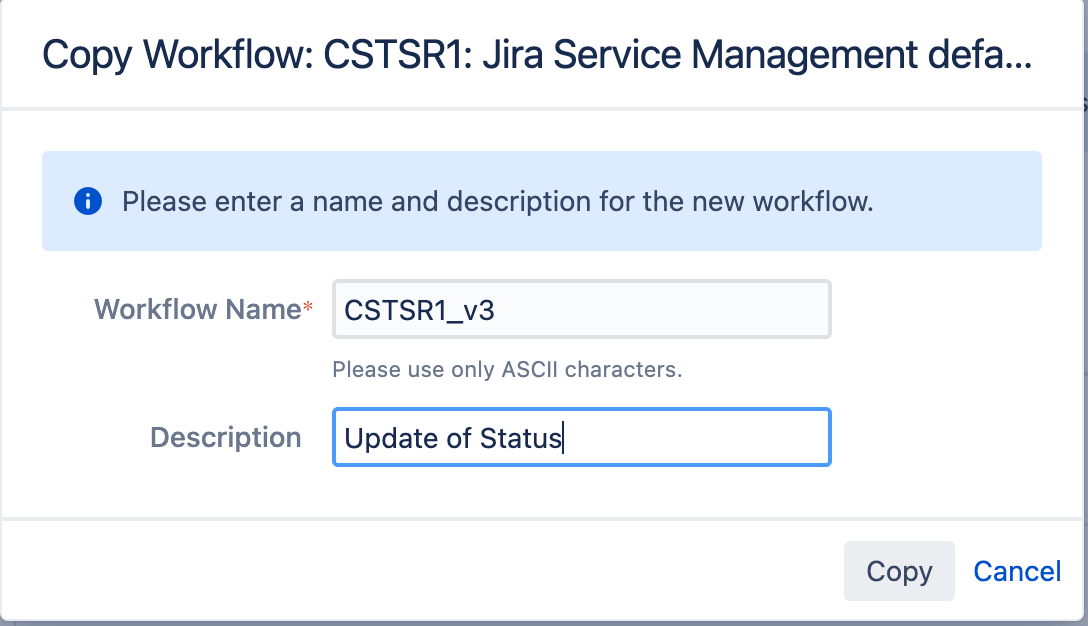
- When you do click on copy, it will show the Workflow edit screen.
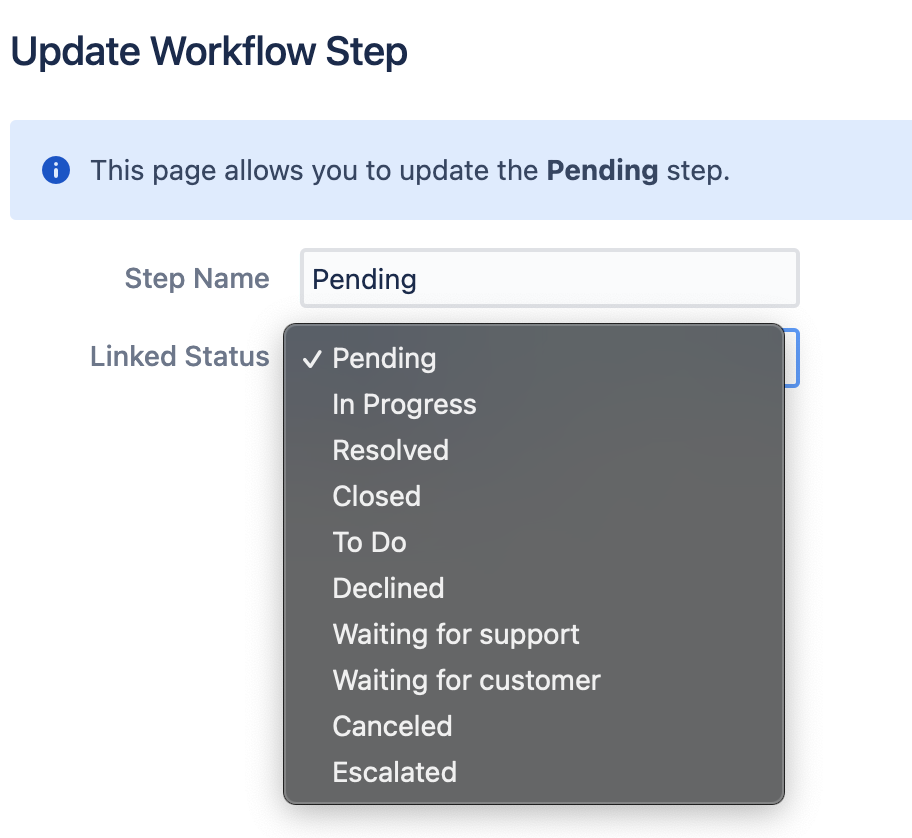
- On which you can select the step you want to update the status and click Edit.
- On which you can select the step you want to update the status and click Edit.
- the Result is a Workflow with the status updated:
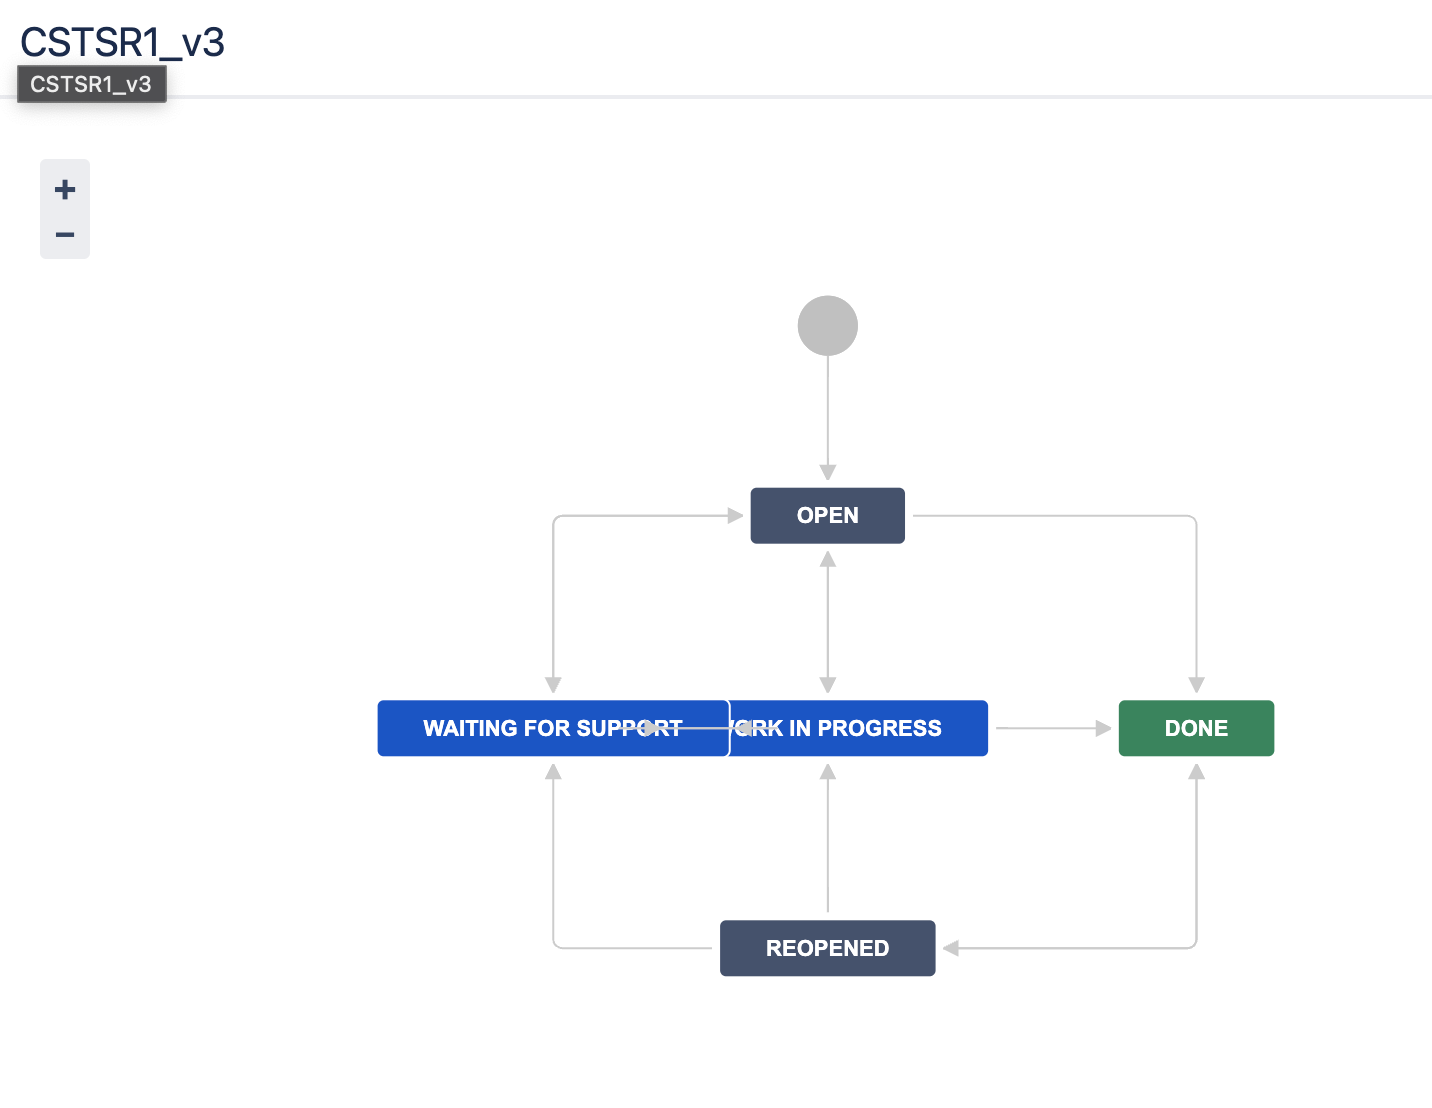
- Once updated, the change will be automatically saved.
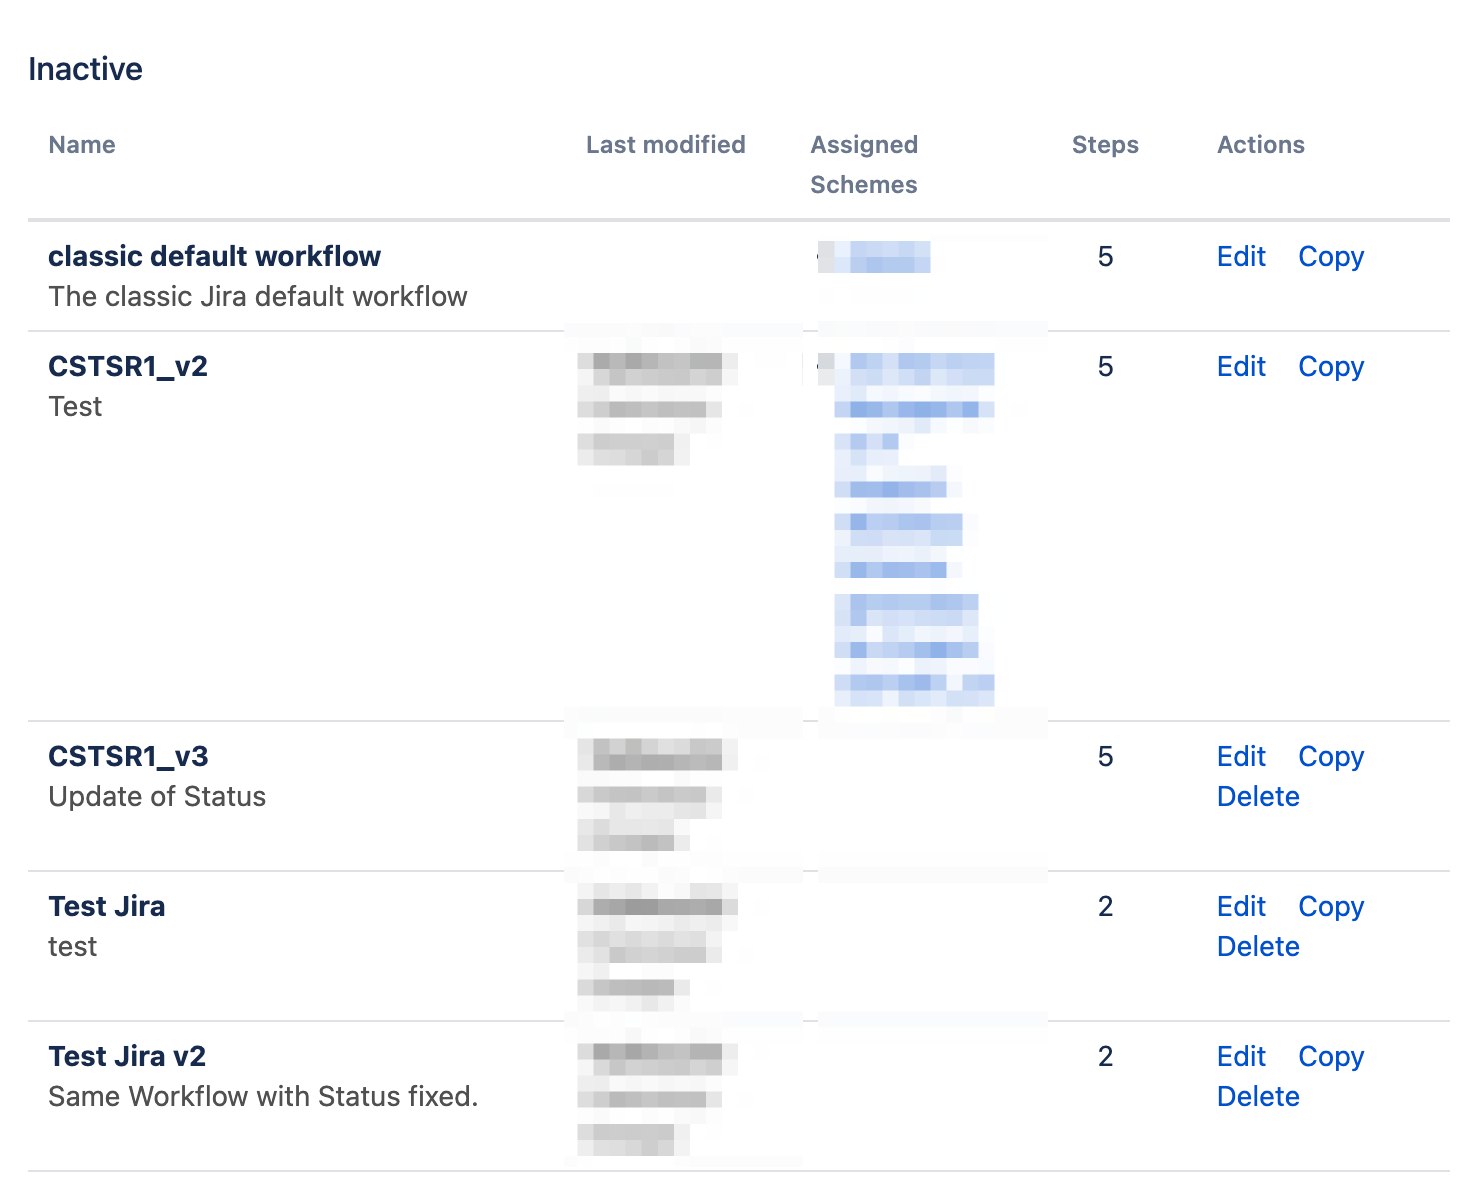
- The Inactive workflows will be affected by any update, it does not have the need to publish it.
- To Check your new workflow you may need to go to the Inactive section, at the bottom of the Workflows page.
- Go to Administration > Issues > workflows
Workflow scheme
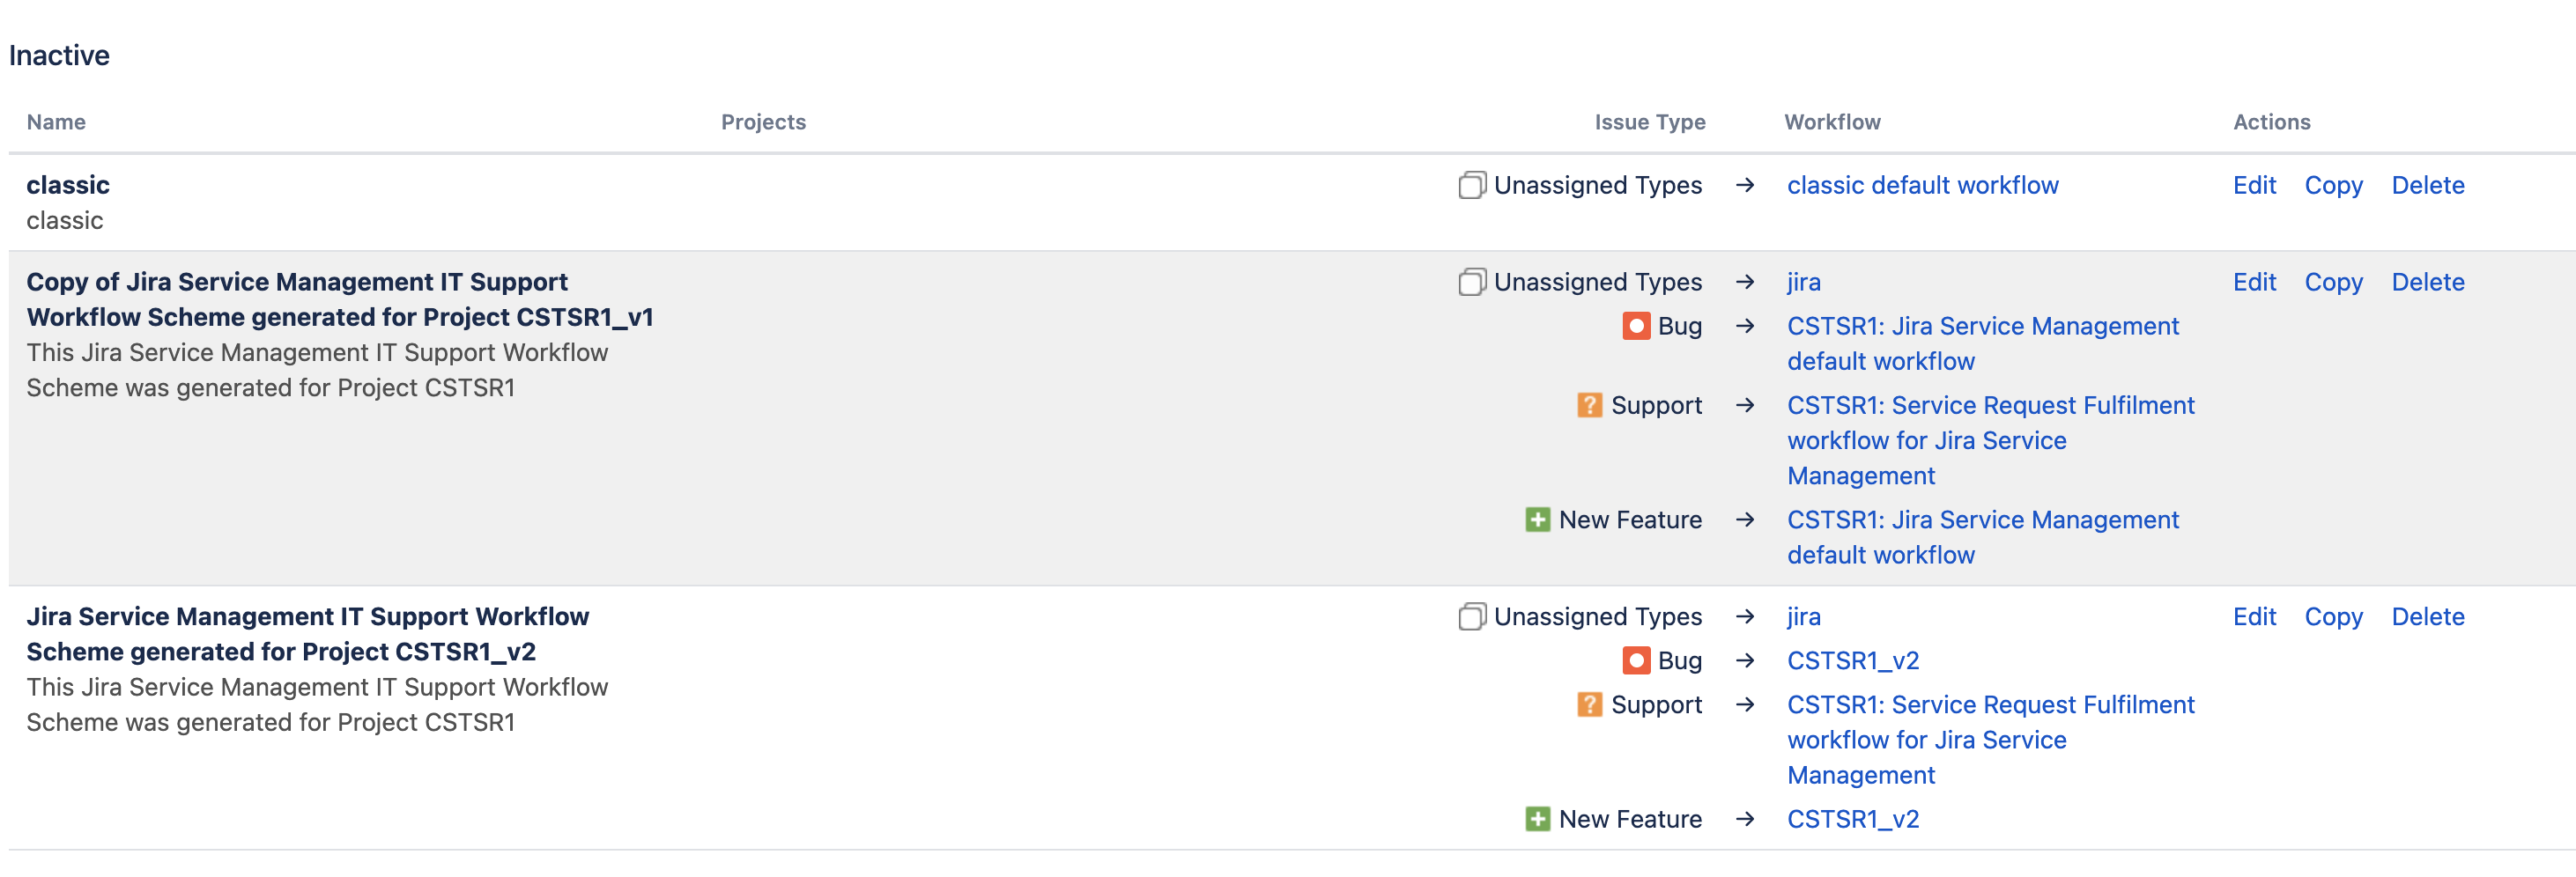
- Go to Administration > Issues > workflows schemes
- Select the Workflow scheme that your workflow is being assigned.
- Then click on copy and automatically creates a copy in the Inactive Section.
- Then click on Edit on the Copy of the workflow schema we are going to update.
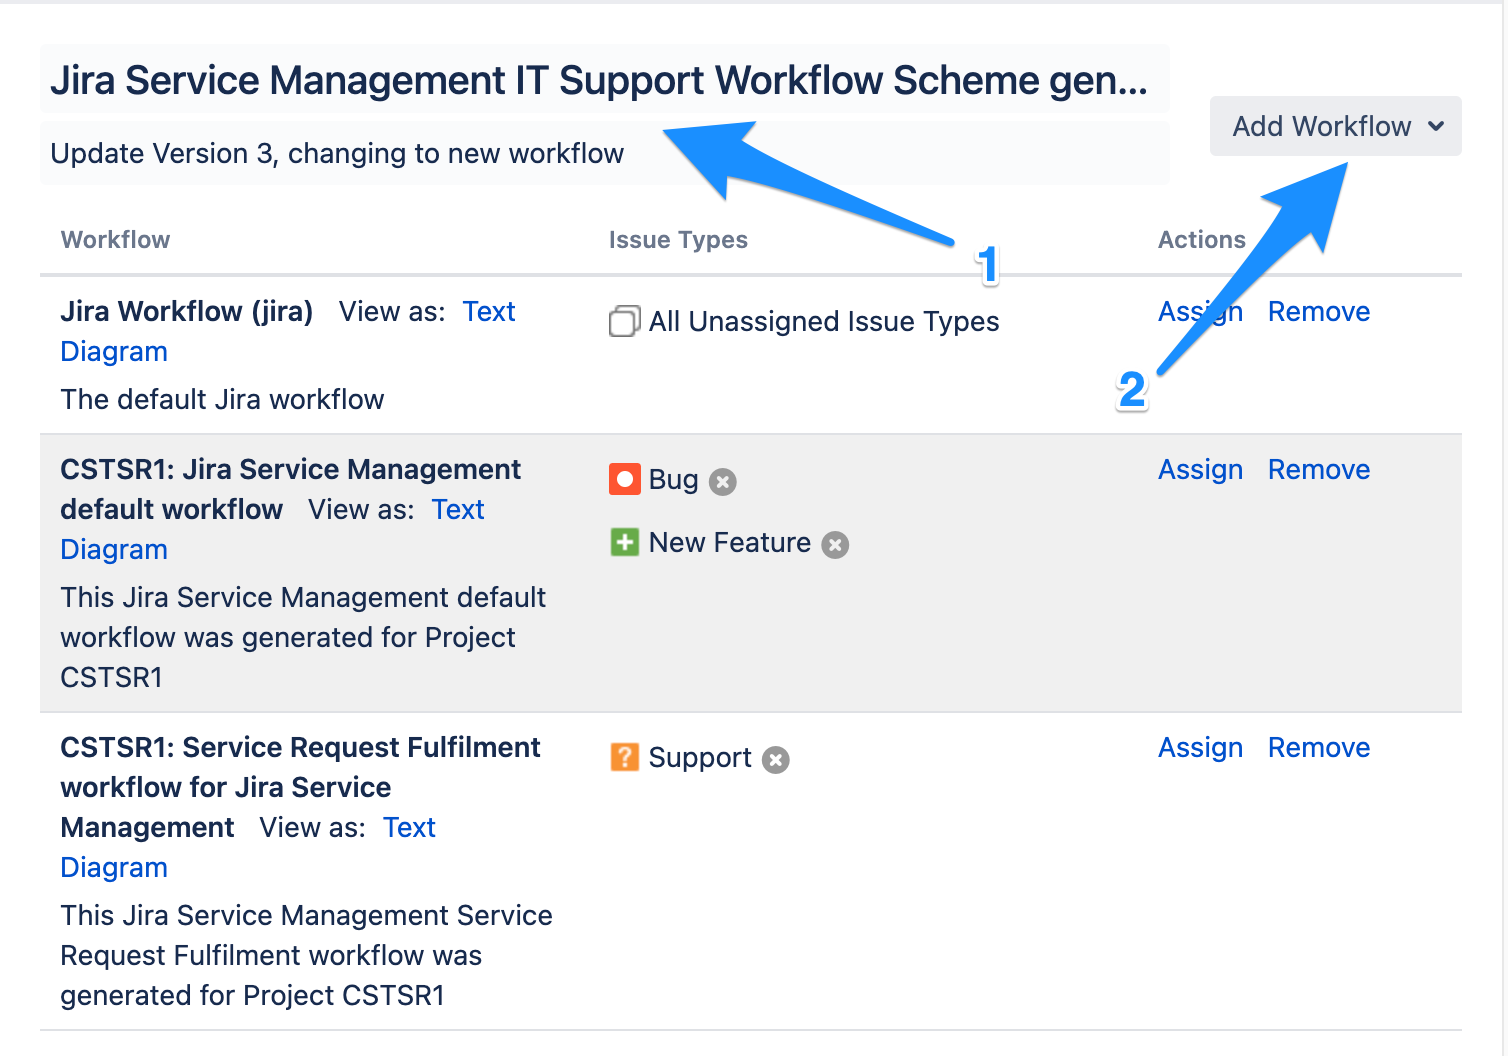
- Edit the name and the description of the workflow scheme, so it's easy to identify.
- Suggestion as the workflow, add the version after the name so you can identify it easily.
- Add the Workflow you created, by clicking Add Workflow > Add Existing
- You need to select the Workflow created

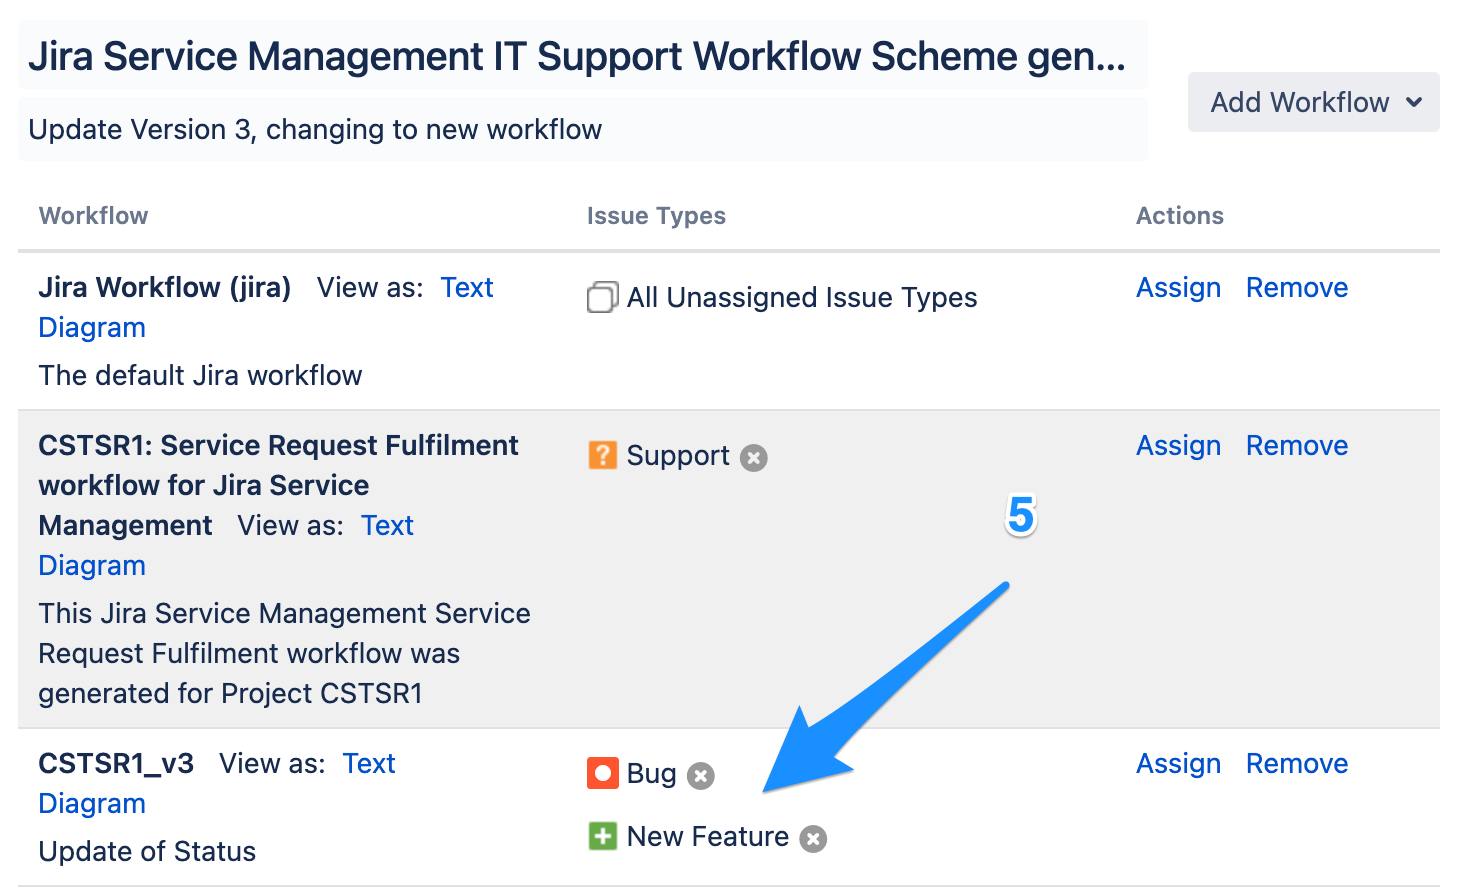
- Then Select the Issue types that the old Workflow was assigned, this is to replace it with the new Workflow.
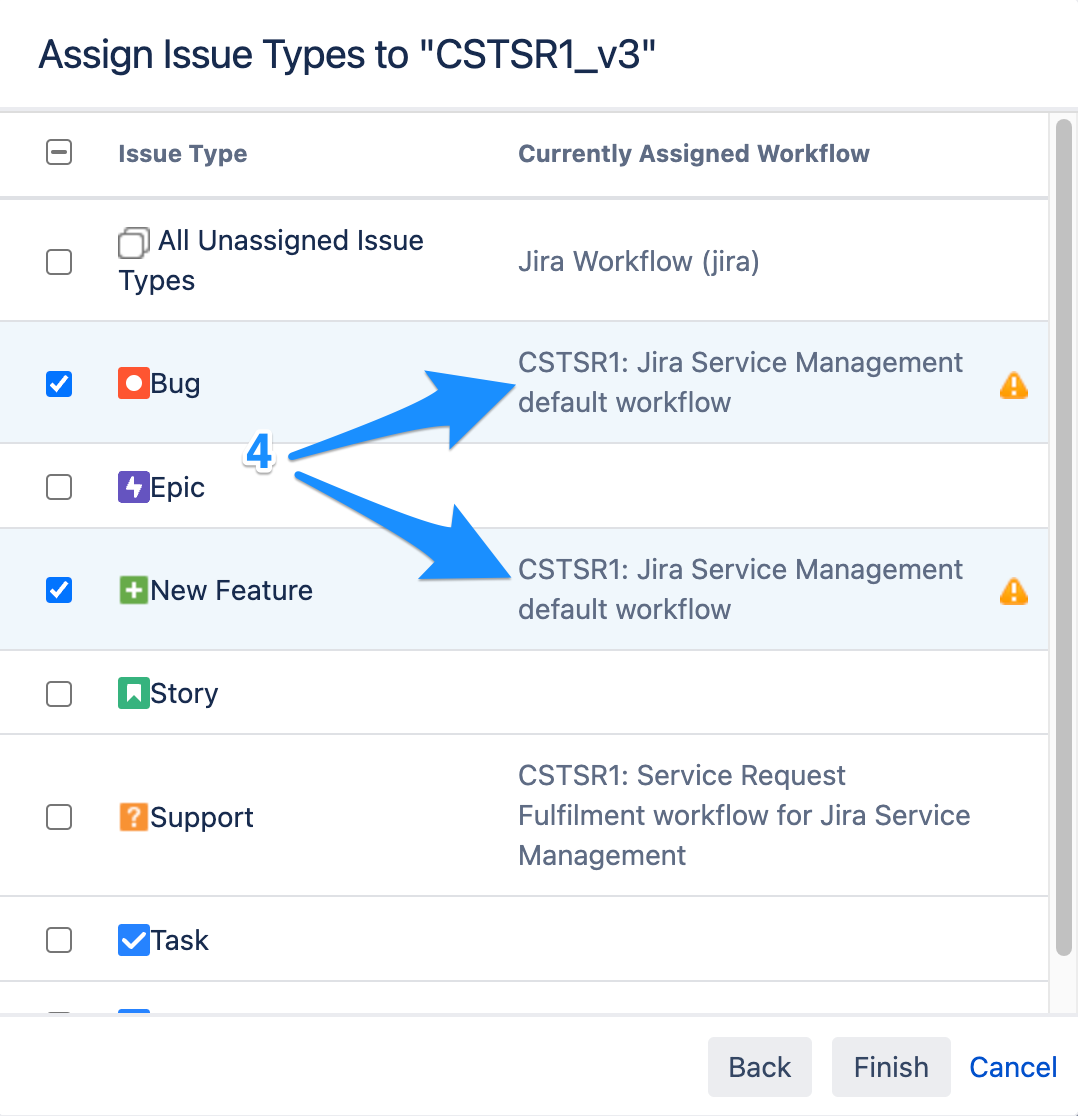
- The result is a Workflow schema setup with the new workflow.
- Edit the name and the description of the workflow scheme, so it's easy to identify.
- Go to Administration > Issues > workflows schemes
Project Settings
- Once the new workflow is set with the new status, and the new workflow schema has the Issue types assigned to the new workflow, we can proceed to switch the Workflow Schema.
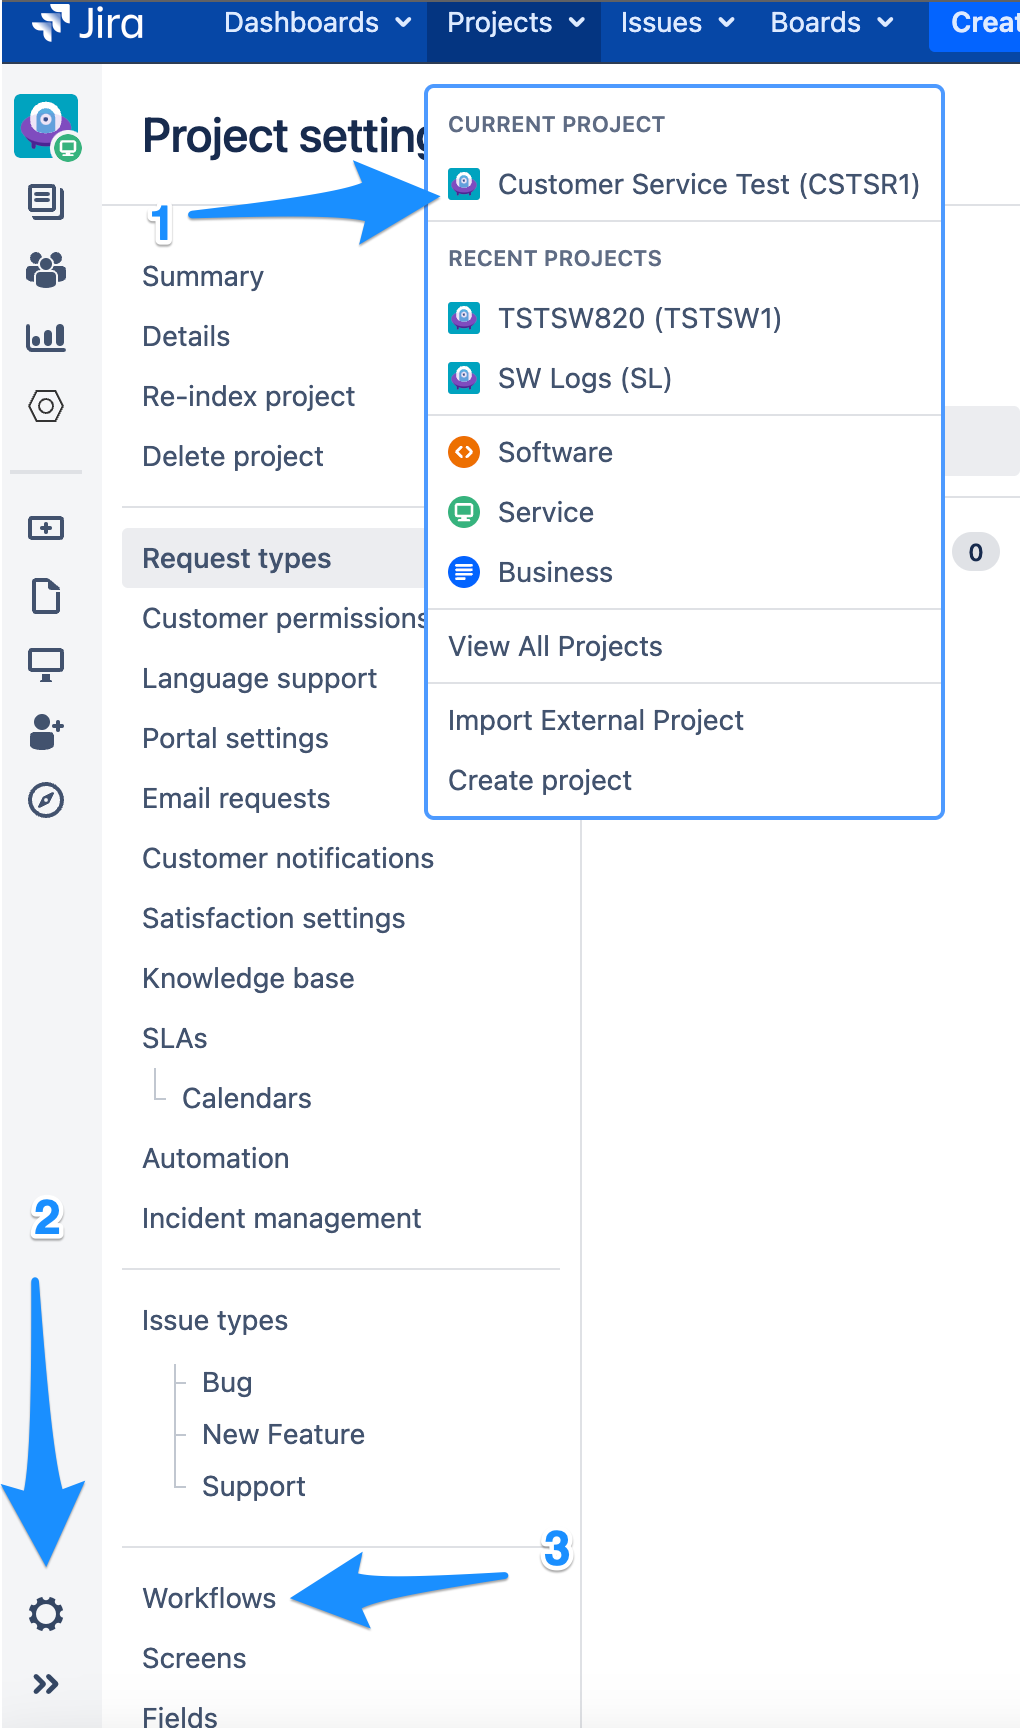
- Go to the "Project" > Project Settings > workflows
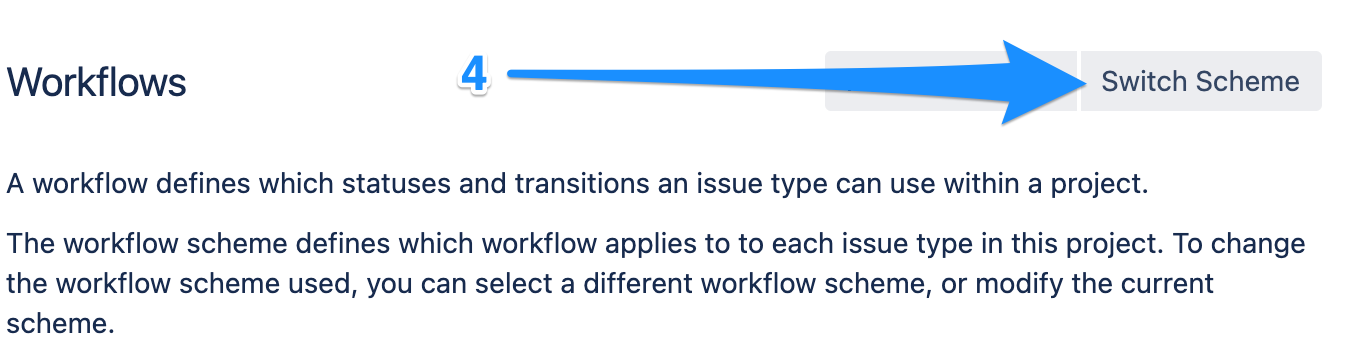
- Click on Switch Scheme
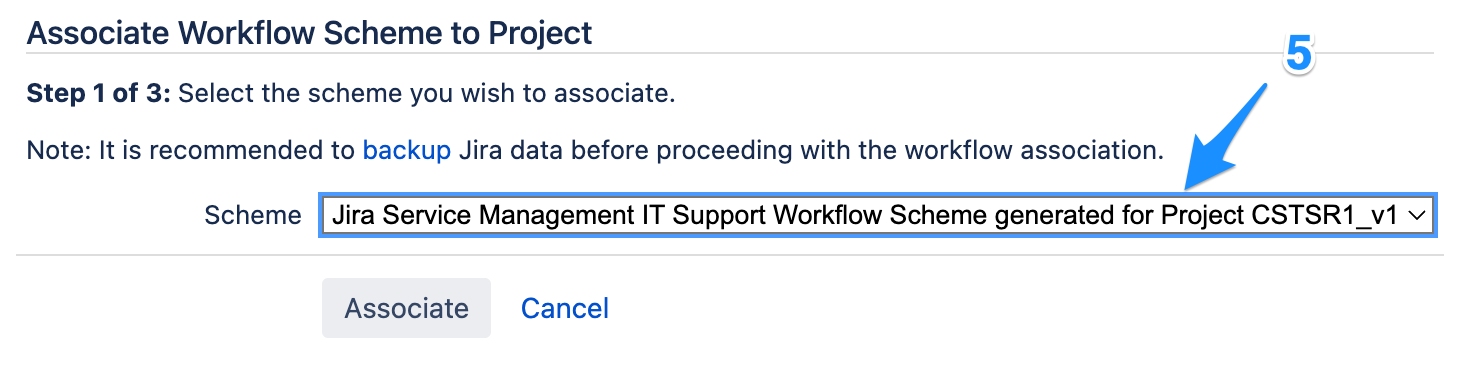
- Associate the Workflows scheme:
- Select the Scheme from the drop-down.
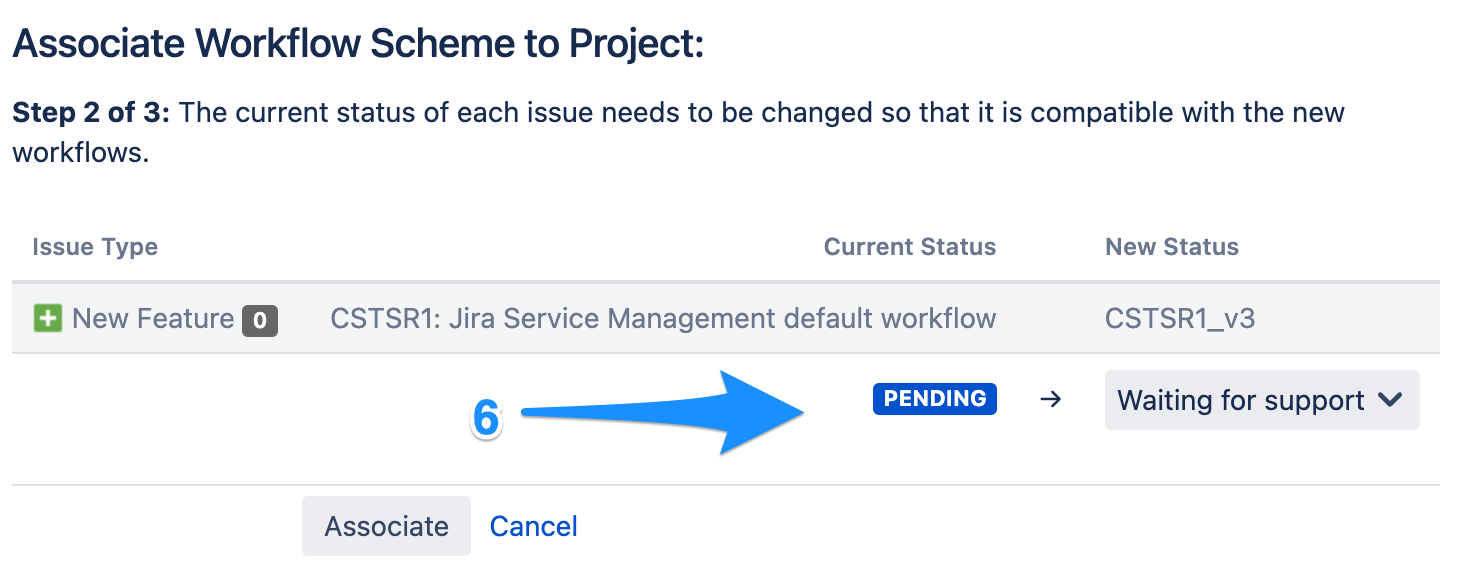
- Associate the current status on the old workflow to the one in the new workflow.
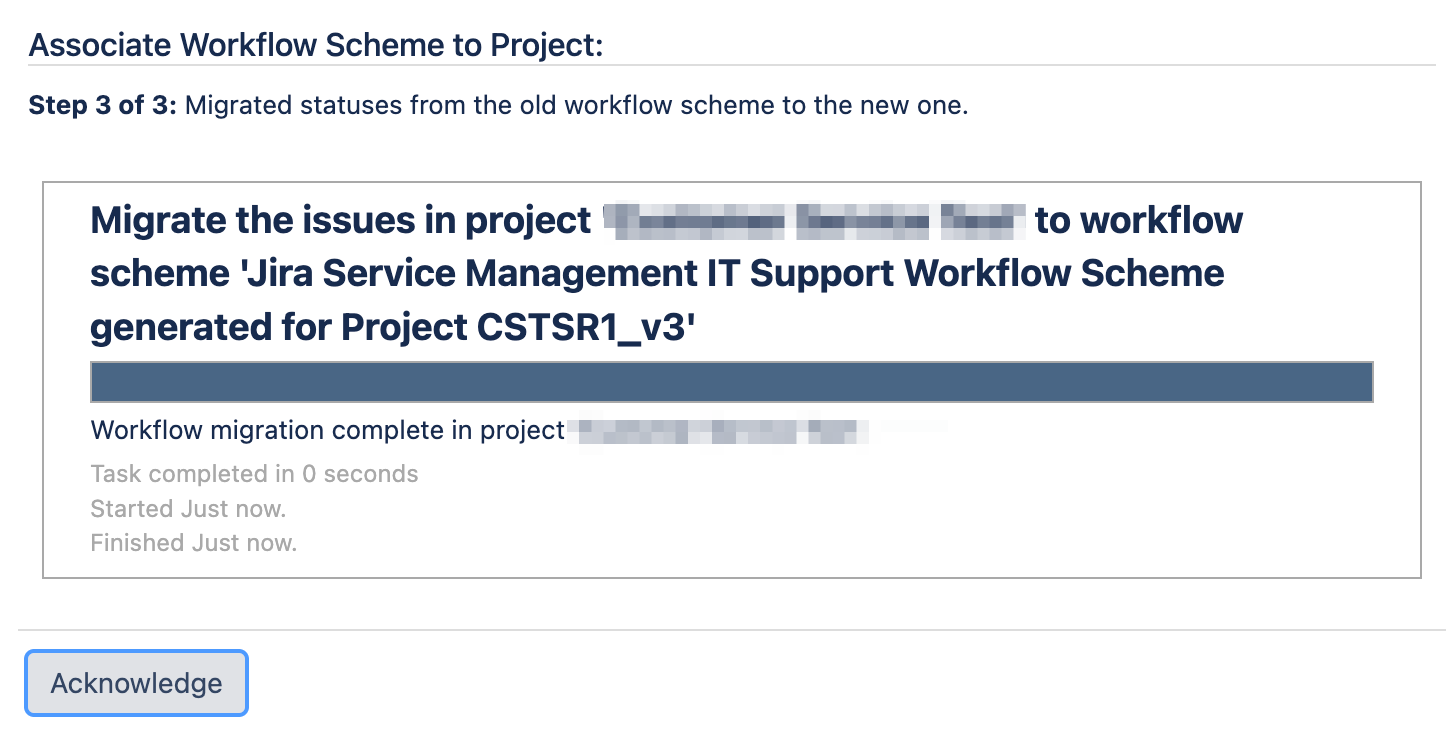
- The system will migrate the status from the old workflow scheme to the new one.
- Select the Scheme from the drop-down.
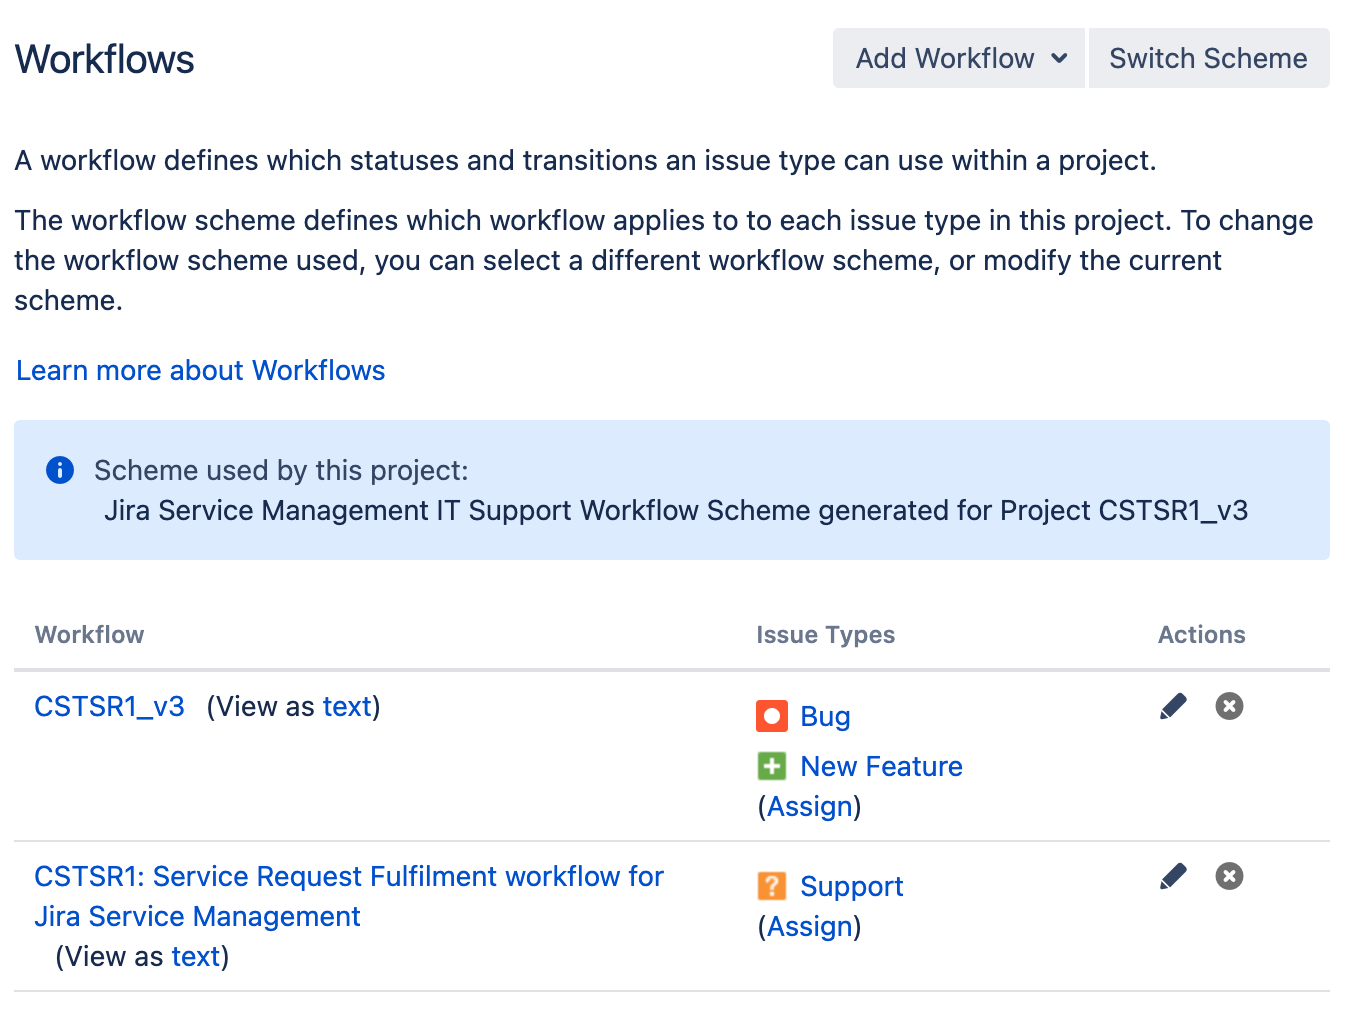
- The result is a project with the proper workflow scheme update with the proper workflow.
These steps are suggested as you are modifying a new Workflow or new workflow scheme in case of any trouble you can do a rollback to the old workflow scheme.
Last modified on Jun 22, 2023
Powered by Confluence and Scroll Viewport.