How to create and configure CC (Participant) field in Jira
Platform notice: Server and Data Center only. This article only applies to Atlassian products on the Server and Data Center platforms.
Support for Server* products ended on February 15th 2024. If you are running a Server product, you can visit the Atlassian Server end of support announcement to review your migration options.
*Except Fisheye and Crucible
Purpose
To enable users to create and configure CC or participant field in Jira.
Environment
Jira Server / Data Center 7.0.0 and any higher version.
Solution
- Log into the Jira application as a Jira administrator user
- Go to the page ⚙ > Issues > Custom fields, and click on the button Add custom field to create a new custom field:

When prompted to select a field type, click on Advanced and create a new Custom Field that you can call CC using the type User Picker (multiple user):

- After you click on the Next button, select the project(s) for which you want the new field to be available:

- After you click on the Create button, select the screen(s) for which you want the new field to be available:

- Go to the relevant project's Notification Scheme (either via the page ⚙ > Issues > Notification Schemes or via the page Project Settings > Notifications) and add notification for the relevant Event.
- For example: Notify CC users when the particular Issue is updated.
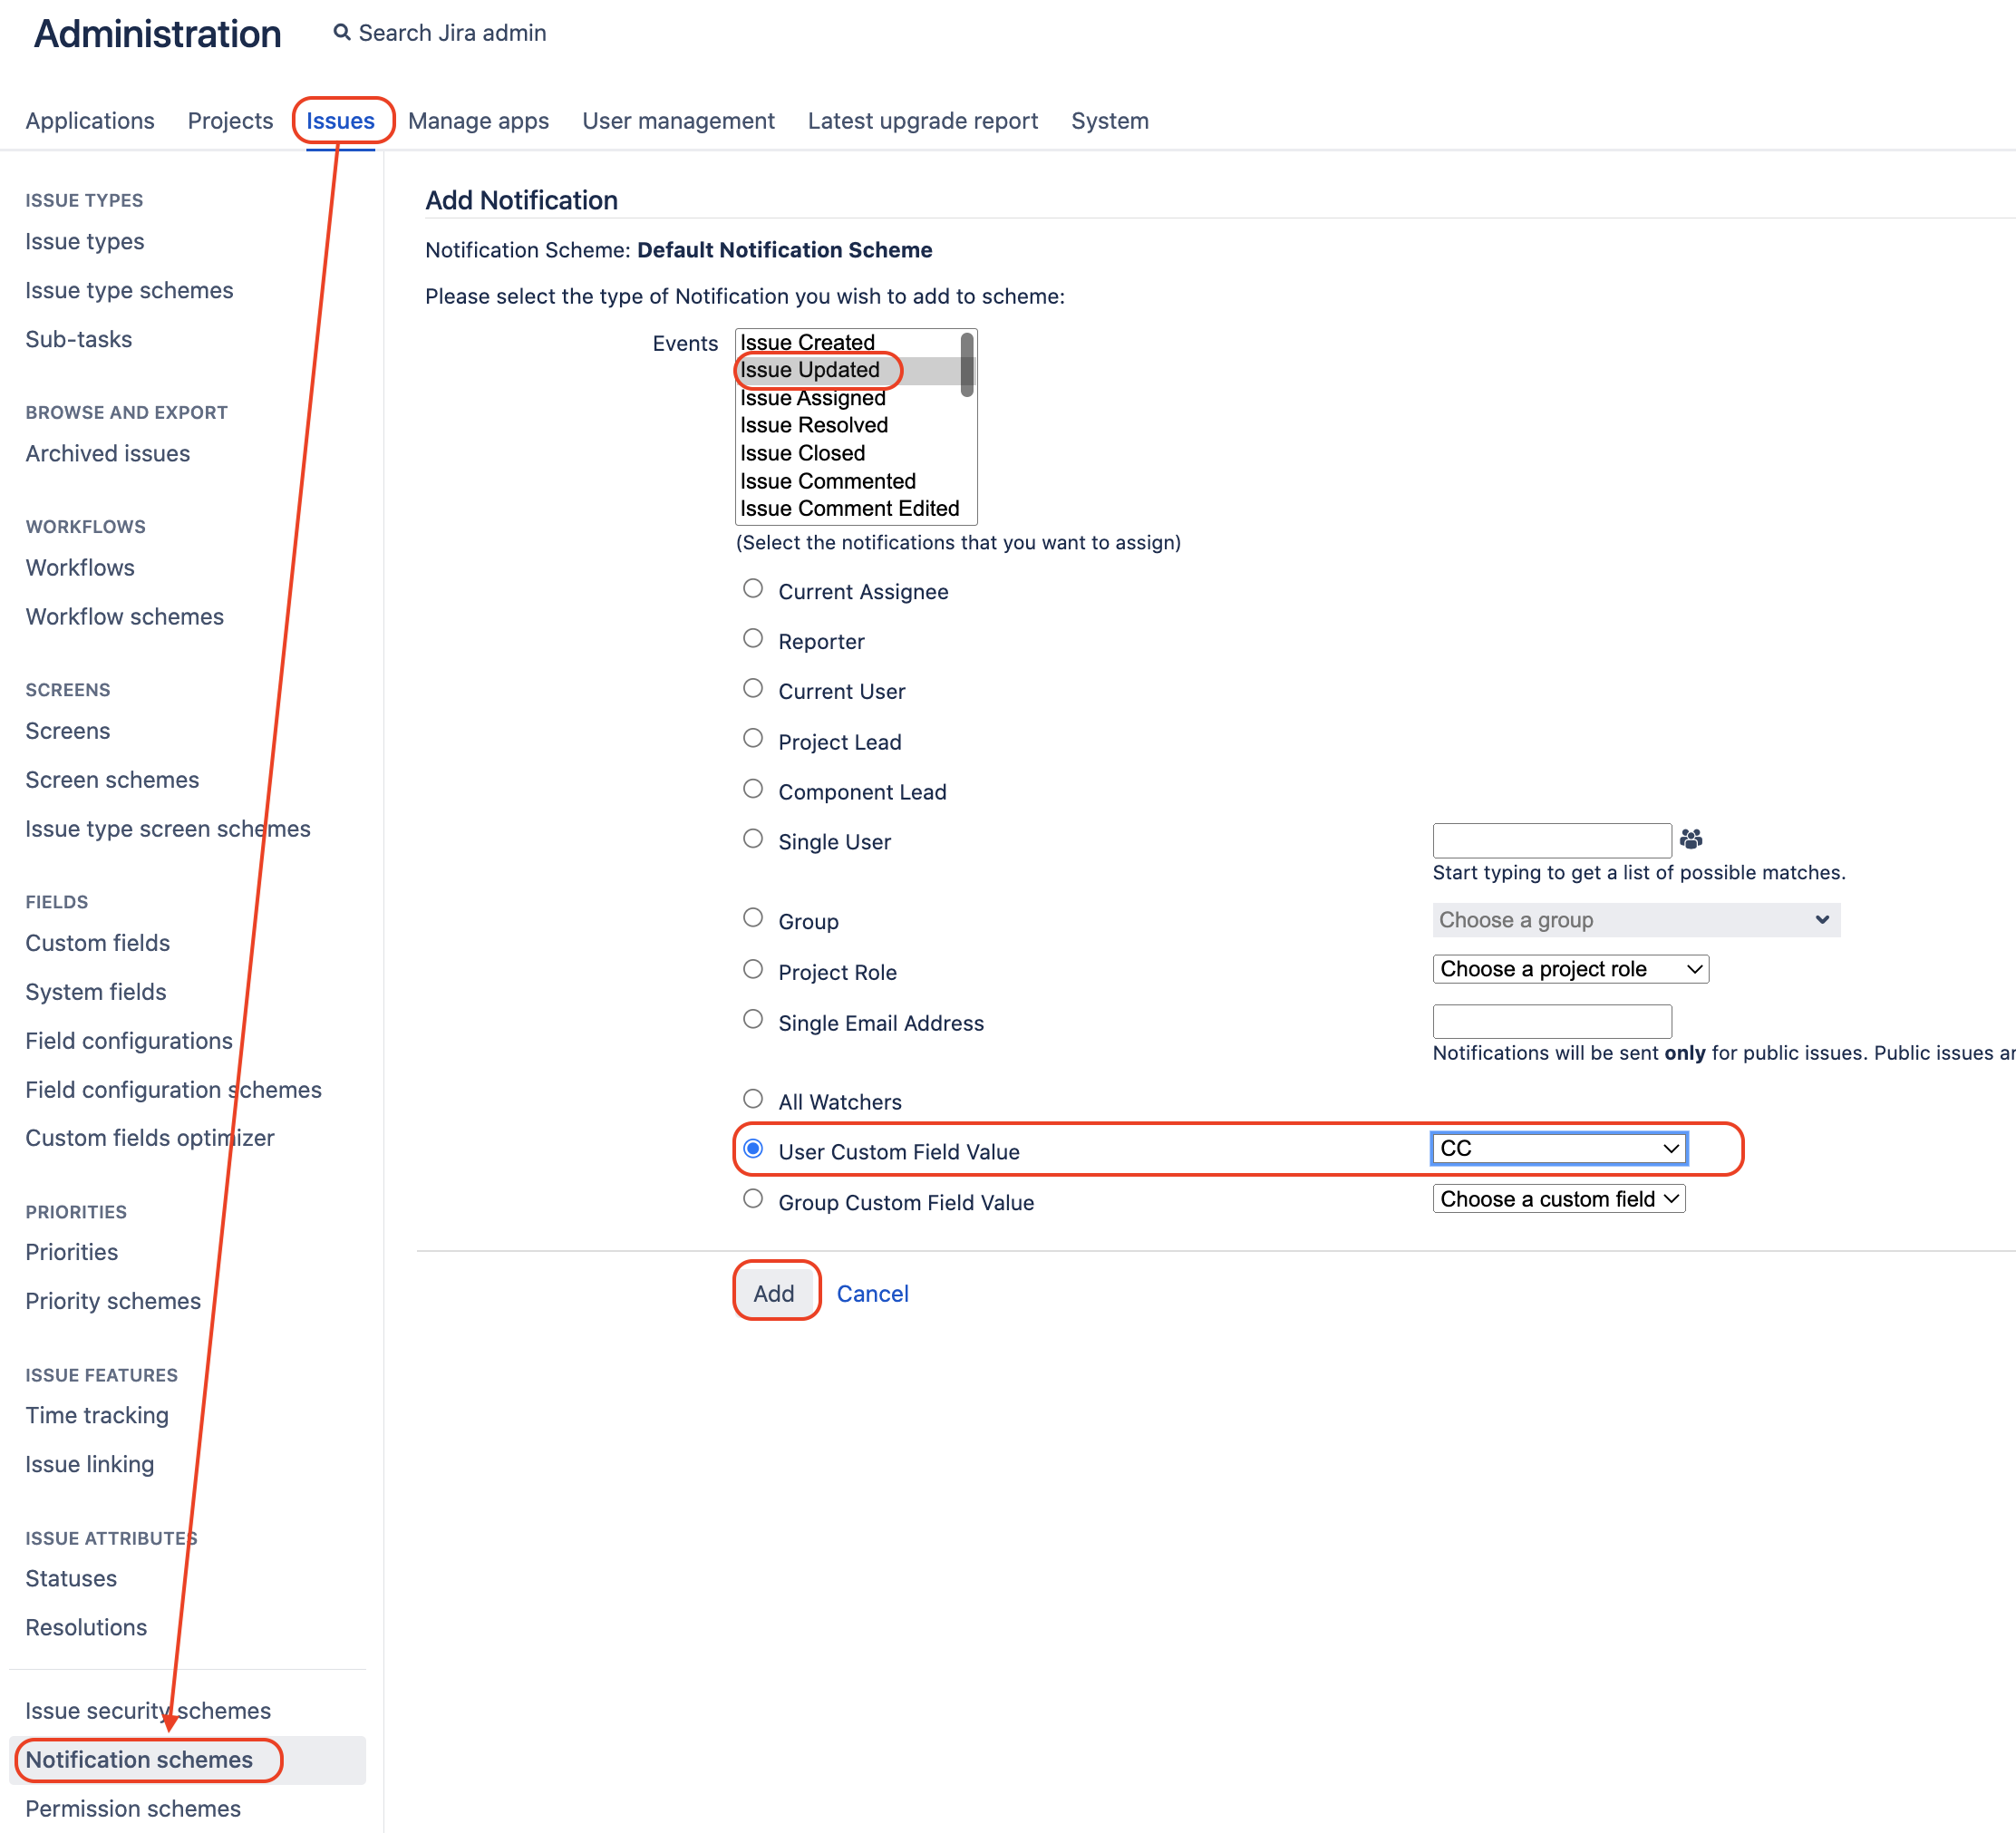
- For example: Notify CC users when the particular Issue is updated.
Last modified on Aug 2, 2022
Powered by Confluence and Scroll Viewport.