How to create and link remote Jira Cloud issues using automation
Platform Notice: Cloud - This article applies to Atlassian products on the cloud platform.
Summary
While it is possible to link two remote Jira instances via app links and link existing issues it's not possible to create issues across the linked remote Jira applications.
Brief overview
This automation provides a solution to the limitations mentioned above. This will be achieved using 3 separate automation rules.
Rule A: This rule will be triggered when a bug or incident is created in the service desk project. It will send the new issue details to the software project on the remote site through a webhook.
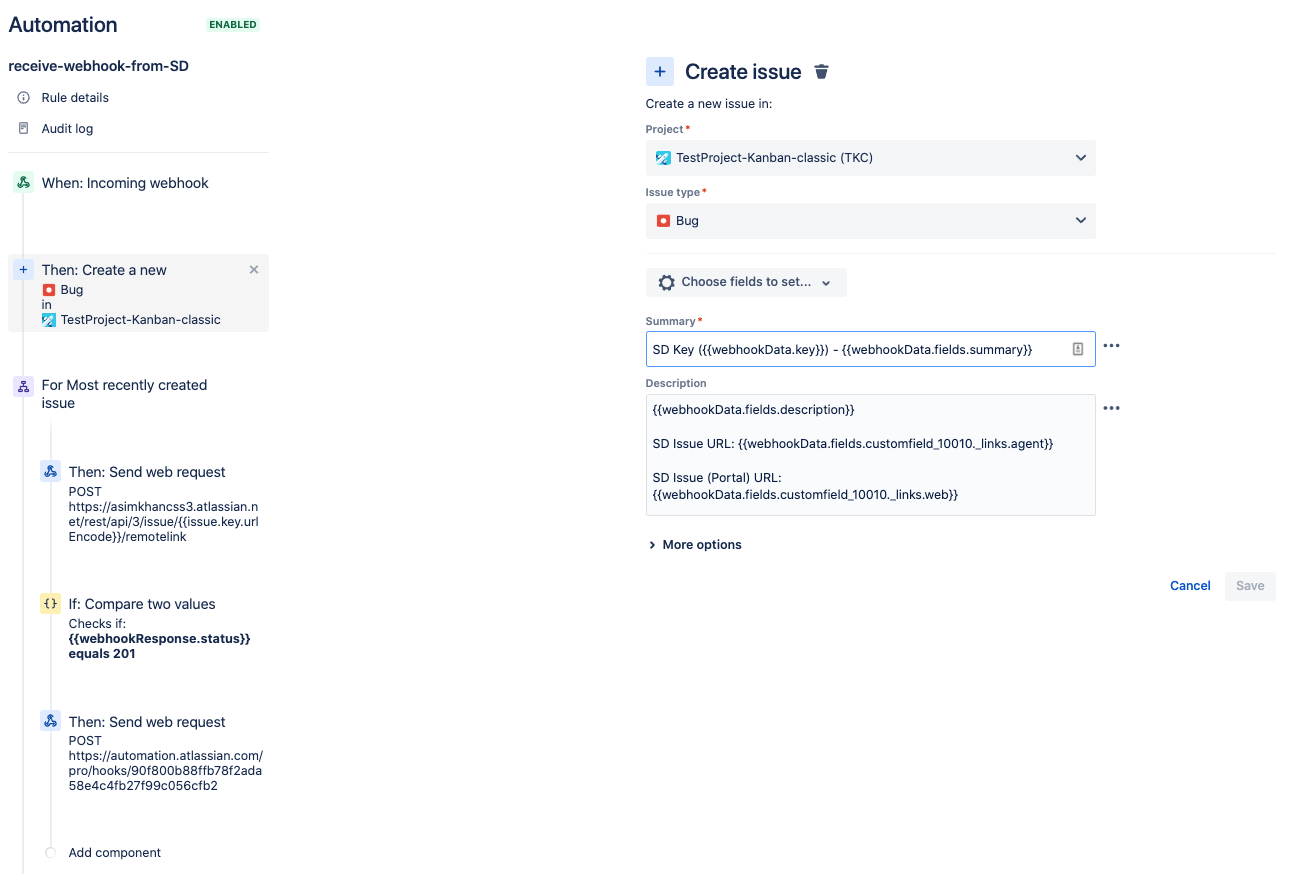
Rule B: Will receive the information sent by Rule A, and create an issue in the software project with this information. We will also link the two issues one way. Finally, it will send back the software project issue information to the service desk project to complete the two-way linking.
Rule C: Will receive the information sent by Rule B, and complete the two-way linking.
During this article, we will refer to the service desk instance as local and the software instance as remote.
A bit of groundwork
Make sure that both (local and remote) Jira Cloud applications are linked through functional Application Links.
- Make sure that you have access to both the projects on the local and remote sites.
In steps 2 and 4 below, while setting up links between issues, a REST call will be made through an outgoing webhook with some payload. In order to get the right values for the payload parameters for your instances, first, you need to create an issue in both the concerned projects manually on each Jira site and link (both ways) manually. Once the issues are linked, you can get the right values for the parameters of the payload for the automation through this REST call Get remote issue links. See this short video recording showing how to get this.
This data will be used in steps 2 and 4 to link remote issues through this REST call Create remote issue links.
- Learn more about Basic auth for REST APIs.
The automation rule
1. Set up an incoming webhook on the remote instance project (Rule B)
Setup a very basic automation rule in the remote site with one action to listen for incoming webhook. Copy the incoming webhook URL. This URL will be used on the local site to send an outgoing webhook to the remote Jira instance.
2. Capturing the incident/bug creation event in the service desk project and sending the issue data to the remote site (Rule A)
Set up a rule to send an outgoing webhook to the URL that we copied from the previous step when an incident/bug is created.
Changes in Issue Formats
As of 2024 there are 2 types of Issue formats that can be sent using "Send web request":
- Automation Format.
- Jira Format.
It is important to use "Issue Data (Jira Format)" to ensure that this will work as expected.
3. Extending the rule created in step 1 to create a corresponding software project issue (Rule B)
In this step, the rule will be extended to do the following.
Receive incoming data from the service desk project.
Use this data to create a corresponding software project issue.
Create a one-way link from remote to the local project issues.
Send an outgoing webhook with the newly created software project issue data back to the local service desk project.
Receive incoming webhook and create an issue in the software project
Create a one-way link between Jira and service desk issues.
Send the newly created software project ticket information back to the service desk project through webhook
4. Finally, linking the tickets from the service desk project to the remote software project (Rule C)
An incoming webhook is setup to receive the newly created issue data from the remote software project. This data is being sent through an outgoing webhook from the last action of the automation rule explained in the previous step.
Once the data is received, the linking of issues is performed through a REST API call. Ref: Get & Create remote issue links


