Using the request-channel-type property on filters
Platform Notice: Cloud - This article applies to Atlassian products on the cloud platform.
Summary
When it’s required to verify the channel that customers use the most for raising tickets, it will be necessary to filter the tickets by using the request-channel-type property.
request-channel-type = jira
request-channel-type = portal
request-channel-type = anonymousportal
request-channel-type = email
request-channel-type = API
request-channel-type = deployment
Tickets created via Chat (e.g Slack and Microsoft teams) will be considered as created via API.
As request-channel-type is a property and not a custom field, it’s not possible to add a column on the Issue navigator, on the Queues, or on the Dashboard gadgets.
The purpose of this documentation is to show you the steps for creating an automation rule to store the value of this property on a read-only custom field so you can use the options mentioned above.
Steps
1. Create a read-only custom field
The best custom field to store the value is a read-only one. Using this field, only the automation will be able to edit, so it won’t be possible for any internal user to change the value of this field.
You can add the name Channel so you and your team can easily identify it.
2. Automation rule
If you need this option to be available on more than one Service project, go the > System > Global automation, otherwise, if you want rules for specific Service projects go to Project settings > Automation.
Be aware of Automation execution limits. For more details, refer to the documentation How is my usage calculated?
When: New trigger > Issue created > Save.
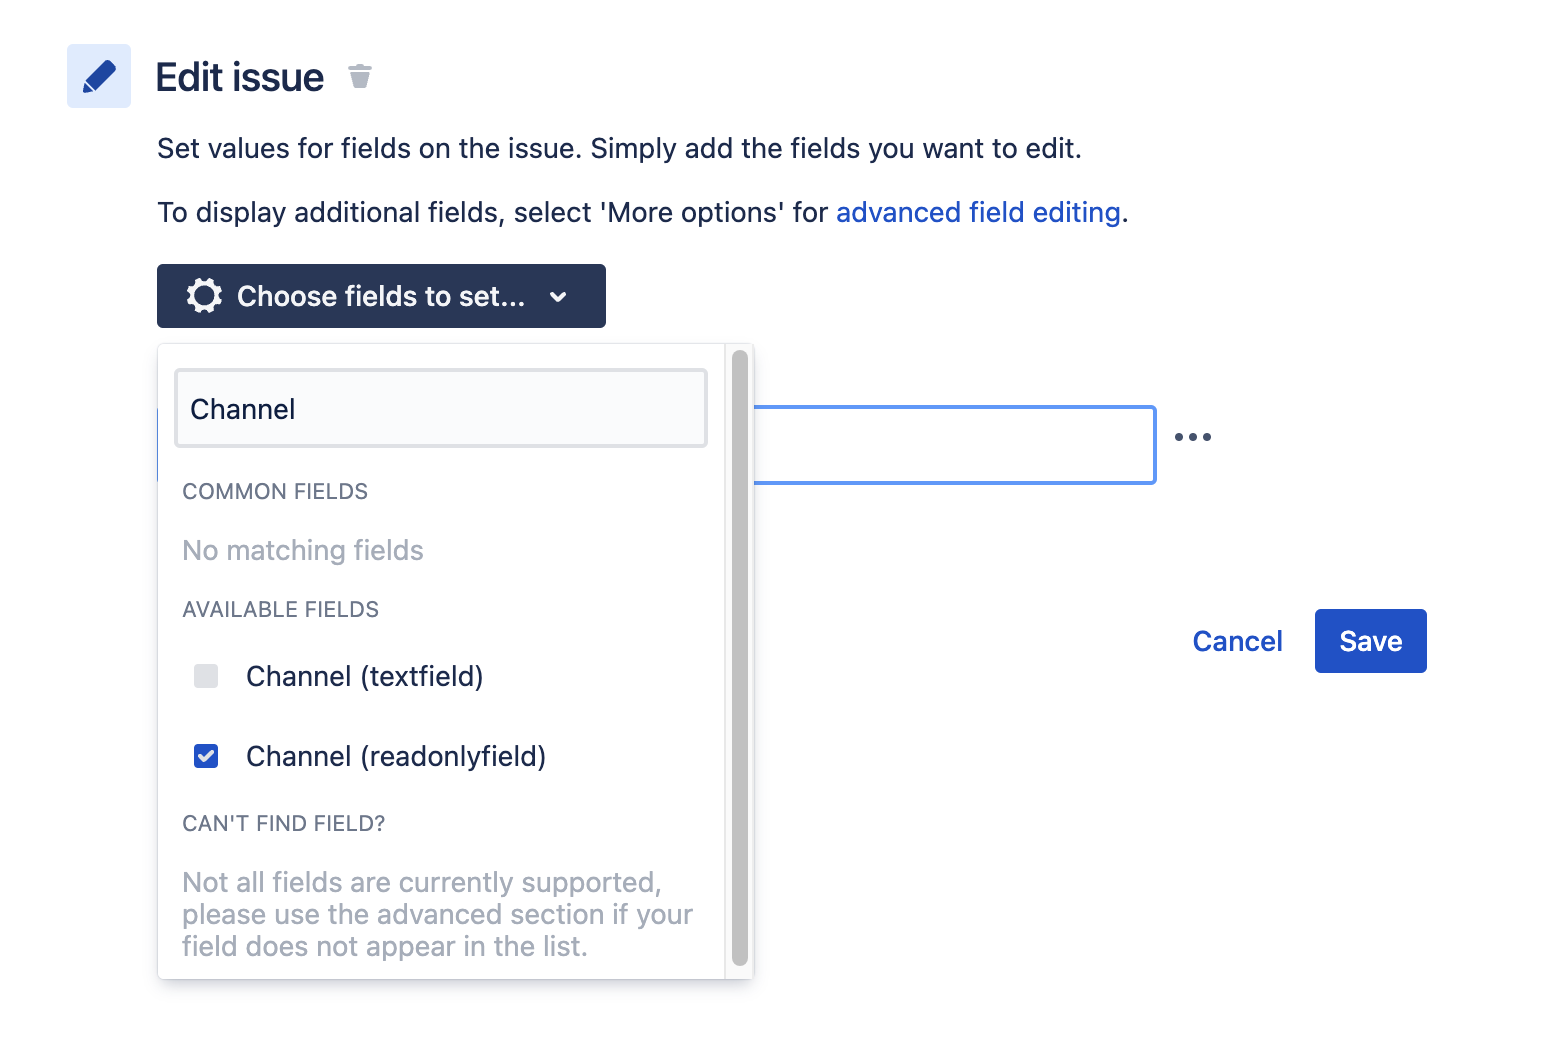
Add component > New action > Edit issue.
On the Choose fields to set…, select the read-only custom field you created.
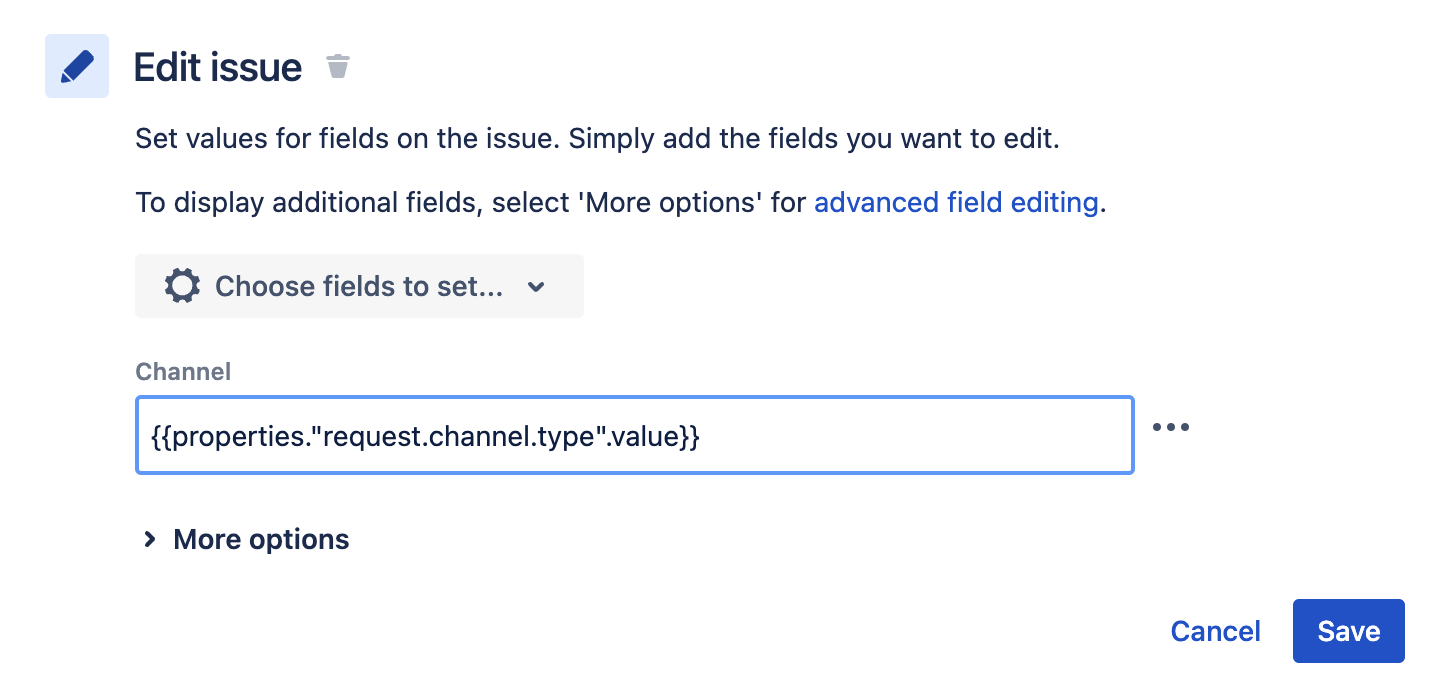
Once you select, it will appear a text box for you to add a value and here we will use a smart value that will identify the property value and add the correct one.
{{properties."request.channel.type".value}}After that, click on Save and Publish your rule.
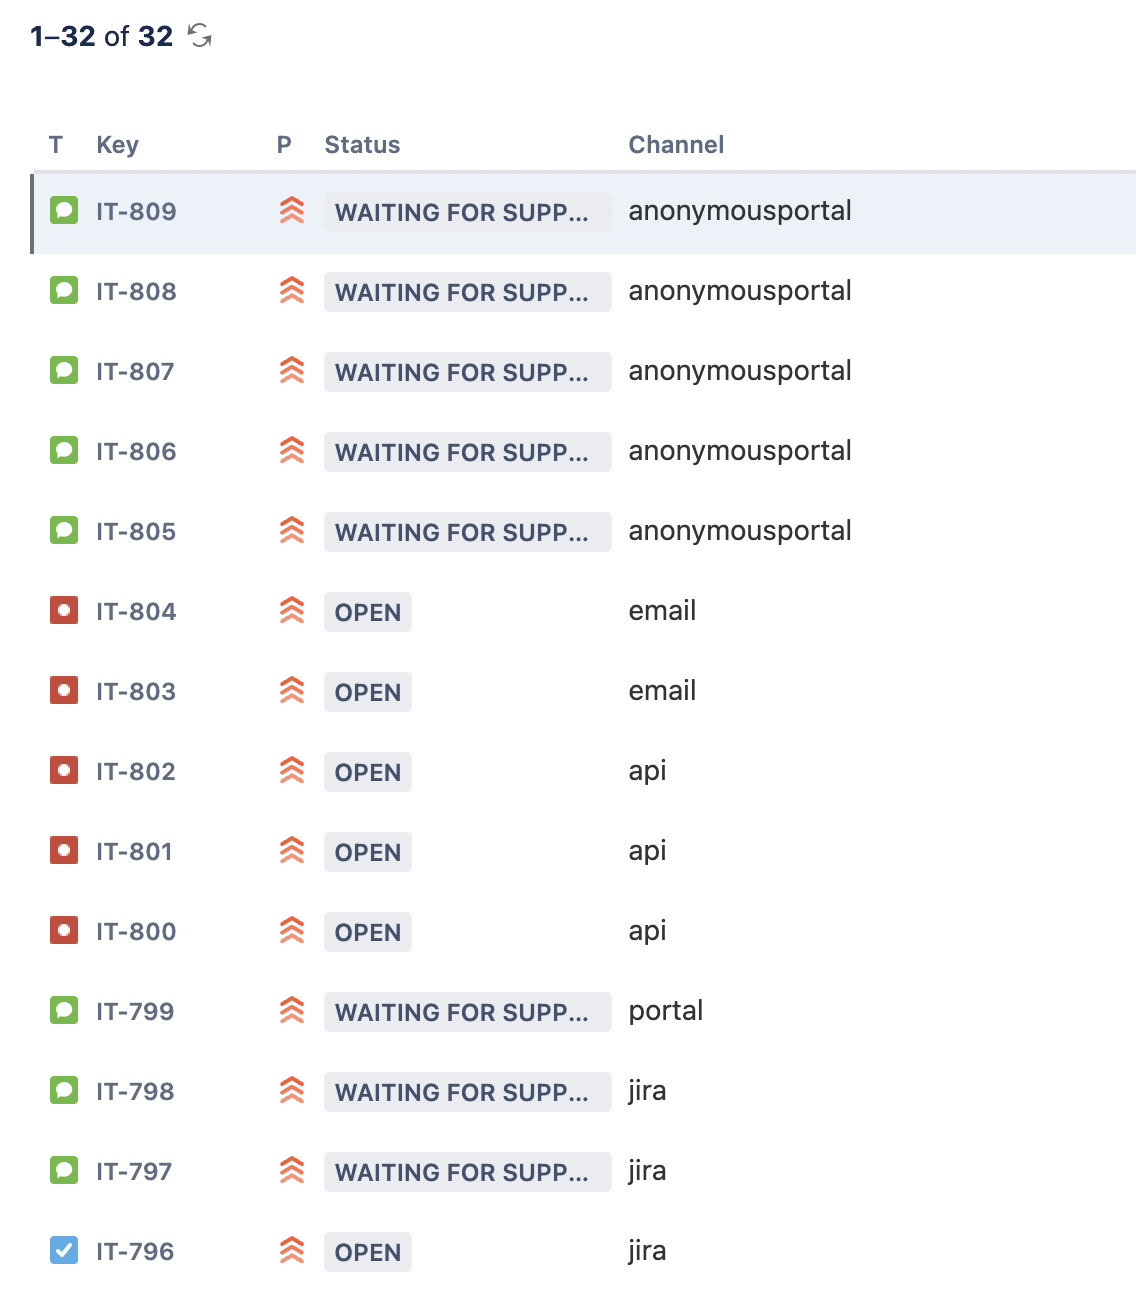
Here is an example of how it will appear when adding the custom field as a column via Filters > Advanced issue search.
Note that, we used the Issue created trigger, so the changes will be applied to any new ticket.
In case you need to update existing tickets, use the Scheduled trigger.
Using this option, you can select Run a JQL search and execute actions for each issue in the query > Add a JQL containing the tickets that need to be updated > Uncheck Only include issues that have changed since the last time this rule executed and after saving it and clicking on Publish changes, click on Run rule.


