Configuring shared teams
You can choose to share teams across multiple plans so you only have to define your teams in one place. This is helpful when you'd need to have a team own work across multiple plans. In this situation, that team becomes a shared team. Advanced Roadmaps can let yo define a shared team in one place, so you won't have to define the same team across multiple plans over and over again.
To illustrate shared teams:
You have two plans, Mobile expansion and Web expansion, and both plans use the same feature team.
In this case, you can then do the following:
- Make the feature team a shared team.
- Make sure the feature team is assigned to both plans.
With both plans now using the same team, if you update any details about the team in the Mobile expansion plan, the details in the Web expansion plan will be automatically updated as well.
Before you begin
Make sure that you have the shared team management permission in Advanced Roadmaps.
Viewing shared teams
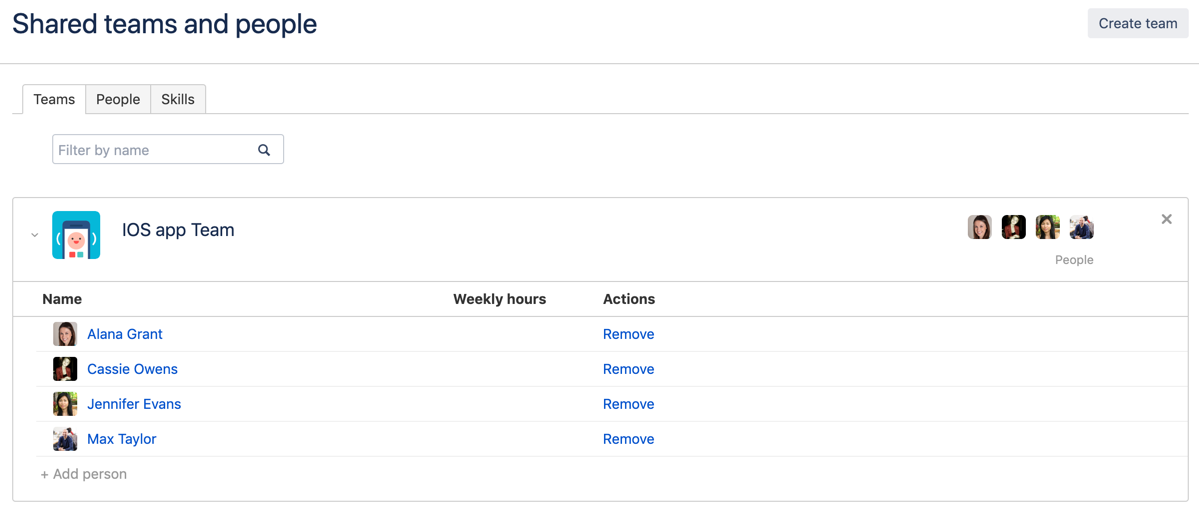 The teams tab will display the teams that are shared across all existing plans. By expanding each team, you can view the members of that team, and the weekly hours allocated to each member.
Note that any configured weekly hours will not have any effect on capacity in plans with the improved interface.
Creating a shared team
Note that any changes made to shared teams will affect all the plans that these shared teams belong to.
- In the 'Shared teams and people' page, click the Teams tab, if necessary.
- Click Create team. This will display the Create shared team dialog.
- Give the new team a name > click Create.
To delete a shared team, go to the corresponding team in the 'Shared teams and people' page. Click the x icon for the team you want to delete.
Adding members to a shared team
- In the 'Shared teams and people' page > click the Teams tab, if necessary.
- Expand the team to which you want to add members.
- Click + Add person.
- Start typing the name of the person you want to add. A list of matches will appear.
- Select the person you want to add. This will add the person to the team.
To remove a member from a shared team, click the Remove link for the member, then click Remove in the confirmation dialog.
Configuring members of a shared team
This section only applies to the usage of live plans.
You can modify the weekly hours of the members of a shared team as necessary.
- In the 'Shared teams and people' page > click the Teams tab, if necessary.
- Expand the team that contains the member you want to configure.
- Set the weekly hours of the member.
Adding a shared team to a plan
To add a shared team to a plan, the shared team must already be an existing one.
- In your plan, click the Teams tab.
- Click + Create team. This will display the Create team dialog.
- Choose the Add existing shared team option.
- From the Team menu, select a shared team.
- Click Add shared team.
Sharing an existing private team
You can convert a private team (a team that's not a shared one) into a shared team. This is helpful when you already have an existing team assigned to a plan, and you want to assign the same team to another plan.
- In your plan, click the Teams tab.
- Go to the team you want to convert into a shared team.
- Click more (
 ) > Share.
 - Click Share in the confirmation dialog.
Sharing skills across plans
This functionality is only available if you're using a live plan. If you decide to enable the improved interface for that live plan, any settings you configure here will not have any impact on the plan data in the improved interface.
Much like Advanced Roadmaps lets you define a shared team in one place, so you won't have to define the same team across multiple plans over and over again, you can also define skills that are shared across plans in one place.
For example, let's say a developer with the frontend development skill is working on Plan 1, and Plan 2 requires the same developer with the same skill. Sharing skills across plans then makes sense, so any shared requirements in Plan 1 will be automatically added to Plan 2.

Sharing a skill
This functionality is only available if you're using a live plan. If you decide to enable the improved interface for that live plan, any settings you configure here will not have any impact on the plan data in the improved interface.
- Go to your plan via Plans (in header) > View plans > click your plan.
- In your plan, click more (
 ) next to the plan name > Configure > Stages and skills.
 - Click + Add skill > enter a name for the skill > Create skill.
- Go back to your plan.
- Commit the changes back to your Jira Software instance.
- In your plan, click more () next to the plan name > Configure > Stages and skills.
- Go to the newly added skill > click more () > Share. This will add the shared skill in the skills tab of the 'Shared teams and people' page.
Sharing a skill across plans
This functionality is only available if you're using a live plan. If you decide to enable the improved interface for that live plan, any settings you configure here will not have any impact on the plan data in the improved interface.
- Go to your plan via Plans (in header) > View plans > click your plan.
- In your plan, click more () next to the plan name > Configure > Stages and skills.
- Click + Add skill > select one of the shared skills. This will add the skill to the selected plan.
If the shared skill has already been assigned to a certain team member, note that all plans that have that skill will inherit both the skill and the team member that has that skill.