Creating your plans
- Installing Advanced Roadmaps
- Preparing your planning environment
- Creating your plans
- Managing your teams
- Managing your releases
- Working with your plans
- Customizing your plans
- Sharing your plans
Before you begin
Depending on how your organization is structured, the content on this page is meant for Advanced Roadmaps admins and plan owners.
The guide discusses the typical end-to-end path that users and administrators may find themselves taking part in when using features of Advanced Roadmaps. You'll also find high-level content on concepts, as well as some recommendations and optional steps you can consider, as you flesh out your plans.
Creating plans
The content on this page is written with the assumption that you've already performed the following tasks:
- Figured out the issue sources to use in your plans.
- Created the issue types and hierarchy levels, to map your plans to the work of your teams.
- Defined the dependencies needed when planning work for your teams.
- Ensured that important issue details are surfacing across your plans and Jira.
See Preparing your planning environment if you haven't completed any of these tasks.
Types of plans
Advanced Roadmaps has two types of plans that you can use:
- Plans with the improved planning interface
- Live plans (version 2.0 to 2.27)
Plans with the improved planning interface
In the improved interface, you can manually schedule issues by dragging and dropping them in the timeline of your plan. This is handy for when you're in the early stages of high-level planning.
As work becomes clearer over time, and issues are already estimated and assigned to relevant sprints and releases, you can then choose to use the automatic scheduling feature of the improved interface. You then have the option to accept these changes or not, which is significantly different from live plans where any schedule changes are automatically implemented in the plan.
If this method of planning work suits you, we recommend you use the improved interface.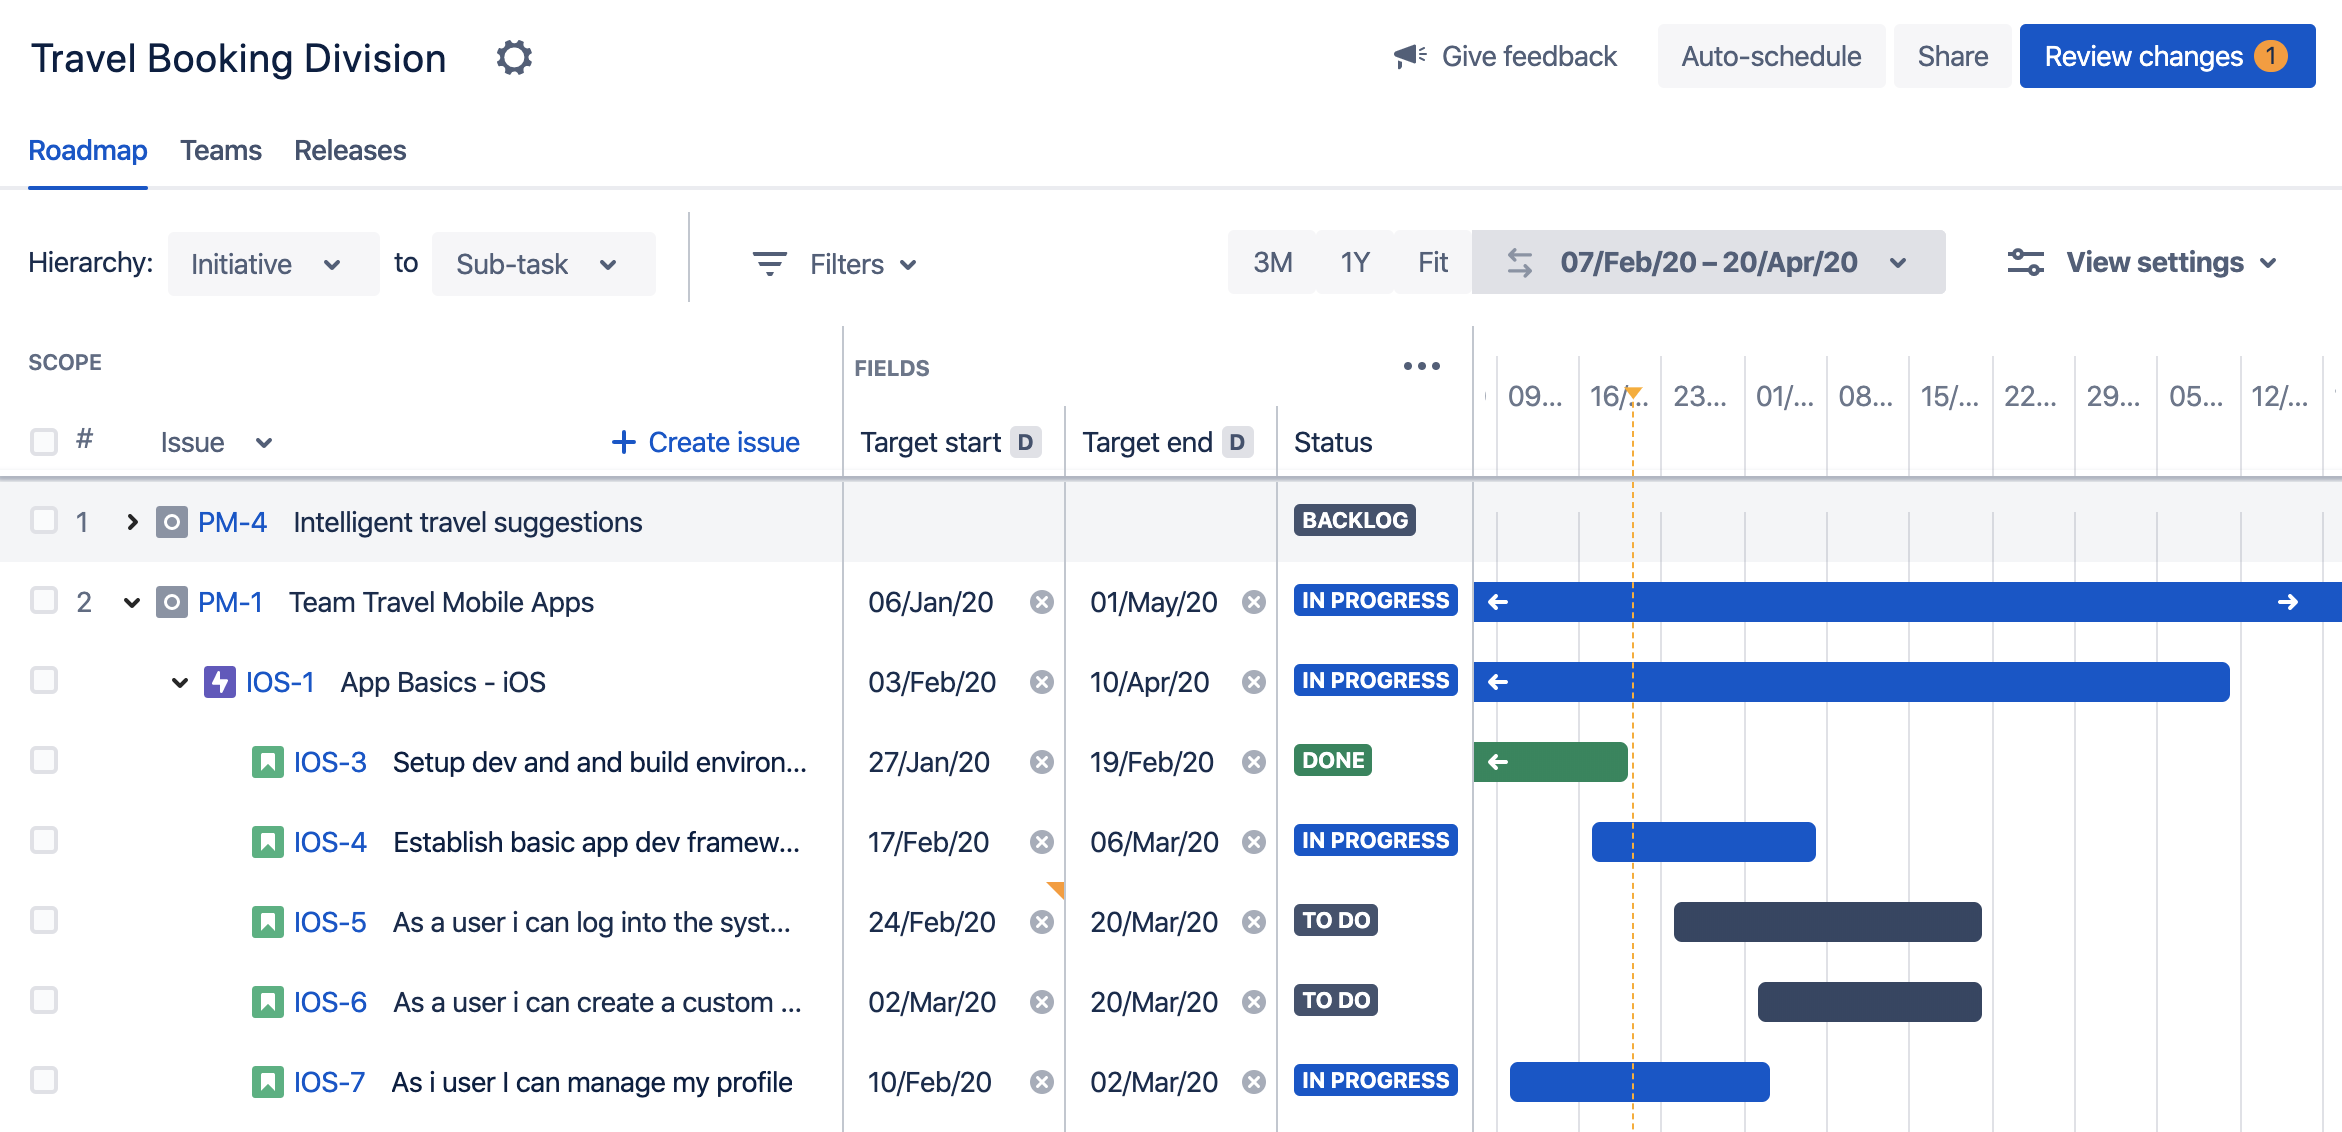 Sample plan with the improved interface
Live plans (version 2.0 to 2.27)
In live plans, work is scheduled using the automatic scheduling feature of the plan. In this type of plan, you cannot manually drag and drop issues in the timeline to schedule them. Advanced Roadmaps will automatically create a schedule of all the work in a plan, based on several scheduling factors. Advanced Roadmaps will also automatically assign teams to issues, as well as take dependencies and priorities into account.
If this method of planning work suits you, we recommend you use live plans. Note that live plans aren't the default type of plan. If you prefer the automatic scheduling feature of live plans, you'll need to disable the improved interface of each plan first.

Sample live plan
Creating a plan
If a plan becomes too large, this can cause Jira Software to time out. To prevent this, you can consider creating multiple plans and spreading the work across these plans, or you can remove certain issues from the issue sources that you've connected to the plan.
Note the following loading limits in a plan:
- Absolute issue limit: The number of issues you can load into a plan, which is 5000.
Hierarchy issue limit: The number of issues that can be displayed for each hierarchy level in the plan, which is 2000. This limit only applies when you're creating a plan; you will not be able to create a plan if the total number of issues exceeds 2000 for any of the hierarchy levels.
- Project limit: The number of projects you can load into a plan, which is 100. This limit only applies when you're creating a plan; you will not be able to create a plan if the total number of projects in the plan exceeds 100.
- Team limit: The number of teams you can access via shared team settings. The limit for the number of teams that a plan can directly display is 50. If you have more than 50 teams, some teams won't be displayed directly in the shared team settings page. To find teams that are not displaying, enter the team name in the search box.
The following sections outline the steps on how to create plans. If you prefer seeing the steps in action, check out this video instead.
Creating a plan with the improved interface
- In Jira Software, go to Plans (in header) > Create. The 'Create' page will be displayed.
- Select Plan > Create.
- Give your plan a name.
- Select one of the privacy options from the privacy drop-down:
- No restrictions – all users can view and access the plan
- Private – only the creator of the plan can view, access, and edit the plan
- Click Next.
- Choose the issue sources (boards, projects, filters) that you want to use for your plan.
- Out of the three (3) issue sources, we recommend that you use Scrum boards. This gives you the ability to manage sprints from those boards, plan the capacity of future sprints, and assign issues to sprints — all directly from your plan.
- If you choose a Scrum board as one of the issue sources in your plan, you'll also be asked to choose how you want to estimate your issues. We recommend that you use story points.
- See What is a plan to know more about issue sources.
- Click Next.
- Choose the releases that are relevant to your work, then click Next.
You'll only need to choose releases if there are existing releases in Jira Software, that are associated with the selected issue sources. By choosing the relevant releases, the issues assigned to these releases will display in your plan. - You can choose to accept the suggested teams that you want to include in your plan, or you can do either one of the following:
- Configure the settings of the teams: agile method (Scrum or Kanban) and weekly capacity
Note that for plans that have boards as issue sources, Advanced Roadmaps will suggest the velocity for the team. The suggested velocity will be based on past performance, i.e. if the team previously completed any sprints in the corresponding boards. - Delete a team that you don't need to include in your plan, by clicking more (
 ) > Delete.
- Configure the settings of the teams: agile method (Scrum or Kanban) and weekly capacity
Click Next.
- Confirm the issues that you want to include in your plan by selecting the corresponding checkboxes.
By default, all the issues are selected. Filter the issues by project, issue source, issue key, or issue summary as needed. - When you've marked all the issues you need, click Done.
Creating a live plan
If you're using Advanced Roadmaps 3.0 or later, the following steps apply to you. If you're using any version from 2.0 to 2.27, see Creating and deleting plans instead.
Starting with Advanced Roadmaps 3.0, newly created plans come with the improved interface by default. If you prefer to use live plans, you'll need to:
- Follow the steps in the above procedure, Creating a plan with the improved interface.
- Once your plan is created, you'll need to disable the interface by following the steps below:
- In your plan, click settings (
 ) > Configure > Planning interface.
- Click Disable improved interface.
- In your plan, click settings (
![]() Note that you'll need to disable the interface for each plan that has it, so you can go back to the previous planning layout.
Note that you'll need to disable the interface for each plan that has it, so you can go back to the previous planning layout.
Creating a program
A program is a high-level view that helps you track status and progress across multiple plans. Programs let you see how deliverables and releases align across work streams, and aggregate scope data into high-level scope tables and schedule views.
Programs and plans are different in the sense that they display information at different levels of granularity. Read about the distinction between programs and plans to know if using programs would be beneficial for you.
To create a program:
- In Jira Software, go to Plans (in header) > Create. The 'Create' page will be displayed.
- Select Plan > Create.
- Give your program a name, and choose one of the privacy options:
- No restrictions (default option) – every user will be able to access the program
- Private – only the creator of the program has view and edit permissions
- Select the plans you want to include in your program.
If there are no available plans just yet, you can add them to the program you're creating later on. - Click Create.
- For a program to display information, it must have at least one plan added to it.
- A plan can only exist in one program at a time, which means Plan A can only be added to Program 1. If you want to add Plan A to Program 2, you'll need to remove it from Program 1 first.
- See the documentation on programs to learn more.