View your Advanced Roadmaps plan
This diagram has features grouped together with each number dedicated to a specific type of action:

- Manage your view
- Modify your view
- Issues in your plan
- Issue values in columns
- Timeline schedule bars, dependencies, and releases
- Clean up your plan and save changes
1. Manage your view
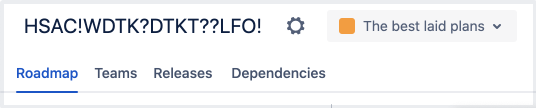
The tabs in the upper left corner of your plan are where you can switch which aspect of your plan you’re seeing, and it contains four tabs:
- Your Roadmap views are where your project plans come to life. On this screen, you’ll see the issues included in your plan laid out with schedule bars to represent their estimated duration. Learn more about creating a plan on the Plans in Advanced Roadmaps page.
- Teams is where you’ll find more information about the teams included in your plan. As you build your plan, you can assign work to these teams or individuals. Learn more about Teams in Advanced Roadmaps.
- Releases is where you configure and manage the releases associated with your plan. Learn how to use releases in your plan.
The Dependencies Report is a visual map of issues that are linked and must be completed in a specific order. Find out more about the Dependencies report.
The ![]() next to your plan name will take you to the Plan settings menu where where you can configure settings specific to your plan. Learn how to change your plan settings.
next to your plan name will take you to the Plan settings menu where where you can configure settings specific to your plan. Learn how to change your plan settings.
The menu on the right is the Scenarios menu. Use this to navigate between different versions of your plan, if scenarios are enabled in your plan. If you’re not, then this menu won’t be here. Learn more about Scenarios in Advanced Roadmaps in Advanced Roadmaps.
2. Modify your view

This area of Advanced Roadmaps is where you apply rules to limit what information is shown on your timeline.
Starting in the upper right, Advanced Roadmaps comes with four preconfigured views and also allows you to create your own custom views that you can recall at any time. Switch between these views, as well as any custom saved views, using the Views menu. Learn more about these views on the Preconfigured timeline views in Advanced Roadmaps and Modify your views pages.
You can filter and hide issues from your plan using the level beneath the tabs and the Views menu. On the left side underneath the roadmap tab, select which hierarchy levels you want to show on your plan iwth the Hierarchy menus, or filter by other criteria using the Filters menu. Learn more about how to filter issues on your timeline.
The right side of the header is where you can adjust your view settings. You can choose the length of time you want your roadmap to cover using the timeframe dropdown menu. Choose from 3 months (3M), one year (1Y), or Fit which will adjust the timeframe to fit all scheduled work into view.Advanced Roadmapsalso gives you the option to set your own timeframe. When you select Custom, you can choose to either set Fixed dates to show a specific range, or Relative to show a rolling period of time that is relative to the current date (for example, the past 2 weeks, the next 3 months).
The View settings menu lets you customize how issues and related information are displayed on your timeline. In this menu, you can do the following:
- change how issues are sorted
- change how issues are grouped
- add color to issues in your plan
- enable or disable warnings
- turn rollup values on and off and
- enable capacity management on your timeline
3. Issues in your plan

In the Scope section, Advanced Roadmaps shows (from left to right):
- issue ranking (if applicable)
- issue type
- issue key
- issue summary
If an issue contains children, select the arrow (>) to expand collapsed rows. Or use the Issue dropdown menu at the top to expand or collapse all issues.
If you create an issue using the + Create issue button, Advanced Roadmaps places your new issue at the bottom of your current project. If you’ve made a child-level issue (such as a story or subtask), it will be listed under the collapsible x issues without parent heading at the bottom of your timeline until it’s linked to a parent task.
4. Issue values in columns
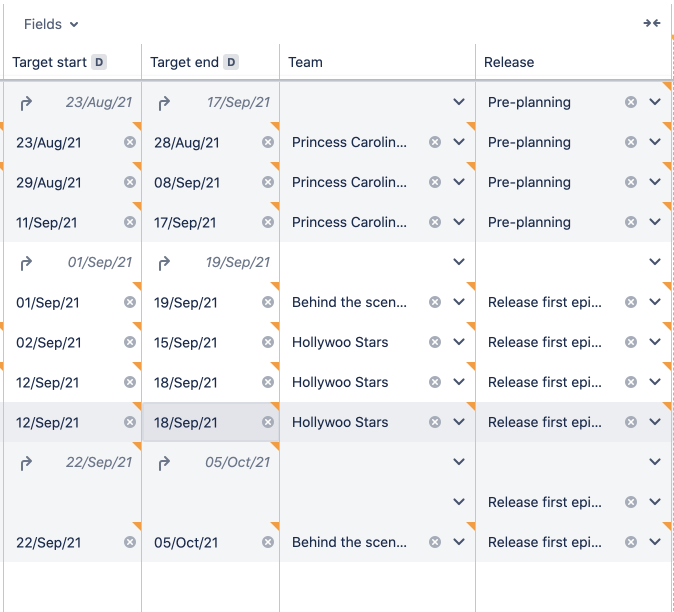
By default, newly created plans include target start, target end, and status columns. You can add columns for values that are already configured in your plan via the Fields dropdown menu. Learn how to add, edit, and remove columns in Advanced Roadmaps.
To change the value of these fields, simply select the value you want to change, then press Enter when you’re done. Advanced Roadmaps adds an orange accent (displayed in the image above) to the corner of any field which has a change that hasn’t been committed to a Jira issue. If you’re planning in a scenario, this accent mark will be the color that you chose to represent it.
5. Timeline schedule bars, dependencies, and releases

To the right of the fields columns, you’ll find the timeline bars which represent the expected duration of scheduled issues.
The issue bars themselves also hold clues to the structure of your plan. Striped bars indicate that an issue has rolled-up values as discussed above, and the link icons that display on either end of an issue imply that an issue has a dependency attached to it. Learn more about dependencies.
Advanced Roadmaps also displays health indicators on your timeline of your plan including sprint capacity (not pictured; more information can be found on the Monitor capacity from your timeline page) and releases that are included in your plan, which show as red and green circles above your timeline. Learn more about releases on the Monitor Releases section.
6. Clean up your plan and save changes

When you’re ready to put your plan into motion, use the Review changes button to save the values in your plan back to Jira, overwriting existing values in the process. This will also create issues, teams, and releases that you made from your timeline in your Jira project. Until you do this, every change that you make in Advanced Roadmaps only lives in your plan. Read more about committing your changes back to Jira issues.
If you’re planning in a scenario, Advanced Roadmaps saves the values from the scenario you’re currently viewing.
Warnings in Advanced Roadmaps alert you to any issues that break your plan. For example, if you have a dependency with misaligned dates. Learn more about Warnings in Advanced Roadmaps in Advanced Roadmaps.
When you’re ready to share your plan with the world (or your coworkers) use the Share as button to embed your page, create a sharable link, or export as a .csv file. Learn more about the ways you can share your Advanced Roadmaps data on the Share plan and export data page.
Advanced Roadmaps also comes with an Auto-schedule function that automatically creates a plan based on issue details and settings. Learn more about the auto-scheduling function of Advanced Roadmaps on the Auto-schedule issues in Advanced Roadmaps page.
Advanced Roadmaps is now part of Jira Software Data Center. To get access to the features described on this page, upgrade to Jira Software Data Center 8.15 or later. Can't upgrade yet? Depending on your current Data Center version, you can access these features by installing the latest version of the app (at no cost). See our FAQ for all the details