Configure your Advanced Roadmaps plan settings
For all of the following procedures, you must have the Advanced Roadmaps admin access.
As the administrator, you get to define how Advanced Roadmaps handles almost every aspect of your plan, from where it pulls issues to how it treats dependencies.
In this section, we’ll discuss how to adjust the following:
Issue sources
To create and maintain an accurate plan, you must first specify in the Advanced Roadmaps where to find your issues in Jira Software. This is referred to as an issue source and is first defined while creating a new plan, though you can change or add more issue sources after plan creation.
To add or change the issue sources of your plan:
- From the Plans tab, select View plans, and open the plan you want to configure.

- Go to Settings
 > Configure.
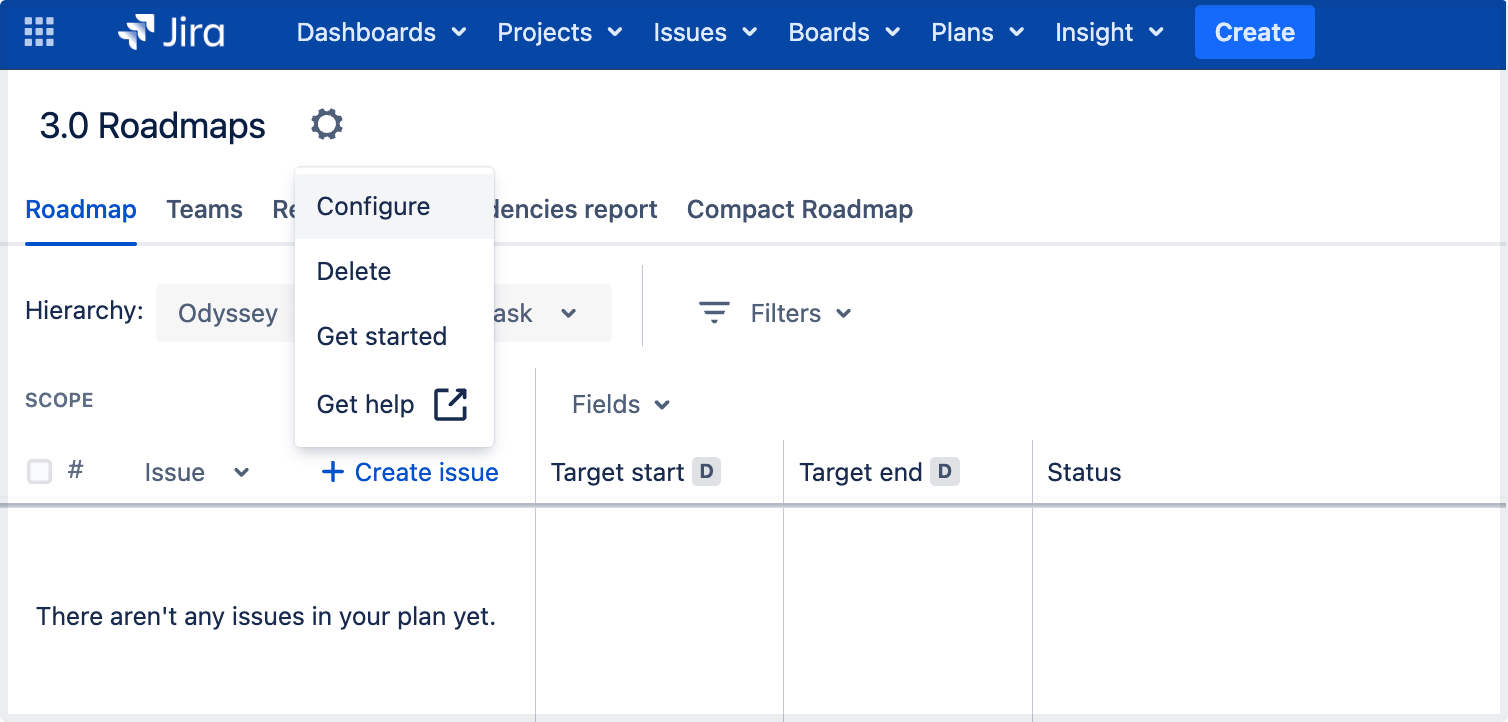
- Select Issue sources. You can select a project, board, or filter as the source of issues for your plan.

Estimation units
You can choose which unit to use when estimating issues in your plan. Estimation for issues can be based on time (hours or days) or story points.
To change the estimation units in your plan:
- From the Roadmap tab of your plan, navigate to Settings > Configure.
- In the Scheduling tab, select whether you’d like your plan to be estimated in Hours, Days, or Story Points.

Story points and time-based estimates (hours and days) are not interchangeable. For this reason, changing this setting will erase any issue estimations not already saved in Jira Software.
Time-based estimates
Time-based estimates can be used for both Scrum or Kanban teams. The default capacity is 200 weekly hours, though this can be changed. See our section on Capacity to learn how.
For Scrum teams, the default iteration length is set to two weeks. For Kanban teams, each iteration lasts one week.
Story points
If you’re using story points to estimate issues, you can only use Scrum teams in your plan. The default team velocity is set to 30 story points, and the default iteration length is set to 2 weeks.
Dates
By default, target start and target end dates are used when scheduling issues in a plan. To align with how your teams work, you can use due dates, sprint dates, or custom dates to schedule issues.
Target start and target end dates are independent from local timezone settings. Due and custom dates are based on the local timezone settings of the user. However, if you're using due dates and custom dates as the start and end dates in the plan, users in different timezones will see the same dates in Advanced Roadmaps and different dates in Jira Software. This is becauseJira Software and Advanced Roadmaps handle dates and timezone settings differently.
To change the date settings in your plan:
- From the Roadmap tab, navigate to Settings > Configure.
- In the Scheduling tab, the section titled Dates lets you select howAdvanced Roadmaps handles dates in your plan.
Custom dates
To use custom dates in your plan, you must add the custom date field to the schemes of all the projects associated with the plan’s issue sources. Once added, these custom dates will be available in the dates settings (as outlined above) along with their corresponding IDs for easier identification.
If you want to use the Date Picker custom field, you make the following changes so that it’s available in your plan:
- associate the field with all projects in a plan
- associate the field with all issue types in the Advanced Roadmaps for Jira (ARJ) hierarchy
- ensure that it has the Date Picker type
On your timeline, the custom dates will be displayed with the date lozenge (D) in the date column.
Sprint dates
This only applies to Scrum teams.
If an issue is assigned to a sprint, it can be scheduled according to the sprint’s start and end dates. These dates will be displayed in the date fields section with the sprint lozenge (S). The issue will also have a schedule bar in the timeline, based on the sprint start and end dates.

To use sprint dates for issues without dates:
- From the Roadmap tab, navigate to Settings > Scheduling.
- Under Dates, select the checkbox labeled Use sprint dates when issues don't have start and end dates.
Dependencies
When one issue must be completed before the other, or the progress of one issue is reliant on another issue’s progress, this is referred to as a dependency. There are two types used in Advanced Roadmaps:
- Incoming dependencies are waiting on another issue to be completed before work can begin.
- Outgoing dependencies need to be completed before the next issue can begin.
These can be further configured by your admin. Learn how to configure dependencies on the Configure your Jira Software instance for Advanced Roadmaps page.
Dependencies settings will be applied to all plans in your Jira instance.
Sequential and concurrent dependencies
You can choose whether you want to work on dependent issues in order or at the same time. This is what Advanced Roadmaps refers to as sequential or concurrent dependencies. Sequential dependencies can’t be worked on at the same time, while concurrent ones can. This is true whether the issues are manually scheduled or auto-scheduled.
To change between sequential and concurrent dependencies:
- From the Roadmap tab, navigate to Settings > Scheduling.
- Under Dependencies, select either sequential and concurrent dependencies.
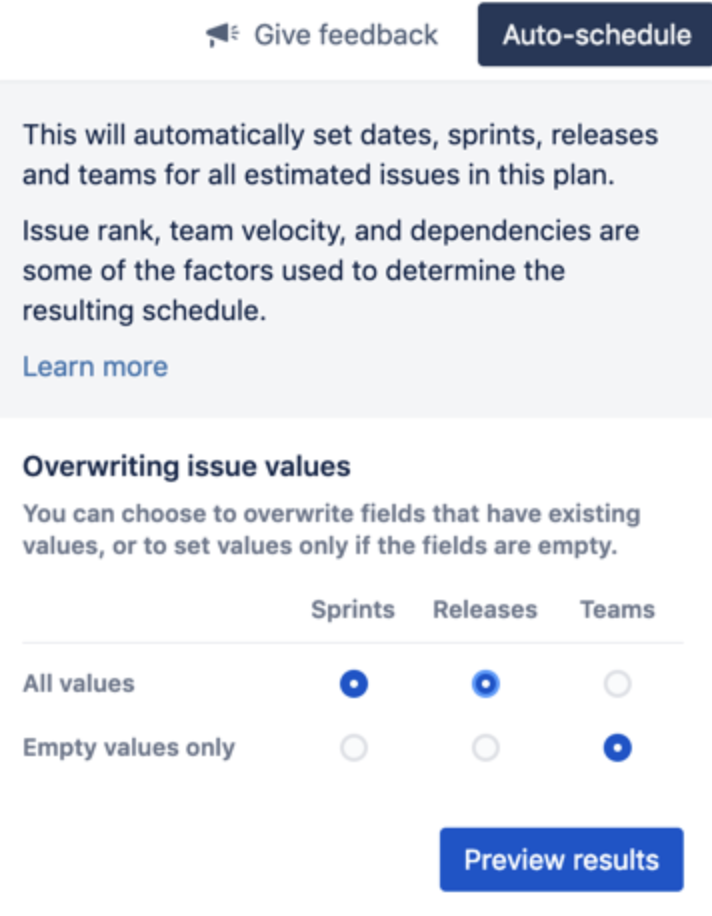
Auto-scheduler
Those with administrator permissions can configure which fields the auto-scheduler has permission to overwrite. They can also decide whether to only auto-fill empty fields or to fill all fields in a plan. These settings are available to administrators when they select the Auto-schedule tab from the plan view.
Unestimated issues that have sprint, release, or team values will not be overwritten regardless of your auto-schedule settings.