Scenarios in Advanced Roadmaps
The process of planning large pieces of work can involve assumptions, and these assumptions can cause a ripple effect in your plan. The Scenarios tool in Advanced Roadmaps helps you to plan for and assess the impact of possible outcomes by mapping out different “what if” versions of your plan. When using this tool, any changes you make to issues will only be applied to the currently selected scenario.
These modified versions of your plan only live in Advanced Roadmaps unless you save the changes to Jira Software.
Enable scenarios
To enable scenarios in your plan, go to Settings > Configure > Scenarios, then select Enable scenarios. If you skip this step, you won’t see Scenarios in your plan.
Create a scenario
Once enabled, you can create scenarios directly from the Roadmap tab.
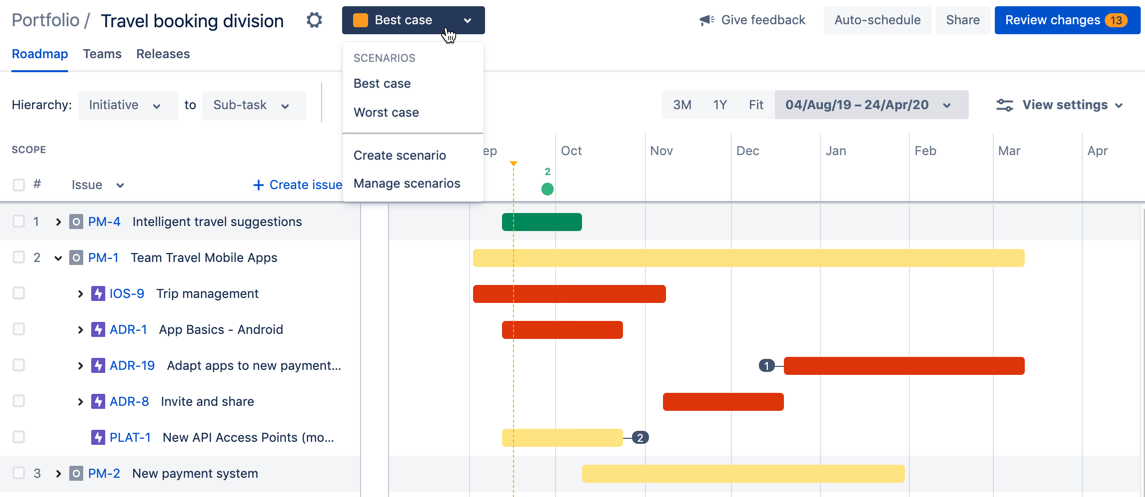
To create a scenario, navigate to the Scenario menu next to Settings > Create scenario. Give your scenario a name and choose a color for it. Any changes you make in this scenario will be displayed with flags in the color you select.
When creating a new scenario, Advanced Roadmaps gives you two options for starting points:
- A blank scenario will create a new scenario based on the data from your Jira Software issues. It will not include any unsaved changes in your Advanced Roadmaps plan.
A copy of an existing scenario will inherit changes from the scenario of your choice.
When you’re done, select Create.
Once you’ve created multiple scenarios, you can switch between them using the Scenario dropdown menu.
Save a scenario to Jira Software
Advanced Roadmaps is a sandbox environment which means that any changes you make won’t be saved to Jira unless you choose to save them. Once you’ve created and modified your scenarios, select the appropriate scenario for your team, then save it using the Review changes button. Doing so will overwrite your data in Jira Software with these new values.
Manage scenarios
Make changes to your scenarios by navigating to the Scenario menu > Manage scenarios. In this menu, you can do the following:
- Update the name of a scenario by selecting the name.
- Change the assigned color of the scenario by selecting the color swatch.
- Delete a scenario using the delete icon.
Alternatively, you can access the Scenarios page by going to Settings > Configure > Scenarios.
Turn scenarios off
If you choose to disable scenarios in your plan, you'll be able to keep the changes of only one scenario in your plan. All other scenarios will be lost.
To disable scenarios, navigate to Settings > Configure > Scenarios and select Disable. From the dropdown menu, select which scenario you’d like to save in your plan, then confirm your choice by selecting Disable.
